

Event Mechanics and Requirements
The event runs December 1, 2026 through February 23, 2026—a 12-week cycle worth approximately 160 wishes in primogem value.
Eligibility: Adventure Rank 14+ and Archon Quest Prologue Act I completion.
Weekly Goals: Complete daily commissions on 5 separate days (non-consecutive) and craft 2 Condensed Resin per week for 8 consecutive weeks.
Selection Process: After completing all 8 weeks, access Event Screen > Invite Character. Choice is permanent—no reversals after confirmation.
Available Characters: Jean, Diluc, Mona, Qiqi, Keqing, Dehya, Tighnari, Mizuki. Limited banner characters excluded.
Players managing resources strategically can explore constellation primogem top up at BitTopup for competitive rates.
Strategic Selection Framework
Account Progression Stage
Early Game (AR 14-45): Prioritize energy generation and survivability over raw damage. You lack optimized artifacts to amplify percentage-based damage increases.
Mid-Game (AR 45-55): Focus on constellations enabling new team archetypes or enhancing primary DPS. Artifact farming makes percentage damage boosts more impactful.
Late-Game (AR 55+): Evaluate based on Spiral Abyss optimization and quality-of-life improvements. Interruption resistance often outweighs 10% damage increases.
Roster Gap Analysis
Audit your character archive before selecting:
- Which elemental reactions do you struggle to trigger?
- Which team archetypes can't you field?
- Which content types cause repeated failures?
If you lack strong Pyro DPS, Diluc constellations gain value despite lower meta ranking. If you have multiple built Hydro characters, Mona's constellation provides better roster-wide improvement.
Meta vs Playstyle Balance
Current Spiral Abyss rotations shift every 6 weeks. Don't choose purely based on current Floor 12 blessings—meta relevance changes rapidly. Balance optimization with actual gameplay preferences. An unused constellation provides zero value.
Top Constellation Recommendations
S-Tier Choices
Tighnari C1 (Best Overall)

- Grants 15% Charged Attack Crit Rate
- ~7.5% average damage increase at 60% baseline crit rate
- Reduces artifact farming requirements
- Allows stat reallocation from crit rate to crit damage
- Universal value against all enemy types
Jean C4 (Best Support)
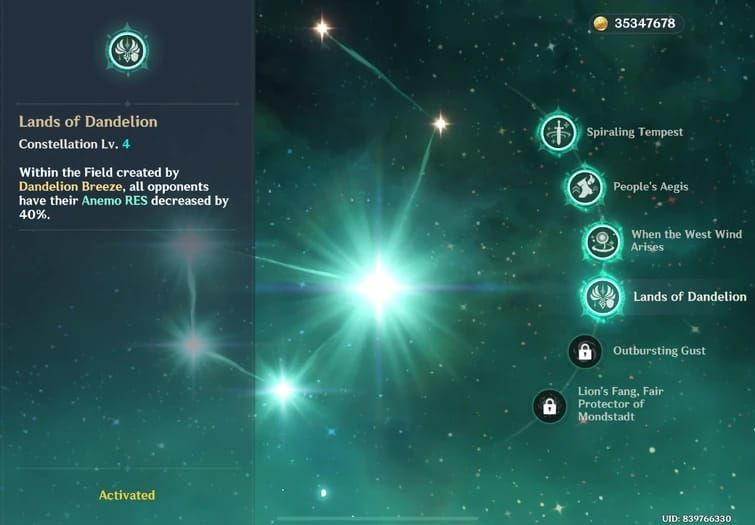
- 40% Anemo resistance shred within burst field (10s duration)
- 20-25% damage increase for Anemo DPS teams
- Viable alternative to Kazuha/Sucrose for Xiao, Wanderer teams
- Requires positioning awareness—enemies must stay in field
- Maximized with crowd control (freeze, Venti grouping)
Mona C1 (Burst Specialist)
- 160% Hydro damage buff through Hexerei mechanic
- 12-18% team burst damage increase in freeze/vaporize teams
- Requires precise rotation timing and Omen extension knowledge
- Best for players already using Mona as burst support
A-Tier Options
Mona C4: 15% Crit Rate + 15% Crit DMG during burst. For C3 Mona owners, pushing to C4 provides substantial offensive stats.
Tighnari C2: 125 Elemental Mastery after Elemental Skill. Good for C1 owners, but C1 provides most impactful single improvement.
Avoid These
Qiqi (All Constellations): Increases healing without solving energy generation problems. Genshin endgame rarely requires excessive healing. Bennett, Diona, Barbara provide sufficient healing plus additional utility.
Keqing (All Constellations): C1 adds minor AoE, C2 adds Energy Recharge. Neither addresses Electro's reaction limitations or low multipliers. Outperformed by modern DPS options.
Dehya (All Constellations): C1 adds HP scaling and interruption resistance, C2 extends field duration. Still outperformed by 4-star alternatives (Thoma, Xiangling) even with constellations.
Diluc (Marginal Value): Constellations provide <15% DPS improvement. Slower animations and lower multipliers than Hu Tao, Arlecchino, optimized Xiangling teams. Only consider if he's your sole built Pyro DPS.
Character-Specific Analysis
Jean C4 Deep Dive
Mechanics: 40% Anemo RES shred applies to all enemies in 10s burst field simultaneously.
Team Synergy: Xiao, Wanderer, future Anemo DPS. Requires enemies to stay in field—less effective vs mobile bosses without crowd control.
Damage Calculation: ~20-25% damage increase vs 10% base Anemo RES enemies. Higher value vs innate Anemo-resistant enemies.
Tighnari C1 Deep Dive
Mechanics: Unconditional 15% Charged Attack Crit Rate for his primary damage source.
Artifact Efficiency: At 60% baseline crit rate, effectively 7.5% average damage increase while reducing farming requirements.
Scaling: Benefits from Dendro reaction meta. Maintains value across all content types.
Mona C1 Deep Dive
Mechanics: 160% Hydro damage buff when enemies affected by burst take damage. Duration extends through freeze.
Rotation Requirements: Precise timing needed. Optimized freeze teams achieve 12-18% burst window damage increase.
Skill Floor: High execution requirement. Poorly timed rotations provide <5% improvement.
F2P and Low-Spender Strategy
Constellation Acquisition Sources
F2P players get 5-star constellations through:
- Standard banner accumulation (months of play)
- Losing 50/50 on limited banners
- Events like To Temper Thyself
Standard banner constellations accumulate passively. Don't select constellations for characters you don't actively use—you'll likely get them eventually through standard pulls.
Investment Priority
Only select constellations for characters you've built with optimized artifacts and weapons. An unused constellation provides zero account value.
If you haven't built any standard banner characters, ask: will this constellation motivate me to actually invest in building them?
Four-Star Core Teams
Many F2P accounts achieve 36-star Abyss with primarily 4-star characters (Bennett, Xingqiu, Fischl, Xiangling). If your 5-star fills a role 4-stars can cover, constellation investment provides lower returns than optimizing your 4-star core.
For efficient resource management, wish planning crystal recharge through BitTopup offers fast delivery and excellent service.
Spiral Abyss Impact
Clear Time Improvements
Single constellations improve clear times by 8-12% in optimized scenarios with proper rotation execution. Poorly integrated constellations may provide <5% improvement.
Damage Constellations: Tighnari C1, Mona C1 provide consistent time reductions in DPS-check chambers.
Utility Constellations: Jean C4 offers greater value in survival-oriented chambers with heavy incoming damage.
Boss-Specific Advantages
- Jean C4: Maintains effectiveness vs mobile bosses that escape other support buffs
- Mona C1: Excels in scenarios with predictable vulnerability windows
- Tighnari C1: Universal value—charged attack crit applies against all enemy types
36-Star Threshold
Currently at 33-34 stars? A constellation enabling 36-star clears justifies selection even if lower-ranked abstractly. The 150 primogem difference per rotation (300/month) compounds over time.
Already achieving 36 stars consistently? Evaluate based on clear time reduction and quality-of-life, not raw power.
Common Mistakes to Avoid
The Favorite Character Trap
Review your past 30 days of gameplay. If that character hasn't appeared in recent Spiral Abyss attempts or daily rotations, a constellation won't change that pattern.
Psychological satisfaction of improving a favorite lasts 2-3 days. Practical gameplay impact matters long-term.
Low-Impact Warning Signs
Avoid:
- Percentage damage increases <15% for non-primary DPS
- Utility you don't need (excessive healing, overkill shield strength)
- Energy Recharge when character already achieves burst-per-rotation
Energy constellations adding 10-15% generation may still leave you below threshold for consistent burst access.
Account-Specific Factors
Generic tier lists ignore:
- Your specific roster gaps
- Artifact inventory quality
- Weapon availability
- Current constellation levels (C5→C6 vs C0→C1 value differs)
Verify you have resources to actually build and deploy that character in optimized teams.
Constellation vs New Character Value
Primogem Equivalent
- Single 5-star constellation via wishes: ~160 pulls (25,600 primogems)
- New 5-star character: 90-180 pulls (14,400-28,800 primogems)
Event provides slightly better primogem efficiency, but ignores qualitative difference between constellation improvements and new character acquisition.
Team Flexibility
Limited Rosters (<6-8 five-stars): New characters enable new team archetypes. Character acquisition typically provides more value.
Mature Accounts (12+ built five-stars): Constellation optimization provides more practical value. You already possess characters for multiple meta teams.
Sunk Cost Fallacy
Previous investment only justifies constellation selection if that investment translates to current usage. If you built a character but benched them after acquiring better alternatives, the constellation won't resurrect viability unless it fundamentally changes power level.
Future-Proofing Your Choice
Meta Trends
Recent Spiral Abyss rotations emphasize reaction damage amplification and Elemental Mastery scaling. Constellations enhancing reaction damage, elemental application frequency, or EM sharing align with this trend.
Dendro reactions shifted meta toward Bloom/Hyperbloom/Burgeon. Tighnari benefits from this. Characters focused on traditional damage scaling (Diluc, Keqing) continue declining.
Universal Benefits
Constellations providing universal benefits maintain value regardless of new reactions:
- Crit stats (Tighnari C1, Mona C4)
- Resistance shred (Jean C4)
- Energy generation (if solving actual bottleneck)
Constellations tied to specific reactions face obsolescence risk if those reactions fall out of meta.
Character Longevity Patterns
Support characters with buffing/healing/crowd control (Jean, Mona) show more stable usage rates across patches than main DPS characters facing continuous power creep.
Constellation investment in support-oriented characters provides better long-term value than DPS-focused characters, even when current DPS constellations offer higher immediate damage.
Decision Checklist
Step-by-Step Process
Step 1: List all 5-stars you've used in Spiral Abyss during past two rotation cycles (~1 month). Characters absent receive reduced consideration.
Step 2: For each character on usage list, identify specific performance bottlenecks:
- Fails to achieve burst uptime?
- Dies frequently?
- Underperforms damage expectations?
Step 3: Verify constellation actually solves identified problem vs providing improvements where character already performs adequately.
Step 4: Calculate improvement magnitude. For damage, determine percentage increase in realistic rotations. For utility, assess whether change crosses critical thresholds.
Priority Matrix
Score each constellation (0-10 points per category):
- Immediate Impact: How much does it improve current performance?
- Long-Term Value: Meta durability and future content compatibility
- Account Synergy: Integration with existing roster, artifacts, weapons
- Opportunity Cost: Score higher when few alternatives exist
Total Score Interpretation:
- <25 points: Rarely justifies selection
- 35+ points: Strong alignment with account needs
- Highest score = optimal choice (unless qualitative factors override)
Confirmation Process
Take 24-48 hour cooling-off period before final confirmation. Impulsive decisions frequently result in regret.
Review decision against checklist criteria. Verify no overlooked factors alter assessment.
Access Event Screen > Invite Character > review exact effects > confirm through verification prompt. No reversal option exists.
FAQ
Which free 5-star constellation has highest value?
Tighnari C1 provides highest universal value with 15% Charged Attack Crit Rate—immediate damage increase and reduced artifact farming. Jean C4's 40% Anemo RES shred ranks second for Anemo DPS users. Mona C1's 160% Hydro damage buff excels in specific team comps.
Should I pick DPS or support constellation?
Support constellations generally provide better long-term value due to lower power creep impact and broader team compatibility. However, if you lack strong DPS in specific element and have standard banner DPS built, their constellation may provide more immediate improvement.
How much damage increase do 5-star constellations provide?
Standard banner 5-star constellations typically increase damage by 8-15% per level in optimized scenarios. Tighnari C1 provides ~7.5% average damage increase. Mona C1 can increase burst window damage by 12-18% in proper teams. Assumes optimal rotations—suboptimal execution reduces gains.
Can I change my choice after selection?
No. Selection is permanent and irreversible after final confirmation. Interface includes secondary verification to prevent accidents, but no customer service reversal exists.
Which constellation helps most in Spiral Abyss?
Jean C4 provides consistent value across all floor rotations for Anemo teams. Tighnari C1 offers reliable performance against all enemy types. Optimal choice depends on your actual team compositions—review past usage patterns before selecting.
How do I claim my free constellation?

Complete 8 weekly training goals over 8 consecutive weeks: finish daily commissions on 5 separate days per week and craft 2 Condensed Resin weekly. After completing requirements, access Event Screen > Invite Character > select desired constellation > confirm.
Ready to maximize your Genshin Impact experience? Top up Genesis Crystals and Primogems safely and instantly at BitTopup with the best rates and 24/7 customer support!


