

Getting to Know Nefer: Your New Dendro Powerhouse
The Numbers That Matter
The magic happens under Ascendant Gleam Moonsign, where she transforms ordinary Dendro Cores into Seeds of Deceit. These power up her Charged Attacks with this fascinating dual EM/CRIT scaling that honestly makes building her feel like solving a puzzle.
Your target numbers? 500+ EM before combat buffs, 40-50% CRIT Rate from artifacts alone, 220%+ CRIT DMG, and 130% Energy Recharge. Hit these thresholds and you'll see why everyone's calling her kit Phantasm Performance — because it really is a performance.
How Her Kit Actually Works
Senet Strategy: Dance of a Thousand Nights — her Elemental Skill — gives you two charges of AoE Dendro damage while entering Shadow Dance state. The real show starts with Phantasm Performance: 5 hits total, with 2 Nefer-based Dendro strikes (52.36% + 104.72% EM at Level 13) followed by 3 shade-based Lunar-Bloom hits (68.07% + 136.14% EM).
Those Verdant Dew stacks (max 3) are crucial. Each one grants +10% damage per 100 EM over 500, capped at 50%. So at 1000 EM, you're looking at a flat 50% damage bonus just from existing.
Her Burst scales hard: 477.36% ATK + 954.72% EM for the first hit, then 716.04% ATK + 1432.08% EM for the second at Level 13. Plus it generates more Verdant Dew for those longer fights.
Quick note for anyone looking to optimize their pulls — Genshin Impact recharge discount options through BitTopup offer solid pricing and instant Genesis Crystal delivery. Just saying.
Where She Fits in the Meta
Nefer's sitting pretty in SS tier Main DPS for Version 6.1 Phase 1, but here's the catch: she needs Nod-Krai allies like Lauma to reach that potential. Without proper support, you're looking at a 15-30% damage drop. Ouch.
Her strength? Converting all damage to CRIT-capable Lunar-Bloom reactions that completely bypass enemy DEF while maintaining consistent scaling through EM + CRIT combinations. It's elegant, really.
Night of the Sky's Unveiling: Why This Set Rules Everything
The Set Bonuses Breakdown
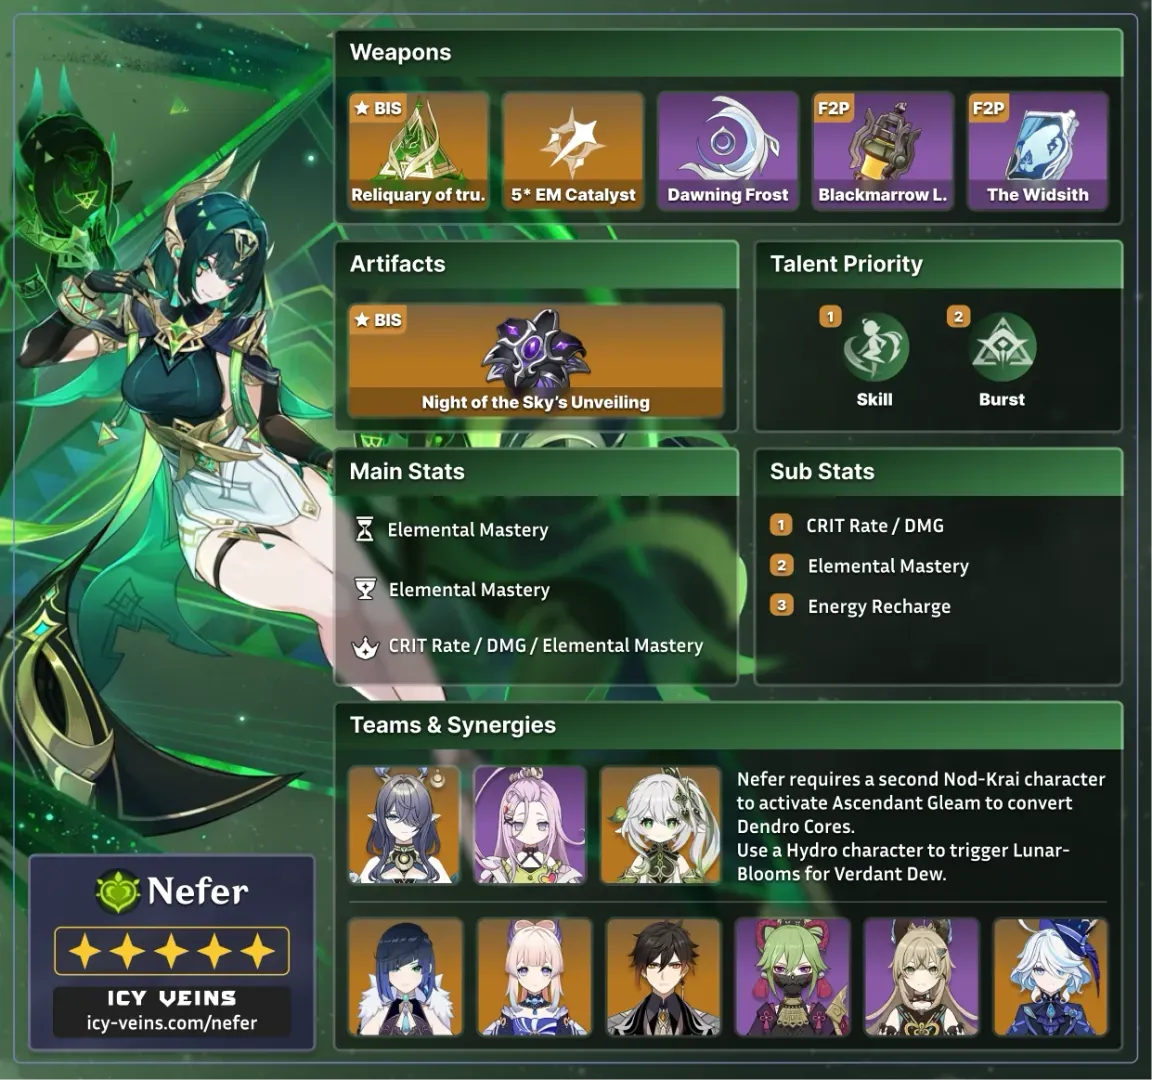
Night of the Sky's Unveiling is unconditionally best-in-slot. No competition. The 2-piece gives +80 EM, while the 4-piece provides 15-30% CRIT Rate through Gleaming Moon effects plus +10% Lunar DMG per unique effect. With Lauma's Ascendant Gleam, Nefer gains +40% total CRIT Rate, letting you go absolutely wild with CRIT DMG investment.
Alternatives exist: 4-piece Gilded Dreams for EM buffs, 4-piece Deepwood Memories for -30% Dendro RES shred. Transition builds can use 2-piece combinations like Wanderer's Troupe + Gilded Dreams for +160 EM total, but honestly? You're just delaying the inevitable farm.
Main Stats That Actually Matter
EM on Sands and Goblet. Period.
Circlet depends on your CRIT Rate situation — with Night of the Sky's Unveiling + Lauma giving you +40% CRIT Rate, go CRIT DMG Circlet. Without optimal team/artifacts, stick with CRIT Rate Circlet until you hit that 60-70% threshold.
ER requirements are surprisingly manageable: 100% with double/triple Dendro teams, 105% solo Dendro. Only use ER Sands if you're completely without Dendro battery support (and honestly, why would you do that to yourself?).
Substat Priority That Makes Sense
Energy Recharge to requirement > CRIT Rate/DMG > Elemental Mastery > ATK%. Target distributions across 5 artifacts: 15-20% CRIT Rate, 20-30% CRIT DMG, 80-120 flat EM.
Final stats should hit 60-70% total CRIT Rate, 140-180% CRIT DMG, 800-1000+ EM. And here's something that might surprise you — avoid ATK% substats entirely. They're dead weight on Nefer.
Weapon Tier List: From Signature to F2P Heroes
The 5-Star Hierarchy
Reliquary of Truth (her signature) is the clear winner. Base ATK 542, CRIT DMG 88.2%, +8% CRIT Rate baseline, +80 EM for 12s after Skill, +24% CRIT DMG for 4s after Lunar-Bloom (+50% effectiveness when combined). It provides a 15-20% DPS advantage over alternatives — significant, but not game-breaking.
Nightweaver's Looking Glass offers an interesting alternative: Base ATK 542, EM 265 substat, +60 EM on Hydro/Dendro Skill usage, additional +60 EM on Lunar-Bloom triggers plus team buffs. Competitive for reaction-focused builds despite lacking CRIT stats.
4-Star Options That Don't Disappoint
Dawning Frost surprised me. Base ATK 510, CRIT DMG 55.1%, +72 EM after Charged Attacks, +48 EM after Skill usage. R1 actually outperforms R5 Blackmarrow Lantern in most scenarios.
Blackmarrow Lantern remains the F2P king: Base ATK 454, EM 221, R5 provides +96% Bloom damage, +24% Lunar-Bloom damage, +12% damage under Ascendant Gleam. Achieves 80-85% signature weapon performance, which is honestly impressive.
For immediate premium currency access, buy Genesis Crystals voucher through BitTopup's secure platform — they've got excellent exchange rates and 24/7 customer support.
F2P Solutions
Mappa Mare provides EM substat and reaction damage bonuses. Sacrificial Fragments offers EM and Skill reset potential (though the reset isn't crucial for her rotation). Prototype Amber enables aggressive team compositions through weapon passive healing. Event weapons like Oathsworn Eye work as temporary solutions while you farm something better.
Talents and Constellations: Where to Spend Your Resources
Leveling Strategy
Elemental Skill first — it's 70%+ of her total damage. Level to 10+ immediately for substantial scaling improvements. Elemental Burst second: Target Level 6-8 for F2P, Level 10+ for premium builds. The AoE damage and Verdant Dew generation are worth it.
Normal Attack stays at Level 1. Don't even think about it.
Constellation Value Analysis
C1 Planning Breeds Success grants +60% EM to Lunar-Bloom damage from Phantasm Performance with Veil stacks. This rivals signature weapon value — it's the highest priority constellation by far.
C2 Observation Feeds Strategy extends Veil stacks to 5 (+5s duration), +140% Phantasm DMG, +200 EM for 8s at maximum stacks. Skill grants 2 stacks immediately. It's a massive power spike.
C6 transforms Phantasm's second stage to Lunar-Bloom damage, adds AoE Dendro effects (85-120% EM scaling), +15% Lunar-Bloom elevation bonus. Whale territory, but undeniably powerful.
Investment Breakpoints
Character ascension 80/90 minimum for A4 passive and full CRIT DMG bonus. Talent breakpoints: Level 6 (F2P value), Level 8 (moderate spenders), Level 10+ (premium builds). Crown Skill first, then Burst if you're feeling generous.
Weapon Level 90 for signature, Level 80 for 4-star alternatives works fine.
Team Compositions: Making Nefer Shine
The Meta Teams
Premium Lunar-Bloom: Nefer + Lauma + Kokomi + Aino maximizes Ascendant Gleam benefits with consistent core generation. Lauma increases team damage by 200-400% versus non-Nod-Krai alternatives. It's not even close.
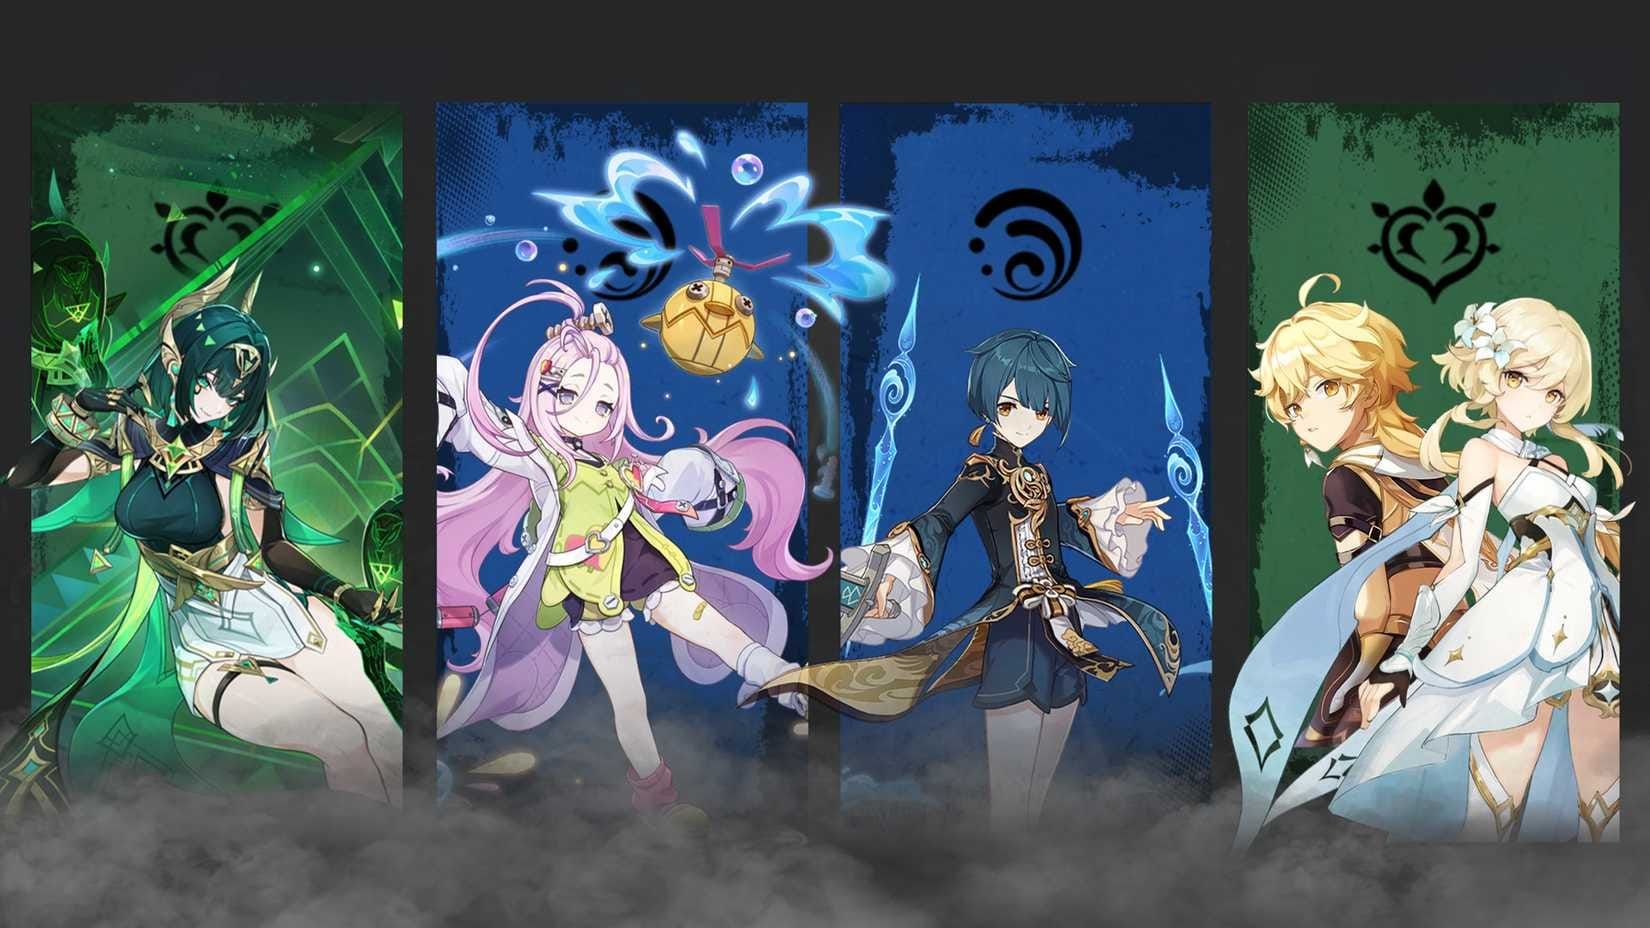
Alternative premium: Nefer + Lauma + Yelan + Dahlia trades healing for higher damage potential. F2P Bloom: Nefer + Dendro Traveler + Xingqiu + Aino for accessible core generation.
Character Synergies That Work
Lauma provides Ascendant Gleam activation and -25% Dendro RES shred via Hold E. She's near-essential for optimal performance — I can't stress this enough.
Hydro applicators: Kokomi (healing + consistent application), Yelan (Sub-DPS), Xingqiu (reliable off-field + damage reduction), Aino (accessible Nod-Krai option).
Support options include Nahida (EM buffs + Dendro application), Ineffa (Quickbloom + healing), Kuki Shinobu (Electro reactions + sustain), Zhongli (RES shred + shields).
Rotation Guides
Optimal rotation: E 3[CD] E CD Q CD (E=Skill, C=Charged Attack/Phantasm, D=dash cancel, Q=Burst).
Team example: Nahida E Q → Aino E Q → Lauma E Q → Aino E → Nefer E 3[CD] E CD Q (20-second cycle).
Alternative stable rotation: E 3[C] E 3[C] without dash cancels for consistent Verdant Dew management. Easier execution, slightly lower DPS.
Phase 2 Meta Transition: What's Coming
The November Shift
Version 6.1 Phase 2 (November 11 - December 2, 2025) brings Arlecchino and Zhongli reruns, emphasizing frontloaded damage and defensive utility. Nefer's ranking adjusts from SS to S tier due to reduced Lunar synergy emphasis, but she remains highly viable.
Team Adaptations
Phase 2 modifications focus on sustainability: Nefer + Lauma + Zhongli + Hydro applicator for balanced offense/defense. Without Lauma: Nefer + Nahida + Furina + Ineffa emphasizing Hyperbloom triggers.
Hybrid approaches combine Nefer with Arlecchino for Pyro-Dendro synergy — an interesting development worth watching.
Future-Proofing Your Investment
Upcoming Nod-Krai releases will likely restore SS tier status through improved Lunar-Bloom synergy. Investment in core build components provides future-proofing value. Consider saving for Lauma reruns or new Nod-Krai characters.
Build Optimization: The Math Behind the Magic
Stat Thresholds Explained
Optimal targets: 800-1000+ EM (14% Base DMG bonus at 800 EM), 60-70% CRIT Rate, 140-180% CRIT DMG. ER requirements: 100% double/triple Dendro, 105% solo Dendro, +20-40% for Spiral Abyss with Favonius weapons.
Minimum viable: 500+ EM, 60% CRIT Rate, 150% CRIT DMG for functional performance.
The Damage Formula
Lunar-Bloom formula: [Base Core DMG + (EM × 4.608)] × Multipliers, with 1.7x base damage versus standard Bloom. Enhanced cores detonate in 1.2s (vs 2s), have 3.5m AoE (vs 2m), and ignore enemy DEF.
At 1000 EM: 10,240 base damage before multipliers. Veil stacks add +49% damage per stack (max 5 at C2). C1R1 builds achieve 99% CRIT Rate, 354% CRIT DMG, 1226 EM, resulting in 146k+ Charged Attack damage.
Performance Benchmarks
Spiral Abyss showcases 146k/146k/184k Charged Attack damage in realistic scenarios. Lauma provides that massive +200-400% damage amplification. DEF-ignoring Lunar-Bloom proves incredibly effective against high-DEF enemies.
Consistent clear times competitive with established meta teams? Check.
Common Mistakes (And How to Avoid Them)
Build Errors That Hurt
Prioritizing ATK% over EM/CRIT is the big one. Nefer scales from reaction multipliers, not traditional ATK. Using Bennett/Sara for ATK buffs provides minimal value versus EM buffers like Lauma/Sucrose/Nahida.
Neglecting ER calculations leads to inconsistent Burst uptime — don't be that person.
Resource Waste Prevention
Avoid quick core burst triggers like Nilou teams without C2 — they prevent Seeds of Deceit conversion. Ensure 1+ Verdant Dew stacks before Shadow Dance.
And seriously, don't invest Normal Attack talents beyond Level 1.
Optimization Tips
Hybrid EM/CRIT builds outperform pure EM by 15-25%. Double Dendro + Favonius weapons provide +20-40% ER bonus for Abyss. Align rotations to 9-second Shadow Dance duration for buff synchronization.
Endgame Performance: Where She Really Shines
Spiral Abyss Dominance
S+ tier performance Floor 12, exceeding 146k per Charged Attack. DEF-ignoring mechanics excel against high-DEF enemies. Lunar-Bloom teams handle grouped enemies, Hyperbloom variants focus single-target bosses.
Domain Farming Efficiency
Consistent AoE damage and reaction-based scaling provide reliable clear times across enemy types. Dendro application enables various reactions depending on support choices. Weekly bosses showcase sustained damage through extended rotations.
Showcase Examples
C1R1 optimal: 99% CRIT Rate, 354% CRIT DMG, 1226 EM achieving top-tier damage. F2P R5 Blackmarrow: 80-85% signature performance proving budget viability. Speed-runs demonstrate burst potential through proper buff stacking.
FAQ: Your Burning Questions Answered
Q: What's the best artifact set for Nefer? Night of the Sky's Unveiling 4-piece, no contest. +80 EM, up to +30% CRIT Rate, +10% Lunar DMG per effect. With Lauma, you're looking at +40% total CRIT Rate.
Q: Which weapon should I prioritize? Reliquary of Truth provides 15-20% DPS advantage if you can afford it. F2P players: R5 Blackmarrow achieves 80-85% signature performance. Dawning Frost R1 actually outperforms R5 Blackmarrow.
Q: How do I build for maximum damage? Target 800-1000+ EM, 60-70% CRIT Rate, 140-180% CRIT DMG, 100-105% ER. EM main stats on Sands/Goblet, CRIT DMG Circlet. Priority: Skill > Burst > Normal Attack (don't level this).
Q: What teams work best? Premium: Nefer + Lauma + Kokomi + Aino. F2P: Nefer + Dendro Traveler + Xingqiu + Aino. Lauma provides that crucial 200-400% damage increase.
Q: Is Nefer viable without Nod-Krai support? Yes, but expect a 15-30% damage decrease without Lauma. Use Aino for Ascendant Gleam, pair with Nahida for EM buffs. Hyperbloom variants work but perform significantly lower.
Q: Constellations or weapon first? C1 provides exceptional value equal to signature weapon. Priority: Reliquary of Truth ≥ C1 > C2. C0 remains fully viable with proper team and artifacts — don't feel pressured to whale.


