

Here’s the thing about Kazuha that most players don’t fully grasp – he’s not just swirling one element at a time. When executed properly, his Double Swirl technique can buff and debuff two elements simultaneously, essentially doubling his support value in a single rotation.
The magic happens when Kazuha swirls one element from an enemy’s aura with his initial Skill cast, then absorbs a completely different element for his Plunging Attack (Midare Ranzan). Both his A4 Passive and that coveted 4-piece Viridescent Venerer effect trigger for both elements. It’s elegant. It’s powerful. And honestly? It’s criminally underutilized.
For players looking to maximize Kazuha’s potential while managing resources efficiently, cheap Genesis Crystal bundles from BitTopup offer excellent value with instant delivery and secure transactions for obtaining Kazuha and his constellations.
Understanding Kazuha’s Double Swirl Mechanics
The Core System That Changes Everything
Double Swirl leverages Kazuha’s A1 Passive (Soumon Swordsmanship) – that often-overlooked talent that enables Elemental Skill absorption when he contacts Hydro, Pyro, Cryo, or Electro. The subsequent Plunging Attack deals an additional 200% ATK as absorbed elemental damage, which then gets swirled by the plunge’s Anemo damage.
His A4 Passive is where things get spicy: 0.04% Elemental DMG Bonus per EM point to swirled elements for 8 seconds. When you’re hitting 1000+ EM (which you should be), that’s a 40% damage bonus to your entire team’s elemental damage.
Element Absorption vs Infusion – Know the Difference
This trips up even experienced players. Absorption follows a strict priority system: Pyro > Hydro > Electro > Cryo. No exceptions. If an enemy has Hydro and Kazuha’s standing in Bennett’s Pyro Burst field, his abilities will absorb Pyro every single time.
I’ve seen countless rotations fail because players didn’t account for this hierarchy. Bennett’s Burst is particularly notorious for causing unwanted Pyro absorption when you’re trying to set up something more nuanced.
Element Absorption Rules and Priority System
The Hierarchy You Can’t Override

That priority order again: Pyro > Hydro > Electro > Cryo. It’s hardcoded into the game. Multiple elements present? Highest priority wins. Period.
Bennett’s Burst commonly ruins carefully planned setups by applying Pyro to the active character. I’ve learned this the hard way more times than I care to admit.
Gauge Theory in Practice
Kazuha’s Tap Skill applies 1U Anemo, while Hold Skill applies 2U Anemo. The Hold version’s stronger application can actually clear existing auras before applying the absorbed element – crucial for consistent swirl patterns.
The aura gauge reduces by 20% (what theorycrafters call Aura Tax), with reaction coefficients determining consumption rates. Weak amplifying reactions consume 0.5x, strong amplifying reactions consume 2x. It sounds technical, but understanding this helps predict when your setups will work.
Environmental Curveballs
Environmental elements love to mess with your perfectly planned rotations. Burning grass creates prioritized Pyro auras. Electro-Charged enemies maintain simultaneous Hydro/Electro auras – actually useful for Double Swirl! Water bodies and those random Cryo flowers can provide unexpected element applications.
Pro tip: Learn your domains. Some have environmental effects that’ll consistently interfere with specific Double Swirl setups.
Step-by-Step Double Swirl Setup Guide
Getting Your Kazuha Ready
Energy Recharge requirements vary dramatically by team comp:
Solo Anemo teams: 190-200% ER
Raiden teams: 155-170% ER
Double Anemo: 105-110% ER
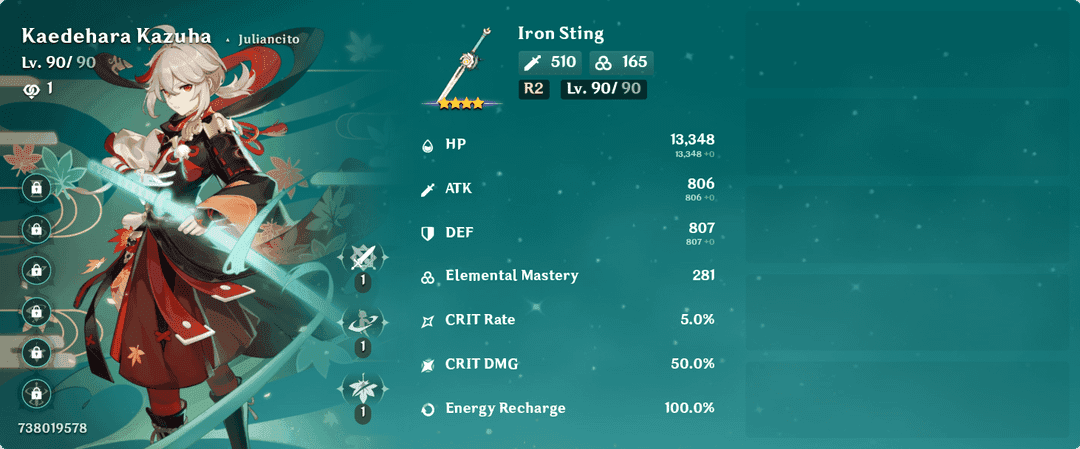
Build him with full EM artifacts (EM/EM/EM) using 4-piece Viridescent Venerer. Level him to 90 – Swirl damage scales directly with character level, making this one of the few cases where max level actually matters.
The Execution (Where Most Players Mess Up)
Apply your first element to the enemy
Position Kazuha to absorb the second element (usually from Bennett’s Burst)
Use Kazuha’s Skill – the initial cast swirls the first element
The Skill absorbs the second element from your positioning
Plunging Attack deals additional elemental damage, which gets swirled by the plunge’s Anemo component
For Electro-Charged teams, it’s simpler: use Hold Skill on an enemy with both auras. That 2U Anemo application reacts with both simultaneously.
Viridescent Venerer Optimization for Double Swirl
Why 4-Piece VV Is Non-Negotiable
The 4-piece set increases Swirl DMG by 60% and decreases opponent Elemental RES by 40% for 10 seconds. Against enemies with 10% base resistance, this provides roughly a 27.78% damage increase. Double Swirl applies resistance shred to both elements with independent 10-second timers.
That resistance shred is multiplicative, not additive – meaning it becomes more valuable against high-resistance enemies.
Stat Priorities That Actually Matter
EM on Sands, Goblet, and Circlet. Use ER Sands only if you can’t meet requirements through substats and weapon choice. For substats: Energy Recharge first, then EM.
CRIT stats? Largely irrelevant except for about 20% CRIT Rate if you’re running Favonius Sword for the passive procs.
Optimal Team Compositions and Rotations
International Team – The Gold Standard
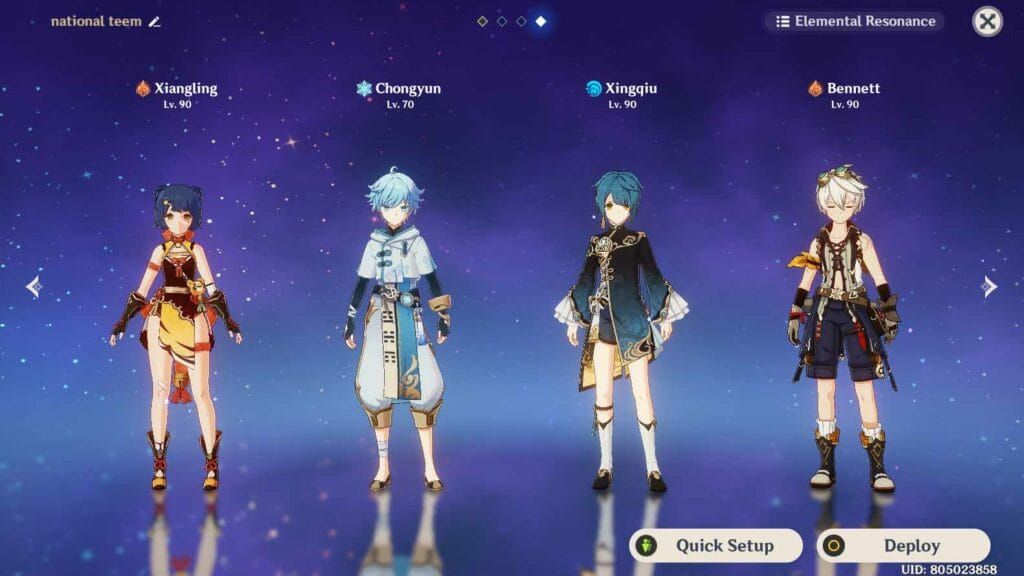
The International team (Tartaglia-Xiangling-Bennett-Kazuha) showcases Double Swirl perfectly:
Tartaglia E (applies Hydro) → Bennett Q (applies Pyro to enemy and self) → Kazuha Q + tEP (swirls Hydro, absorbs Pyro, swirls Pyro) → Xiangling Q + E → Tartaglia Q + Melee stance
Multi-target scenarios require Tartaglia’s E and Bennett’s Q hitting different enemies – positioning matters here.
Taser Teams – The Beginner-Friendly Option
Electro-Charged offers the simplest Double Swirl execution. An enemy with both auras allows simultaneous swirl with a single Hold Skill. Clean and efficient.
Example rotation: Raiden E → Xingqiu Q+E → Kazuha E+Q establishes Electro-Charged for effortless dual swirling.
For building these optimal compositions, BitTopup provides a trusted Genshin recharge site with competitive pricing for acquiring necessary characters and weapons.
Common Mistakes and Troubleshooting
Timing Disasters
Failed Double Swirls usually stem from incorrect timing. If the initial aura is too strong for your Anemo application, things fall apart quickly. Use Hold Skill (2U) over Tap Skill (1U) for better aura manipulation and more consistent results.
The Bennett Problem
Incorrect absorption ruins setups faster than anything else. This is particularly painful in Hu Tao Vaporize teams where Pyro absorption instead of Hydro completely interferes with your reactions. Bennett’s Burst field is the usual culprit.
Position Kazuha carefully when precision matters.
Simultaneous Reaction Priority Issues
Here’s where it gets technical: when Kazuha’s absorbed Burst hits an enemy with an existing aura, non-Swirl reactions take priority.
Example: ≤1U Electro aura + Pyro-absorbed Burst = only Overloaded reaction, preventing the Electro Swirl and VV activation you actually wanted.
Advanced Techniques and Optimization
Animation Canceling for Efficiency
Advanced players use animation canceling to reduce field time. In Hu Tao VV Vape setups: Kazuha N1 + tEP (+N1) + Q, canceling the Normal Attack with Skill for efficient Hydro application before swirling.
Energy Management
Hold Skill generates 4 particles versus Tap’s 3, but has a longer cooldown (9s vs 6s). Use Hold before Burst when possible for better energy generation.
Favonius Sword with 20% CRIT Rate gives you a 47.2% proc chance against one enemy, 72.1% against two enemies, and 89.3% at R5 against two enemies.
Constellation Considerations
C1 lets you use Hold Skill before Burst without timing penalties due to the cooldown reset. C2 provides 200 EM to Kazuha and active characters in his Burst AoE, increasing A4 buff effectiveness. C6 enables on-field Anemo DPS with constant swirling – completely changes his playstyle.
Weapon and Artifact Recommendations
The Top Tier

Freedom-Sworn (5-star): Best-in-slot. High EM plus team ATK% and Normal/Charged/Plunging DMG% buffs. Expensive but transformative.
Xiphos’ Moonlight (4-star): Best 4-star option, converting EM to ER. R5 with 800 EM provides 57.6% ER to Kazuha – solves energy issues elegantly.
F2P Reality Check
Favonius Sword: Solves ER issues for your entire team, generates particles on CRIT hits. Using Favonius with EM sands often beats Iron Sting with ER sands.
Iron Sting: Substantial EM but zero energy support. Only viable in comps where energy isn’t an issue.
Energy Requirements Breakdown
Solo Anemo (1 tE + 1 hE): ~190-200% ER (160-170% with Favonius)
Solo Anemo (2 tE): ~205-215% ER (170-180% with Favonius)
With Raiden (1 hE): ~155-170% ER (120-130% with Favonius)
Double Anemo: ~105-110% ER
Triple Anemo: ~145-155% ER (115-125% with Favonius)
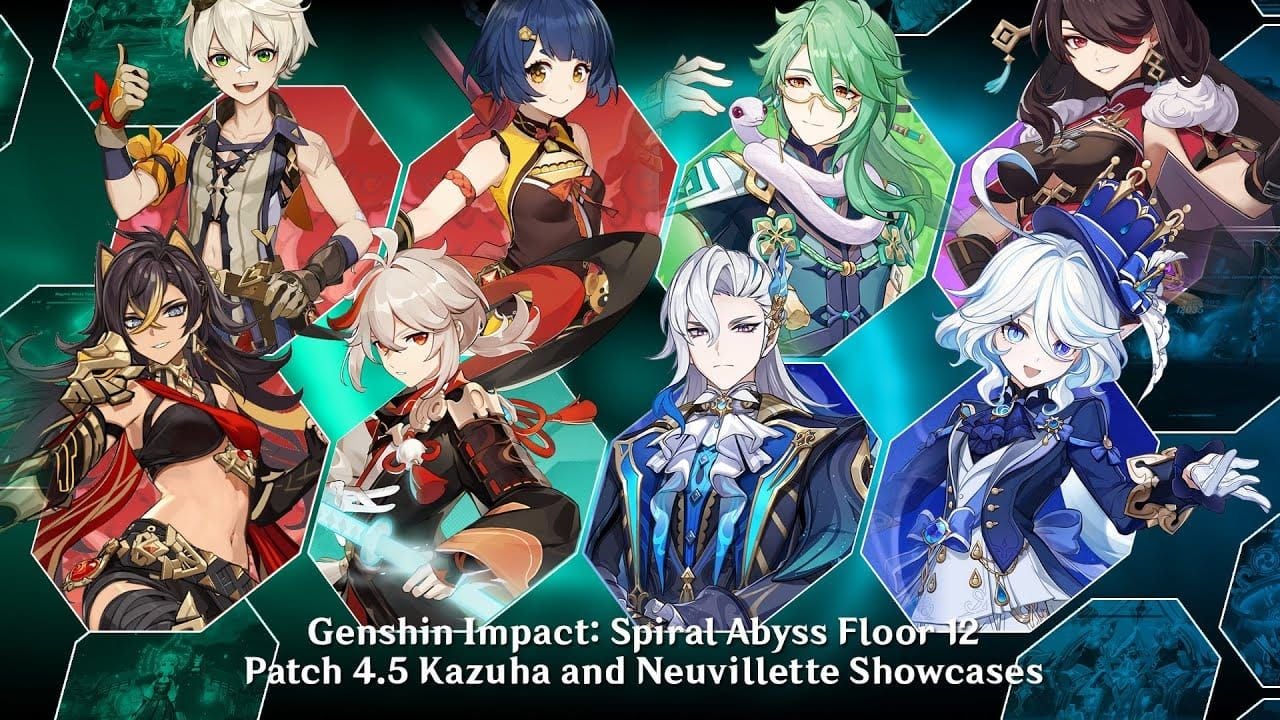
Spiral Abyss Applications
Where Kazuha Shines
Kazuha excels on floors with multiple enemy types for grouping and simultaneous debuffing. Electro-Charged enemies are particularly favorable for efficient dual-element swirling. His 8-second A4 buff duration aligns perfectly with most DPS windows.
Enemy-Specific Strategies
Against heavy enemies that Venti can’t lift, Kazuha’s grouping provides more controllable positioning. VV’s 40% resistance shred becomes increasingly valuable against high-resistance enemies due to its multiplicative nature.
Time Optimization Tips
Use Tap Skill for single swirls in quickswap teams, reserve Hold for grouping and Double Swirl setups. The 15-second Burst cooldown fits fast rotations perfectly. Position his Burst to hit multiple waves when possible – that 8-second field persistence is valuable.
FAQ
How does Kazuha’s double swirl work exactly? Kazuha swirls one element from an enemy with his initial Skill, absorbs a second element (often from Bennett’s Burst), then his Plunging Attack applies and swirls that second element. This triggers his A4 Passive and VV resistance shred for both elements.
What’s the element absorption priority? Pyro > Hydro > Electro > Cryo. This determines which element his abilities absorb when multiple are present, directly affecting Plunging Attack and Burst applications in Double Swirl setups.
Is Viridescent Venerer worth using? Absolutely essential for support Kazuha. The 4-piece provides 60% Swirl damage increase and 40% resistance shred for 10 seconds. Double Swirl applies shred to both elements, providing roughly 27.78% damage increase against 10% base resistance enemies.
How much Elemental Mastery does Kazuha need? Prioritize EM on all main stats (EM/EM/EM). His A4 Passive provides 0.04% Elemental DMG Bonus per EM point. 1000 EM grants 40% bonus to swirled elements. There’s no practical upper limit – more is always better.
What are the best team compositions for double swirl? International (Childe-Xiangling-Bennett-Kazuha) for Vaporize, Electro-Charged teams with Raiden/Xingqiu, Freeze teams with Hydro/Cryo DPS. Electro-Charged offers the easiest execution with natural dual auras.
Should I use Tap or Hold Skill? Hold Skill is better for Double Swirl: 2U versus 1U Anemo application, more effective aura clearing, better grouping, and 4 versus 3 particles. The longer cooldown (9s vs 6s) is worth it for superior results.


