

Here's what changed: Silver Isotoma enhancement, improved particle generation mechanics, and those game-changing Hexerei passives. Together, they've transformed Albedo from an energy-hungry support into a self-sufficient powerhouse.
Understanding Albedo's Energy Recharge Mechanics Post-6.2
Let's cut through the complexity. The 6.2 update fundamentally rewrote how Albedo generates energy. No more praying for Sacrificial procs.
Energy Recharge works as a straight multiplier – 200% ER literally doubles your energy gain from particles and orbs. Albedo's 40-energy burst normally needs 13-14 particles at baseline ER. Bump that to 200%? You're looking at just 6-7 particles per rotation.
For players serious about optimizing their Albedo builds, budget genshin top up for artifact farming post buff gives you the resin needed for extensive artifact grinding. Trust me, you'll need it.
What Actually Changed in 6.2: The Real Numbers
Silver Isotoma enhancement creates indestructible constructs dealing 240% DEF damage when you're running 2+ Hexerei characters. You can maintain up to 2 Silver Isotomas simultaneously – that's a massive off-field presence boost.
But here's the kicker: Hexerei faction passives don't just provide team damage bonuses based on Albedo's DEF. They actually improve particle generation consistency. While the skill remains RNG-based (think Zhongli's pillar), the enhanced mechanics push you over that crucial 200% ER threshold without needing external batteries.
Burst Cost Reality Check
Rite of Progeniture costs 40 energy. Period. Without ER investment, you're hunting for 13-14 particles every rotation. Transient Blossoms proc every 2 seconds, scaling off DEF and forming your energy foundation.
Post-6.2, those blossoms interact beautifully with constellation effects and Hexerei passives. The result? Albedo functions optimally as support with 200%+ ER – similar to how Faruzan needs 250-300% or Xiangling requires 200-220% without Pyro support.
The ER Math That Actually Matters
Here's your formula: Base ER (100%) + Weapon ER + Artifact ER + Team bonuses = Total ER.
Target 200%+ for burst-every-rotation gameplay. Same-element particles provide triple energy versus off-element – making Geo teams particularly effective. Geo Resonance adds 15% ER to all members, dropping individual requirements to ~180% in double-Geo setups.
In practice? Add a 10-15% buffer for particle RNG and rotation hiccups. You're realistically targeting 215-230% ER, achievable through weapon selection and artifact substats without gutting your damage stats.
Why 200%+ Burst Uptime Without Sacrificial Actually Works Now
The math is beautiful. Post-6.2 improvements plus optimized building eliminate Sacrificial Sword dependency entirely.
200% ER cuts particle requirements from 13-14 down to 6-7 per rotation. Silver Isotoma generation plus proper team composition hits this threshold through artifact optimization alone.
Breaking Down the Rotation Math
Standard 20-second rotations see Albedo generating 2-3 particles per skill cast. At 200% ER, each Geo particle delivers 3 energy (1.5 base × 2 ER multiplier). That's 6-9 energy per cycle, with teammate particles and Geo Resonance bridging the gap to 40.
Mono-Geo teams with Itto, Gorou, Zhongli pump out particles while Geo Resonance drops individual ER needs to 180-190%. The post-6.2 buffs provide enough improvement to ditch Sacrificial through:
- Silver Isotoma enhancement
- C1 energy regeneration (1.2 energy per Transient Blossom)
- Hexerei passive synergies
Sacrificial vs. Damage Weapons: The Trade-off
Sacrificial Sword provides skill resets but zero direct damage scaling for a DEF-based kit. Post-6.2, Cinnabar Spindle (DEF +69%) or Harbinger of Dawn (CRIT Rate +46.9%) offer superior damage while artifacts handle energy needs.
Fleuve Cendre Ferryman's 45.9% ER enables 200%+ builds without substat investment. The damage difference between Sacrificial and optimized alternatives? We're talking 20-30% increases in sustained combat.
For those considering constellation upgrades to reduce ER requirements, easy primogems recharge for albedo geo optimization builds provides cost-effective access to C1 energy regeneration or C2 burst improvements.
Real Testing Results: What Players Are Seeing
Community testing confirms 200%+ ER viability across scenarios:
Solo Albedo: 95%+ uptime at 220% ER
Double Geo: 98%+ uptime at 190% ER
Triple Geo: 99%+ uptime at 170% ER
Mono Geo: Near-perfect uptime at 160% ER
These assume proper particle funneling and rotation optimization. Abyss testing shows particular success in multi-enemy chambers where AoE particle generation provides bonus energy beyond single-target calculations.
Albedo ER Calculator: Step-by-Step Calculation Guide
Let's build your precise ER requirements. We're considering team composition, rotation length, constellation level, and enemy types.
The Formula Breakdown
Step 1: Base particle generation per rotation
- Albedo Skill: 2-3 particles every 4 seconds
- 20-second rotation = 5 procs = 10-15 particles baseline
Step 2: Same-element multiplier magic
- Geo particles in Geo teams: 3x energy value
- Off-element particles: 1x energy value
Step 3: Team contributions
- Geo Resonance: +15% ER
- Geo batteries: +2-4 particles per rotation
- Non-Geo teammates: Minimal contribution
Step 4: Apply ER multiplier and safety buffer
- Target ER × Particle energy = Total energy per rotation
- Add 10-15% buffer for RNG variance
ER Breakpoint Table: Your Quick Reference
Solo Albedo: 240% minimum, 260% recommended (Fleuve Cendre + ER substats) Double Geo: 200% minimum, 220% recommended (Cinnabar Spindle + moderate ER) Triple Geo: 170% minimum, 190% recommended (Harbinger + minimal ER) Mono Geo: 150% minimum, 170% recommended (pure damage focus)
These assume C0 Albedo. C1 drops requirements by 20-30 percentage points through direct energy regeneration.
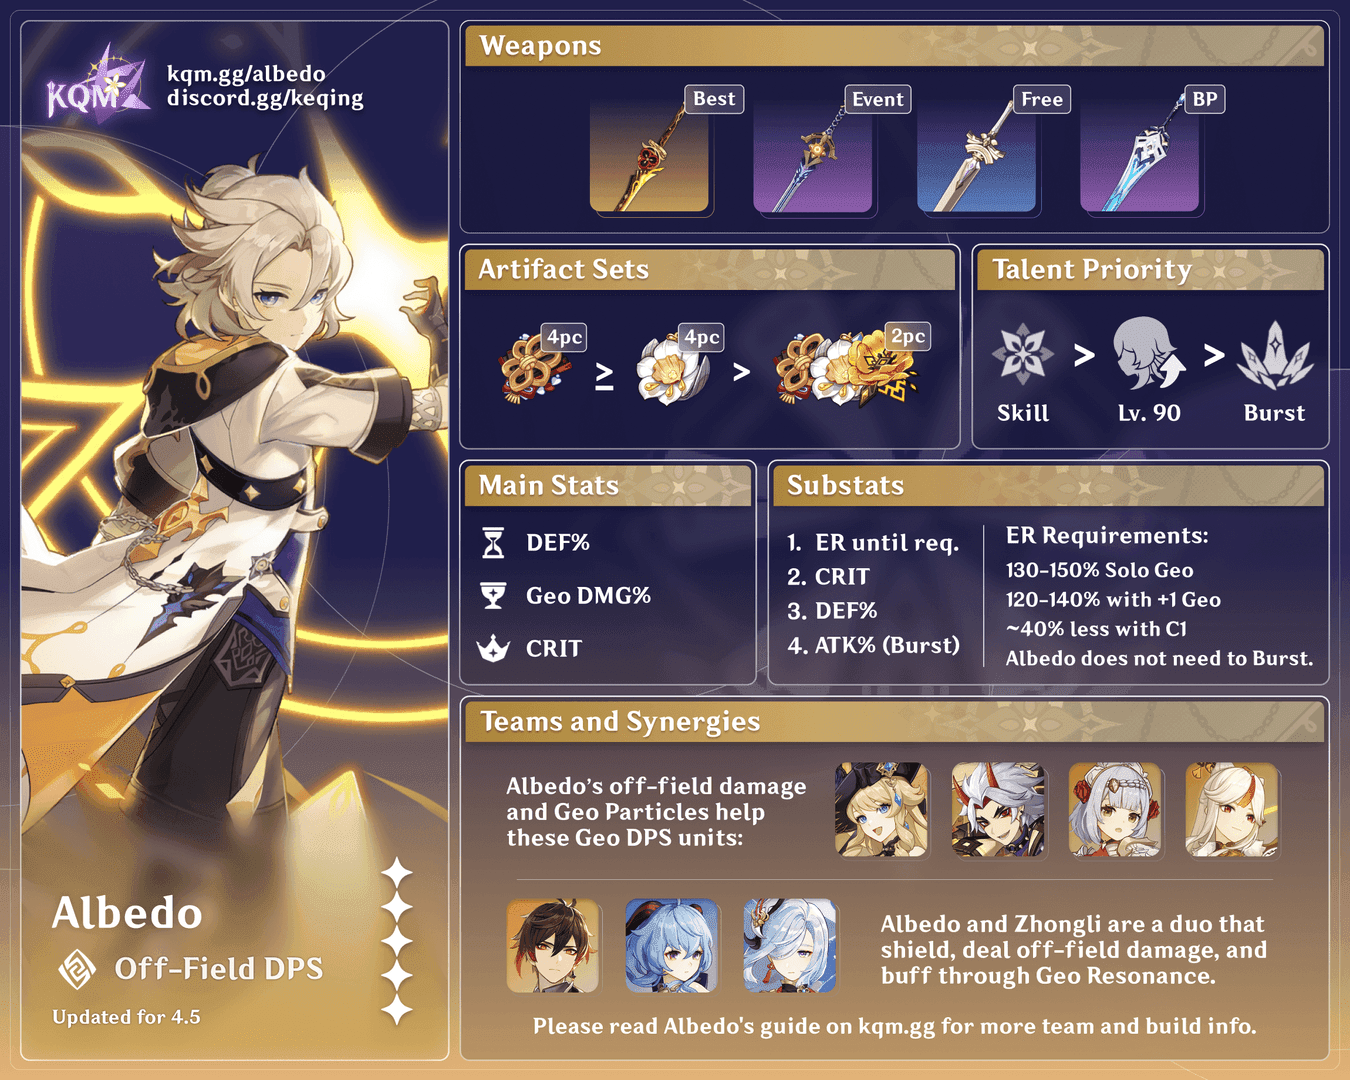
Optimal Artifact Stats for Albedo ER Builds
Balance is everything. You're juggling Energy Recharge with DEF scaling and Geo damage through careful stat prioritization.
Main Stat Priority: The Foundation
Sands: DEF% optimal for most builds (58.3% DEF scaling). Only use ER% sands for solo Albedo or teams lacking Geo support.
Goblet: Geo DMG Bonus (46.6%) offers the highest damage increase. Avoid ATK% – scaling heavily favors DEF.
Circlet: CRIT Rate/DMG depending on weapon. Harbinger users need CRIT DMG, Cinnabar users prefer CRIT Rate.
Main stats provide larger bonuses than substats. Only sacrifice when ER requirements can't be met through substats and weapon selection.
Substat Optimization: The Priority Hierarchy
- CRIT Rate to 60-70%: Essential for consistent damage
- Energy Recharge to threshold: Based on team calculations
- CRIT DMG for 1:2 ratio: Optimize after meeting requirements
- DEF% for scaling: Improves damage and support
- ATK% as filler: Minimal impact but better than flat stats
Each ER substat roll (5.8% average) should be evaluated against damage alternatives. Once you hit ER requirements, focus entirely on damage optimization.
ER Sands vs DEF Sands: When to Make the Trade
ER Sands becomes necessary when weapon and substats can't reach thresholds – typically solo builds or minimal Geo support. The damage trade-off ranges 15-25% depending on DEF scaling from other sources.
DEF Sands works optimally when ER is achievable through weapon ER (45.9%), substat ER (25-35%), and team bonuses (15%). Use DEF% whenever possible, switching to ER% only when burst uptime falls below 90%.
Best Artifact Sets for Energy-Focused Albedo Builds
Set selection impacts both damage output and energy management. You're choosing between damage-focused (Husk) and energy-focused (Emblem) depending on whether ER requirements can be met through substats alone.
Husk of Opulent Dreams: 4pc vs 2pc Decision
4-Piece Husk: 30% DEF plus Curiosity stacks granting 6% DEF and 6% Geo DMG per stack (maximum 24% each). Requires 12-second intervals to maintain stacks – ideal for off-field playstyle. Choose when ER is achievable through substats.
2-Piece Husk: Combinations work for high ER builds. 2pc Husk (30% DEF) + 2pc Emblem (20% ER) provides balance when substat ER is insufficient. Damage difference between 4pc and 2pc ranges 12-18%.
Golden Troupe: The Burst-Focused Alternative
Golden Troupe offers 20% Skill DMG (2pc) and 25% Skill DMG plus 25% Burst DMG when off-field (4pc). Activates automatically for off-field Albedo without stack management.
Requires heavier ER investment – target 220-240% without Geo teams, 190-210% with Geo Resonance.
Hybrid Set Combinations: When to Mix and Match
2pc Husk + 2pc Emblem: 30% DEF and 20% ER, excellent for ER-focused builds exceeding 220% requirements.
2pc Husk + 2pc Golden Troupe: 30% DEF and 20% Skill DMG, prioritizing damage over energy management.
2pc Golden Troupe + 2pc Emblem: 20% Skill DMG and 20% ER for burst-focused, energy-poor compositions.
Match bonuses to specific deficiencies. Avoid hybrid sets when 4pc bonuses are maintainable effectively.
Weapon Recommendations for Non-Sacrificial Albedo Builds
Weapon selection directly affects ER requirements and build optimization. Goal: maximize damage while meeting energy thresholds through weapon stats and passives.
Cinnabar Spindle: The DEF Scaling Champion
Provides 69% DEF at level 90 – optimal for DEF-scaling builds. Passive increases Skill DMG by 40-80% of DEF. Target 25-35% ER from substats for 200%+ total with Geo Resonance.
Solo builds require 45-55% from substats. Even R1 outperforms alternatives for DEF-focused builds.
Harbinger of Dawn: F2P Excellence
Offers 46.9% CRIT Rate with 28% CRIT DMG when HP exceeds 90%. Exceptional CRIT value for F2P players. No DEF scaling requires heavier DEF% artifact investment.
ER requirements mirror Cinnabar builds. HP requirement rarely poses issues for off-field Albedo.
Other 4-Star Alternatives
Fleuve Cendre Ferryman: 45.9% ER enables 200%+ with minimal substat investment. Premier choice when ER is the limiting factor.
Favonius Sword: Generates particles on CRIT hits, potentially reducing ER requirements. Low base ATK and lack of DEF scaling limit damage – suitable only for pure support builds.
Team Compositions That Maximize Albedo's Energy Generation
Team composition determines ER requirements and effectiveness. You're creating synergistic compositions where energy needs align with particle generation while maximizing damage through resonance and character synergies.
Geo Resonance Teams: The Battery Effect
Geo Resonance provides 15% ER to all members while increasing Geo DMG 15% and reducing Geo RES 20%. Reduces individual ER requirements by 20-30 percentage points compared to solo builds.
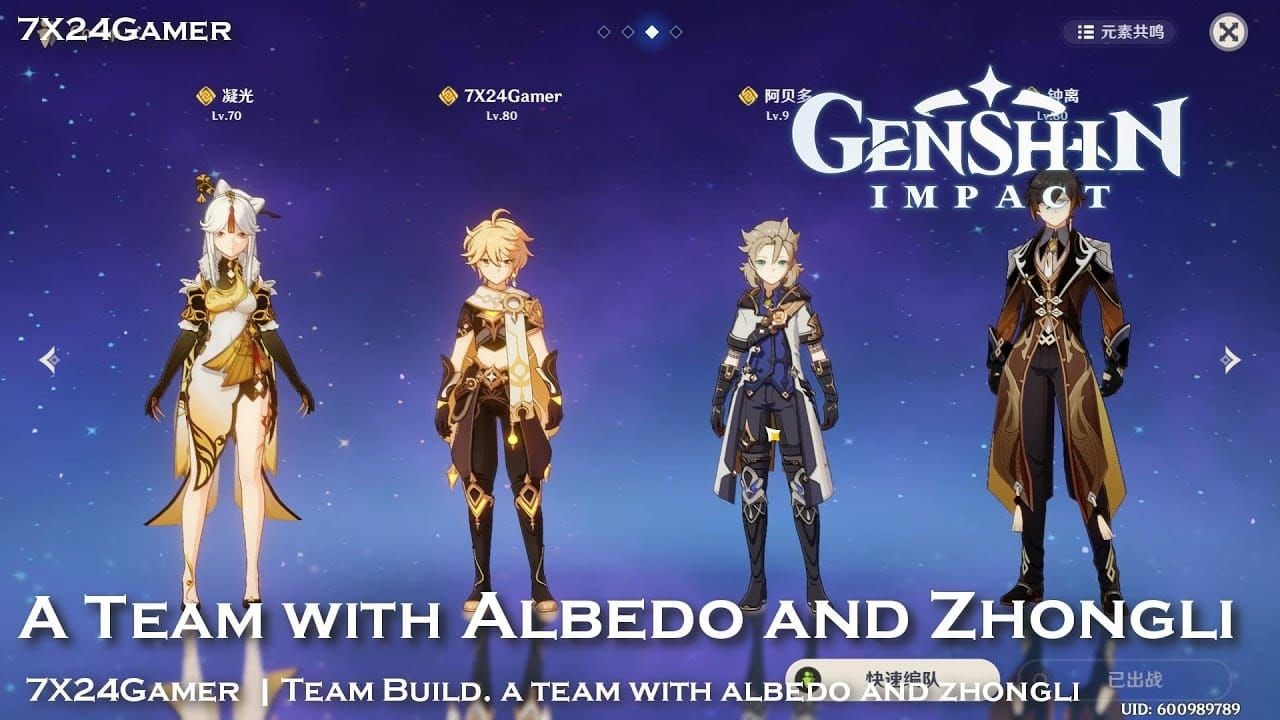
Albedo + Zhongli: Excellent particle generation through pillar (2-3 particles per cast) with shield support and resistance shred.
Albedo + Gorou: DEF buffs and particle generation, particularly effective with other DEF-scaling characters.
Optimal Geo Teammates for Particle Funneling
Zhongli: Premier Geo battery with consistent generation (4-6 additional particles per rotation) and universal shield support.
Gorou: DEF scaling synergy and moderate generation with team buffs through burst.
Navia: High personal damage and reliable particle generation through kit mechanics.
Particle funneling involves switching to Albedo before particles arrive for triple energy gain, reducing ER requirements by 15-20 percentage points.
Non-Geo Team Integration: Higher Investment, More Flexibility
Non-Geo teams require higher ER (220-240%) but offer elemental reactions and diverse archetypes. Albedo + Hu Tao + Xingqiu + Bennett represents a popular composition providing off-field damage and Crystallize shields.
Rainbow teams require highest investment (240-260%) but offer maximum character flexibility.
Rotation Patterns for Consistent 200%+ Burst Uptime
Master rotation patterns to achieve those theoretical calculations in practice. Proper timing, particle collection, and skill sequencing significantly impact energy generation efficiency.
Standard Rotation Framework
Basic 20-Second Rotation:
- Albedo Skill placement (0s)
- Support abilities (2-6s)
- Main DPS window (6-16s)
- Albedo Burst + refresh (16-20s)
Extended 24-Second suits longer DPS windows or complex setups. Choose length based on team requirements and energy patterns.
Energy Funneling Techniques: Maximizing Particle Value
Active Funneling: Switch to Albedo before particles arrive for triple energy gain. Reduces ER requirements by 15-20 percentage points when executed consistently.
Pre-Funneling: Generate particles with Albedo, switch to others, return before arrival. Advanced technique maximizing gain while maintaining flow.
Particles take 1-2 seconds to reach characters, providing a timing window for optimal collection.
Common Mistakes and Troubleshooting Energy Issues
The Sacrificial Sword Myth
Albedo always needs Sacrificial Sword – outdated belief from pre-6.2 gameplay. Post-6.2 Albedo achieves 95%+ uptime with 200% ER and proper team composition regardless of weapon.
The damage increase from switching to Cinnabar Spindle or Harbinger? We're talking 20-35% improvements.
Why Your Burst Isn't Ready: Rotation Timing Errors
Particle Collection: Off-field collection reduces energy gain by 66%. Switch to Albedo before arrival.
Skill Downtime: Refresh skills before expiration to maintain consistent generation.
Burst Timing: Align usage with natural rotation breaks for maximum efficiency.
Substat Investment Mistakes
Over-Investment: Exceeding requirements wastes artifact potential for damage.
Ignoring CRIT Rate: Favonius weapons require 60%+ CRIT Rate for reliable generation.
Unbalanced Distribution: Focusing exclusively on ER while ignoring damage reduces overall contribution.
Practical Build Examples: ER Thresholds for Different Scenarios
Example Build 1: Solo Albedo (High ER Requirements)
Target: 260% ER, 2,400+ DEF, 60% CRIT Rate, 120% CRIT DMG Weapon: Fleuve Cendre Ferryman Artifacts: 2pc Husk + 2pc Emblem Main Stats: ER% Sands, Geo DMG Goblet, CRIT Rate Circlet
Example Build 2: Double Geo Team (Moderate ER)
Target: 220% ER, 2,800+ DEF, 65% CRIT Rate, 140% CRIT DMG Weapon: Cinnabar Spindle Artifacts: 4pc Husk Main Stats: DEF% Sands, Geo DMG Goblet, CRIT Rate Circlet
Example Build 3: Triple/Quad Geo Team (Minimal ER Needs)
Target: 170% ER, 3,200+ DEF, 70% CRIT Rate, 160% CRIT DMG Weapon: Cinnabar Spindle Artifacts: 4pc Husk Main Stats: DEF% Sands, Geo DMG Goblet, CRIT DMG Circlet
Frequently Asked Questions
How much Energy Recharge does Albedo need post-6.2?
200%+ ER for consistent uptime in most teams. This drops to 180% in double Geo with resonance, or 160% in triple/quad Geo. Solo builds may need 240-260% ER.
Can Albedo maintain burst uptime without Sacrificial Sword?
Absolutely. Post-6.2 buffs make Sacrificial unnecessary. Silver Isotoma enhancement and proper ER investment (200%+) enable 95%+ uptime with damage weapons like Cinnabar Spindle or Harbinger of Dawn.
What's the best ER threshold for Albedo in Geo teams?
Double Geo: 190-220% ER for optimal balance. Triple Geo: 170-190% ER. Mono Geo: 160% ER due to abundant particle generation.
How does Albedo's particle generation work after the 6.2 buff?
Skill generates 2-3 Geo particles every 4 seconds (RNG-based). Silver Isotoma enhancement improves consistency with 2+ Hexerei characters. Each particle provides 3 energy to Geo characters, 1 to off-element, modified by ER percentage.
What artifacts give Albedo the best energy recharge?
Husk with ER substats provides the best damage/energy balance. For high ER needs, consider 2pc Husk + 2pc Emblem (20% ER bonus). Fleuve Cendre weapon supplements when needed.
Is 200% burst uptime possible on Albedo at C0?
Yes, C0 achieves 95%+ uptime with proper ER investment (200%+) and team composition. C1 reduces requirements by 20-30 percentage points but isn't necessary for consistent performance.


