FN2000 REQUIEM Valor Pricing (Jan 2026)
Cost Breakdown
Worst-Case (Pity Trigger):
- 80-100 pulls at 90 Gold each
- Total: 7200-9000 Gold
- Equivalent: 12,000-15,000 Diamonds (100 Diamonds = 60 Gold)
Average Pulls:
- Expected: 3000-5000 Gold
- Most players obtain within 40-55 pulls
- Represents 5000-8333 Diamonds
Baseline Comparison:
- Standard EVO weapons: 4000 Gold direct purchase
- REQUIEM gacha offers 25-40% savings on average luck
- Worst-case exceeds baseline by 80-125%
Gold Acquisition Efficiency
Elite Strike Pass (January 15):
- Initial cost: 520 Gold
- Tier 50 refund: 520 Gold (complete return)
- Net cost: Zero with full completion
Daily Missions:
- Individual: 20-50 Gold each
- Win 5 TDM: 150 Gold
- Top 5 BR (10x): 180 Gold
- Weekly potential: 400-600 Gold
Diamond Conversion:
- 100 Diamonds = 60 Gold (0.60 ratio)
- 1000 Diamonds = 650 Gold (0.65 ratio)
- Bulk purchases: 8.3% better value
For efficient Blood Strike Golds top up, BitTopup offers competitive rates with instant delivery.
Spending Scenarios
Light Spender (F2P Focus):
- Daily missions + Strike Pass refund
- 2000-3000 Gold over 4-6 weeks
- 40-50% acquisition chance
- Timeline: Late February 2026
Medium Spender:
- Purchase 3000-5000 Gold
- Supplement with dailies
- 75-85% probability
- Immediate January 16 access
Heavy Spender:
- Secure 9000 Gold for pity
- 100% guaranteed
- Optimal for competitive players
Restore Energy Mechanics
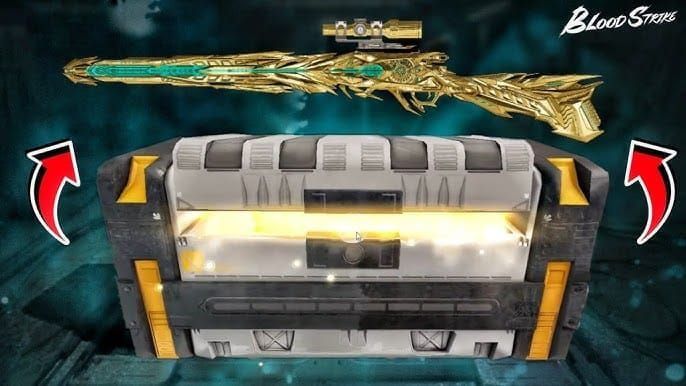
Launches January 8 in BR Matchmaking/Room modes, expands to Ranked/Peak January 15.
How It Works
Activation:
- Auto-triggers below 30% health
- Activates at zero armor
- No manual input required
Restoration Scaling:
- Scales with enemy armor level
- Maximum at Level 3 armor elimination
- Health and armor restore simultaneously
Skill Cooldown Integration:
- Evolution Tier 2 (250 points): 15% cooldown reduction
- Tier 3 (500 points): 25% enhanced effects
- Ghost: 25s → 17s cooldown
- Sparkle: 30s → 22s cooldown
vs Standard Regeneration
Standard:
- 5-second delay after damage
- 10 HP/second recovery
- Full health: 15-20 seconds
- Armor requires manual pickup
Restore Energy:
- Instant activation on elimination
- Immediate 40-60% health restoration
- Simultaneous armor restoration
- Enables consecutive engagements
Combat Benefits
Player at 30% health (30 HP) eliminating Level 3 armor opponent:
- Instant restoration to 70-80 HP
- Armor restored to Level 3
- Skill cooldowns reduced 15-25%
- Ready for next fight in 2-3 seconds
Sparkle Synergy:
- Base: 40 HP over 5 seconds
- Tier 3: 50 HP over 5 seconds
- Combined: 90-100 HP total recovery
- Effective health pool: 200+ HP
Why Aggressive Play Works Now
Pre-January 2026 Problems
Aggression Costs:
- 40-60 HP loss per elimination
- 8-12 seconds armor replacement
- Forced 15-20 second repositioning
- Vulnerable to third-parties
Post-Restore Energy Benefits
Resource Gains:
- Instant 40-60% health per elimination
- Immediate armor restoration
- Reduced cooldowns for ability spam
- Consecutive engagements without repositioning
Practical Scenario: Pushing three-player position:
- Eliminate first defender → restore to 70-80 HP, gain Level 3 armor
- Engage second → restore again
- Push third with full resources
- Exit with higher health than entry
Ability Spam Potential
Ghost Optimization:
- Base cooldown: 25s
- Reduced: 17s
- Invisibility: 8s (10s at Tier 3)
- Uptime: 47-58% with consecutive eliminations
Sparkle Sustainability:
- Base cooldown: 30s
- Reduced: 22s
- Healing: 40 HP/5s (50 HP at Tier 3)
- Near-continuous availability
Before/After Comparison

Pre-Restore Energy Building Push:
- Enter at 100 HP, Level 3 armor
- Eliminate first floor → exit 45 HP, Level 1 armor
- 20-second recovery required
- Third-party during recovery
- Result: Elimination/retreat
Post-Restore Energy:
- Enter 100 HP, Level 3 armor
- Eliminate first floor → restore to 75 HP, Level 3 armor
- Push second floor in 3 seconds
- Eliminate second → restore to 80 HP
- Complete clear in 15 seconds
- Result: Position secured
FN2000 REQUIEM Performance
Base Stats
Core Statistics:
- Fire rate: 750 RPM
- Magazine: 30 rounds
- Effective range: 40-50m with attachments
- Body damage (0-15m): 28
- Body damage (40m+): 22
Time-to-Kill:
- Close (0-15m): 4 shots (320ms)
- Mid (15-40m): 4-5 shots (320-400ms)
- Long (40m+): 5-6 shots (400-480ms)
REQUIEM Valor Features
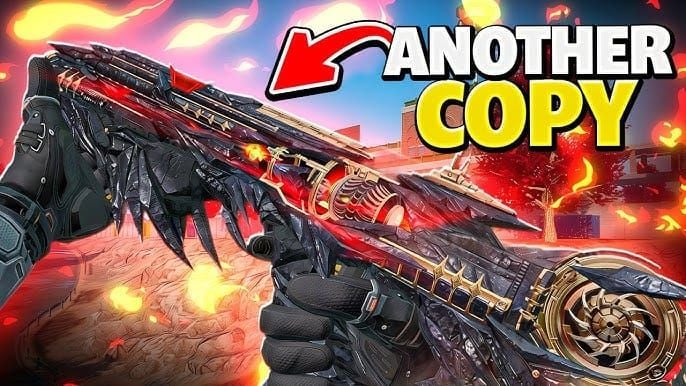
EVO-class cosmetic only (no stat changes):
- Unique kill effects
- Custom reload animations
- Distinctive muzzle flash/tracers
- Evolution-tier visual progression (3 tiers)
- Prestige value
Performance identical to standard FN2000.
Recoil Pattern
Characteristics:
- Initial 5 rounds: Tight vertical
- Rounds 6-15: Gradual left drift (2-3°)
- Rounds 16-30: Increased vertical, right correction
- Full spray: 15° vertical, 5° horizontal
Control Techniques:
- Pull down 10-12% initial burst
- Micro-adjust left mid-magazine
- Burst fire 40+ meters (5-7 rounds)
- Full auto viable 0-30m
Optimal Ranges
Ideal Zones:
- 20-35m: Maximum effectiveness
- 15-20m: Competitive with SMGs
- 35-45m: Outperforms SMGs
- 45m+: Requires burst discipline
For Restore Energy, maintain 20-35m where 28 damage enables 4-shot eliminations.
Perfect Aggro Loadout
Attachments
Optimal Setup:
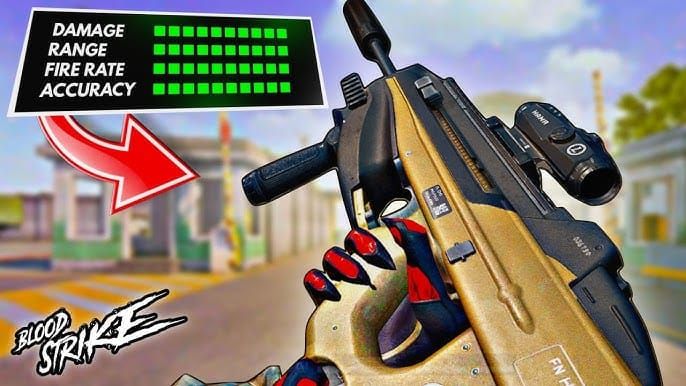
- Optic: Red Dot (fastest acquisition)
- Barrel: Compensator (15% vertical reduction)
- Grip: Vertical Foregrip (horizontal stability)
- Magazine: Extended (40 rounds)
- Stock: Tactical (8% ADS movement speed)
Alternative:
- Optic: Holographic (wider FOV)
- Barrel: Flash Hider (concealment)
- Grip: Angled (50ms faster ADS)
- Magazine: Fast Mag (1.2s reload vs 2.1s)
- Stock: Skeleton (12% sprint-to-fire)
Extended mag critical for 2-3 eliminations per reload.
Secondary Weapons
P90 SMG (Optimal):
- Damage: 18/shot at 900 RPM
- Magazine: 50 rounds
- Range: 15-25m
- TTK: 267ms (0-15m)
Bizon SMG:
- Damage: 16/shot at 750 RPM
- Magazine: 64 rounds (largest)
- Range: 12-22m
- TTK: 320ms (0-15m)
RPK LMG:
- Damage: 24/shot at 600 RPM
- Magazine: 75 rounds
- Range: 20-35m (43m Heavy Barrel)
- TTK: 400ms (0-20m)
Equipment
Offensive Priority:
- Flashbangs: Disable before engagement
- Frags: Soften to 50-60 HP
- Smokes: Conceal rotations
Defensive (Situational):
- Trophy System: Protect recovery windows
- Deployable Cover: Temporary positions
Perks
Tier 2 (250 Points - Priority):
- 15% cooldown reduction
- Ghost: 25s → 21.25s
- Sparkle: 30s → 25.5s
Tier 3 (500 Points - Maximum):
- 25% enhanced effects
- Ghost: 8s → 10s invisibility
- Sparkle: 40 → 50 HP restoration
Reach Tier 2 early for ability usage every 2-3 eliminations.
Map Strategies
Urban Maps
Optimal Strategy:
- Identify 2-3 defender building cluster
- Push weakest position
- Trigger Restore Energy first elimination
- Transition adjacent building
- Chain 3-4 building eliminations
- Exit with equal/better resources
FN2000 Positioning:
- Maintain 20-30m distance
- Use doorways/windows for sightlines
- Pre-aim common positions
- Burst through windows, full auto in rooms
Open Maps
Rotation-Based Aggression:
- Target isolated players during rotations
- Use vehicles for rapid positioning
- Prioritize high-ground
- Maintain 35-45m distances
Energy Conservation:
- Avoid extended fights without elimination potential
- Disengage if target reaches cover >30% health
- Coordinate for guaranteed eliminations
- Reserve abilities for confirmed triggers
Vertical Maps
Ghost Vertical Application:
- Invisibility enables silent 2-floor climbs
- 8-10s duration undetected
- Surprise eliminations
- Immediate Restore Energy before reaction
Vertical Push Sequence:
- Deploy Sparkle at base
- Activate Ghost for invisible climb
- Eliminate high-ground defender
- Hold with restored resources
- Repeat for multi-floor
Chokepoints
Setup:
- Position 25-35m from entrance
- Maintain cover for restoration windows
- Extended Mag for multi-target
- Trophy for grenade protection
Elimination Chain:
- Eliminate first pusher
- Re-peek for second
- Chain as enemies commit
- Restore after each
- Maintain position
Common Mistakes
Over-Aggression Without Tracking
Mistake:
- 60 HP player eliminates opponent
- Restore Energy doesn't trigger (above 30%)
- Continues expecting restoration
- Dies next engagement
Correction:
- Monitor health before engagements
- If above 30%, brief recovery
- Take calculated damage to trigger
- Use Sparkle to supplement
Ignoring Energy Economy
Mistake:
- Trade damage without elimination
- Expect trigger that never occurs
- Forced retreat depleted
Correction:
- Commit to eliminations or disengage
- Avoid 50/50 trades
- Use abilities to secure kills
- Reset when targets reach cover
Poor Attachments
Mistakes:
- 4x/6x scopes (excessive zoom)
- Heavy Barrel (reduced mobility)
- Tactical Laser (visible beam)
- Standard Mag (insufficient capacity)
Optimal Philosophy:
- Prioritize mobility over range
- Fastest acquisition optics
- Maximum magazine capacity
- Balance recoil with movement
Misunderstanding Triggers
Clarifications:
- Requires elimination (not knockdown)
- Scales with enemy armor
- Triggers below 30% health OR zero armor
- Maximum vs Level 3 armor
Optimization:
- Prioritize high-armor targets
- Recognize restoration variance
- Don't expect full from low-armor
- Target selection impacts effectiveness
Value Analysis
Performance vs Cost
Tangible Benefits:
- Visual distinction
- Evolution progression
- Kill effect psychology
- Personal enjoyment
Intangible:
- No competitive advantage
- Equivalent performance free
- Personal preference investment
3000-5000 Gold average (5000-8333 Diamonds) vs:
- 2-3 Elite Strike Passes (1040-1560 Gold)
- Multiple legendary skins (800-1200 Gold)
- Battle Pass acceleration
Meta Longevity
Stability Factors:
- Balanced stats prevent nerfs
- Versatile range adapts to metas
- Restore Energy synergy weapon-independent
- Assault rifles consistently viable
Season Outlook (Jan-Mar 2026):
- Restore Energy favors aggressive weapons
- FN2000 optimal 20-35m
- No announced AR balance changes
- Expected Q1 2026 stability
Alternatives
Free:
- Standard FN2000 (identical stats)
- M4A1 (similar range, higher fire rate)
- AK-47 (higher damage, more recoil)
Premium:
- Vector Flame Fox (Noble Coins, Jan 12)
- Guard Valor (Jan 23)
- Previous EVO ARs (4000 Gold)
All provide equivalent competitive viability.
Who Should Buy
Ideal Buyers:
- FN2000 mains
- EVO-class collectors
- Disposable Gold after Strike Pass
- Cosmetic enthusiasts
Should Skip:
- F2P prioritizing Strike Pass
- Uncommitted to FN2000
- Awaiting Guard Valor/future releases
- Budget-conscious satisfied with standard
For purchases, secure Blood Strike Gold recharge instant through BitTopup for immediate January 16 access.
Advanced Tips
Energy Tracking
Visual Methods:
- Peripheral health bar monitoring
- Audio cues per damage tier
- Armor break notifications
- Post-elimination resource check
Mental Techniques:
- Estimate damage per hit
- Count shots received
- Calculate health percentage
- Predict trigger timing
Application:
- Take 3 AR body shots (~70 damage)
- Estimate 30 HP (30%)
- Recognize trigger on next elimination
- Commit for guaranteed restoration
Team Coordination
Elimination Sequencing:
- Designate primary aggressor
- Secondary provides suppression
- Primary triggers Restore, continues
- Rotate based on resources
Communication:
- Call health percentage
- Announce Restore triggers
- Coordinate around timing
- Share elimination opportunities
Counter-Play
Defensive Counters:
- Abilities force open positions
- Grenades deal pre-engagement damage
- Multi-angle simultaneous pushes
- Bait ability usage before main push
Patience vs Aggression:
- Recognize overly strong positions
- Avoid feeding eliminations
- Force rotations through zone
- Third-party during other engagements
Situational Awareness
Decision Framework:
- Current health/armor
- Restore trigger proximity
- Enemy composition/positioning
- Cover/escape routes
- Third-party threats
Scenarios:
40 HP, Level 1 armor, enemy 60 HP:
- Decision: Disengage
- Reasoning: Won't trigger above 30%, disadvantaged
25 HP, zero armor, enemy 80 HP:
- Decision: Aggressive with abilities
- Reasoning: Triggers on elimination, full restoration
70 HP, Level 3 armor, multiple enemies:
- Decision: Aggressive multi-target
- Reasoning: High resources, multiple restoration opportunities
FAQ
How much does FN2000 REQUIEM Valor cost?
90-150 Gold per pull, pity at 80-100 pulls (7200-9000 Gold worst-case). Average 3000-5000 Gold (40-55 pulls). Elite Strike Pass (Jan 15) provides 520 Gold refund at tier 50.
What does Restore Energy do?
Auto-restores health/armor when eliminating opponents, triggering below 30% health or zero armor. Scales with enemy armor level. Reduces skill cooldowns 15% (Tier 2) and enhances effects 25% (Tier 3).
Is REQUIEM Valor worth buying?
Purely cosmetic, no stat advantage. Worth for FN2000 mains, collectors, customization enthusiasts. Skip if prioritizing Strike Pass, awaiting Guard Valor (Jan 23), or satisfied with standard skins.
How does Restore Energy change gameplay?
Eliminates resource depletion for aggression by instantly restoring health/armor after eliminations. Enables consecutive multi-engagement pushes without repositioning. Combined with 15-25% cooldown reductions, maintains sustained pressure.
Best FN2000 REQUIEM attachments?
Red Dot, Compensator, Vertical Foregrip, Extended Mag (40 rounds), Tactical Stock. Alternative: Holographic, Flash Hider, Angled Foregrip, Fast Mag, Skeleton Stock for maximum mobility.
How to maximize Restore Energy?
Maintain 20-35m with FN2000, prioritize eliminations over trades, reach Tier 2 (250 points) for 15% cooldown reduction, coordinate for guaranteed eliminations. Monitor health to ensure triggers (below 30%), target high-armor opponents.
Ready to dominate with FN2000 REQUIEM Valor? Get Blood Strike currency safely through BitTopup – trusted by millions. Secure checkout, instant delivery, 24/7 support. Power up today!


