

Understanding Morse Invisibility Mechanics in Free Fire OB52
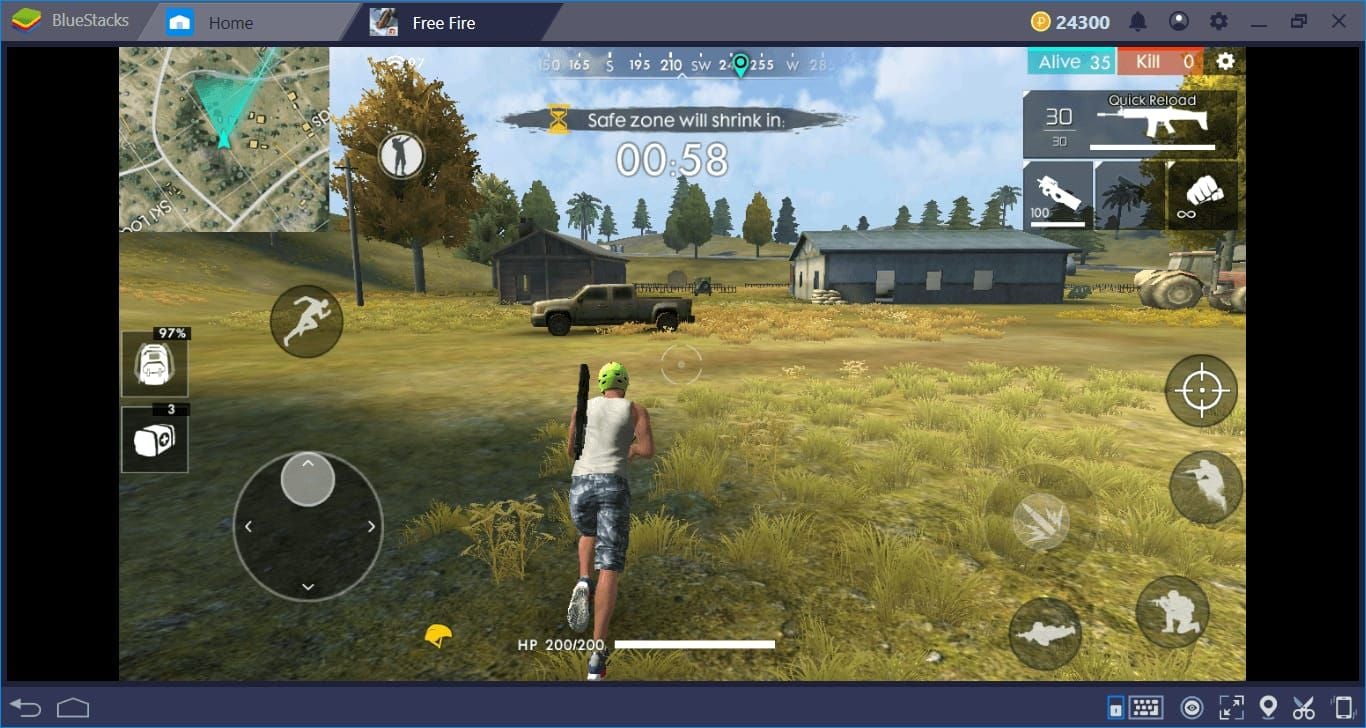
Morse's Stealth Bytes provides 15s complete invisibility when enemies are beyond 16m, plus 20% speed boost (5 m/s → 6-7 m/s). Bidirectional detection means Morse can't see opponents beyond 16m either, creating tactical blind zones.
Key mechanics:
- 45s cooldown with 1s exit delay (vulnerability window)
- 4m aim-assist reveal window (MP40/UMP expose Morse here)
- Typical activation: 50-80m zone rotations, 10m compound pushes, disengagements
For competitive advantages, Free Fire Diamonds top up on BitTopup provides instant character unlocks with secure transactions.
Visual and Audio Indicators During Invisibility
Audio signatures persist despite invisibility:
- Stealth activation: audible within 20m
- Movement sounds: under 8m
- Footsteps: 5m (max volume), 8-12m (medium), 15-20m (faint)
Optimal audio settings:
- Environmental: 100%
- Master: 80-90%
- Treble: 40-50%
- Voice chat: 60-70%
- Music: 20%
Stereo headphones provide 15-degree directional accuracy. Dust trails visible at 30+ meters even during invisibility, revealing movement across Purgatory's 50-70m sight lines.
Common Morse Activation Scenarios
Three primary situations:
- Zone rotations: 60-80m Kalahari crossings through open terrain
- Compound pushes: Breaching triple Gloo Walls (2m gaps) within 15s duration
- Disengagements: After losing shield advantage (Xayne's 70 Shield regenerates at 4.67/s)
Zipline escapes trigger 10s ability resets for Wukong/Tatsuya, but Morse provides immediate concealment without requiring knockdowns.
Top 7 Scan Skills That Counter Morse Invisibility
Anti-stealth equipment creates 16m detection bubbles that negate invisibility. Position at compound entrances, zone edges, and chokepoints for layered awareness.
Tatsuya's Rebel Rush: 90s cooldown, resets on knockdowns within 10s. Securing knockdown during initial rush refreshes ability for sustained pursuit.
Wukong's Camouflage: 10s invisibility, 90s cooldown, resets on takedowns within 10s. 10% speed reduction (4.5 m/s) makes him slower than Morse's 6-7 m/s, but reset potential matches Tatsuya.
Xayne's Shield Advantage
Xtreme Encounter generates 70 Shield Points over 15s (4.67/s regeneration), 75s cooldown. Outlasts Morse's 15s invisibility—when Morse deactivates, Xayne retains full shield advantage.
Cooldown mismatch: 75s vs Morse's 45s creates vulnerability windows. Combine with detection equipment for 16m safe zones where shield + visibility compound.
JJK Collaboration Techniques
Malevolent Shrine: 10m horizontal radius, 5m vertical, deals 5 damage every 0.5s for 15s (150 total). Matches Morse's exact 15s window, forcing repositioning. Deals 400 damage/s to Gloo Walls, no line of sight required.
Unlimited Void: 300+100 Cursed Energy. Full HP restore, 5% speed boost, 30 Shield Points for 30s. Speed boost (5.25 m/s) narrows Morse's advantage. 30s duration outlasts two potential Morse activations.
For JJK event advantages, cheap Free Fire diamond recharge through BitTopup delivers fast access to Cursed Energy bundles.
Divergent Fist: 100 Cursed Energy. 30 dash + 30 impact damage, destroys 3 Gloo Walls. Dash matches Morse's 6-7 m/s speed for pursuit.
Hollow Purple: 70 damage + knockback, 40 damage explosion after 80m trajectory. Knockback disrupts positioning even without visual confirmation.
Ember Insects: 100 Cursed Energy. 25 initial + 5/s burn for 3s (40 total) in 1m radius. Burn reveals invisible enemies through persistent damage ticks.
Optimal JJK Event Loadout for Ranked Push
Kugisaki's Hammer: 50 Cursed Energy (L1), 100 (L2), unlimited ammo (L3) as main weapon. Eliminates reload vulnerabilities during extended fights.
Character combos: Gojo skins + Moco's tagging or Skyler's sonic wave for mechanical advantages.
Pet selection:
- Rockie: shield detection alerts
- Falco: gliding advantage for aerial reconnaissance
Equipment Setup for Maximum Detection
Armor priority: L3 armor/helmet for damage reduction over mobility. Absorbs first shots when Morse deactivates within 4m range.
Utility items:
- Gloo Grenades: instant 16m detection bubbles
- Smoke grenades: Morse moving through smoke creates visible disturbances
- Medkits: heal behind triple Gloo Walls (2m gaps) within detection bubbles during Morse's 45s cooldown
Weapon Loadout Synergy
Primary weapons:
- M1014 shotgun: max burst damage within 4m reveal window
- MP40/UMP: 4m detection enhancement + close-range lethality

Secondary weapons: High fire-rate ARs for 15-20m suppression where footsteps remain audible. AWM for brief visibility windows.
Attachments:
- Red dot sights: faster ADS when Morse appears within 16m
- Foregrips: reduce horizontal recoil for blind suppression
- Flash hiders: maintain visual clarity over sound suppressors
- Extended mags: essential for sustained engagements
Advanced Counter Tactics Against Morse Users
Activation pattern prediction: Morse activates during three windows—after taking damage, before compound pushes, during zone rotations. Pre-position detection equipment accordingly.
Baiting strategies: Expose one squad member to force early stealth usage, then ambush with pre-positioned teammates. Trades temporary vulnerability for 45s of aggressive pressure during cooldown.
Positioning techniques: Buildings under 10m height force Morse into 4m reveal window. Hold doorways/stairwells with MP40/UMP for guaranteed detection.
Squad Communication Protocols
Precise callouts: Morse audio north 10m vs vague reports. Track 45s cooldown through verbal countdowns.
Coordinated abilities: Stagger Tatsuya's Rush + Wukong's Camouflage for overlapping pressure. If Tatsuya fails within 10s, Wukong continues pursuit.
Zone rotations: Prioritize vehicle mobility (15-20 m/s) over edge-riding to outpace Morse's 6-7 m/s. Neon City's 4 Rift Portals enable 30s fast-travel, bypassing ambush positions.
Audio Cues and Visual Tells
Footstep volume patterns:
- 5m: max volume → deploy Gloo Walls
- 8-12m: medium → reposition toward teammates
- 15-20m: faint → place detection equipment
Environmental distortions: Grass movement, water splashes, dust clouds persist during invisibility. Purgatory's open areas make dust trails visible at 30+ meters. Kalahari's sand shows footprint depressions.
Weapon/healing sounds: Swap sounds indicate close-range prep. 4s medkit audio broadcasts exact position—Morse can't move quickly while healing.
Recommended Audio Settings
- Master: 80-90%
- Music: 20%
- Environmental: 100% (most critical)
- Voice chat: 60-70%
- Treble: 40-50%
Stereo headphone positioning provides 15-degree directional precision. Test in training mode with Wukong invisibility to calibrate detection thresholds.
Weapon and Attachment Selection
Shotgun loadouts: M1014 excels in 4m reveal window, securing knockdowns during 1s exit delay. Position near doorways/stairwells where terrain forces close encounters.
SMG configs: MP40/UMP function as weapons + detection tools. High fire rates enable sustained suppression at audio-indicated positions.
Scope selection: Red dots for fastest acquisition within 16m, 2x for 15-20m range where faint footsteps audible. Avoid high-mag scopes (tunnel vision).
Muzzle attachments: Flash hiders over suppressors—maintain visual clarity during sustained fire. Revealing position matters less than seeing when Morse appears.
Foregrips: Reduce horizontal recoil for blind suppression accuracy. Angled grips reduce ADS time for aggressive pushes toward audio signatures.
Pet Abilities That Enhance Detection
Rockie: Shield detection provides passive awareness beyond 4m aim-assist window. Early warning enables defensive positioning.
Falco: Gliding advantage for aerial reconnaissance. Top-down visibility reveals environmental disturbances invisible from ground level.
Pet positioning: Maintain close proximity for consistent detection radius. Coordinate squad pets to cover compound perimeters, eliminating blind spots.
Rank-Specific Strategies
Gold-Platinum: Foundation Building
- Maintain 15m engagement distances
- Activate detection equipment proactively
- Track 45s cooldown mentally
- Avoid chasing beyond detection bubble coverage
- Practice audio tracking in casual matches
Diamond-Heroic: Predictive Positioning
- Pre-position equipment along predicted rotation paths
- Call precise distance estimates: Morse 8m northeast, medium volume
- Coordinate ability chains to maintain continuous pressure
- Understand map chokepoints where terrain forces detection range
Grand Master: Frame-Perfect Execution
- Bait activations through deliberate vulnerability displays
- Exploit 1s exit delay for guaranteed damage windows
- Assign dedicated anti-Morse roles (MP40/UMP carriers)
- Track enemy cooldowns across multiple fights
- Maintain tactical flexibility—disengage when zone/third parties threaten
Map-Specific Counter Positioning
Bermuda Remastered
High-traffic areas: Shipyard, Factory, Clock Tower. Multiple elevations + tight corridors compress detection ranges. Hold interiors with MP40/UMP.
Detection equipment at bridges, valleys, building clusters controls rotations between POIs.
Purgatory
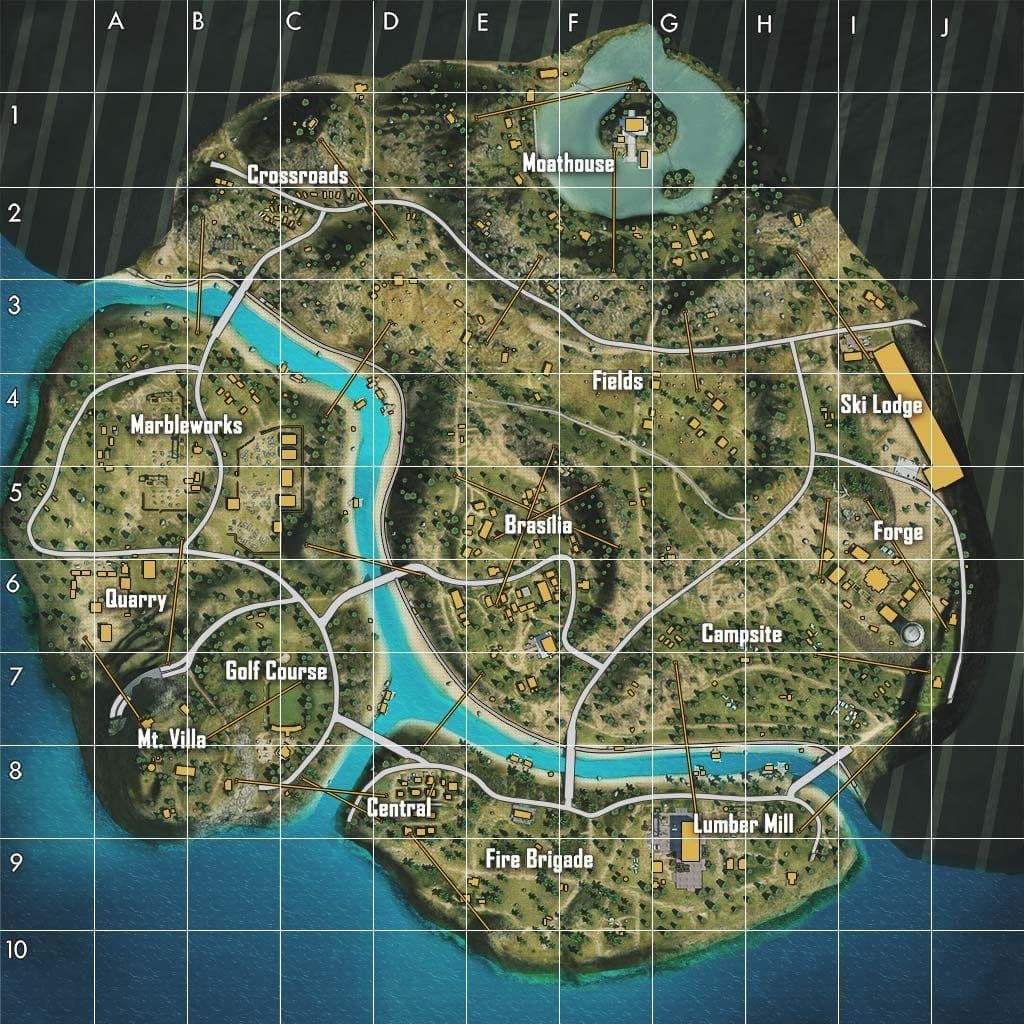
Open areas (50-70m) create natural detection zones. Dust trails visible at 30+ meters. Elevated terrain provides top-down visibility.
Layered defenses 30m behind primary cover outlast 15s invisibility. Secondary detection bubbles catch bypass attempts.
Kalahari
Expansive rotations (60-80m) favor vehicles (15-20 m/s) over foot travel. Early rotations establish detection networks before Morse arrives.
Sandy terrain shows footprints + dust clouds. Position at zone edges with long sightlines for 30+ meter tracking.
Neon City's 4 Rift Portals enable instant 30s repositioning, completely bypassing Morse-controlled areas.
Maximizing JJK Event Resources
Priority rewards: Malevolent Shrine, Unlimited Void, Divergent Fist. Claim gameplay abilities before cosmetics.
Token farming: Complete daily missions aligned with ranked gameplay—knockdowns, wins, top placements.
Skin advantages: Gojo/Itadori skins aid team coordination. Teammates recognize Domain Expansion carriers for coordinated setups. Psychological impact causes cautious opponent play.
FAQ
How does Morse invisibility work in OB52? 15s invisibility beyond 16m, 20% speed boost (6-7 m/s), 45s cooldown, 1s exit delay. Bidirectional detection—Morse can't see enemies beyond 16m either. 4m aim-assist window reveals to MP40/UMP.
What characters detect invisible enemies? Anti-stealth equipment (16m bubbles), Tatsuya's Rebel Rush (resets on knockdowns within 10s), Wukong's Camouflage (counter-stealth), Xayne (70 Shield over 15s outlasts invisibility).
Can you hear footsteps when Morse is invisible? Yes—within 8m. Max volume at 5m, medium at 8-12m, faint at 15-20m. Stealth activation audible within 20m. Optimal settings: Environmental 100%, Master 80-90%, Treble 40-50%.
Best loadout to counter Morse? JJK: Malevolent Shrine (10m radius, 150 damage over 15s), Divergent Fist (60 damage, destroys 3 walls). Weapons: MP40/UMP (4m detection), M1014 (close burst). Pets: Rockie (passive awareness).
How long does Morse invisibility last? Exactly 15s, 45s cooldown, 1s exit delay. Creates 30s windows between activations for aggressive pressure during confirmed cooldowns.
Does JJK event give advantages against Morse? Yes—Malevolent Shrine matches 15s duration with continuous damage. Unlimited Void (30s) outlasts two stealth activations. Divergent Fist destroys defensive walls. Hollow Purple (80m range) harasses through knockback.
Dominate OB52 ranked with premium diamonds and JJK items! Top up instantly on BitTopup for best rates, secure transactions, 24/7 support. Get your competitive edge now with fast delivery and excellent customer service supporting your climb to Grand Master!


