

Understanding Morse Counter Mechanics in OB52
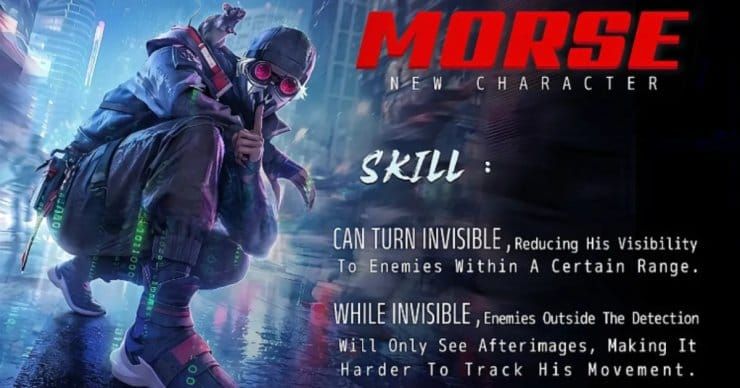
Morse's Stealth Bytes grants 15 seconds invisibility with 45-second cooldown, fundamentally altering engagement dynamics. The ability provides 20% speed boost during activation, but operates within strict limitations: Morse becomes invisible only beyond 16-meter detection threshold. This bidirectional detection limit is the key exploit point.
The 1-second exit delay when deactivating creates vulnerability windows. Competitive players time attacks during this transition phase.
To maintain competitive advantage, Free Fire Diamonds top up through BitTopup provides instant access to essential resources with secure transactions.
Core Detection System
Detection Ranges:
- 16-meter threshold: Morse visible within this range regardless of stealth
- 4-meter aim-assist window: Reveals Morse in close quarters
- MP40/UMP weapons: Enhanced 4-meter aim-assist detection
These weapons create detection bubbles effective in Bermuda's urban buildings under 10 meters height where vertical space compresses engagement distances.
Cooldown Management
The 45-second cooldown demands strategic timing. Activate stealth during:
- Third-party escapes
- Safe zone rotations through open terrain
- Flanking maneuvers against entrenched positions
Tatsuya's Rebel Rush resets its 90-second cooldown on knockdowns within 10 seconds. Wukong's Camouflage resets on takedowns within 10 seconds, though it imposes 10% speed reduction vs Morse's 20% boost.
Mastering Scanning Techniques
Optimal Detection Range
Anti-Stealth equipment creates 16-meter detection bubble, matching Morse's invisibility threshold. Positioning within this range forces visibility. Layered Defense positioning 30 meters behind primary positions creates overlapping detection zones Morse can't bypass.
In Purgatory's open areas (50-70 meters), visual scanning at maximum render distance reveals movement patterns. Dust trail visibility extends 30+ meters, creating environmental detection cues.
Timing by Game Phase
Early Game: Focus on landing zone perimeters. Neon City's 4 Rift Portals provide 30-second fast-travel with no combat allowed. Position detection bubbles at portal exits to catch players during 1-second exit delay.
Mid-Game: Scan at vehicle engagement ranges. Vehicle mobility (15-20 m/s) escapes Morse's stealth speed (6-7 m/s), but scanning during dismount catches transition vulnerability. Kalahari rotations (60-80 meters) create optimal scanning corridors.
Final Zone: Zones compress below 50 meters diameter, forcing all players within detection range.
Advanced Scanning Patterns
Triple Gloo Wall formations with 2-meter gaps counter stealth through controlled sightlines. This spacing creates detection corridors forcing predictable movement. Compound spacing at 10 meters limits area-denial abilities while maintaining coverage.
Alpine's vertical terrain requires adjusted scanning. Malevolent Shrine's 10-meter horizontal radius extends only 5 meters vertically, creating safe zones on elevated positions.
Common Mistakes
- Scanning beyond 16-meter threshold wastes resources
- Maintain 15-meter engagement distance for consistent detection
- Don't neglect audio cues—Morse's stealth doesn't eliminate movement sounds at close range
Sound Cue Recognition
Audio Breakdown
Stealth Bytes activation produces distinct audio within 20 meters. Movement sounds persist during stealth under 8 meters: footsteps, weapon switching, healing sounds. Bermuda's urban buildings amplify these through environmental acoustics.
Recommended Settings
- Master volume: 80-90%
- Music: 20%
- Environmental sounds: 100%
- Voice chat: 60-70%
- Bass boost: Enhances low-frequency footsteps
- Treble enhancement: 40-50% for ability activation clarity
Distance Recognition
Footstep Volume Indicators:
- Maximum volume: Within 5 meters (matches aim-assist window)
- Medium volume: 8-12 meters (early warning)
- Faint: 15-20 meters (approaching detection range)
Healing sounds reveal stationary positions. 4-second medkit audio creates extended detection windows.
Headphone vs Speaker
Stereo headphones provide directional accuracy within 15 degrees, essential for pinpointing positions. Surround sound extends to 360-degree awareness, though some find processing delay reduces reaction speed. Competitive players universally prefer headphones despite audio fatigue.
Character Synergy
Top 5 Characters
Xayne: Xtreme Encounter provides 70 Shield Points for 15 seconds (75-second cooldown), regenerating 4.67 points/second. Shield duration outlasts Morse's 15-second stealth, creating engagement windows.
Tatsuya: Rebel Rush (90-second cooldown) resets on knockdowns within 10 seconds, enabling chain engagements. Mobility burst closes gap during Morse's 1-second exit delay.
Wukong: Camouflage lasts 10 seconds (90-second cooldown) with counter-stealth capabilities. 10% speed reduction less favorable than Morse's 20% boost, but cooldown reset on takedowns creates sustained pressure.
Skill Combinations
Solo: Combine Xayne's shield with aggressive scanning. 15-second shield allows complete area sweeps within 16-meter detection bubble.
Squad: Layer detection bubbles through staggered positioning. Forward player at 16 meters, teammates at 30-meter intervals create overlapping coverage. Zipline escapes trigger 10-second resets on Tatsuya and Wukong.
Ability Timing
Activate Xayne's shield before entering high-risk zones. 75-second cooldown requires careful timing. Coordinate Tatsuya's Rebel Rush with teammate scanning for pincer movements.
Neon City Map Analysis
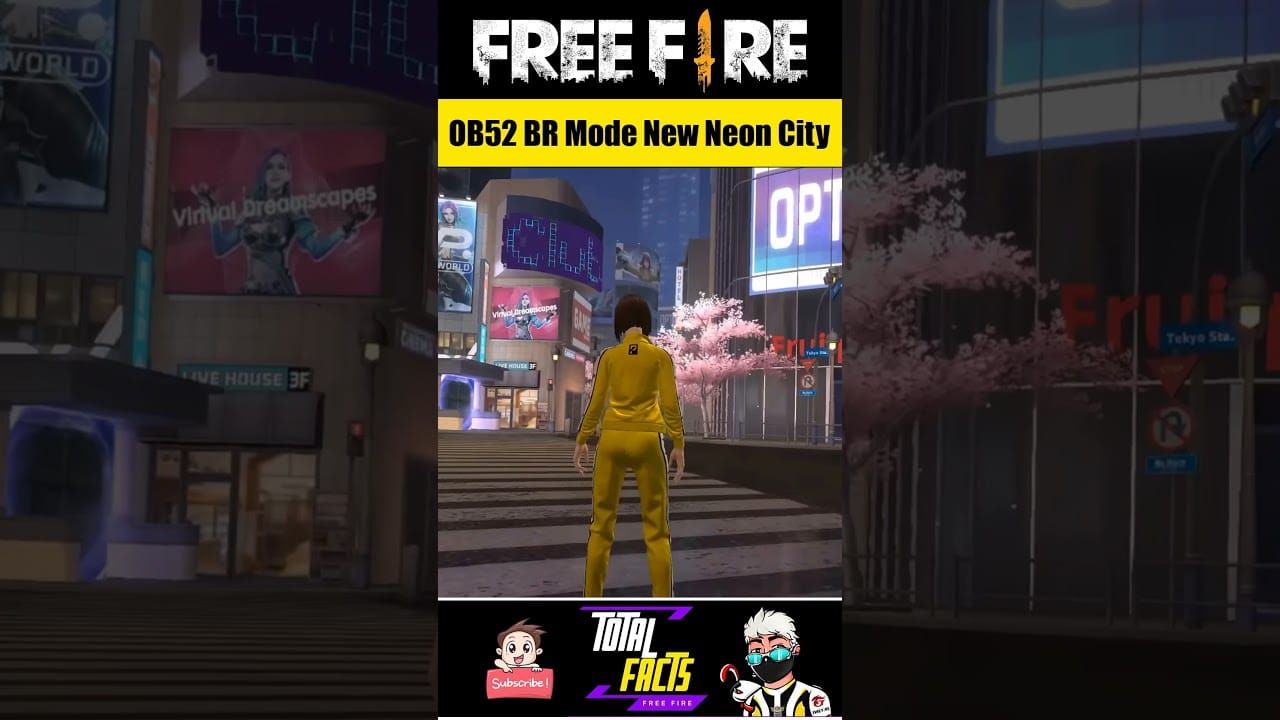
Layout Overview
4 Rift Portals provide 30-second fast-travel with no combat allowed. These create predictable rotation points. Position detection bubbles at portal exits to catch Morse during 1-second exit delay.
Vertical structures compress detection ranges. Buildings under 10 meters force engagements within 16-meter threshold. Rooftop positions reduce Morse's effective stealth zone through improved sightlines.
Risk Zones
High-Risk: Rift Portal exits and central loot areas attract multiple squads. Increase scanning frequency to prevent stealth ambushes.
Low-Risk: Perimeter zones offer safer looting with reduced player density but less valuable loot.
Loot Distribution
Central compounds: Highest density, maximum player concentration. Perimeter buildings: Moderate loot, reduced engagement frequency. Portal-adjacent areas: Strategic value for third-party interception.
Safest Drop Routes
For competitive advantages through premium content, buy Free Fire Diamonds instant recharge at BitTopup for fast delivery and secure transactions.
Top 7 Landing Spots
Northwest Perimeter Compounds: Consistent tier-2 loot, minimal traffic. Building layouts create natural detection corridors limiting stealth effectiveness.
Eastern Portal-Adjacent Buildings: Rapid rotation through Rift Portal access. 30-second fast-travel enables quick escapes.
Southern Industrial Zones: Vertical structures compress detection ranges. Multi-story buildings force close-quarters within 4-meter aim-assist window.
Risk Assessment
- Central plaza: 60-70% engagement probability within first minute
- Perimeter drops: 20-30% engagement probability, adequate equipment
- Survival rate improvement justifies reduced loot quality
Early Positioning
Immediate building occupation establishes detection perimeters. Second floor positioning creates elevation advantages extending 16-meter threshold coverage.
Triple Gloo Walls with 2-meter gaps create controlled sightlines around loot buildings, forcing predictable approach paths.
Alternative Zones
Secondary compounds 150-200 meters from primary zones provide fallback with tier-2 loot and reduced combat. Portal-based rotation enables rapid repositioning, though no-combat restriction creates vulnerability if enemies control exits.
Rotation Paths
Optimal Routes
Northwest Zones: Rotate through western corridors maintaining building cover. Urban terrain compresses stealth effectiveness within 16-meter threshold.
Eastern Portal Zones: Rapid rotations through Rift Portal networks. 30-second fast-travel bypasses dangerous terrain, but exits require immediate scanning.
Southern Industrial: Vehicle mobility (15-20 m/s) outpaces Morse's stealth speed (6-7 m/s). Scan during dismount transitions.
Mid-Game Counter Usage
Maintain 16-meter detection bubbles during rotations. Layered Defense 30 meters behind point creates overlapping coverage catching flanks.
Increase scanning near safe zone boundaries where density concentrates. Compressed area forces Morse closer, increasing detection probability through visual and audio (8-meter range).
Safe Zone Tactics
Analyze zone patterns to predict final locations. Pre-positioning establishes detection perimeters before other squads arrive.
Compound spacing at 10 meters limits area-denial while maintaining coverage. Prevents Malevolent Shrine's 10-meter radius from covering entire positions while ensuring Morse can't approach undetected.
Advanced Strategies
Counter-Camping
Systematic building clearing using 16-meter detection bubbles reveals campers before visual contact. Audio scanning during approaches detects movement within 8 meters, allowing pre-aimed entries.
Third-Party Prevention
Maintain 360-degree scanning rotation during engagements. Designate one squad member for perimeter scanning while others engage.
Vehicle sound detection at 50+ meters provides early warning. 15-20 m/s vehicle speed creates distinct audio signatures indicating incoming third parties.
Final Zone Usage
Final zones compress below 50 meters diameter, forcing all within detection range. Vertical positioning extends detection through improved sightlines, forcing ground-level positioning where detection is guaranteed.
Squad Communication
Immediate callouts when detecting stealth activation coordinate responses. Communicate 15-second duration for timing aggressive pushes during 1-second exit delay.
Directional audio cues shared through voice triangulate positions. Multiple members reporting footstep directions creates intersection points revealing exact positions.
Defending Against Morse Counter
Identifying Counter Users
Anti-Stealth equipment creates subtle visual indicators within 16-meter bubble. Observe positioning patterns—players maintaining specific distance thresholds indicate active counter-scanning.
Aggressive pushing during Stealth Bytes suggests detection capabilities. Confident forward movement indicates maintained visual contact despite stealth.
Minimizing Detection
Maintain distances beyond 16 meters. 20% speed boost enables rapid repositioning keeping enemies outside detection while closing to engagement distance.
Use 1-second exit delay strategically by deactivating behind cover. Time deactivation with building entry or Gloo Wall placement for protection during transition.
Building Positioning
Multi-story buildings create vertical separation beyond Malevolent Shrine's 5-meter vertical radius. Different floor positioning forces multi-elevation scanning, dividing attention.
Rapid floor changes during combat confuse detection. 15-second duration allows multiple transitions forcing re-establishment of detection.
Premium Resources for OB52
Essential Items
Xayne: 70 Shield Points regenerating 4.67 points/second provides sustained aggression outlasting 15-second stealth.
Jujutsu Kaisen Collaboration (Jan 14-17, 2026): Unlimited Void requires 300+100 Cursed Energy but restores full HP, adds 5% speed, provides 30 Shield Points for 30 seconds.
Malevolent Shrine: 10-meter radius dealing 5 damage every 0.5 seconds for 15 seconds (150 total damage). 400 damage/second against Gloo Walls destroys defensive positions.
BitTopup Advantages
BitTopup provides instant diamond top-ups with secure transactions and competitive pricing. Fast delivery ensures immediate access to essential OB52 content. Wide game coverage and excellent customer service with high ratings make it the reliable choice for competitive players.
FAQ
How does Morse's Stealth Bytes work in OB52? 15 seconds invisibility, 45-second cooldown, 20% speed boost. Only functions beyond 16 meters from enemies. 1-second exit delay creates vulnerability when deactivating.
What's the exact detection range for countering Morse? 16-meter bidirectional limit. Anti-Stealth equipment creates detection bubbles at this range. Aim-assist reveals within 4 meters. MP40/UMP provide enhanced 4-meter detection.
Which characters work best against Morse? Xayne (70 Shield Points for 15 seconds matches stealth duration), Tatsuya (Rebel Rush resets on knockdowns within 10 seconds), Wukong (10-second Camouflage with takedown resets).
Safest Neon City landing spots? Northwest perimeter compounds (tier-2 loot, 20-30% engagement vs 60-70% central), eastern portal-adjacent buildings (rapid rotation), southern industrial zones (vertical structures compress detection).
How to optimize audio for detecting Morse? Master volume 80-90%, music 20%, environmental 100%. Bass boost for footsteps within 8 meters. Stereo headphones for 15-degree directional accuracy.
Can stealth work through walls? Yes, but 16-meter detection threshold applies through all terrain. Buildings under 10 meters compress engagement within detection range. Audio cues persist through walls under 8 meters.


