

Understanding Free Fire Utility Meta in 2026
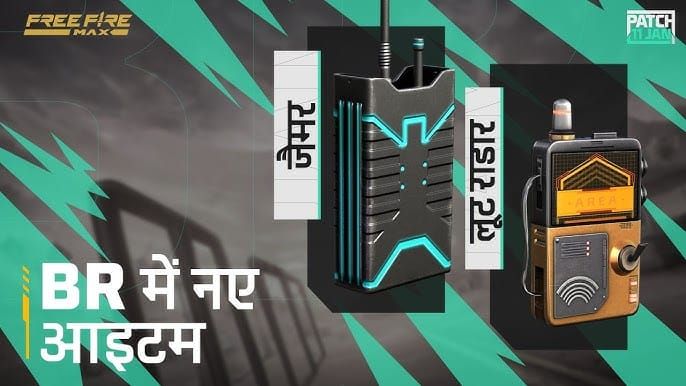
Here's what changed everything: the OB48 update bumped throwable capacity from 3 to 5 items—that's a 68% increase that fundamentally rewrote how we approach inventory management.
And honestly? It's about time. Utility combos now separate the winners from the eliminated in those nail-biting final circles. Pure aggro rushing? That's old school thinking that'll get you sent back to the lobby faster than you can say booyah.
What Defines Utility Combos in Free Fire
Think of utility combos as your tactical toolkit—smoke grenades for when you need to vanish, gloo walls for instant nope, not today cover, and explosive throwables to make enemies seriously reconsider their life choices. These aren't just random items you chuck around. They work together, creating this beautiful symphony of chaos that controls space and manipulates enemy positioning.
What experienced players know is this: it's not about having the items, it's about making them dance together.
For players looking to maximize their utility potential, Cheap Free Fire diamonds recharge for gloo wall skins through BitTopup ensures you have the resources needed for competitive play with competitive pricing, fast delivery, and secure transactions.
Why Utilities Win End-Zone Fights
End-zone fights aren't about who's got the fastest trigger finger anymore. They favor players who think three moves ahead—positioning and timing trump mechanical skill every single time.
Utilities give you superpowers: instant cover creation, movement concealment, and area control that makes enemies dance to your tune. I've watched countless pro matches where utility-heavy strategies consistently outperform the rush everything approach. The data doesn't lie.
2026 Meta Shifts in Throwable Usage
Character reworks shook things up big time. Koda's Gloo Strike and Oscar's Valiant Dash created these incredible utility synergies that didn't exist before. But here's the real game-changer—backpack capacity improvements that actually matter:
Level 1 backpacks jumped to 188 slots (that's +60%), Level 2 hits 248 slots (+30%), and Level 3 reaches a whopping 360 slots (+20%). Translation? You can finally carry the utility arsenal you've always wanted.
Smoke Grenade Mastery for End-Zone Control
Smoke Deployment Timing and Positioning
Here's a pro tip that'll save your life: deploy smoke grenades 2-3 seconds before you move, not after you're already getting shot at. I see too many players panic-throwing smokes while they're taking damage—by then, it's usually too late.
Position your smokes between where you are and where you're going. Create a corridor, not a cloud around your feet. And here's something most guides won't tell you—deploy during zone countdown phases when opponents are focused on their own rotations. They're less likely to immediately push when they're worried about their own positioning.
Creating Safe Rotation Paths with Smokes
The leapfrog technique is pure gold. Throw your first smoke at maximum range, advance to its edge, then deploy your second smoke to continue the journey. It's like building a bridge of concealment across dangerous terrain.
Use the map to your advantage—deploy smokes behind hills, rocks, or buildings to create natural chokepoints that amplify effectiveness. The terrain becomes your co-conspirator.
Smoke Duration and Coverage Area Mechanics

Smoke grenades give you roughly 15 seconds of you can't see me time with a 6-meter radius. But here's the kicker—multiple smokes create overlapping zones that extend both duration and coverage area. Deploy them in sequence, not all at once, to maintain continuous concealment throughout those nerve-wracking rotations.
Advanced Gloo Wall Placement Strategies
Defensive Gloo Wall Patterns for Final Circles
L-shaped formations are your bread and butter for final circles. One wall faces your biggest threat, the second covers flanking attempts. Always leave yourself an escape route—I can't stress this enough.
Want to get fancy? Stack gloo walls vertically. Deploy a base wall, then immediately place a second on top. Instant elevated firing position in flat terrain. It's like building your own personal watchtower in seconds.
Offensive Gloo Wall Rush Techniques

Gloo wall rushes are an art form. Deploy walls in sequence toward enemy positions—you're literally building your own advancing cover. Place walls every 10-15 meters to maintain protection while closing distance gaps.
For players seeking to enhance their gloo wall strategies, instant Free Fire diamond top up for utility items through BitTopup provides quick access to characters like Skyler with excellent service and high ratings.
Pro move: use gloo walls to block enemy escape routes during third-party situations. Trap opponents between your squad and approaching threats. It's psychological warfare at its finest.
Gloo Wall Durability and Destruction Mechanics
Standard gloo walls can take about 800 damage before they crumble. But explosive damage and Skyler's Riptide Rhythm? They'll delete your walls instantly. Oscar's Valiant Dash detonates the first three gloo walls in its path, dealing 25 damage per wall destroyed.
Know your enemy's capabilities. Plan accordingly.
Complete Free Fire Throwable Breakdown 2026
Frag Grenade Arc and Damage Zones
Frag grenades are unforgiving within 3 meters—maximum damage territory. Reduced damage extends to 6 meters from explosion center. Master that throwing arc by aiming slightly above your target to account for projectile drop.
Use frags to flush rats from cover or deny area access during rotations. They're area denial tools, not just damage dealers.
Flashbang Tactical Applications
Three seconds of I can't see anything within effect radius. That's your window. Deploy flashbangs around corners or over cover to blind enemies before close-range engagements.
Coordination is everything—throw flashbangs 1-2 seconds before teammates initiate their advance. Timing makes the difference between a successful push and a squad wipe.
Treatment Gun Utility in Squad Play
Treatment guns are lifesavers—literally. Instant healing for downed teammates plus supplement for traditional medical supplies during extended fights. Deploy behind gloo wall cover to safely revive teammates in contested areas where traditional revival methods turn you into target practice.
5 Winning Utility Combos for End-Zone Dominance
Combo 1: Smoke + Gloo Wall Rotation Push
Deploy smoke to obscure enemy vision, advance through the concealment while placing gloo walls at the smoke's edge. Time your gloo wall placement to coincide with smoke dissipation—continuous protection throughout the entire maneuver.
It's like passing the baton from concealment to cover.
Combo 2: Flashbang + Rush with Gloo Cover
Throw flashbangs over enemy cover, then immediately rush while deploying gloo walls for protection. That 3-second blindness window is your golden opportunity—gloo walls provide cover during advance and subsequent engagement.
Combo 3: Smoke Screen + Flanking Maneuver
Create multiple smoke screens across a wide area, then use concealment to reposition for flanking attacks. Deploy 2-3 smoke grenades in sequence to maintain continuous concealment while moving to advantageous positions.
Combo 4: Defensive Gloo + Grenade Counter
Establish defensive gloo wall positions, then use frag grenades to deny enemy advances or destroy their cover. Deploy walls in L-shaped or triangular patterns to protect multiple angles, then throw grenades at enemy positions attempting to push your setup.
Combo 5: Multi-Smoke Zone Confusion Tactic
Deploy smoke grenades at multiple locations simultaneously to create confusion about your actual position and movement direction. This psychological warfare forces enemies to guess your location while you maintain tactical flexibility.
Mind games work.
Utility Inventory Management for End Game
Optimal Utility Loadout by Game Phase
Early game keeps it simple: 1-2 smoke grenades, 2-3 gloo walls, and 1 frag grenade. You're still looting, still building your arsenal.
Mid-game ramps up: 2-3 smoke grenades, 4-5 gloo walls, 2 frag grenades, and 1 flashbang. You're preparing for the chaos ahead.
End-game goes full tactical: 3 smoke grenades, 5 gloo walls, 2-3 frag grenades, 1-2 flashbangs, and 1 treatment gun. This is where utility mastery wins games.
When to Prioritize Utilities Over Ammo
If you're carrying more than 180 rounds for your primary weapon, it's time to prioritize utilities over excess ammunition. Replace excess healing items with utilities when you've got more than 6 medical supplies—positioning prevents damage more effectively than additional healing capacity.
Squad Utility Distribution Best Practices
Designate one squad member as the primary utility carrier for comprehensive throwable supplies. Distribute specific types among squad members: smoke grenades to support player, gloo walls to entry fragger, explosive throwables to squad leader.
Communication and coordination separate good squads from great ones.
Character Synergies with Utility Playstyle
Best Characters for Utility-Heavy Tactics

Skyler's Riptide Rhythm destroys enemy gloo walls while providing healing when placing your own walls. It's a two-for-one special that never gets old.
The Gloo Wall Destroyer combination pairs Skyler with D-Bee's Bullet Beats (improved accuracy and movement speed), Moco's Hacker's Eye (enemy tagging through walls), and Luqueta's Hat Trick (increased maximum HP per elimination). This build turns you into a utility-wielding powerhouse.
Skyler + Mr. Waggor Synergy Breakdown
Mr. Waggor's automatic gloo wall supply synergizes with Skyler's healing-on-placement ability, creating an infinite cycle of gloo wall deployment and health regeneration. Deploy this synergy during end-zone holds by continuously placing and replacing gloo walls while maintaining full health.
It's like having a personal construction crew and medical team rolled into one.
Character Builds for Different Utility Roles
Support utility builds focus on team enhancement: DJ Alok's Drop the Beat (healing and speed boost), K's Master of All (EP to HP conversion), Chrono's Time Turner (force field creation), and Jota's Sustained Raids (HP recovery on SMG eliminations).
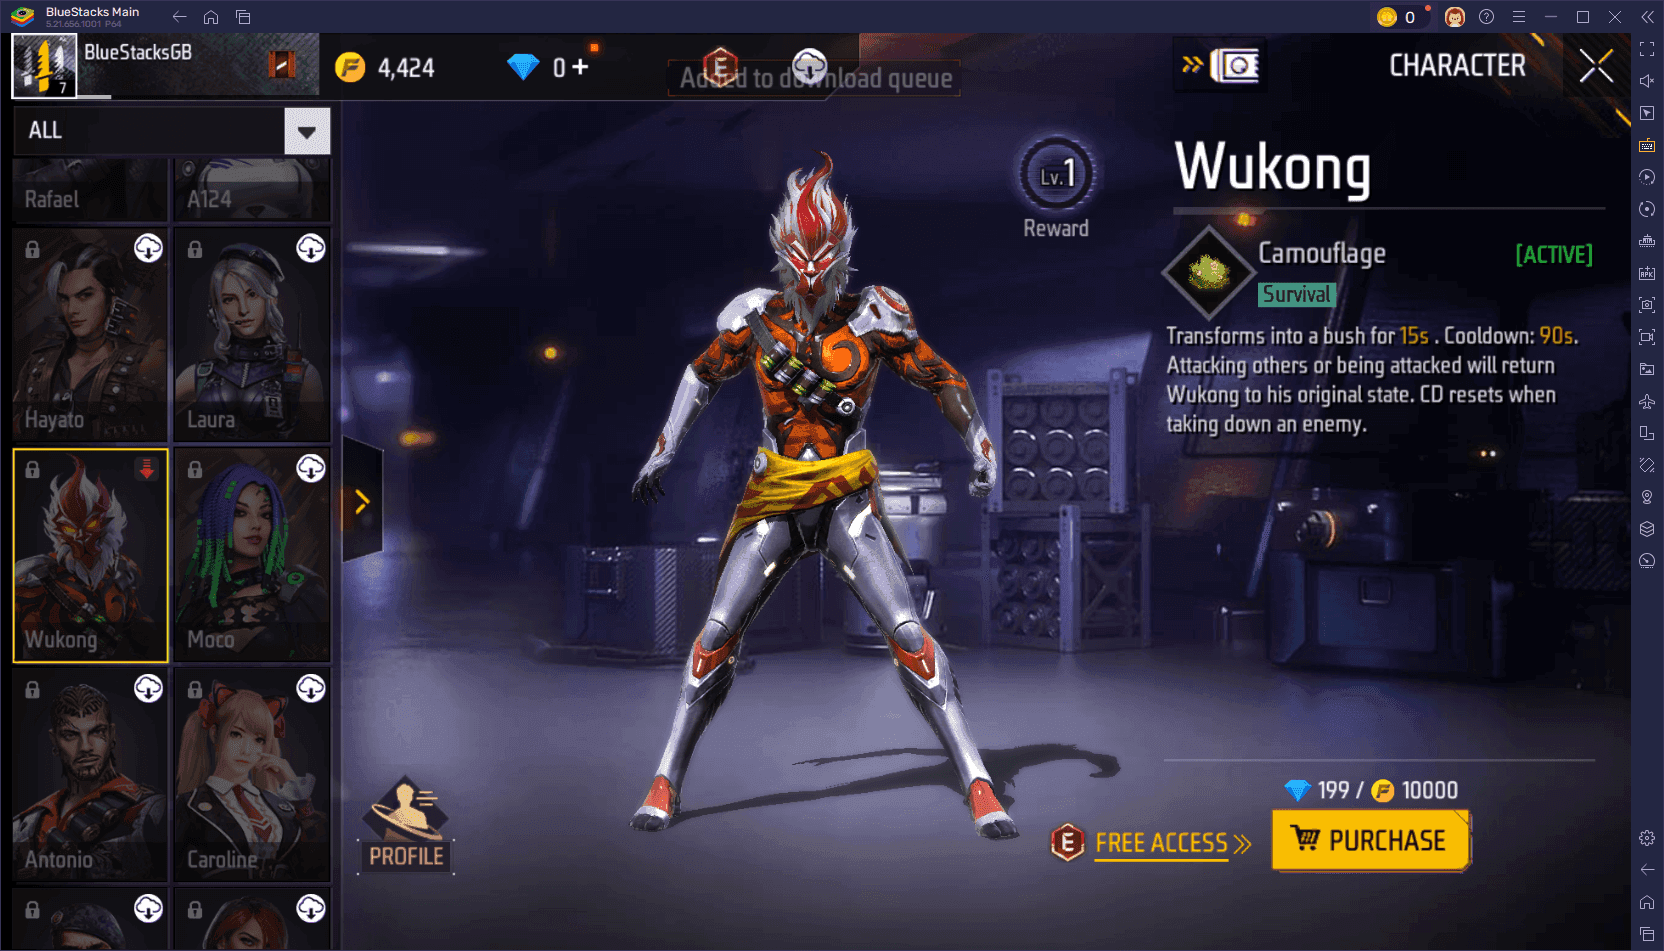
Aggressive utility builds emphasize combat effectiveness: Xayne's Xtreme Encounter (increased gloo wall damage), Hayato's Bushido (armor penetration), Wukong's Camouflage (temporary invisibility), and Luqueta's Hat Trick (HP stacking).
Zone-Specific Utility Tactics Across Maps
Bermuda End-Zone Utility Strategies
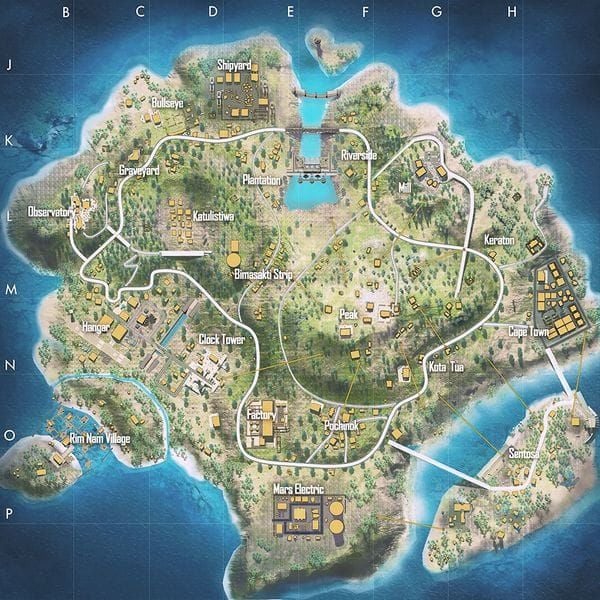
Bermuda's varied terrain provides elevation changes that amplify gloo wall effectiveness. Use hills and ridges to create elevated gloo wall positions overlooking common rotation paths. The map's abundant natural cover reduces smoke grenade necessity while increasing gloo wall value for gap-filling between rocks and trees.
Work with the terrain, not against it.
Purgatory Final Circle Positioning
Purgatory's riverside areas create natural chokepoints that benefit from smoke and gloo wall combinations. Deploy smoke grenades across water crossings while placing gloo walls at landing points. Use building rooftops as platforms for vertical gloo wall deployment, creating elevated firing positions.
Open-Field Utility Usage Strategies
Open terrain maps require heavy smoke grenade usage to create concealment where natural cover doesn't exist. Deploy multiple smoke screens in sequence to maintain continuous concealment during long-distance rotations. Gloo walls become critical for creating instant cover in exposed areas.
When the map won't help you, make your own cover.
Counter-Strategies and Defensive Utility Usage
How to Counter Enemy Smoke Pushes
Don't just sit there when enemies deploy smoke pushes—immediately reposition to flanking angles rather than holding your current position. Deploy your own smoke grenades perpendicular to enemy smokes to create crossing concealment patterns that confuse enemy movement predictions.
Turn their tactic against them.
Breaking Gloo Wall Defenses Efficiently
Use Skyler's Riptide Rhythm to instantly destroy multiple enemy gloo walls, creating immediate access to defended positions. Coordinate squad fire on individual gloo walls to quickly destroy them through concentrated damage rather than distributed shooting across multiple walls.
Focus fire works wonders.
Predicting and Avoiding Grenade Throws
Watch for enemy throwing animations and immediately reposition to avoid grenade damage zones. Use gloo walls to block incoming grenades, causing them to detonate harmlessly against the wall surface.
Your gloo walls aren't just cover—they're shields.
Pro Player Utility Patterns and Analysis
Tournament-Winning Utility Sequences
Professional teams execute utility sequences in coordinated phases: reconnaissance smokes to gather information, positioning gloo walls to establish defensive strongholds, and explosive throwables to deny enemy advances. Successful teams prioritize utility conservation during early and mid-game phases, reserving comprehensive deployments for final circle scenarios.
It's chess, not checkers.
Common Pro Player Utility Habits
Professional players consistently deploy utilities preemptively rather than reactively, anticipating enemy movements and zone rotations to establish advantageous positions before conflicts develop. Elite players practice utility deployment in custom rooms to develop muscle memory for rapid throwable usage under pressure.
Practice makes permanent.
Adapting Pro Tactics to Ranked Matches
Implement professional utility timing by deploying throwables during enemy reload windows or healing phases when opponents can't immediately capitalize on positioning changes. Practice professional-level utility coordination with regular squad members, assigning specific utility roles and developing communication protocols.
FAQ
What are the most effective utility combos for Free Fire end zones in 2026? Smoke + Gloo Wall rotations for safe positioning, Flashbang + Rush combinations for aggressive plays, and Multi-Smoke confusion tactics for defensive holds. These combos leverage the OB48 throwable capacity increases to maintain sustained utility pressure.
How many utilities should I carry in my end-game loadout? Carry 8-12 utility items total: 3 smoke grenades, 5 gloo walls, 2-3 frag grenades, and 1-2 flashbangs. This loadout provides comprehensive tactical options while maintaining space for essential healing items and ammunition.
Which characters work best with utility-heavy playstyles? Skyler excels with gloo wall manipulation, providing destruction and healing abilities. The Gloo Wall Destroyer build (Skyler + D-Bee + Moco + Luqueta) offers the most comprehensive utility synergies for competitive play.
When should I prioritize utilities over weapons or healing items? Prioritize utilities when carrying more than 180 rounds of ammunition or 6 healing items. End-zone fights favor positioning over firepower, making utility items more valuable than excess supplies during final circles.
How do I counter enemy gloo wall spam effectively? Use Skyler's Riptide Rhythm to instantly destroy multiple walls, coordinate squad focus fire on individual walls, or deploy explosive throwables to clear defensive positions.
What's the optimal timing for smoke grenade deployment? Deploy smoke grenades 2-3 seconds before initiating movement to ensure maximum coverage during rotations. Time deployments during zone countdown phases when enemies focus on their own positioning.


