

Understanding Chasca’s Core Kit and the Astral Vulture System
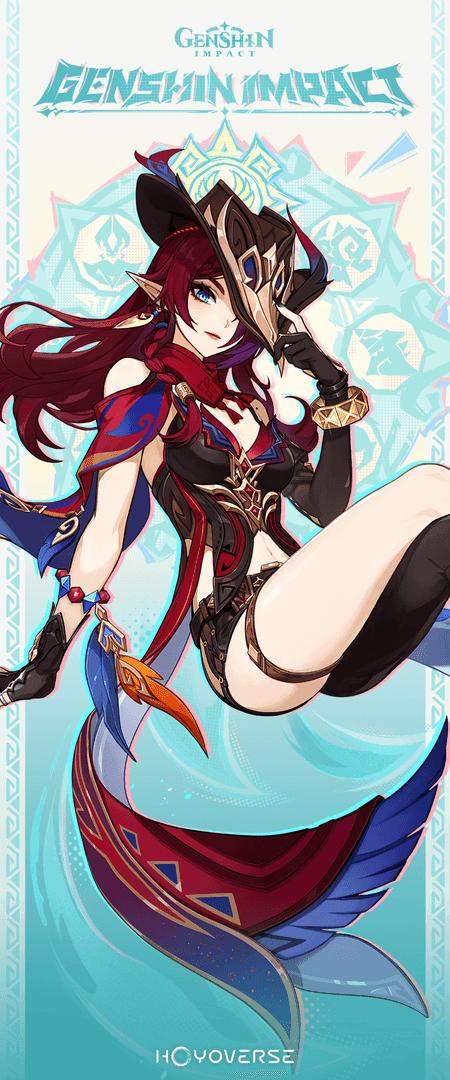
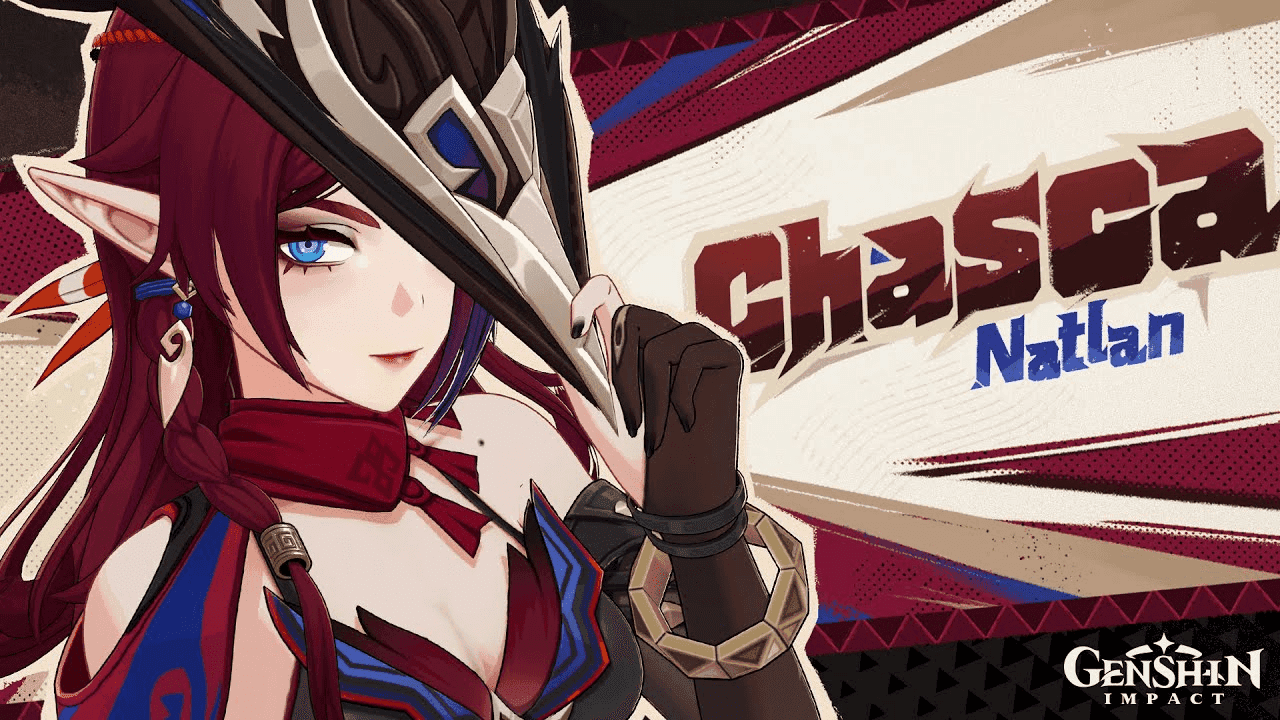
Who Is Chasca, Really?
Meet the Skyborne Arbiter from Natlan’s Flower-Feather Clan - an on-field Elemental DPS who dropped in Version 5.2 (November 20, 2024) and immediately shook up team building conventions. Her first rerun banner ‘Piercing Shot’s Crimson Wake’ hits Version 5.8, Phase 2 (August 19 - September 9, 2025) alongside Mualani, featuring Ifa, Ororon, and Bennett.
At Level 90, she packs 9,797 HP, 347 ATK, and 615 DEF. Her ascension stat? A generous 19.2% CRIT Rate (24.2% total). That high base ATK combined with built-in crit makes her a natural damage dealer across multiple elements - something we’ve never really seen before.
Why Astral Vulture’s Crimson Plumage Changes Everything.
This signature 5-star bow isn’t just another stat stick. With 608 Base ATK and 66.2% CRIT DMG at Level 90, it’s already solid. But the passive ‘The Moonring Sighted’ is where things get spicy.
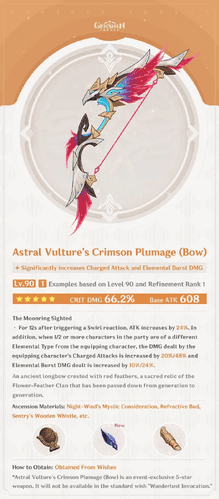
After triggering Swirl reactions, you get 24% ATK for 12 seconds. Have one different elemental teammate? Enjoy +20% Charged Attack DMG and +10% Elemental Burst DMG. Got two or more different elements on your team? Those numbers jump to +48% and +24% respectively. We’re talking about 15-30% damage increases over alternatives here - that’s not pocket change.
The Numbers That Matter
At Talent Level 10, her Shining Shadowhunt Shells (the converted elemental bullets) deal a hefty 299.83% ATK compared to regular Anemo shells at 87.84%. Her Elemental Burst’s Radiant Soulseeker Shells reach 372.2% ATK.
Your endgame stat targets should look like this: ATK 1900-2400, CRIT Rate 55-60%, CRIT DMG 220-270%, EM 80-220, ER 100-110%. Notice how low that ER requirement is? That’s intentional.
Talent Breakdown: What Actually Matters
Elemental Skill - The Heart of Her Kit
Spirit Reins, Shadow Hunt activates Nightsoul’s Blessing state, giving you aerial combat with immunity to Frozen (thank Barbatos for that). Hold the attack button to load 6 Shadowhunt Shells - here’s the kicker: the 4th, 5th, and 6th shells automatically convert to PHEC elements based on your teammates.
The damage registers as Charged Attack DMG, which is crucial for artifact and weapon synergies. After the state ends, you’ve got a 6.5-second cooldown before you can go airborne again.
Elemental Burst - Your Secondary Damage Source
Soul Reaper’s Fatal Round launches AoE Anemo damage that splits into 6 shells. Each PHEC party member converts two shells into Radiant Soulseeker Shells with impressive 25-meter auto-targeting. At 60 Energy Cost with a 15-second cooldown, this provides solid secondary damage but isn’t your main focus.
Passive Talents - The Conversion Magic
Bullet Trick (A1) is where the rainbow team concept comes alive. With 1/2/3 unique PHEC teammates, you get 33.3%/66.7%/100% chance to convert that crucial 3rd shell to elemental damage. Plus, you gain 1/2/3 Spirit of Radiant Shadow stacks, increasing Shining Shadowhunt damage by 15%/35%/65%.
Maximum stacks require three different PHEC elements - this fundamentally shapes how you build teams around her.
Level This, Skip That
Elemental Skill > Elemental Burst > Normal Attack. Period.
Your skill provides the overwhelming majority of damage through those elemental bullets. Normal Attack only affects weak tap-fire shots that don’t contribute meaningful damage in practice. Don’t waste the resources.
Artifact Optimization: Building for Multi-Element Dominance
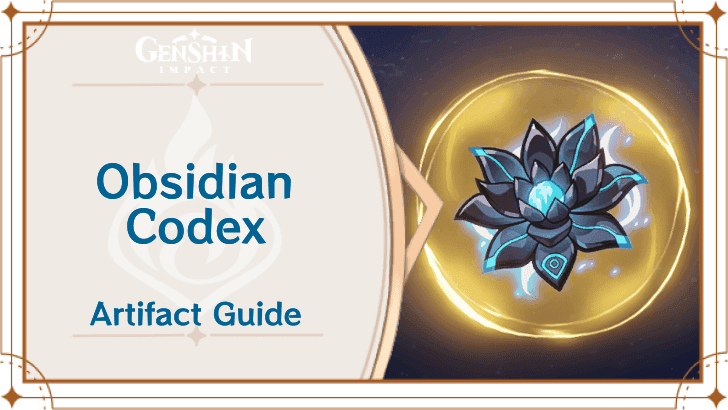
The Clear Winner: 4-Piece Obsidian Codex
This set was practically designed for Chasca. +15% damage while in Nightsoul’s Blessing, plus +40% CRIT Rate for 6 seconds after consuming Nightsoul points. The buff is easily maintainable, which lets you go heavy on CRIT DMG in your substats.
For players looking to maximize their Primogems for artifact farming, Buy Genesis Crystals through BitTopup offers competitive pricing with instant delivery.
Alternative Sets (When You’re Still Farming)
4-piece Viridescent Venerer works for Swirl-driver builds but sacrifices personal damage. 4-piece Marechaussee Hunter has synergy with Furina teams but remains inferior to Obsidian Codex. 4-piece Shimenawa’s Reminiscence serves as a temporary option, though the Energy drain conflicts with her burst usage.
Main Stats That Actually Work
ATK% Sands, ATK% Goblet, CRIT DMG Circlet. Yes, ATK% Goblet - not Anemo DMG%.
Why? Because ATK% scales all her converted elemental damage types, while specific Elemental DMG% options only boost one element. The versatility wins out. CRIT DMG Circlet gets priority thanks to all those CRIT Rate sources we mentioned.
Substat Priority Order
CRIT DMG > CRIT Rate > ATK% > Elemental Mastery. Keep Energy Recharge between 100-130% - that’s genuinely sufficient.
Focus hard on CRIT DMG substats. Between her 24.2% ascension CRIT Rate and Obsidian Codex’s 40% buff, you’ll have plenty of crit chance to work with.
Weapon Tier List: From F2P to Whale Territory
The 5-Star Hierarchy
Astral Vulture’s Crimson Plumage dominates with perfect kit synergy. At R5, you’re looking at 48% ATK buff, 40%/96% Charged Attack DMG, and 20%/48% Elemental Burst DMG compared to R1’s 24%, 20%/48%, and 10%/24%.
Aqua Simulacra provides the CRIT DMG stat stick treatment without meaningful synergy. Skyward Harp offers solid stats but might push you into CRIT Rate overcapping territory.
4-Star Options That Don’t Disappoint
Flower-Wreathed Feathers stands out as the best 4-star for Natlan characters. Scion of Blazing Sun excels in single-target scenarios with its CRIT Rate substat. Song of Stillness takes the crown for craftable weapons with 32% DMG bonus for 8 seconds after healing at R5.
F2P Reality Check
Song of Stillness becomes your priority weapon. That 32% damage bonus activates easily in Bennett or healer teams, making it surprisingly competitive. Hamayumi conflicts with burst usage due to its full energy requirements - skip it.
What to Look For in Weapon Passives
Prioritize CRIT DMG substats and Charged Attack damage passives. ATK% buffs provide universal scaling across all her elemental conversions. The signature weapon shows substantial improvements from R1 to R5 if you’re considering refinements.
Team Building: Rainbow Compositions That Actually Work
The Core That Can’t Be Replaced
Rainbow compositions featuring Chasca, Furina, Bennett, plus a flexible PHEC slot maximize both damage and conversion mechanics. Furina provides Hydro application and DMG% scaling, Bennett delivers ATK buffs and healing.
Losing either of these two represents a significant performance downgrade. Genshin Impact Top Up options help secure these crucial support characters if RNG hasn’t been kind.
The Premier Team Setup
Chasca, Furina, Bennett, Shenhe for Vaporize/Melt reactions. Your rotation flows like this: Furina Skill/Burst → Bennett Skill/Burst → Shenhe Skill/Burst → Chasca DPS combo.
Alternative flex picks include Mavuika (Pyro), Citlali (Cryo/shield), or Ororon (Electro). Each brings different reaction potential and utility.
Support Character Synergies
Cryo and Electro characters provide optimal conversion coverage for her passive. Shield providers become valuable for interruption resistance during aerial combat - you’re surprisingly vulnerable up there. Crowd control helps position enemies for her single-target focused damage.
The C1 Game Changer
At C0, you need three different PHEC characters for 100% conversion chance and that crucial 65% damage bonus. This prevents running Zhongli or Kazuha without sacrificing core mechanics.
C1+ reduces PHEC requirements, opening slots for Xilonen (Geo) or Anemo groupers. It’s a significant quality-of-life improvement for team building flexibility.
Constellation Investment Guide: Where Your Primos Matter Most
Early Constellations (C1-C3)
C1 ‘Cylinder, the Restless Roulette’: Your 2nd shell converts to Shining Shadowhunt, and 3rd shell conversion gets +33.3% per required element. This enables two PHEC teammate compositions, opening slots for non-PHEC supports. High importance rating - excellent stopping point for most players.
C2 ‘Muzzle, the Searing Smoke’: Gain 1 Spirit stack when taking the field. Shining Shadowhunt Shells deal additional 400% ATK AoE damage, solving her AoE weakness completely. This essentially doubles your DPS in multi-target scenarios.
Late Game Investments (C4-C6)
C4 ‘Sparks, the Sudden Shot’: Radiant Soulseeker hits restore 1.5 Energy and deal 400% ATK AoE damage. Medium importance since burst remains secondary to skill damage.
C6 ‘Showdown, the Glory of Battle’: After her passive triggers, gain Fatal Rounds for 3 seconds - instant charging with 120% CRIT DMG increase. Once per 3 seconds. This is a massive single constellation buff that transforms her damage ceiling.
Investment Priority Rankings
C2 > C1 > C6 > C4 > C3 > C5. C2 gets highest priority for DPS doubling and AoE viability. C1 provides excellent team building value. C6 represents the ultimate damage ceiling.
C1-C2 address her core weaknesses: restrictive team building and lack of AoE damage. They transform a specialized single-target DPS into a versatile hypercarry. Buy Genshin Primogem through BitTopup provides competitive rates for constellation investments.
Resource Planning: Materials and Farming Routes
Character Ascension Requirements
Getting to Level 90 demands 420,000 Mora plus a shopping list: 1 Vayuda Turquoise Sliver, 9 Fragment, 9 Chunk, 6 Gemstone, 46 Ensnaring Gaze, 168 Withering Purpurbloom, 18 Juvenile Fang, 30 Seasoned Fang, 36 Tyrant’s Fang.
Ensnaring Gaze drops from Natlan bosses, Purpurbloom is a local specialty, and Fangs come from Saurian enemies throughout the region.
Talent Materials Breakdown
Maxing talents to 10 requires 4,957,500 Mora, 18 Silken Feather, 3 Crown of Insight, and a mountain of Conflict books (9 Teachings, 63 Guide, 114 Philosophies). Don’t forget those Fang materials again.
Conflict books drop on Wednesday/Saturday/Sunday domains. Plan accordingly.
Farming Timeline Reality
Complete development spans 4-6 weeks depending on resin allocation. Pre-farming accelerates this timeline significantly. Priority order: ascension materials first, then talents following our established skill > burst > normal attack hierarchy.
Weekly boss materials for Silken Feather represent the longest timeline component since you can’t rush those drops.
Combat Mastery: Rotations and Advanced Techniques
The Optimal Damage Sequence
Standard flow: support buffs → Elemental Burst (if available) → Elemental Skill → 3-4 fully loaded Charged Attacks.
Specifically: Furina Skill/Burst → Bennett Skill/Burst → Chasca Burst → Chasca Skill → 3-4 six-bullet volleys. Always hold for complete charges - those elemental shots load last and pack the real punch.
Energy Management Simplified
Those low ER requirements (100-130%) exist for a reason - her damage comes from skill, not burst. Many optimal builds skip burst every rotation to maximize skill uptime.
Focus your energy investment on support characters like Bennett and Furina for buff consistency instead.
Positioning and Mobility Mastery
Aerial combat provides positioning advantages but creates vulnerability to interruption. That 25-meter auto-targeting range lets you maintain damage while staying mobile.
Vertical positioning helps avoid melee attacks while maintaining elemental application from your supports. Use it strategically.
Advanced Optimization
Maximize Nightsoul point efficiency and conversion optimization. Target prioritization becomes crucial in multi-enemy encounters - her single-target focus means choosing wisely. Time elemental application with bullet sequences for consistent reactions.
Meta Analysis: How Chasca Stacks Up
Spiral Abyss Performance
She excels in single-target scenarios with unmatched elemental versatility. Multiple reaction types provide value against various shields and resistances. C0 handles single-target adequately; C2 enables competitive multi-target performance.
Comparison with Other Anemo DPS
vs Wanderer: Superior elemental versatility and reaction potential, but sacrifices raw Anemo damage output. vs Xiao: More consistent damage without health drain mechanics, but requires more specific team compositions. vs Kazuha: Higher personal damage vs team support utility - different roles entirely.
Strengths and Honest Weaknesses
Strengths: Exceptional elemental versatility, strong mobility, flexible ATK% builds, high damage scaling, unique multi-reaction capability.
Weaknesses: Single-target focus pre-C2, interruption vulnerability during aerial combat, restrictive team requirements, difficulty incorporating Zhongli/Kazuha at C0.
Future-Proofing Potential
Strong long-term viability through elemental versatility and unique mechanics. New PHEC character releases will improve team flexibility over time. Her distinctive mechanics favor meta longevity over pure stat scaling approaches.
Plus, that exploration utility adds permanent value beyond just combat scenarios.
Frequently Asked Questions
What makes Chasca different from other Anemo DPS characters? Her unique bullet conversion system deals Pyro/Hydro/Cryo/Electro damage based on teammates, enabling multiple personal elemental reactions. Those 299.83% ATK scaling elemental bullets at talent 10 combined with adaptability to different enemy types create something genuinely new.
Is Chasca’s signature weapon worth pulling for? It provides 15-30% damage increase over alternatives with perfect passive synergy (48% Charged Attack DMG, 24% Burst DMG with proper teams). That said, F2P Song of Stillness achieves surprisingly competitive performance in healer teams.
Which constellations are most important for Chasca? C1 improves team flexibility by guaranteeing conversion with fewer PHEC teammates. C2 adds 400% ATK AoE damage to elemental bullets, essentially doubling DPS and enabling multi-target viability. These two address her main limitations.
What team composition works best with Chasca? Chasca, Furina, Bennett, Cryo/Electro flex (Shenhe/Ororon works great). This rainbow composition maximizes her conversion passive while enabling Vaporize/Melt/Electro-Charged reactions. Bennett provides ATK buffs, Furina offers Hydro application and DMG% scaling.
How does Chasca perform in Spiral Abyss compared to other DPS options? She excels in single-target chambers with unmatched shield versatility. C0 handles current rotations adequately; C2 transforms her into a top-tier option. That 25-meter auto-targeting and aerial mobility provide unique advantages in Floor 12 scenarios.
What are the most common mistakes when building Chasca? Prioritizing CRIT Rate over CRIT DMG despite abundant sources, using Elemental DMG goblets vs ATK%, leveling Normal Attack talent, insufficient PHEC coverage, and using tap-fire instead of full 6-bullet charges. Remember: CRIT DMG > CRIT Rate > ATK% with 3 different PHEC teammates for optimal performance.


