

Look, I’ve been covering Genshin optimization since the early days, and I can’t tell you how many perfect builds I’ve seen that look amazing on paper but fall apart the moment you try to maintain Burst uptime. That’s where multi-target setups come in.
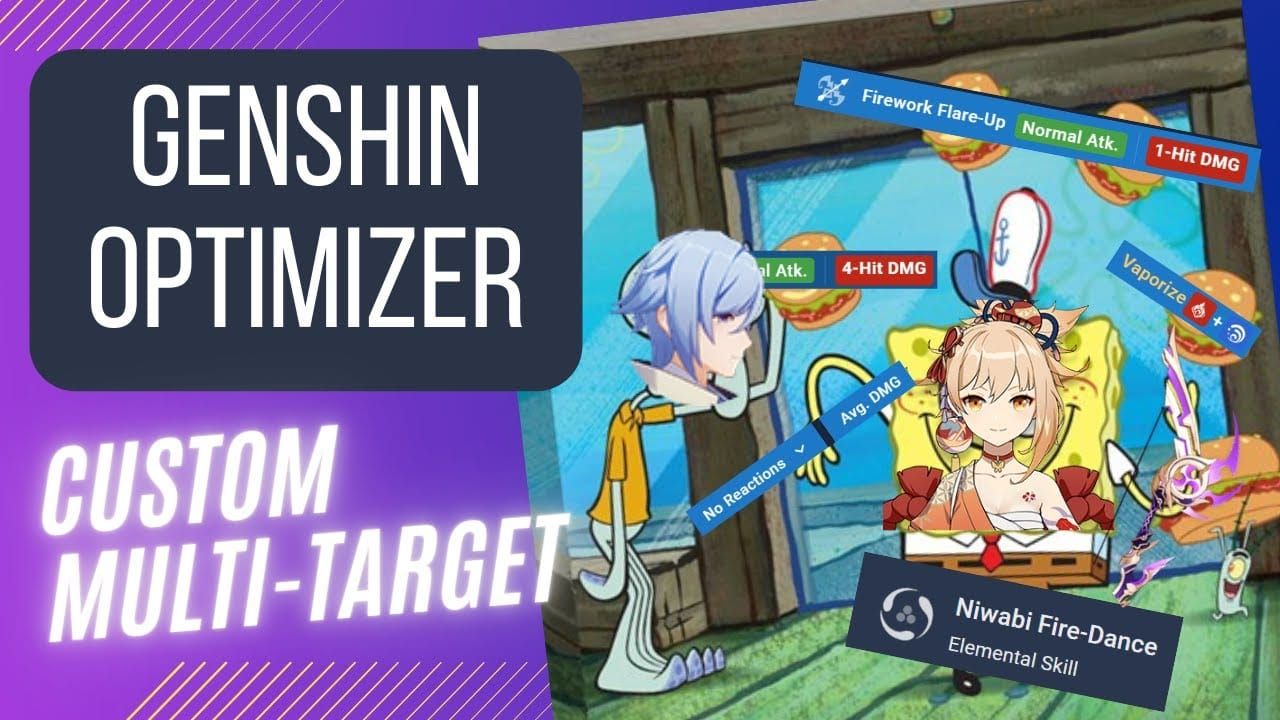
Understanding Multi-Target Optimization in Genshin Optimizer
What Actually IS Multi-Target Setup?
Multi-Target Optimization – let’s call it Multi-Opt because we’re not writing a dissertation here – creates weighted averages across different damage instances, buffs, and team member contributions. Instead of obsessing over that one perfect Burst screenshot, you’re optimizing for actual rotation patterns.
Think about it this way: when’s the last time you stood still and only used Burst attacks? Never, right? You’re weaving Normal Attacks, Skills, and Bursts together. Multi-Opt weighs these realistically – maybe 30% Normal Attack damage, 40% Elemental Skill, 30% Burst for a balanced kit.
The upcoming GO-next version is bringing some seriously cool features. We’re talking ‘Pando’ calculation engine, team damage calculations, and shareable configurations via URL. (Finally! No more screenshot-sharing build discussions.) This tells me the community’s finally catching on that team-based optimization isn’t just the future – it’s the present.
For Genesis Crystals safe payment method, BitTopup provides secure transactions with competitive pricing and instant delivery, ensuring your optimization experiments never face resource constraints.
Why Single Character Optimization is Holding You Back
Here’s my controversial take: single-character optimization is basically theoretical masturbation at this point.
Sure, your Hu Tao hits for 300k in that perfect setup. But can she do it consistently? Does she have energy for her next rotation? Are you missing Vaporize procs because your EM is trash?
The damage formula tells the whole story: DMG = Base DMG × DMG Bonus% × CRIT Multiplier × Enemy DEF Multiplier × Enemy RES Multiplier × Amplifying Reaction Multiplier. Notice how many multiplicative components there are? Single-target optimization typically maxes out Base DMG through ATK% stacking while completely ignoring the other multipliers.
Multi-target optimization gives you:
Energy management that actually works in practice
Reaction damage that doesn’t rely on perfect conditions
Buff utilization across your entire rotation
Higher team DPS (even if individual peaks look lower)
Real-World Applications That Matter
Reaction-based teams are where Multi-Opt really shines. The new Lunar-Charged mechanic from version 5.8? It literally calculates damage based on ALL party members’ stats. You can’t optimize that with single-target approaches.
Spiral Abyss is another obvious case. Multi-wave structure, varying enemy types, energy constraints – it rewards balanced builds over hyperspecialized glass cannons every single time.
Characters like Tartaglia with his Riptide mechanics or Nilou’s Bountiful Core transformations show how multi-target scenarios completely flip stat priorities. And don’t get me started on energy-dependent teams requiring 150-180% ER – you HAVE to balance offensive stats with energy generation.
Why Raw ATK% is Overrated in 2025 Meta
The Math Doesn’t Lie About Diminishing Returns
Okay, let’s talk about why ATK% is basically the participation trophy of artifact substats in 2025.
The multiplicative damage formula creates brutal diminishing returns for ATK% beyond certain thresholds. ATK% only touches the ‘Base DMG’ component while other multipliers give you way better relative increases. A character sitting at 2000 ATK getting an 18% ATK% substat (360 additional ATK) sees a smaller boost than gaining 36% CRIT DMG when properly balanced.
But here’s where it gets really ugly for ATK% – the 2025 meta is all about complex team synergies. Teams running Bennett (700-1000+ flat ATK), Thrilling Tales (48% ATK), or Pyro Resonance (25% ATK) make additional ATK% substats practically worthless.
Version 6.0 meta analysis hammered this home. Characters like Zhongli got demoted despite their universal utility because they provide less team damage increase than supports offering multiplicative bonuses through reactions or CRIT buffs.
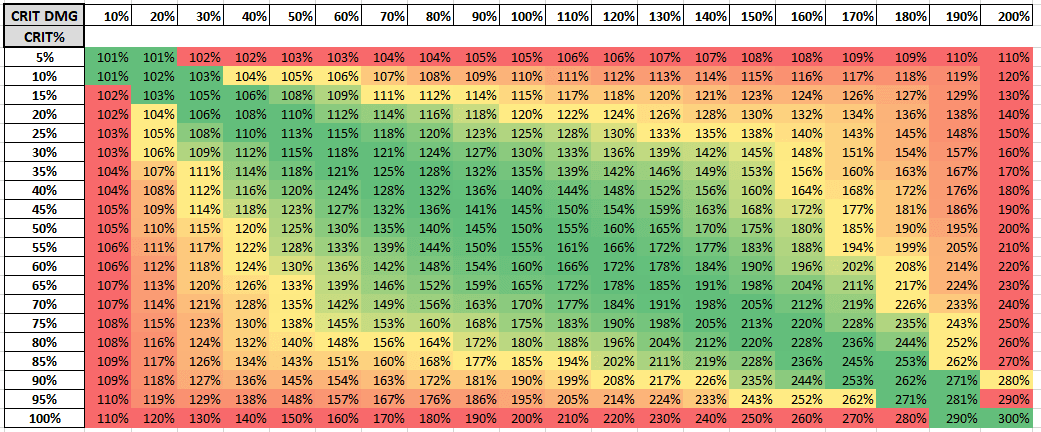
CRIT vs ATK%: The Numbers Game
Artifact evaluation frameworks consistently rank CRIT Rate% and CRIT DMG% above ATK%. The Game8 Artifact Score Checker assigns CRIT substats a value of 1.0 while ATK% gets a measly 0.7-0.9 rating.
The ideal 1:2 CRIT ratio (70% Rate to 140% DMG) maximizes average damage through multiplicative scaling. And look at character ascension stats – they’re basically telling you what to prioritize:
CRIT Rate ascension: Diluc, Xiao, Yoimiya, Itto CRIT DMG ascension: Keqing, Ayaka, Ganyu, Hu Tao, Neuvillette
These innate stats make CRIT investment way more efficient than ATK% stacking.
A character with 1800 ATK, 70% CRIT Rate, and 140% CRIT DMG will consistently outperform the same character with 2200 ATK, 50% CRIT Rate, and 100% CRIT DMG. Every. Single. Time.
Real Examples That’ll Change Your Mind
The new Lunar-Charged reaction provides concrete proof of ATK%'s declining relevance. The damage formula prioritizes diverse stat investment over raw ATK stacking.
Level 90 calculations show substantial damage potential. Three-character Lunar-Charged triggers hit for 17,285 final damage with contributions of 100% highest damage character + 50% second highest + 1/12 third + 1/12 fourth.
But here’s where it gets spicy – Elemental Mastery scaling:
500 EM: +120% reaction damage
1000 EM: +200%
1500 EM: +257%
Transformative reactions like Hyperbloom and Burgeon completely ignore ATK. They scale ONLY with character level and Elemental Mastery. At level 90, Hyperbloom base damage hits 2894, modified only by EM and reaction damage bonuses.
For Genshin crystals instant digital delivery, BitTopup ensures uninterrupted gameplay with 24/7 customer support and multiple payment options, allowing you to focus on perfecting your builds without resource management concerns.
Setting Up Multi-Target Optimization: Step-by-Step Guide
Getting Started (Don’t Skip This Part)
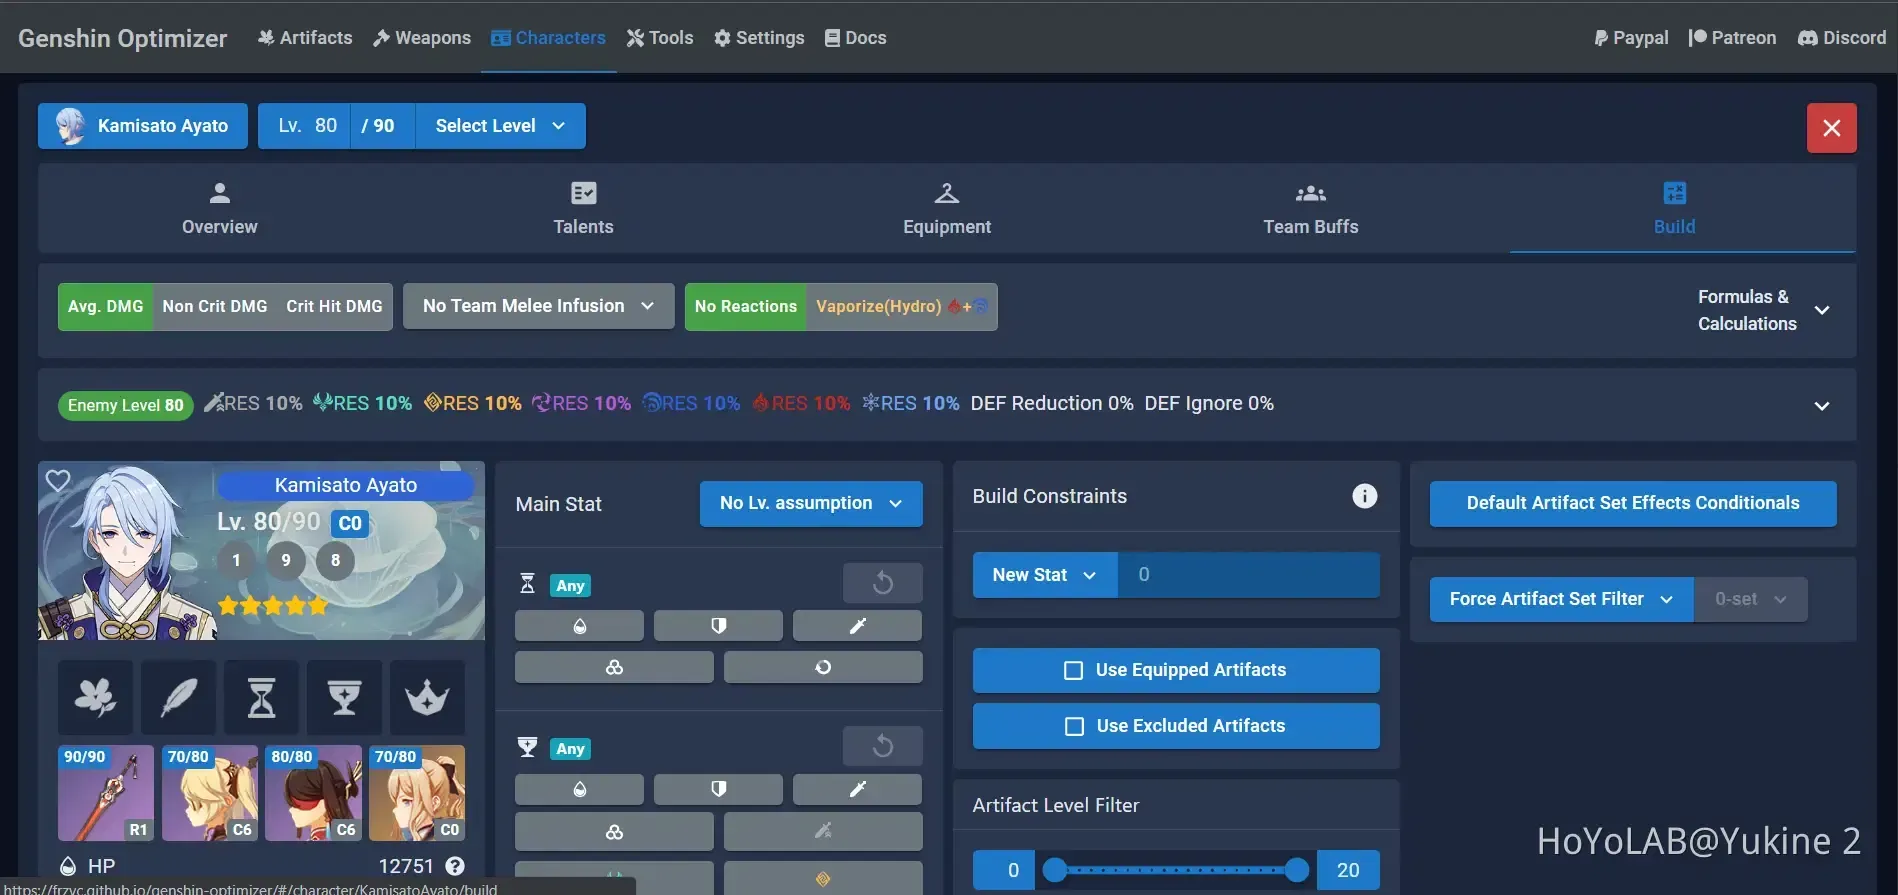
First things first – upload your complete inventory using Genshin Optimizer’s scanner. I mean everything: artifacts, characters, weapons. Half-assed data gives you half-assed optimization.
Navigate to the ‘Teams’ tab and configure your full four-character team with appropriate builds:
4pc Noblesse Oblige on Bennett
4pc Viridescent Venerer on Anemo supports
Proper Energy Recharge values for consistent Burst usage
Here’s where people mess up constantly – activate ALL relevant conditional passives. Weapons, talents, constellations. Hu Tao’s Elemental Skill provides massive ATK bonuses, making additional ATK% way less valuable during her enhanced state.
Pro tip: Use the ‘Theorycraft’ feature to test builds with artifacts you don’t own. Great for planning farming priorities before you waste months in domains.
Adding Multiple Characters (The Fun Part)
Configure optimization targets that reflect how you actually play. Stop optimizing solely for Burst damage! Create weighted combinations like 30% Normal Attack, 40% Skill, 30% Burst for balanced kits.
Weight distribution should be:
Primary DPS: 40-60% optimization weight
Sub-DPS: 20-30%
Pure supports: 5-10% direct damage weighting
Energy Recharge requirements are non-negotiable. Characters with 80-energy Bursts typically need 160-200% ER, while characters with energy generation abilities can function with lower requirements.
The KQM (Keqing Mains) community provides pre-configured JSON files for many characters. These are tested configurations that reflect optimal rotation patterns – use them.
Setting Constraints (This is Critical)
Set minimum CRIT Rate thresholds to avoid those tragic builds with 250% CRIT DMG but 30% CRIT Rate. Most DPS characters should maintain at least 60% CRIT Rate. Characters using Marechaussee Hunter sets can function with lower base CRIT Rate due to conditional bonuses.
Elemental Mastery constraints become crucial for reaction-based characters:
Melt/Vaporize triggers: at least 100 EM
Transformative reaction triggers (like Hyperbloom Kuki): 800-1000 EM
Use the graph feature to visualize damage versus Energy Recharge relationships. You’ll find that sweet spot where additional ER investment gives diminishing returns compared to offensive stats.
Advanced Stat Priority Framework
CRIT Optimization That Actually Works
CRIT optimization follows mathematical principles for maximizing expected damage through balanced Rate and DMG distribution. Characters with CRIT ascension stats achieve higher total CRIT values, making investment more efficient.
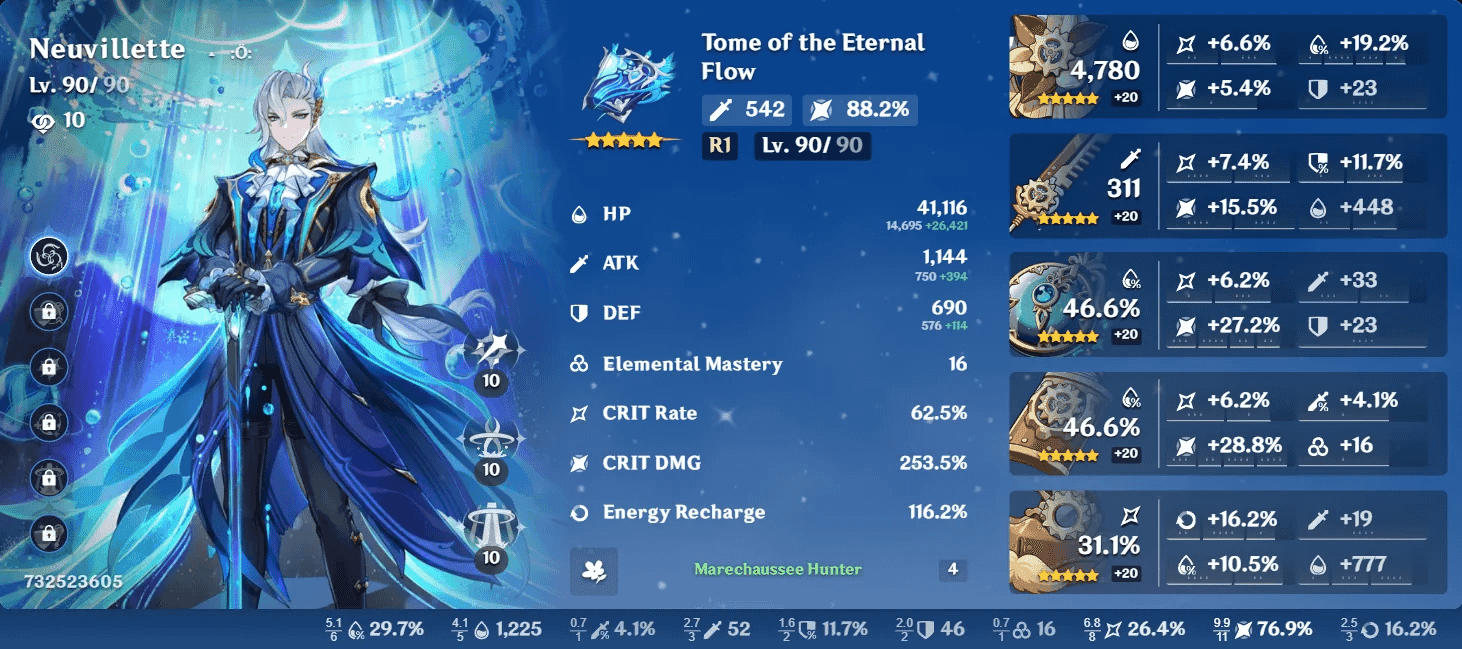
Neuvillette with CRIT DMG ascension easily reaches 200%+ CRIT DMG while maintaining 70%+ CRIT Rate. The Marechaussee Hunter set provides up to 36% CRIT Rate through its 4-piece bonus, letting characters like Gaming focus heavily on CRIT DMG substats.
Gaming at C6 gains 20% CRIT Rate and 40% CRIT DMG for signature attacks. This completely changes optimal artifact stat distributions.
Elemental Mastery: The Misunderstood Stat
EM optimization varies dramatically based on reaction types, and this is where most people get lost.
Amplifying reactions (Melt/Vaporize) benefit from moderate EM investment (100-300). Transformative reactions require heavy EM stacking (800-1000+). The new Lunar-Charged reaction shows EM’s increasing importance with damage scaling reaching 257% at 1500 EM.
Additive reactions (Aggravate/Spread) create unique scenarios where EM directly increases the additive damage component before other multipliers apply. Support characters using Transformative reactions should build full EM when their primary role involves triggering reactions.
Energy Recharge: The Unsexy Necessity
ER optimization requires precise calculation based on team composition and particle generation mechanics. The KQM Energy Recharge Calculator provides exact requirements for specific team configurations.
Characters with energy costs above 60 typically require 140-180% ER for consistent Burst usage. But here’s the kicker – 4pc Emblem of Severed Fate converts Energy Recharge into Burst damage, making ER investment offensively valuable for compatible characters.
Weapon selection significantly impacts ER requirements. Energy Recharge weapons can reduce artifact ER needs, freeing substats for offensive stats.
Character Role-Specific Optimization Strategies
Main DPS in the Modern Era
Main DPS characters in 2025 require optimization accounting for extended field time and diverse damage sources. Neuvillette exemplifies modern main DPS optimization with Charged Attack focus, HP scaling, and Marechaussee Hunter synergy.
His builds prioritize HP% over ATK% – see what I mean about ATK% being overrated? CRIT stats and Hydro DMG% provide the multiplicative scaling that actually matters.
On-field time considerations affect stat priorities significantly. Characters with 12-15 second field time benefit from balanced investment across all abilities. Quick-swap DPS characters focus primarily on Burst optimization.
Constellation effects dramatically alter optimization priorities. Mavuika’s C2 provides 200 flat Base ATK and increases damage by 60%/90%/120% of her ATK – now we’re talking about meaningful ATK scaling.
Sub-DPS and Burst Support Nuances
Sub-DPS characters require optimization that maximizes off-field contribution while maintaining energy sustainability. Ineffa’s optimization demonstrates modern sub-DPS priorities with Lunar-Charged focus and unique energy system.
Her builds prioritize ATK% to reach the 2000 ATK threshold for maximum passive benefits, followed by CRIT stats and Elemental Mastery. (Notice how ATK% has a specific threshold purpose here, not just mindless stacking.)
Burst-focused sub-DPS like Xiangling require careful Energy Recharge balancing. Her 80-energy Burst demands 160-200% ER depending on team composition, but that off-field Pyro application makes her indispensable.
Gaming represents 4-star sub-DPS optimization with Plunging Attack focus and HP fluctuation mechanics.
Pure Support Character Philosophy
Pure support optimization prioritizes team utility over personal damage. Bennett’s optimization focuses on Base ATK maximization through weapon selection and HP investment for healing sustainability.
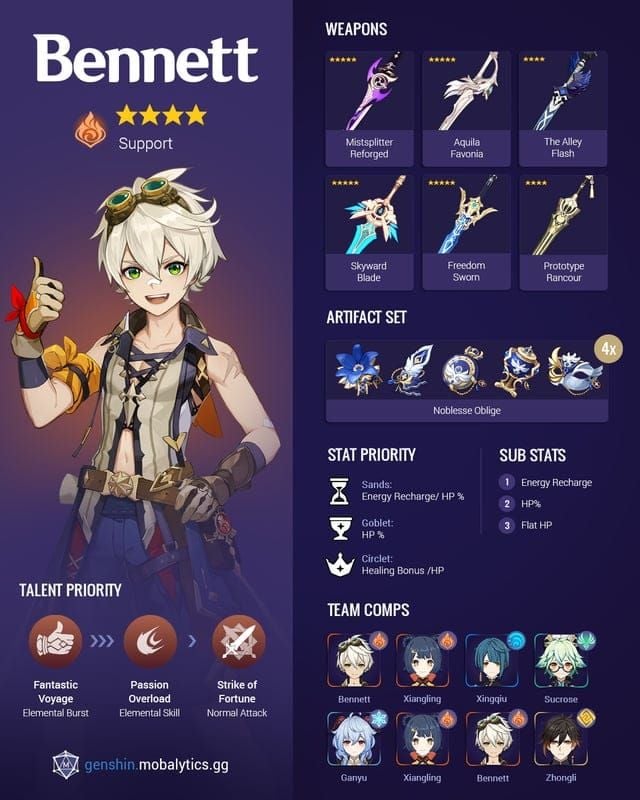
His ATK buff scales ONLY from Base ATK (character + weapon). Artifact ATK% is completely irrelevant for his buff – this is optimization 101, people.
Anemo supports like Kazuha and Sucrose require full Elemental Mastery investment for maximum Swirl damage and elemental damage bonuses. Shield supports like Zhongli optimize for shield strength and utility, with HP scaling making HP% artifacts optimal.
Team Synergy and Buff Considerations
External ATK Buffs: The ATK% Killer
External ATK buffs fundamentally alter individual character optimization by providing multiplicative bonuses that reduce artifact ATK% value. Bennett’s Burst provides 700-1000+ flat ATK, effectively doubling most characters’ ATK values.
An 18% ATK substat on 1800 base ATK provides only 324 additional ATK. That represents an 11.6% increase over buffed total rather than the apparent 18%. See the problem?
Thrilling Tales provides 48% ATK buffs that stack multiplicatively with other sources. Teams utilizing multiple ATK buffs create scenarios where CRIT stats, Elemental Mastery, or specialized scaling stats provide superior value.
Elemental Resonance Effects
Elemental Resonance provides team-wide bonuses that influence individual character optimization priorities. Pyro Resonance’s 25% ATK bonus affects all team members. Geo Resonance provides 15% damage increase when shielded.
Hydro Resonance increases HP by 25%, benefiting HP-scaling characters like Neuvillette and Zhongli. Electro Resonance generates additional energy particles, reducing ER requirements for all team members.
Dendro Resonance provides EM bonuses that scale with team reactions, making EM investment more valuable in Dendro-focused compositions.
Weapon Passive Interactions
Weapon passive effects create complex optimization scenarios requiring careful consideration in multi-target setups. Fractured Halo, Ineffa’s signature weapon, provides 40-80% increased Lunar-Charged damage for ALL party members when the wielder creates a shield.
That’s superior to weapons offering only personal stat bonuses. Favonius weapon series demonstrates how utility passives can outweigh raw stats in team contexts. Energy generation from CRIT hits benefits the entire team, often providing more value than higher ATK weapons.
Common Optimization Mistakes to Avoid
The ATK% Addiction
The most prevalent optimization mistake? Excessive ATK% investment at the expense of multiplicative stats. This manifests in choosing ATK% main stats over CRIT on Circlets, prioritizing ATK% substats over CRIT or EM, and selecting ATK% weapons over specialized options.
These choices create builds with impressive ATK numbers but poor practical performance. The damage cap increase from 9,999,999 to 20,000,000 in Version 5.4 reflects game evolution toward higher damage potential through optimized builds rather than raw stat stacking.
Building ATK% on Zhongli (HP scaling), Albedo (DEF scaling), or Kazuha (EM scaling) represents fundamental misunderstanding of character mechanics.
Energy Recharge Neglect
ER neglect creates builds that excel in damage calculations but fail in practical gameplay due to inconsistent Burst usage. This particularly affects Burst-dependent characters like Xiangling, Eula, and Raiden Shogun.
A Xiangling build with 180% CRIT DMG but only 120% ER shows impressive Pyronado damage but can’t maintain consistent uptime. What’s the point?
Team composition significantly affects energy requirements, making static ER targets inadequate. The same character may require 200% ER in one team but only 140% ER with different teammates providing energy generation.
Reaction Damage Blindness
Reaction damage neglect represents fundamental misunderstanding of modern Genshin combat systems. Transformative reactions scale independently of ATK, making traditional DPS optimization irrelevant for reaction triggers.
Characters like Kuki Shinobu in Hyperbloom teams should build full Elemental Mastery. The new Lunar-Charged reaction exemplifies how modern mechanics reward team-wide optimization over individual character focus.
Practical Build Examples and Case Studies
Meta Team Compositions
Version 6.0 meta showcases team compositions that exemplify multi-target optimization principles. Mavuika Melt teams demonstrate how reaction-focused compositions require different stat priorities than traditional hypercarry setups.
Nilou Superbloom compositions (Lauma/Nilou/Kokomi/Nahida) represent the pinnacle of multi-target optimization with Dendro Core proliferation focus. Lunar-Charged teams (Flins/Ineffa/Aino/Sucrose) showcase the new reaction’s team-wide scaling mechanics.
Optimization requires balancing stats across all four characters since each contributes to final reaction damage. The damage calculation (100% highest + 50% second + 1/12 third + 1/12 fourth) incentivizes building multiple strong contributors.
F2P Optimization Examples
Free-to-play optimization requires maximizing efficiency with limited resources, making multi-target approaches more valuable. Gaming represents an excellent F2P DPS option with 4-star accessibility and flexible build requirements.
Bennett exemplifies F2P support optimization with universal team utility and weapon flexibility. His ATK buff scales from Base ATK, making even 3-star weapons like Skyrider Sword viable when properly leveled.
Xiangling demonstrates how 4-star characters achieve meta relevance through proper optimization, with off-field Pyro application and snapshot mechanics.
Whale vs Dolphin Optimization
High-investment optimization reveals the true potential of multi-target approaches when resource constraints are minimized. Signature weapon access dramatically alters optimization priorities.
Weapons like Fractured Halo provide unique team-wide benefits that can’t be replicated through stat optimization alone. Constellation effects create optimization scenarios unavailable to lower-investment players.
Mavuika’s C2 provides 200 flat Base ATK and percentage-based damage increases, making ATK investment more valuable at high constellation levels while maintaining CRIT and reaction optimization importance.
Advanced Tips and Future-Proofing Your Builds
Preparing for New Characters
Future character releases consistently trend toward complex mechanics rewarding multi-target optimization over simple stat stacking. Characters like Ineffa with team-wide scaling reactions indicate future releases will continue emphasizing synergistic team building.
Artifact farming strategies should prioritize versatile pieces functioning across multiple characters. CRIT-focused artifacts with ER and EM substats provide value for numerous characters, while ATK%-heavy pieces become increasingly niche.
Artifact Efficiency Strategies
Efficient artifact farming requires understanding domain pairings and set versatility. The Gilded Dreams and Deepwood Memories domain exemplifies efficient farming, providing artifacts useful for reaction-based DPS characters and Dendro supports respectively.
Roll Value (RV) assessment provides more comprehensive artifact evaluation than traditional CRIT Value calculations. RV considers all useful substats for specific characters, including ATK%, EM, and ER.
Regular Optimization Maintenance
Optimization requires regular updates as new characters, weapons, and artifacts are released. Meta shifts documented in Version 6.0 analysis demonstrate how character valuations change based on new synergies.
Team composition changes affect individual character optimization significantly. A character optimized for one team may require different stat priorities when moved to a different team, making flexible builds more valuable than hyperspecialized ones.
FAQ
How does multi-target optimization differ from single character optimization? Multi-target creates weighted averages across multiple characters or abilities, reflecting real gameplay scenarios. Instead of maximizing one character’s single highest damage number, it balances stats across team rotations with weighted combinations like 30% Normal Attack, 40% Skill, 30% Burst damage.
Why is raw ATK% considered overrated in current meta? ATK% suffers from diminishing returns due to the multiplicative damage formula – it only affects the Base DMG component. External ATK buffs from Bennett (700-1000+ flat ATK), Thrilling Tales (48% ATK), and Pyro Resonance (25% ATK) further reduce ATK% substat value. CRIT stats provide multiplicative scaling that’s more valuable in late-game optimization.
What stats should I prioritize over ATK% for different character roles? Main DPS: CRIT Rate/DMG in 1:2 ratio, appropriate DMG% bonuses. Sub-DPS: Energy Recharge (160-180%), then CRIT stats. Reaction triggers: Full Elemental Mastery (800-1000+) for Transformative reactions. Supports: Scaling stats like HP% for Zhongli, DEF% for Albedo, EM for Kazuha.
How do I set up proper Energy Recharge requirements? Characters with 80-energy Bursts need 160-200% ER, lower-cost Bursts need 140-160%. Use the KQM Energy Recharge Calculator for team-specific requirements. Set ER constraints in Genshin Optimizer before optimization. Consider team energy generation – Bennett batteries Pyro characters, Favonius weapons provide universal particles.
What are the most common Genshin Optimizer mistakes? Ignoring Energy Recharge constraints leading to impractical builds; optimizing characters in isolation without team buffs; over-prioritizing ATK% despite external buffs; neglecting conditional weapon/talent passives; focusing on single-target damage when characters excel in multi-target scenarios.
How will Version 6.0 meta changes affect optimization strategies? Version 6.0 prioritizes reaction-based teams over individual hypercarries. New mechanics like Lunar-Charged scale with entire team stats, making multi-target optimization essential. Focus on versatile characters excelling in specific team compositions rather than generalist units. Prioritize Elemental Mastery and reaction damage over raw ATK% investment.


