

Look, I'll be honest. When I first heard about overvape, I thought it was just another flashy team name. But after weeks of testing different rotations and watching clear times drop from 90 seconds to under 60, I'm convinced this is one of the most underrated strategies in the game right now.
Why Overvape Actually Works (And Why Most Players Get It Wrong)
The magic happens because you're not just stacking reactions—you're timing them. Most players think overvape means throw all elements at the enemy and hope for the best. That's not it.
What you're really doing is maintaining multiple elemental auras simultaneously. Durin's Pyro hits an enemy that has both Hydro and Electro on it. The Hydro triggers Vaporize, the Electro triggers Overload, and the Hydro-Electro combination keeps Electro-Charged ticking in the background.

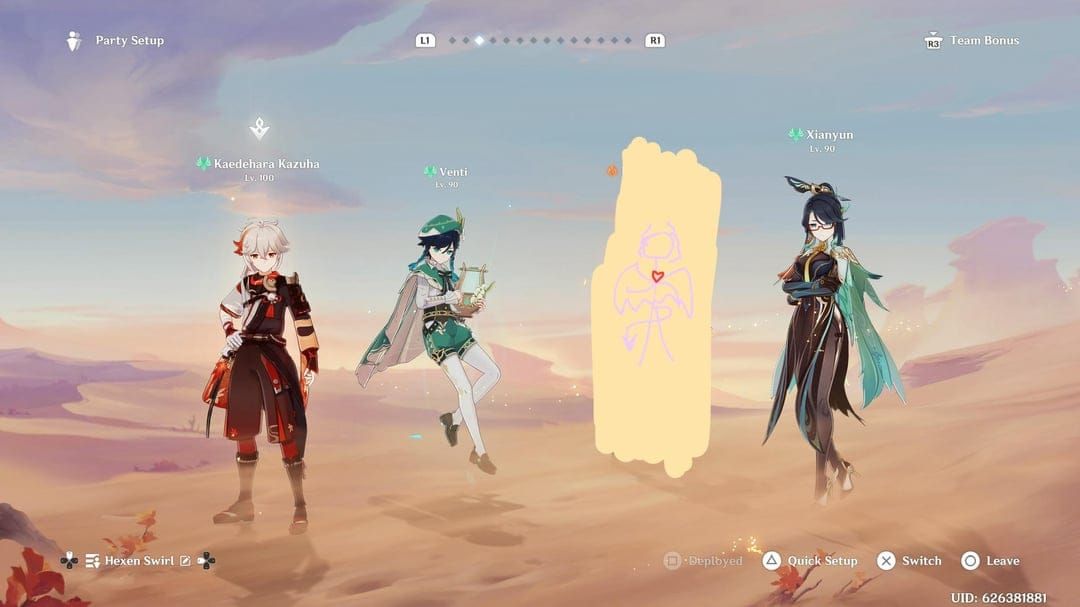
Kazuha's role here isn't just swirl support—he's the conductor of this elemental orchestra. His Hold Skill can swirl two elements in sequence (this is crucial), and with 4-piece Viridescent Venerer, he's shredding 40% resistance while boosting your damage by 64% through his EM scaling.
But here's where it gets interesting. Durin's passive, Witch's Eve Rite, adds another layer with 35% resistance reduction and 70% Vaporize bonus when you run two Magic characters. The numbers start getting ridiculous pretty quickly.
For players looking to optimize their pulls for this team, Genshin Impact 3280 primogems top up through BitTopup offers reliable transactions—I've used them myself for character acquisitions without issues.
The Elemental Gauge Reality Check
Now, let's talk about something most guides skip: why this rotation actually works from a gauge theory perspective.
You need Hydro first. Always. This establishes your base aura. Then Electro creates Electro-Charged without consuming the Hydro completely. When Durin's Pyro hits, it can react with both elements because of how gauge consumption works with multiple auras.
The 1.25-second intervals on Durin's Pyro application? That's not random—it aligns perfectly with Internal Cooldown windows, ensuring you're not overwhelming the elemental system and causing gauge conflicts.
Building Your Overvape Team (What Actually Matters)
After testing dozens of combinations, here's what works in practice:
Core Requirements:
- Hydro enabler (Mona's my preference for grouping, but Xingqiu works)
- Electro applicator (Fischl for consistency, though Raiden works if you adjust the rotation)
- Durin (obviously—he's your main damage dealer)
- Kazuha (irreplaceable for the double swirl)
Durin operates in two forms, and understanding when to use each makes or breaks your DPS. White form (Purity) is your AoE setup—E + E + Q gives you wide Pyro coverage. Dark form (Denial) is single-target focused with E + Normal Attack + Q for concentrated damage.
What experienced players know: Kazuha needs 800 EM and 170-200% Energy Recharge. Not 800 EM OR good ER—both. This is non-negotiable for consistent rotations. His double swirl requires specific absorption order: Hydro first, then Pyro. Get this backwards and you lose significant damage amplification.
The 15-Second Rotation (Frame-Perfect Execution)
Here's the rotation I use, refined through hundreds of Abyss runs:
Opening (0-3 seconds): Start with your Hydro character's Elemental Skill. Don't overthink this—you're establishing the base aura. Immediately swap to Kazuha and use Hold Skill to swirl Hydro and group enemies. Quick swap to your Electro character for skill activation.

Main Window (4-8 seconds): This is where the magic happens. Durin E to switch to Dark form, weave in a Normal Attack (don't skip this—it's significant damage), then Q for off-field Pyro. Immediately swap to Kazuha for his Burst.
Burst Phase (9-15 seconds): Hydro character Burst for sustained application, Electro Burst for continuous aura, then back to Durin for additional Normal Attacks while collecting energy particles.
The timing feels awkward at first. You'll mess up the swirl order, you'll trigger Pyro too early, you'll run out of energy mid-rotation. That's normal. What works best is practicing the muscle memory in overworld before attempting Abyss.
For constellation upgrades that make this rotation more forgiving, Genshin Impact 6480 crystals discount at BitTopup provides solid value—C2 Kazuha in particular transforms the energy requirements.
Animation Canceling (The DPS Difference)
N2C combos aren't optional for competitive clear times. Normal 1 → Normal 2 → Charged → cancel effectively doubles your damage output during Durin's field time.
Dash-cancels are fastest but burn stamina. Jump-cancels preserve stamina but feel clunky. Swap-cancels and Burst-cancels optimize particle absorption—this is how you maintain energy flow in those tight 15-second windows.
Energy Management (Where Most Teams Fall Apart)
Let me be blunt: if you don't have enough Energy Recharge, this rotation doesn't work. Period.
Minimum Requirements:
- DPS characters: 160-180% ER
- Supports: 180%+ ER
- Kazuha specifically: 170-200% ER while maintaining 800 EM
This seems like a lot, and honestly? It is. But Electro resonance helps significantly, and proper particle funneling makes the difference between smooth rotations and energy starvation.
Same-element characters get triple energy from matching particles. This isn't just optimization—it's essential for maintaining Burst uptime. Energy deficits cause rotation failures more than any other factor.
Artifact and Weapon Optimization
Durin's Build Priority: Emblem of Severed Fate is non-negotiable. The 20% ER and Burst damage scaling (up to 75%) align perfectly with overvape's energy demands. Crimson Witch works as an alternative for the Overload bonus, but you'll struggle with energy.
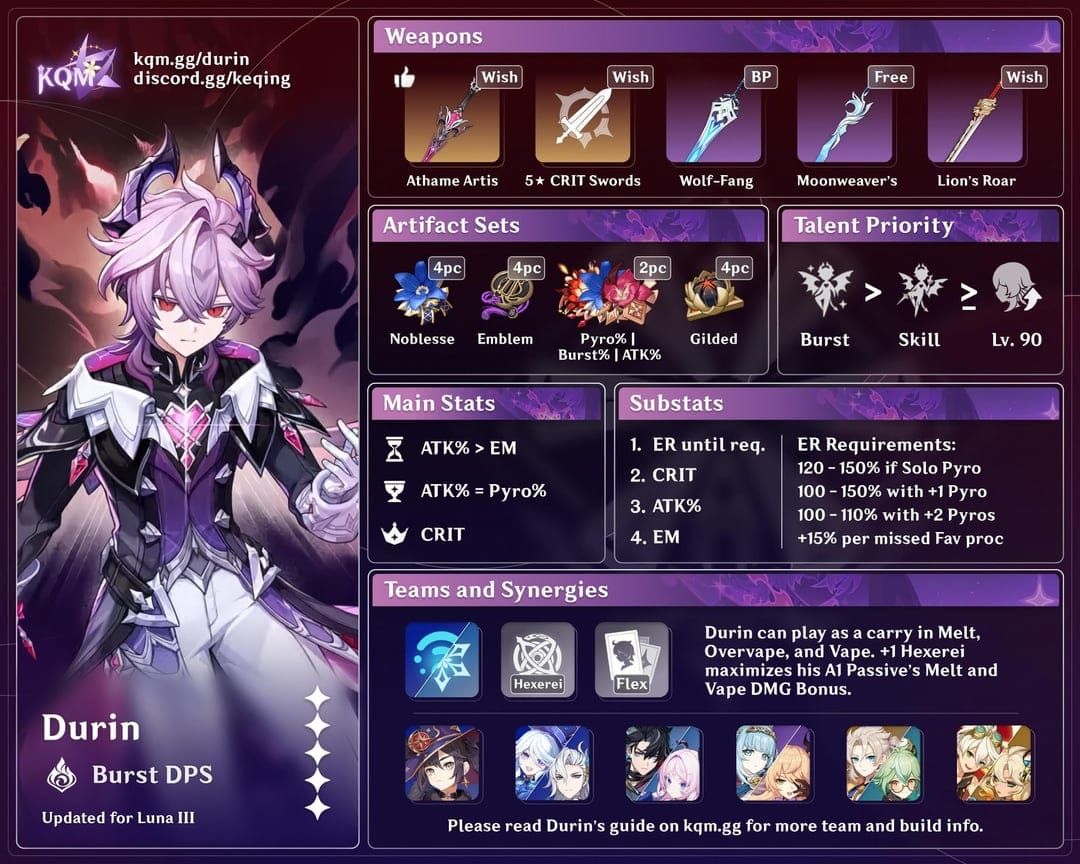
For weapons, Athame Artis (5-star) with 33.1% CRIT Rate and Burst damage boost is ideal. Budget options include Primordial Jade Cutter or Wolf-Fang, though you'll need better artifact substats to compensate.
Kazuha's Setup: 4VV is mandatory—no exceptions. EM/EM/EM main stats with ER substats until you hit that 170-200% threshold. C2 Kazuha provides 200 EM, making builds significantly easier, but C0 is absolutely viable with proper artifact investment.
Advanced Techniques (Separating Good from Great)
Animation canceling transforms this rotation from decent to devastating. Durin's skill animations—E skill (45 frames), Normal Attack (30 frames), Q Burst (60 frames)—can be reduced by 15-20 frames each through proper canceling. That's 1-2 seconds saved per rotation, which accumulates to massive DPS gains.
Hitlag extension is more advanced but worth understanding. Heavy attacks create hitlag windows where multiple reactions can register simultaneously. It's not essential for basic execution, but it's what separates 60-second clears from 45-second clears.
Common Mistakes (Learn from My Failures)
Wrong Skill Order: Pyro before Hydro/Electro ruins everything. The correct sequence—Hydro → Electro → Pyro—isn't negotiable.
Kazuha Swirl Priority: Swirling Pyro before Hydro breaks the double swirl sequence. Hydro first, always.
Energy Desync: When Bursts aren't available mid-cycle, your rotation collapses. This usually means insufficient ER investment or poor particle management.
Positioning Errors: Enemies need to be within 2 meters for consistent reactions. Kazuha's grouping helps, but you need to position correctly.
Abyss 6.2 Performance (Real Clear Times)
The current Abyss heavily favors overvape teams. Chamber 1's grouped enemies are perfect for reaction spread, and the Pyro damage blessing provides 15-20% DPS increases over non-Pyro teams.
Realistic clear times with well-built teams:
- C0 teams: 60-90 seconds per chamber
- C2+ teams: 45-60 seconds per chamber
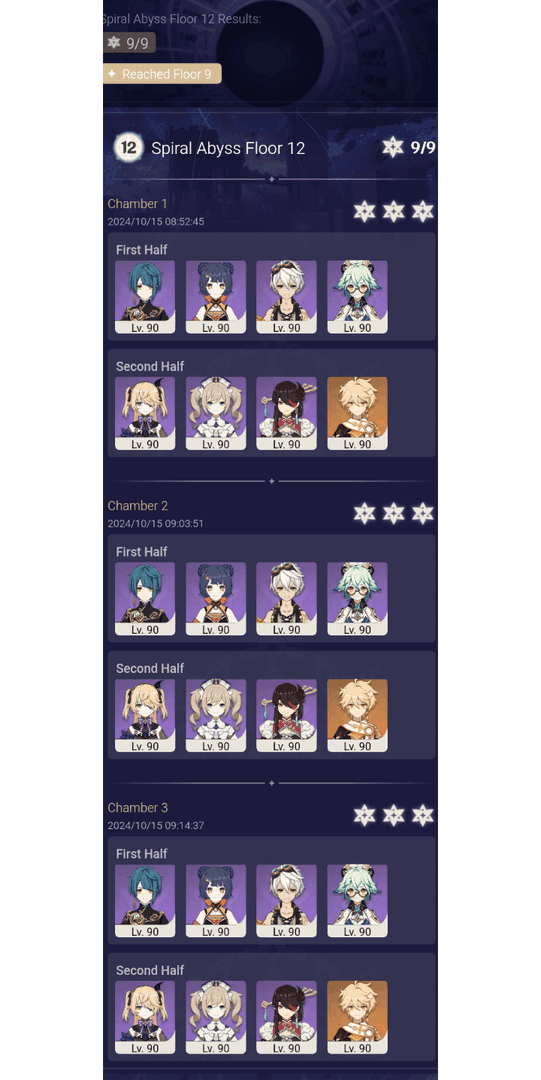
Both achieve consistent 36-star clears, though investment requirements are significant.
Enemy Modifications: Electro-immune enemies reduce overvape to pure Vaporize (still viable). Hydro-immune enemies require Overload focus. The rotation adapts, but core principles remain.
Investment Priority and Budget Options
Resource Priority:
- Kazuha (universal utility, maximum ROI)
- Durin (main DPS)
- Hydro applicator
- Electro applicator
Talent Levels: Burst > Skill > Normal Attack for both main characters. Level 10 Bursts provide maximum scaling and should be prioritized.
F2P Alternatives: Barbara and Lisa can substitute for premium options. You'll lose DPS but maintain core functionality. The rotation principles don't change.
Monthly primogem income for F2P players averages 5,700 through dailies, Abyss, events, and exploration. Character guarantees require 14,400 primogems, making this a 2.5-month investment for guaranteed pulls.
Frequently Asked Questions
What exactly is overvape reaction? It's triggering Electro-Charged, Vaporize, and Overload simultaneously by maintaining multiple elemental auras while applying Pyro. Durin's 1.25-second intervals make this consistent rather than accidental.
How much Energy Recharge does Durin actually need? 180%+ for reliable 15-second rotations. Emblem of Severed Fate helps by converting ER into damage, making this investment worthwhile rather than just functional.
Can Kazuha really enable overvape effectively? Absolutely. His double swirl mechanics provide 64% damage amplification at 800 EM, plus 40% resistance shred through 4VV. He's not just enabling reactions—he's amplifying them significantly.
Is the rotation really that strict? The 15-second timing is flexible, but the skill order isn't. Hydro → Electro → Pyro must be maintained, and Kazuha's swirl sequence (Hydro first, then Pyro) is critical for damage optimization.
Should I use overvape over traditional Vaporize teams? For multi-target content like current Abyss? Yes. Overvape provides 15-20% higher AoE damage. For single-target scenarios, pure Vaporize might edge ahead, but the difference is smaller than most players think.
The bottom line? Overvape isn't just viable—it's competitive with the best teams in the game when executed properly. The learning curve is steep, but the payoff in clear times and Abyss performance makes it worth the investment.


