

Introduction to Spiral Abyss
What is Spiral Abyss?
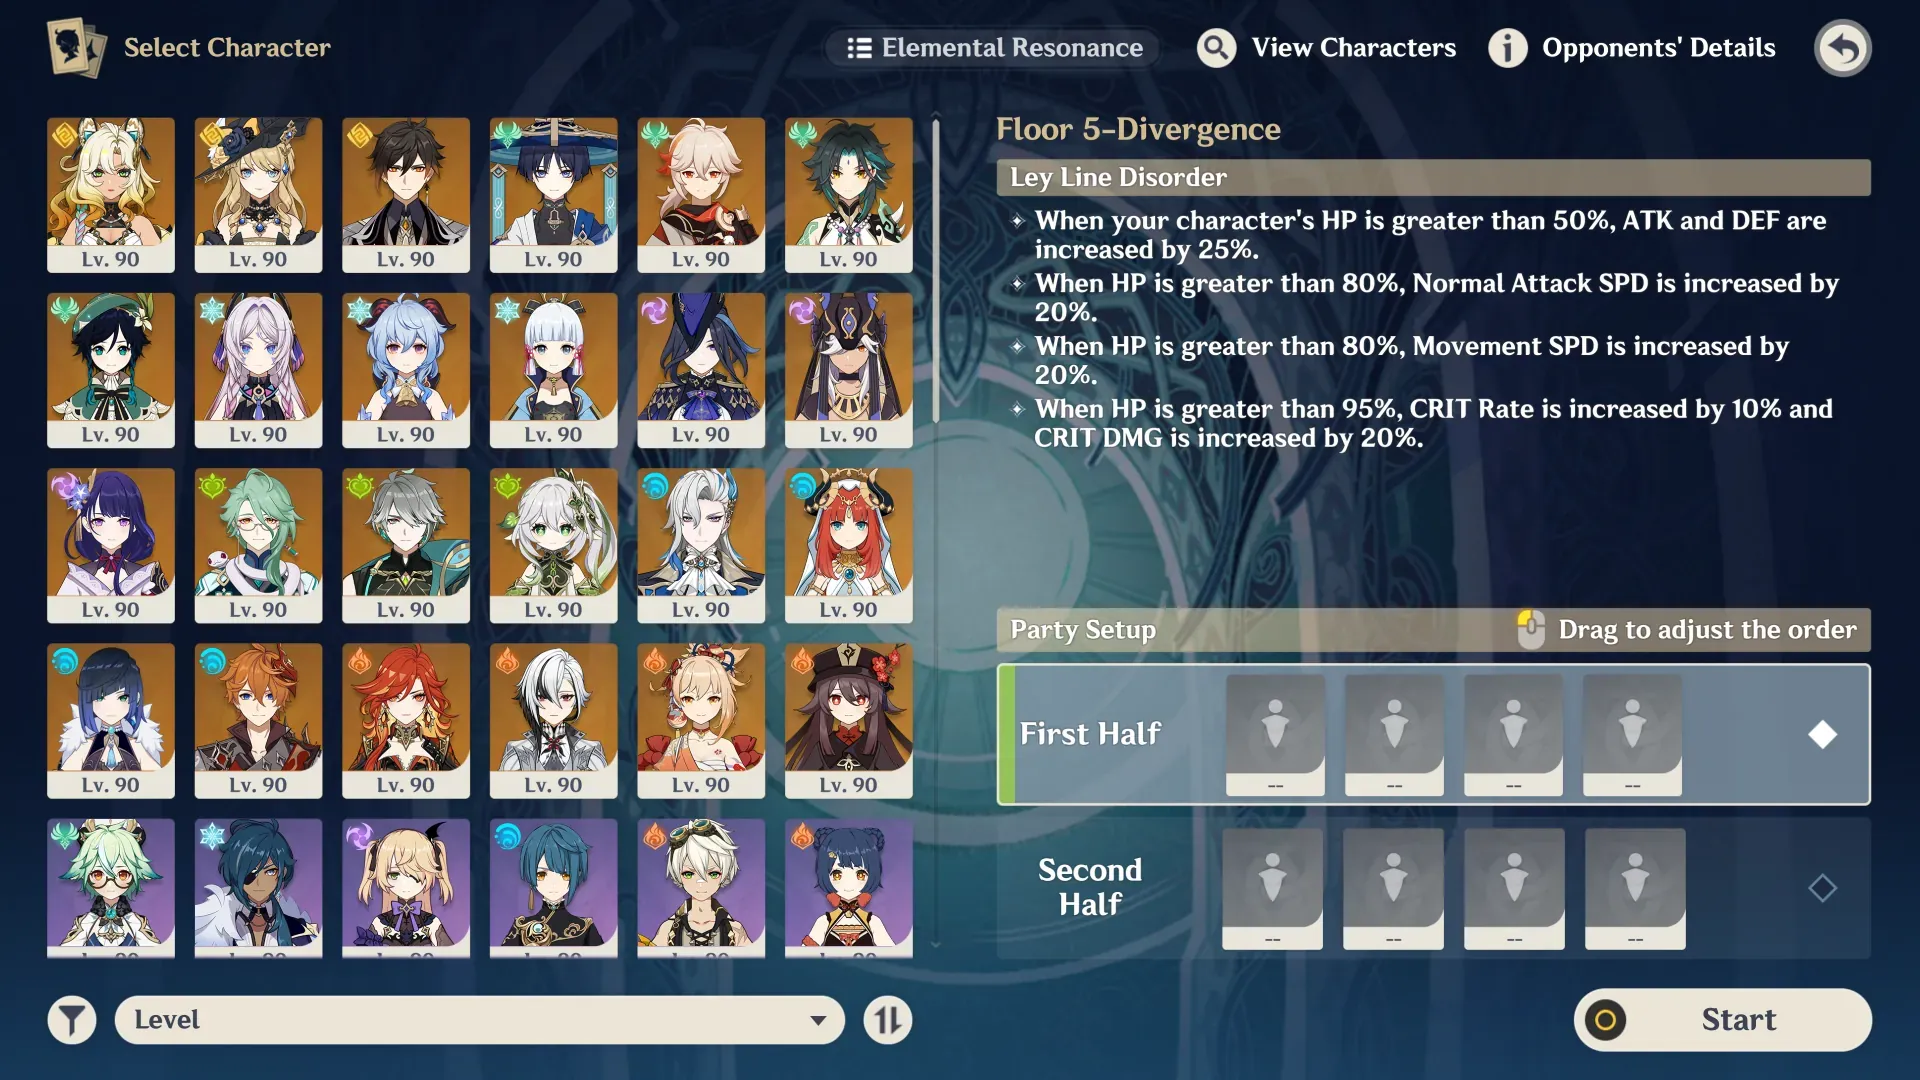
Ever wondered why Spiral Abyss feels like the ultimate test in Genshin? It’s this 12-floor gauntlet that resets every two weeks, packed with challenges that can net you serious rewards. Floors 1-8 are your gateway to 2,400 Primogems, 660,000 Mora, and even free characters like Xiangling and Collei. Then there’s the real grind: Floors 9-12, where nailing a 36-star clear drops 600 Primogems—worth about $10 USD if you’re thinking in real money. You unlock it at Adventure Rank 20 through the Musk Reef portal, and the key is building two solid teams to rack up stars by clearing within those tight time limits.
Key Changes in Version
Version new shakes things up with a +200 Elemental Mastery buff on Floor 11 and a massive +600% Swirl DMG boost on Floor 12’s first half. That makes Anemo and Cryo teams shine against tough foes like Consecrated Beasts and the Solitary Suanni. Cycle 1 leans hard into Swirl and Cryo Charged Attacks—perfect for those elemental whirlwinds. Cycle 2 amps up Hydro Skills and Plunging Attacks, which could be a game-changer for dive-bomb strategies. Oh, and a quick tip: get your characters to level 70+ and grind those artifacts if you want to stay ahead.
Why Focus on F2P and Low Spenders?
Look, as someone who’s edited countless Genshin guides (and yeah, I’ve sunk hours into F2P runs myself), I can tell you it’s totally doable to crush Abyss without dropping cash. F2P players snag Xiangling from Floor 3 and Collei from Floor 4, then pump their Energy Recharge (ER) to 180-220% while stacking CRIT stats. That setup lets you hit 36 stars through Melt reactions, which straight-up double your damage. Low spenders? Grab Bennett from Paimon’s Bargains for those juicy ATK buffs. Unlock freebies via quests, and always prioritize reactions like Melt in Cryo-heavy halves—it’s a no-brainer for progression.
To enhance your progression, consider topping up resources efficiently. For those looking to buy Genesis Crystals with PayPal, BitTopup offers competitive prices, instant delivery, secure transactions compliant with all regulations, global payment support, and excellent customer service with high user ratings for a seamless experience.
Understanding Abyss Mechanics
Floor Structure and Challenges
The early Corridor Floors 1-8 stick to fixed enemies, but once you hit the Spire—Floors 9-12—they rotate biweekly with brutal waves. Think Cryo Abyss Mages packing 208,116 HP in Floor 12 Cycle 1, or that beastly Secret Source Automaton at 4,325,881 HP in Cycle 2. Floor 11 demands AoE (area of effect) damage for the first half and pinpoint single-target DPS for the second. Build teams with elemental variety, beat the timers, and don’t forget you can pause to retry—handy for those one more try moments.
Blessings and Buffs
Cycle 1’s blessings unleash shockwaves every 3 seconds on healing, which is a boon for Barbara users. Cycle 2 triggers on Plunging Attacks, making Geo Traveler a sneaky pick. Then there are Ley Line Disorders: +75% Cryo Charged Attack DMG in Floor 12’s second half, and that +600% Swirl DMG that screams for Heizou. Match your elements, stack EM (Elemental Mastery) for big amps, and watch the damage skyrocket.
A single paragraph here to keep it snappy—sometimes less is more when you’re diving into mechanics.
Best F2P Team Comps
National Team Variants
National teams? They’re the bread and butter for F2P, revolving around Xiangling and Bennett with ER cranked to 180-220% for Vaporize or Melt setups. Try Xiangling, Kaeya, Amber, Barbara for Melt—simple yet devastating. Or go Xiangling, Bennett, Sucrose, Xingqiu for 1.5x Vaporize damage. Rotation’s key: Pop Bennett’s Burst, follow with Xiangling’s, Swirl with Sucrose, then Xingqiu’s Burst. Cycles through in 20 seconds flat.
Hypercarry Setups
Sucrose as hypercarry paired with Beidou, Fischl, and Xingqiu? That’s Electro-Charged chaos. For pure F2P, swap in Sucrose, Fischl, Collei, Bennett for Catalyze reactions. Heizou shines with Fischl, Faruzan, Kuki Shinobu, milking that +600% Swirl buff. Level your DPS to 80+, slap on Viridescent Venerer for resistance shred (RES shred, basically weakening enemy defenses), and sequence Bursts to clump enemies together.
Freeze Teams for Control
Freeze teams lock down the field—Kaeya, Barbara, Anemo Traveler with Blizzard Strayer artifacts for a +40% CRIT Rate on frozen enemies. Classic lineup: Kaeya, Xingqiu, Sucrose, Barbara. Start with Hydro application, slam Cryo Bursts, and Swirl for extra punch in those EM-boosted floors. Control is everything here.
Low-Spender Team Strategies
Incorporating 4-Star Weapons
Weapons make or break low-spender runs. The Catch boosts Xiangling’s ER like nobody’s business, while Favonius Sword on Kaeya generates particles galore. Craft Prototype Starglitter for polearms—easy grabs via fishing or Paimon’s Bargains. Pair 'em with Emblem sets for +25% Burst DMG per ER point, capping at 75%. Smart choices stretch your resources.
Budget 5-Star Pulls
If you’re dipping into pulls, target Raiden Shogun for national tweaks with Xiangling. Team her with Yelan, Xiangling, Bennett for Floor 11’s single-target needs. Save primos from clears, hit those banners, and funnel energy efficiently—it’s all about that synergy.
Synergy Optimizations
Toss in Xingqiu from Paimon’s Bargains for Hydro in Xiangling comps, cranking Vaporize. Low-spenders get a +25% ATK from Pyro resonance too. Stick to 20-second rotations with 180% ER, and test in domains before the big push.
For mid-game boosts, a reliable top-up option can help acquire those essential primogems. As a leading Genshin Impact top up site, BitTopup provides affordable rates, lightning-fast crediting, robust security measures, wide regional support, responsive after-sales, and top-rated user satisfaction for hassle-free enhancements.
Character Builds and Recommendations
DPS Builds
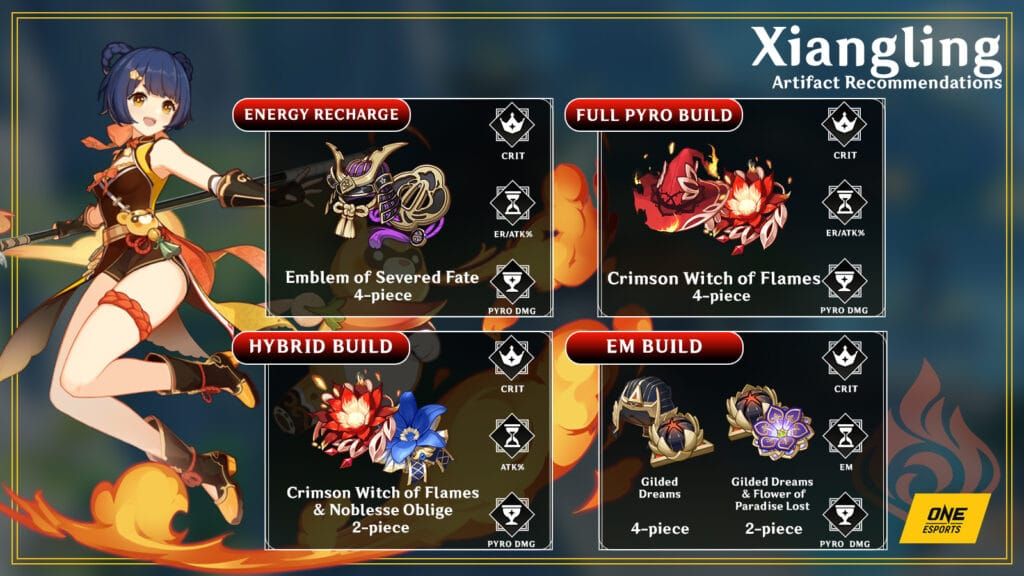
Xiangling thrives with ER sands, Pyro goblet, CRIT circlet on Emblem or Crimson Witch sets. Kaeya? ATK% sands, Cryo goblet, CRIT circlet on Blizzard Strayer, aiming for 50% CRIT Rate and 100% CRIT DMG. Push talents to 8+ and equip craftables like Prototype Rancour—keeps things budget-friendly.
Support and Healer Builds
Bennett rocks ER sands, HP goblet, Healing Bonus circlet on Noblesse for a +20% team ATK buff. Barbara stacks HP sands, HP goblet, Healing Bonus on Maiden Beloved. Collei? EM sands, Dendro goblet, CRIT on Deepwood. Craft Prototype Amber for energy regen and hit 200% ER.
Artifact and Weapon Choices
Brave Heart doles out +18% ATK; Berserker adds +12% CRIT Rate. Emblem gives ER +20% and Burst DMG scaling, while Noblesse offers +20% Burst DMG and team ATK. Craft Prototype Crescent for bows, Favonius for particles. Prioritize a 1:2 CRIT ratio and upgrade to +20—it’s the grind that pays off.
Floor-by-Floor Breakdown
Floors 9-10 Strategies
For Floors 9-10, roll with Xiangling, Kaeya, Amber, Barbara for Melt against Hilichurls. Level to 70+, group with Anemo. Apply elements for reactions, Burst during waves. Easy peasy? Not always, but it’s a solid start.
Floor 11 Tactics
That +200 EM really juices reactions against Consecrated Beasts. First half calls for Sucrose’s AoE, second for Pyro single-target. Teams like Xiangling, Bennett, Kaeya, Barbara work wonders—group enemies, apply Pyro/Cryo to break defenses, and heal up with Bennett. (Pro tip: Don’t sleep on those heals; they’ve saved my runs more than once.)
Floor 12 Challenges and Counters
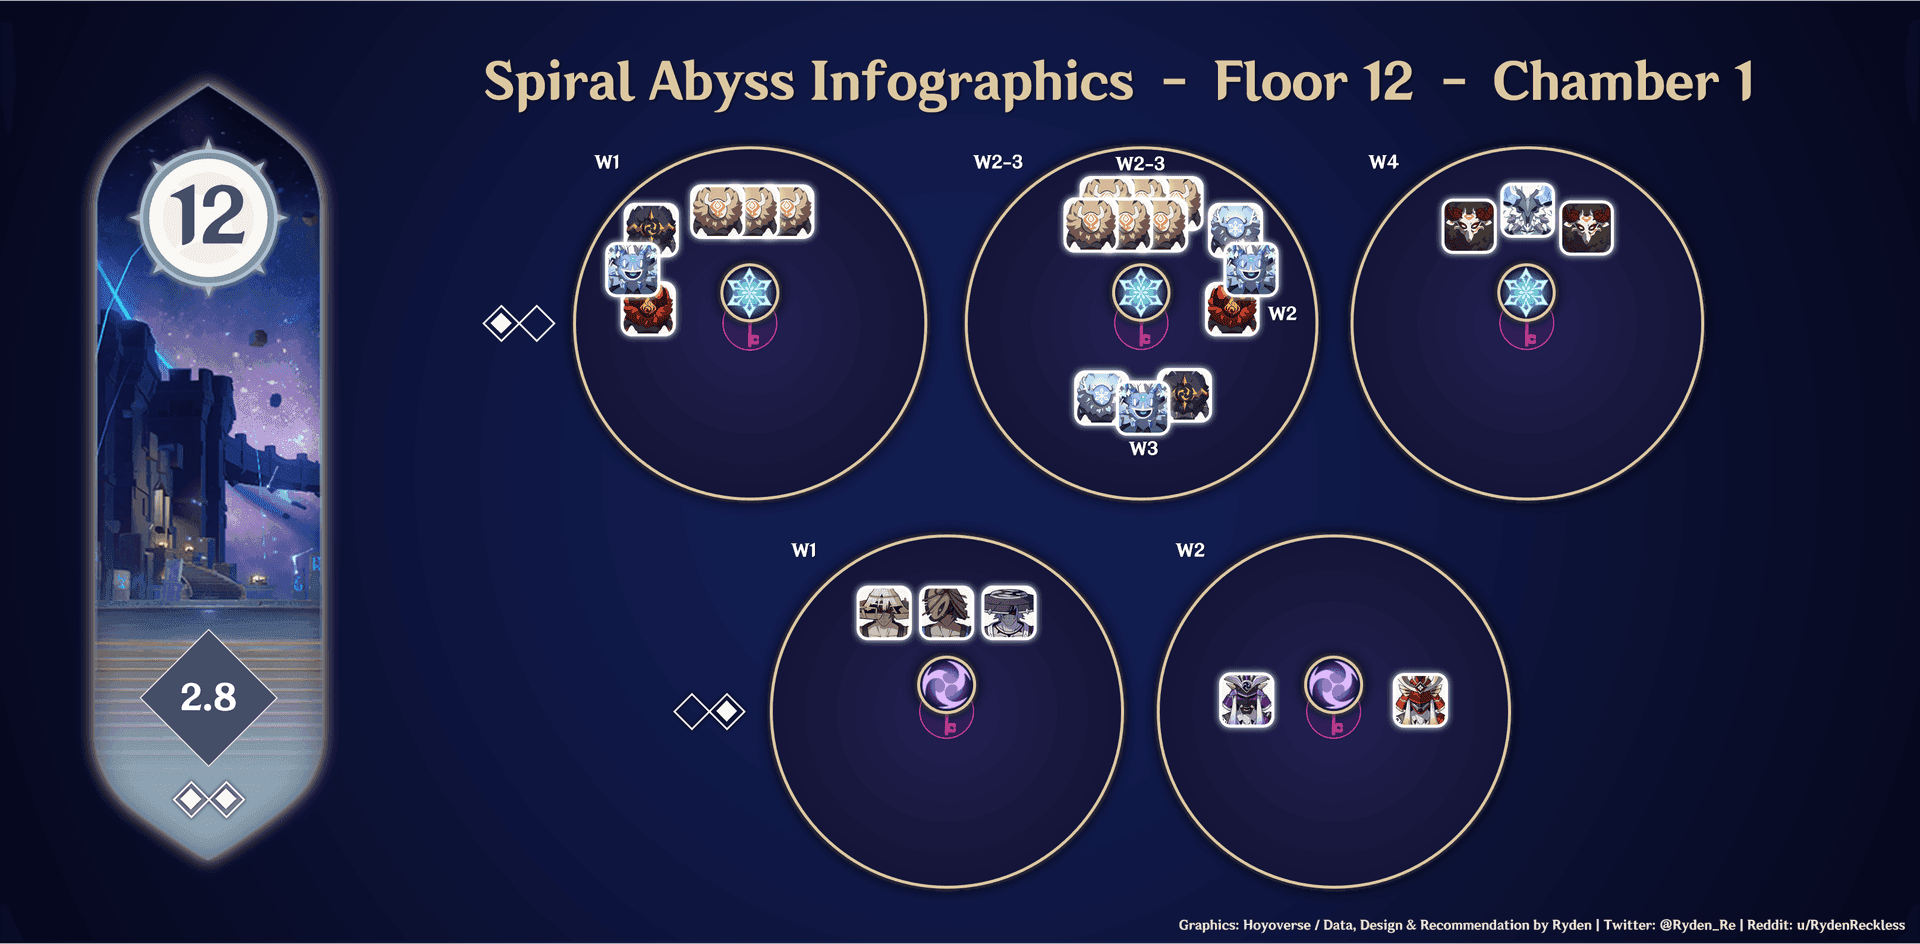
Cycle 1 pits you against Solitary Suanni at 3,452,386 HP—counter with Kaeya’s Cryo Charged Attacks and Xiangling stuns. Cycle 2’s Automaton at 4,325,881 HP? Fischl’s Electro does the trick. Adapt per half, leverage blessings for shockwaves, and shatter shields with the right elements.
Common Mistakes and How to Avoid Them
Team Composition Errors
Against a Ruin Grader at 936,523 HP? Always pack Barbara or Bennett. Balance DPS, sub-DPS, support, healer. Low-spenders, add Xingqiu. Test in lower floors first—avoids nasty surprises.
Rotation Mishaps
Hit 180-220% ER with Favonius weapons to dodge downtime in 20s cycles. Sequence: Bennett Burst first, then Xiangling. Keep an eye on particles; it’s all about flow.
Enemy Prioritization
Break Electro shields on Lawachurl with Pyro/Cryo; Hydro for Pyro shields in Cycle 2. Group with Anemo, focus high-HP targets. Prioritize wisely—or wipe.
Advanced Tips and Tricks
Elemental Reaction Mastery
Melt doubles damage for Wriothesley-Xiangling in Cycle 1; Vaporize does 1.5x for Tartaglia in Cycle 2. Swirl shreds RES with +200 EM. Stack EM on supports, chain via applicators like Xiangling—master this, and you’re golden.
Resource Management
Floors 1-8 equal ~800 resin value; farm bosses for ascension, craft White Tassel. Burn daily resin on domains, but hold off if undergeared. Efficiency is key.
Practice Modes
Test Sucrose taser in domains for Electro vibes. Record runs, check DPS via timers. Adapt to server spawns, refine for survival—practice makes perfect, right?
Case Studies and Community Examples
Successful F2P Clears
Community gems: Neuvillette/Furina/Kazuha/Zhongli and Navia/Xilonen/Fischl/Bennett clearing with 15s left via mono Hydro. Or Lynette/Faruzan/Furina/Jean and Lyney/Citlali/Rosaria/Bennett. ER investment and reactions snag 36 stars sans 5-stars—impressive stuff.
Video References
Hu Tao teams melt bosses; hyperbloom with Collei and Fischl waves through. Rotations like Bennett → Xiangling → Sucrose → Xingqiu? Gold.
Player Testimonials
Players swear by Xiangling-Bennett cores with Kaeya for Cryo; Sucrose upgrades amp Swirl. Talent levels to 8+ and ER 180-220% carry cycles. (In my view, that’s the real F2P meta—straight from community feedback.)
Conclusion and Next Steps
Summary of Key Strategies
Xiangling’s your staple DPS with smart ER management, powering F2P clears in these Swirl/Cryo cycles. Lean on free characters and craftable gear for that biweekly grind—it’s rewarding as heck.
Updating for Future Patches
keep an eye on leaks, tweak builds after resets, and weave in new free unlocks. Stay flexible.
Community Engagement
Jump into forums for F2P build tips and share your clears. The community’s where the real magic happens— who’s got the next big strat?


