


, team synergy, and account-specific scenarios with concrete performance metrics and resource calculations for F2P and low-spenders.
Understanding 4-Star Pull Value in Phase 3 Context
The core question isn't whether Tingyun, Yukong, or Dan Heng are strong—it's whether pursuing them justifies Stellar Jade expenditure and potential pity advancement toward unwanted 5-stars.
Character Event Warp operates on 90-pull hard pity with soft pity at pull 74. Each warp costs 160 Stellar Jades (14,400 for hard pity). Phase 3 provides 4,000-5,000 F2P Stellar Jades (25-31 pulls). Base 5-star rate: 0.6% with 50% featured character chance on first win.
For 4-stars: guaranteed every 10 pulls, but no guarantee for specific featured characters. When you pull a 4-star, you're competing with the entire pool. This randomness creates core tension: chasing specific 4-star eidolons can consume resources equivalent to a guaranteed 5-star without delivering desired results.
Players seeking resources efficiently can obtain Honkai Star Rail Oneiric Shards top up through BitTopup for competitive pricing and instant delivery.
Gacha Economics: 4-Star Eidolons vs 5-Star Pity Conservation
With three featured 4-stars sharing rate-up, each has ~16.7% chance when you pull a 4-star. Obtaining E0 to E6 (seven copies) statistically demands significantly more pulls than anticipated.
Opportunity cost framework: every 10 pulls chasing 4-stars advances your 5-star pity. 40 pulls at 0 pity consumes 6,400 Stellar Jades and moves you 40 pulls closer to next 5-star—potentially triggering unwanted Aglaea or Sunday.
Value equation shifts by pity status:
- 0-20 pity: Maximum flexibility, safety buffer before soft pity
- 60+ pity: Dangerous territory, every pull carries substantial 5-star risk
- 74+ pity: Soft pity zone with dramatically increased 5-star rates
Phase 3 Banner Mechanics
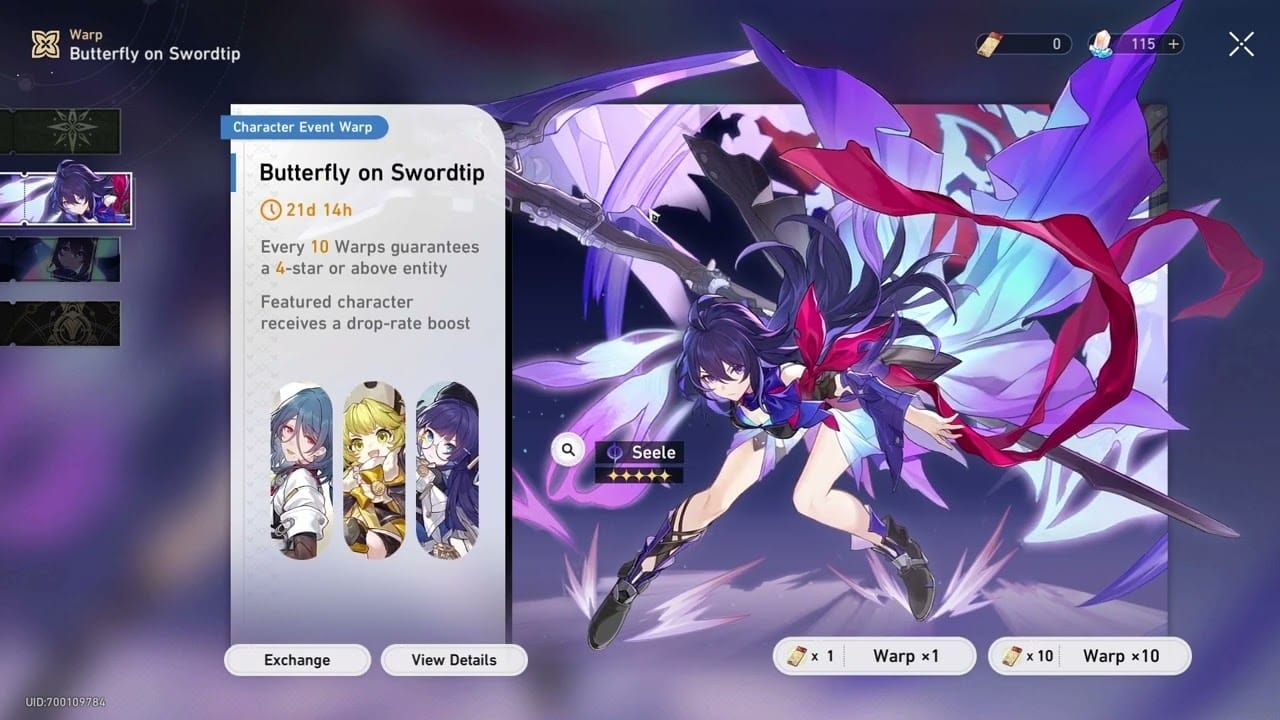
Dual 5-star banners: Aglaea (Lightning Remembrance) and Sunday (Imaginary Harmony). 4-stars Tingyun (Lightning Harmony), Yukong (Imaginary Harmony), Dan Heng (Wind Hunt) appear on both with identical rates.
Light Cone Event Warp: 80-pull hard pity, soft pity at 63-65. Base 5-star rate 0.8% with 75% featured rate on first win.
When 4-Stars Justify Breaking Pull Strategy
Scenario 1: Critical account gaps where featured 4-star solves immediate progression blocker (lacking any Harmony support).
Scenario 2: Eidolon breakpoints that fundamentally transform performance (one eidolon from E4/E6 at low pity).
Scenario 3: Complete 5-star rosters where horizontal investment provides more value.
Scenario 4: Players wanting featured 5-star anyway—4-stars become bonus value.
Tingyun Complete Value Analysis
Tingyun maintains relevance from early game through endgame. Level 80 stats: 846 HP, 529 ATK, 396 DEF, 112 SPD.
Skill (Benediction): Grants ally +50% ATK (capped at 25% of Tingyun's ATK) for 3 turns plus 40% of ally's ATK as bonus Lightning damage.
Ultimate: Regenerates 50 Energy to target ally, grants +60% damage for 3 turns. 130 Energy cost.
Talent: Passively adds 60% of ally's ATK as Lightning damage when enemies hit by Tingyun.
For Phase 3 pulls, HSR Oneiric Shards recharge through BitTopup provides secure transactions with competitive rates.
Base Kit Strengths
Enduring meta relevance stems from:
- Skill point efficiency (3-turn buff duration)
- Universal applicability with any ATK-scaling damage dealer
- 50 Energy injection reduces Ultimate cooldowns by 1-2 turns
- Damage amplification stacks multiplicatively with other buffs
- Lightning damage conversion provides partial element flexibility
Eidolon Breakpoints
- E1: +15% DEF after Skill (minor survivability)
- E2: Ultimate damage bonus +60% → +72% (20% relative increase)
- E4: Skill duration 3 → 4 turns (major skill point economy improvement)
- E6: Regenerates 10 Energy when using Basic Attack (enables Ultimate spam strategies)
E4 and E6 represent meaningful breakpoints for endgame optimization.
Team Flexibility
Maximum flexibility among Phase 3 4-stars. Functions in hypercarry, dual-DPS, and sustain-focused teams. Benefits Jing Yuan, Seele, Qingque, and ATK-scaling characters.
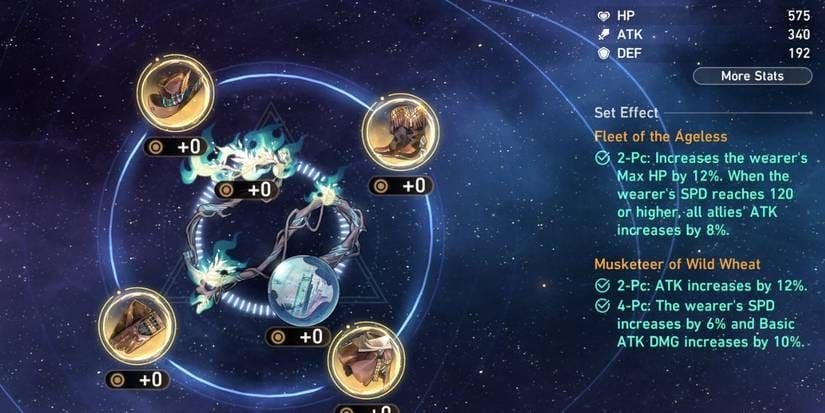
Optimal build: 2,400+ ATK, 146-160+ SPD, 3,000+ HP. Sacerdos' Relived Ordeal 4-piece + Broken Keel ornaments.
Light Cones: Dance! Dance! Dance! (action advancement), Memories of the Past (energy regen), But the Battle Isn't Over (ally energy).
F2P team: Tingyun, Yukong, Dan Heng, Natasha—clears substantial endgame content without limited 5-stars.

Endgame Performance
Memory of Chaos: Consistently appears in high-clear-rate teams across multiple floors. Universal buffing doesn't depend on specific enemy types.
Pure Fiction: Energy regeneration enables AoE Ultimate spam (Jing Yuan, Himeko).
Limitation: Single-target focus in increasingly AoE-oriented meta. Cannot simultaneously buff multiple damage dealers.
Yukong Strategic Assessment
HSR's highest-skill-ceiling 4-star support. Level 80: 917 HP, 599 ATK, 374 DEF, 107 SPD.
Skill (Emboldening Salvo): Grants 2 Roaring Bowstrings stacks (2 turns each) providing up to +80% ally ATK when both active.
Ultimate (Diving Kestrel): 380% ATK Imaginary damage, grants allies +28% CRIT Rate and +65% CRIT DMG if Roaring Bowstrings active.
Talent: Enhanced Basic Attack deals +90% ATK Imaginary damage with +100% Toughness break.
High-Risk High-Reward Mechanics
Roaring Bowstrings stacks consumed when any ally takes action. Maintaining stacks requires precise speed tuning—Yukong must move immediately before damage dealer.
Optimal build: SPD tuned 1-2 points faster than primary DPS, 3,800+ HP, 1,000+ DEF, 30% Effect RES. Wastelander 2pc + Musketeer 2pc.
When executed correctly, CRIT buffs (+28% Rate, +65% DMG = ~93% CRIT Value) rival limited 5-star supports.
Specific Team Compositions
Excels with hypercarry single damage dealers taking multiple actions: Seele (extra turns on kills), Jing Yuan (Lightning-Lord follow-ups), Qingque (multiple Skills per rotation).
F2P team: Tingyun, Yukong, Dan Heng, Natasha.
Struggles with frequent character swapping or multiple damage dealers. Inconsistent turn orders (action advancement/SPD manipulation) cause buffs to miss targets.
Eidolon Requirements
- E0: Functional, delivers core CRIT buffing
- E1: Roaring Bowstrings duration 2 → 3 turns (timing buffer)
- E2: +40% Energy regen rate (more frequent Ultimates)
- E4: Allies gain +40% ATK when Yukong on field (unconditional buff)
- E6: Additional stacks when using Ultimate (dramatically improves consistency)
E6 approaches 5-star support consistency while maintaining exceptional buff potency.
Skill Ceiling vs Accessibility
Value depends on execution capability. Players comfortable with precise speed tuning get 5-star-equivalent CRIT buffing at 4-star cost. Players preferring simple execution face inconsistency and underperformance.
New players lacking CRIT relics benefit enormously. Mid-game players with improving relics find less transformative value. Endgame players rediscover value when pushing perfect clears.
Dan Heng Investment Worth
Starter Wind Hunt character. Level 80 stats support damage dealer role but multipliers fall behind limited 5-stars.
Primary value: early-game contexts lacking alternative Wind damage dealers or single-target specialists.
Role in Account Progression
Early-game (TL 30-45): Provides essential single-target damage for story progression. Wind element covers common weakness type.
Mid-game (TL 45-60): Damage multipliers struggle with higher Memory of Chaos floors. Opportunity cost of building Dan Heng vs saving for limited 5-stars becomes apparent.
Late-game (TL 60+): Typically benched for limited 5-star damage dealers. Single-target focus and lack of defensive utility limit endgame viability.
Functions as temporary solution rather than long-term investment. Build sufficiently for current content but avoid over-investing.
Eidolon Priority
- E1: Skill CRIT Rate +12% for 2 turns (modest consistency improvement)
- E2: +15% SPD for 2 turns after eliminating enemy (conditional, better in Pure Fiction)
- E4: Skill damage +40% (most significant damage breakpoint, requires four copies)
- E6: Reduces enemy Wind RES by 12% for 2 turns (team utility, requires six copies)
Resource commitment typically exceeds value Dan Heng provides vs alternative investments.
Comparing to Alternative Wind DPS
Standard Banner alternatives may provide superior damage with similar investment. Limited 5-star Hunt characters demonstrate performance gap—even heavily invested Dan Heng underperforms minimally invested limited 5-stars.
F2P viability: Provides immediate value for players lacking competent single-target damage dealer. Players with alternatives find Dan Heng represents roster depth rather than core team material.
Future-Proofing Considerations
Power creep trajectory suggests 4-star damage dealers face increasing obsolescence. Dan Heng's simple damage-dealer role offers little unique utility preserving relevance.
Phase 3 potentially final rate-up opportunity. However, Standard Banner presence means patient players eventually acquire eidolons through off-banner pulls.
Investment recommendation: Build to functional levels (appropriate character/talent levels, basic relics) without over-committing. Chasing eidolons represents questionable value unless wanting featured 5-stars and treating Dan Heng as bonus.
Decision Framework: When to Pull
Systematic analysis requires:
- Account gap identification: Which roles does roster lack? Do Phase 3 4-stars fill gaps?
- Pity status evaluation: Risk tolerance based on current pity counter
- Resource planning: Stellar Jade allocation across multiple patches
Account Gap Analysis
Audit roster by role: damage dealers, supports, sustain, debuffers. Identify depth/quality gaps.
- Roster with multiple DPS but one support: benefits from Tingyun/Yukong
- Roster with comprehensive support coverage: less Phase 3 value
- Element coverage: Lightning/Imaginary gaps favor Tingyun/Yukong
- Current Memory of Chaos/Pure Fiction requirements inform immediate needs
Pity Status Evaluation
Check current pity: Warp menu → Character Event Warp → View Details → Records. Count pulls since last 5-star.
0-30 pity: Maximum safety for 4-star chasing. 30 pulls = ~3 guaranteed 4-stars, minimal 5-star risk. Cost: 4,800 Stellar Jades (fits Phase 3 F2P income).
31-60 pity: Moderate risk. Limit pulls to 10-20 maximum. Decision depends on how strongly you want to avoid featured 5-stars vs value 4-stars.
61-73 pity: Approaching soft pity. Substantial 5-star risk—only pull if actively wanting featured 5-star.
74+ pity: Soft pity with dramatically increased rates. Absolutely avoid pulling unless wanting featured 5-star.
Stellar Jade Budget Planning
Phase 3 provides 4,000-5,000 F2P Stellar Jades. Guaranteeing specific featured 5-star requires 180 pulls (28,800 Stellar Jades) worst-case. Accumulating this requires ~6-7 patches F2P income.
Create pull allocation spreadsheet: list upcoming banners, estimate required pulls, calculate if projected income supports goals.
Opportunity cost: Spending 3,000 Stellar Jades (19 pulls) chasing Tingyun eidolons delays next guaranteed 5-star by ~one patch F2P income.
F2P vs Low-Spender Priority
F2P: Strict resource constraints demand maximum efficiency. Every pull must deliver measurable value. Generally inadvisable to chase 4-star eidolons unless filling critical gap. Priority: diverse 5-star acquisition.
Low-spenders (monthly card/occasional top-ups): Additional 10-20 pulls per patch creates room for calculated 4-star chasing. Can afford 20-30 pull investments in favorable lineups while maintaining reasonable 5-star acquisition rates.
Phase 3 offers strong value for low-spenders wanting Aglaea or Sunday—pulling for desired 5-star naturally provides 4-star opportunities.
Comparative Analysis: 4-Star Eidolons vs Saving for 5-Stars
Pursuing specific 4-star E0 to E6 requires seven copies. With three featured 4-stars sharing rate-up and no specific guarantee, obtaining seven copies requires statistical luck or enormous pull volume. Variance: might obtain E6 in 100 pulls or reach 200 with uneven distribution.
Guaranteeing specific 5-star requires exactly 180 pulls worst-case. Predictability enables precise planning.
Mathematical Breakdown
Each 10-pull provides ~33% chance of specific featured 4-star (assuming equal distribution among three). Obtaining one copy requires ~30 pulls average.
E6 (seven copies) requires ~210 pulls average, though variance means 150-300+ range. This 210-pull average exceeds 180-pull 5-star guarantee.
Calculation shifts for players at E4-E5: obtaining one-two additional copies requires 30-60 pulls, making targeted completion more efficient.
Case Study: E6 4-Star vs E0 5-Star Performance
Damage dealers: E6 4-stars rarely match E0 limited 5-stars. Dan Heng E6 with optimal relics typically deals 60-70% damage of E0 limited 5-star Hunt character.
Supports: More favorable comparison. E6 Tingyun provides buffing/energy regen rivaling some E0 limited 5-star supports in specific compositions. Universal applicability and skill point efficiency create scenarios where she outperforms specialized 5-stars.
Yukong E6 with perfect execution delivers CRIT buffing exceeding some E0 limited 5-stars. However, execution requirements create practical limitations theoretical comparisons don't capture.
Resource efficiency: If E6 Tingyun requires 200 pulls while E0 limited 5-star support requires 90 pulls (winning 50/50), 5-star delivers better performance per pull despite Tingyun's strong capabilities.
Long-Term Account Value
Depth-focused (maximizing individual character strength): 4-star eidolons deliver value when targeting specific breakpoints on frequently used characters. However, typically prioritize 5-star eidolons over 4-star.
Breadth-focused (roster diversity): 4-star eidolons represent inefficient allocation. Acquiring new 5-stars expands team-building more than optimizing existing 4-stars.
Memory of Chaos requires two functional teams (favors breadth). Pure Fiction rewards highly optimized single teams (favors depth).
Common Misconceptions About 4-Star Value
Myth: All 4-Stars Become Obsolete in Endgame
Performance data contradicts this. Tingyun appears in numerous 36-star Memory of Chaos clear teams.
Reality: role-specific obsolescence. 4-star damage dealers struggle with endgame DPS checks. 4-star supports provide buffing/utility remaining valuable regardless of power creep.
Investment level impacts viability. Poorly built 4-stars underperform regardless of theoretical capabilities. Even maximum investment can't overcome fundamental multiplier disadvantages for damage dealers.
Reality Check: Meta-Defining 4-Stars in 3.8
Tingyun's appearance rate in Memory of Chaos demonstrates meta relevance. Universal buffing and energy regeneration address fundamental needs no power creep eliminates.
Gallagher (comparison example) shows well-designed 4-stars compete with 5-stars when kits address core mechanical needs.
Meta-defining characteristic: providing unique or highly efficient mechanics rather than raw stats. Tingyun's energy regeneration enables compositions alternatives can't replicate as efficiently.
Phase 3 lineup: Tingyun meta-relevant, Yukong conditional meta performance, Dan Heng obsolete damage dealer category.
The Eidolon Trap
Describes chasing 4-star eidolons beyond reasonable value, consuming resources delivering better returns elsewhere. Particularly affects players at E4-E5 feeling compelled to complete despite questionable final eidolon value.
Sunk cost fallacy drives behavior. Players at E5 after 150 pulls feel just a bit more will complete investment. However, expected 30-60 additional pulls might not justify performance improvement vs guaranteeing new 5-star.
Eidolon value follows diminishing returns. Early eidolons (E1-E2) often provide largest relative improvements, late eidolons (E5-E6) offer smaller incremental gains.
Trap becomes dangerous chasing eidolons on banners with undesired 5-stars. Players at moderate pity continuing for one more eidolon risk triggering unwanted 5-star ruining pity planning.
Practical Pull Scenarios
Scenario 1: New Player (TL 30-45)
Context: TL 35, owns free characters plus one 5-star DPS from beginner banner. No Harmony supports. 15 pity, no desire for Aglaea/Sunday.
Analysis: Tingyun represents transformative account value. ATK buffing and energy regen immediately improve 5-star DPS performance.
Recommendation: Pull 20-30 times targeting Tingyun. High probability obtaining at least one copy while maintaining safe pity distance. Cost: 3,200-4,800 Stellar Jades (fits Phase 3 F2P income).
Risk: 30 pulls advances pity to 45, safely below soft pity. Minimal 5-star risk with reasonable 4-star acquisition probability.
Scenario 2: Mid-Game Player (TL 55)
Context: TL 55, multiple 5-stars including two DPS and one support. Clears MoC floor 10, struggles 11-12. Owns E0 Tingyun built functionally. 55 pity, plans to guarantee upcoming limited 5-star in two patches.
Analysis: Phase 3 presents minimal value. Already owns functional E0 Tingyun—eidolons don't justify resource cost or pity advancement. Yukong's high skill ceiling questionable for mid-game. Dan Heng offers no value.
Recommendation: Skip Phase 3 entirely, preserve resources for planned guarantee. MoC struggles likely stem from relic quality, team composition, or execution rather than roster gaps.
Risk: Any pulling at 55 pity creates moderate 5-star risk disrupting guarantee planning. Even 10-20 pulls advances to 65-75 (soft pity danger zone).
Scenario 3: Endgame Player (TL 70)
Context: TL 70, comprehensive 5-star roster. Experimenting with hypercarry compositions, owns E4 Tingyun. 10 pity, no interest in Phase 3 5-stars, strong interest in E6 Tingyun for enhanced energy regen.
Analysis: Phase 3 presents calculated opportunity. E6 Tingyun enables Ultimate-spam compositions. Low pity provides safety margin.
Recommendation: Pull 30-40 times targeting Tingyun eidolons. Set hard stop at 40 pulls regardless of results. Cost: 6,400 Stellar Jades (one patch F2P income—acceptable for endgame optimization).
Risk: 40 pulls advances pity to 50, maintains reasonable soft pity distance. If pulls yield two Tingyun copies reaching E6, investment succeeds. If zero copies, accept failed gamble and stop.
Scenario 4: F2P Long-Term Planning
Context: TL 60, tracks upcoming banners via spreadsheet. Must-pull 5-star in four patches. 80 pulls saved, 0 pity. Functional teams for all content but lacks Tingyun.
Analysis: Marginal value proposition. Tingyun would improve teams but isn't strictly necessary. Four-patch timeline provides flexibility—will accumulate ~100 additional pulls, reaching 180 total for guarantee.
Recommendation: Pull 10-20 times as calculated gamble. Limited investment provides reasonable acquisition chance while preserving guarantee timeline.
Risk: Spending 20 pulls reduces saved total to 60, requiring 120 from future income for guarantee. Four patches provide ~100 pulls, creating slight shortage requiring luck (winning 50/50) or extending timeline one patch. Conservative players skip entirely; risk-tolerant proceed with 10-20 investment.
Resource Optimization Strategy
Stellar Jade Allocation: Phase 3 vs Upcoming Banners
Phase 3 runs January 28-February 12, 2026, followed by Phase 4 and version 3.9. While specific 3.9 details unconfirmed, historical patterns suggest new limited 5-stars or anticipated reruns.
Conservative approach: Prioritize saving for confirmed high-value future banners over speculative Phase 3 pulling. Guaranteed future value exceeds probabilistic Phase 3 value.
Aggressive approach: Pull every banner with favorable 4-star lineups, accepting sacrifice of 5-star guarantee capability. Suits players prioritizing roster depth over 5-star acquisition. Requires spending or accepting missed limited 5-stars.
Balanced approach: Allocate fixed budget (10-20 pulls) to favorable 4-star banners while maintaining core savings. Provides occasional acquisition opportunities without disrupting long-term planning. Key: strict discipline—never exceed predetermined budget.
Pity System Mastery
Guaranteed 4-star every 10 pulls creates natural stopping points—pull in 10-pull increments, reassess after each 4-star.
Soft pity at pull 74 represents critical boundary. Track pity obsessively, avoid pulls beyond 60-65 unless actively wanting featured 5-star.
Single vs 10-pulls: Singles provide granular control, allowing immediate stop upon obtaining desired 4-stars. No statistical advantage either way—use preferred method, though singles offer better control for conservative strategies.
50/50 system: Losing 50/50 to Standard Banner 5-star preserves guarantee for future banners. Silver lining doesn't justify risky pulling but provides consolation when accidents occur.
Alternative Acquisition Methods
Phase 3 4-stars exist in Standard Banner pool—patient players eventually obtain through off-banner pulls.
Starlight Exchange shop occasionally features 4-stars for Starlight currency. Patient players eventually purchase desired 4-stars without spending Stellar Jades.
Standard Banner pulls from free tickets provide acquisition chances without consuming Stellar Jades. Prioritize using Standard Tickets before considering limited banner pulling for 4-stars.
Never pull Standard Banner with Stellar Jades—wait for off-banner acquisition while pulling limited banners. Maximizes limited 5-star acquisition while eventually obtaining Standard 5-stars passively.
Expert Recommendations: Final Verdict
Who Should Definitely Pull
- Players wanting Aglaea or Sunday (4-stars = bonus value)
- New players (TL 30-45) lacking Harmony supports: invest 20-30 pulls for Tingyun
- Players at low pity (0-20) with E4-E5 Tingyun seeking E6 completion
- Endgame players with comprehensive rosters deriving entertainment from team experimentation
Who Should Skip
- Mid-game players (TL 45-65) at moderate-to-high pity (40+) unless wanting featured 5-stars
- Players owning E0-E2 Tingyun unless targeting E4/E6 breakpoints
- F2P with specific 5-star targets in upcoming patches
- Players with comprehensive support rosters including multiple built Harmony characters
Contingency Planning
Early success: Obtain desired 4-stars within first 10-20 pulls → immediately stop, preserve resources.
Reaching limit: Hit predetermined pull limit without desired 4-stars → resist just pull more temptation. Accept failed attempt, return to original plan.
Unexpected 5-star: Immediately reassess strategy. Evaluate if featured or off-banner. Adjust future plans based on new pity status.
Multiple undesired 4-stars: Recognize as statistical variance, not justification for continued pulling. Each 4-star pull carries identical probability regardless of previous results.
FAQ
Is Tingyun worth pulling in Phase 3?
Yes for new players lacking Harmony supports or players at low pity (0-20) wanting eidolons. Her universal ATK buffing, energy regen, and damage amplification provide value across all team compositions. Players with functional E0-E2 Tingyun should skip unless targeting E4/E6 breakpoints. Decision depends on roster gaps and pity status.
Should I pull for 4-star eidolons or save for 5-stars?
Save for 5-stars in most cases. Chasing 4-star E0 to E6 requires ~210 pulls average, exceeding 180 pulls for guaranteed featured 5-star. Exception: players at low pity targeting high-value breakpoints (Tingyun E4/E6) who already own E3-E5. Completing final eidolons requires fewer pulls with meaningful performance improvements.
How many Stellar Jades guarantee specific 4-star eidolons?
No guarantee mechanism exists for specific 4-stars. Rate-up increases probability but doesn't ensure acquisition. Statistically, one copy of specific featured 4-star requires ~30 pulls average, but variance means some need 100+. Chasing specific 4-stars involves gambling rather than guaranteed acquisition.
Does Yukong work without specific 5-star DPS?
Yes, functions with any CRIT-scaling damage dealer but requires precise speed tuning and turn order management. F2P team (Tingyun, Yukong, Dan Heng, Natasha) demonstrates viability without limited 5-stars. However, conditional buffing mechanics and execution requirements create consistency challenges. Players comfortable with complex mechanics find value; those preferring simple execution should prioritize other supports.
When do 4-stars outperform 5-stars?
4-star supports like Tingyun occasionally match/exceed 5-star support performance in specific compositions due to universal applicability and efficient mechanics. However, 4-star damage dealers rarely outperform limited 5-star damage dealers due to fundamental multiplier/scaling disadvantages. Role distinction matters—supports maintain value through utility/buffing, damage dealers compete on numbers where 5-stars dominate.
What's the pull value of Tingyun E6 vs E0?
E6 provides continuous energy regen through enhanced Basic Attack, enabling Ultimate-spam compositions E0 cannot support. Performance improvement varies by team—hypercarry with energy-hungry DPS see 15-25% damage increases from improved Ultimate uptime. However, E0 to E6 requires seven copies, statistically demanding 200+ pulls. Resource cost exceeds guaranteed 5-star acquisition, making E6 chasing questionable unless obtaining multiple copies through lucky early pulls.


