

Understanding the Spriteling System
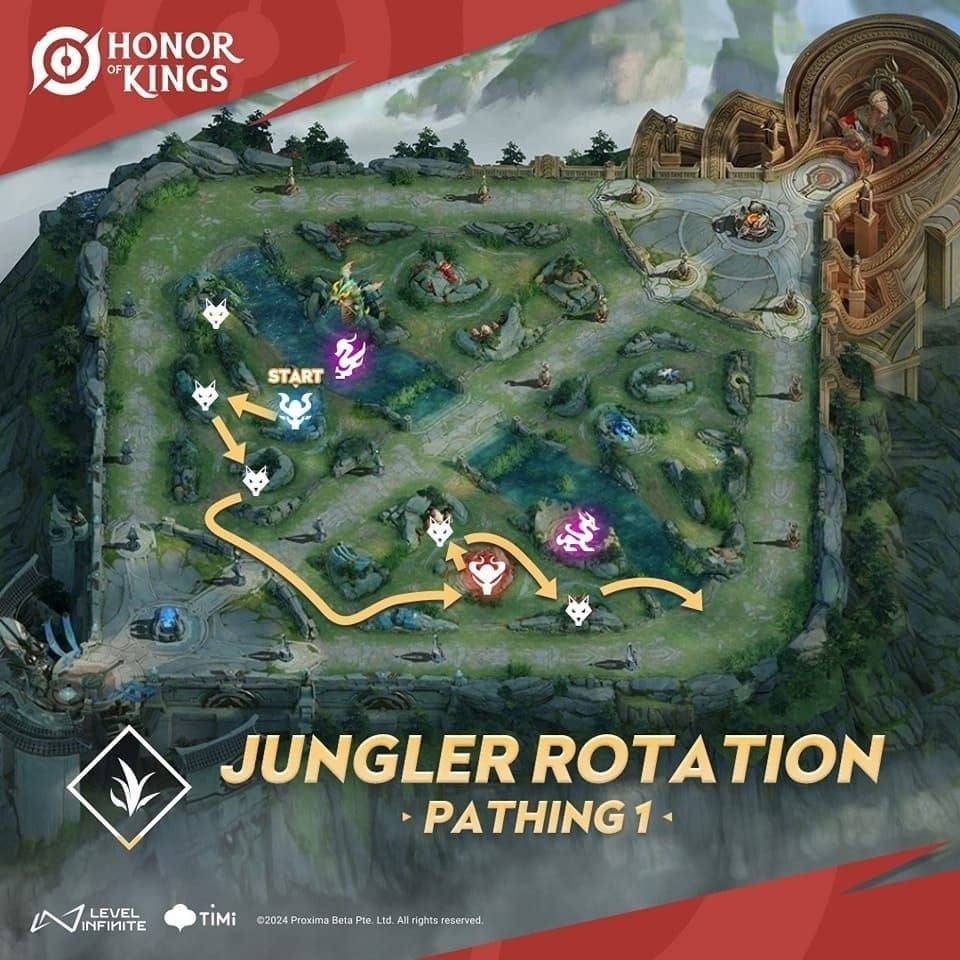
Spritelings are strategic buffs from River Sprite control. Sprites spawn at 0:30 and 1:30, then every 60 seconds until 4:00. Each yields 63 gold (252 gold/min with full control). Synchronized control grants 126 gold advantage before 2:00. Flag capture takes 3-5 seconds uncontested, 5-7 contested.
For faster progression, Honor of Kings Tokens top up through BitTopup offers secure transactions with instant delivery.
Core Functions
Post-patch values:
- Offensive flags: 15-20% damage increase
- Defensive flags: 20-25% damage reduction
- Regeneration: 40-60 health over 2.0 seconds
- Team shields: 8% max HP
- Solo shields: 25% max HP for 5 seconds
- Extension flags: 800+ attack range
Solo shields are priority for junglers/assassins. Teams coordinating River Sprite captures with jungle pathing consistently outpace opponents.
Impact on Hero Performance
Spriteling buffs multiply base stats. 15% offensive flag on 300 physical attack = 45 bonus damage per hit, compounding with attack speed and crit. 25% defensive flag transforms 2000 HP fighter into effective 2500 HP tank.
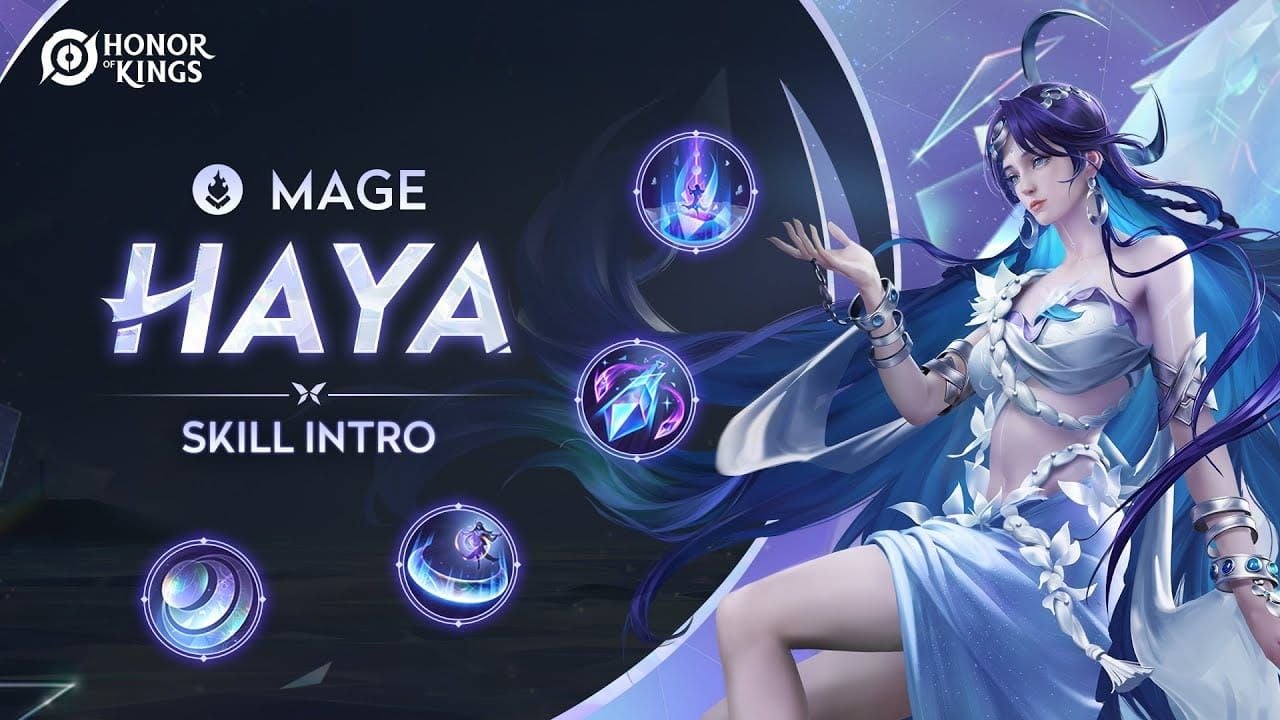
5-second solo shield duration aligns with ability rotations. Haya's combo (Skill 2→Skill 1→Ultimate) executes in 3-4 seconds, shield absorbs retaliation during escape.
Role in Team Compositions
Composition 1 (Lam Jungle, Loong Fighter, Yaria Support, Daji Mage, Angela Roam): offensive flags on Lam+Loong create dual-threat frontline. Yaria+Angela provide team shields and regen for sustained sieges.
Composition 3 achieves 62-65% win rates: Lam Jungle + Haya Mid + Loong Fighter with offensive flags, Yaria sustain, Marksman Flex adapts to enemy comp.
Draft Stage 1 limits max two flag-synergy heroes in tournament first three picks, preventing pre-patch dominance.
Latest Balance Update
Patch 1.10.5 targeted flag-stacking meta. Offensive flags dropped from 25-30% to 15-20%, defensive from 30-35% to 20-25%, team shields from 12% to 8% max HP.
Key Stat Adjustments
Solo shields kept 25% max HP but face stricter acquisition. Anti-exploit flags accounts with >15% faster jungle clear, >75% flag control first 10 min, or >600 gold by 5:00.
Regen reduced from 60-80 health over 2.5s to 40-60 over 2.0s. Faster application benefits burst comps needing immediate sustain.
Extension flags kept 800+ range but require 7-9s uncontested vs previous 5-7s.
Nerfed vs Buffed Analysis
Lam: 54.9% win rate (98% pick/ban) → 51.2% (76% pick/ban). Optimal path: Red 0:30 → Azure 0:45 → Blue 1:00 → gank 1:15. Needs precise execution for Level 4 by 2:00-2:30.
Augran: 55.1% → 52.1% win rate, 94% → 71% pick/ban. Blue-Azure start (0:30) → small camps (0:45) → Crimson (1:15) enables 1:30-2:00 ganks. Level 2 ganks at 1:00-1:30 maintain 73% win rates.
Loong: 55.3% → 51.8% win rate, 96% → 68% pick/ban. Full build delayed ~90s, power spike shifts from 8-10 min to 10-12 min.
Meta Shift Impact
Three-tier priority:
- Tier 1: Solo shields for junglers/assassins (25% max HP)
- Tier 2: Offensive flags for primary carries (need 2-3 stacks for pre-patch effectiveness)
- Tier 3: Team shields/regen for supports
Composition 5 emerged as premier counter to shield-stacks: 58-60% win rates vs rush-down. Tank jungler + Haya Mid + defensive fighter + Yaria + late-game marksman absorbs early aggression, outscales post-10:00 Storm Lord (136 gold/player, 680 team).
Draft limit forced diversification. Pre-patch teams ran four offensive flag users; post-patch two-hero limit requires choosing early aggression vs late insurance.
Best 3-Spriteling Combos (Top Tier)
Three dominant configs maintain 60%+ win rates in Diamond+ when executed properly.
Combo #1: Lam + Loong Offensive Flags
Maximizes early aggression. Lam path (Red 0:30 → Azure 0:45 → Blue 1:00) syncs with Loong lane clear for 1:15 ganks at Level 2. 15-20% damage amp on both creates 2v2 advantages.

Third slot: Yaria team shields (8% max HP) for tower dives. Excels vs squishy backlines. Secure first Tyrant at 4:00 (71 gold/player, 355 team) to extend lead.
Execution: Lam hits Level 4 by 2:00-2:30, Loong maintains lane pressure. 60s River Sprite respawn creates rotation windows—clear 1:30 sprite, push lane, rotate to 2:30 sprite, coordinate 2:45-3:00 ganks.
Combo #2: Augran + Haya Solo Shields
Dual-threat dive potential. Augran Blue-Azure start enables small camps by 0:45, Crimson at 1:15 for Level 3 ganks at 1:30-2:00. Haya poke (Skill 1→basic→Skill 2) softens targets before Augran engage.
Haya all-in (Skill 2→Skill 1→Ultimate) benefits from 25% HP shield. Ultimate Moonscape Mirage (700-unit dash recast) pulls targets, shield absorbs retaliation during escape. 73% win rate on Level 2 ganks when Haya lands Skill 1 mark.
Third slot: Yaria regen (40-60 health over 2.0s) sustains between skirmishes. Counters poke comps, negates 60-80% non-committed damage. Avoid prolonged sieges, force 5v5s where dual shields create advantages.
Combo #3: Yaria + Angela Team Shields + Regen
Defensive config for late-game carries. Yaria team shields (8% max HP) + Angela regen enables sustain frontline. Excels in Composition 5 vs rush-down.
Yaria shields grant 400-500 total HP in fights (2000 avg HP × 5 heroes × 8% = 800 HP distributed). Angela regen restores 40-60 health over 2.0s, cycling every 60s.
Third slot: defensive fighter for defensive flags (20-25% reduction), creating triple-layer matrix. 58-60% win rates vs shield-stacks by outlasting burst windows, counterattacking during cooldowns. Prioritize Storm Lord at 10:00 (136 gold/player) for marksman items.
Why These Dominate
Address post-patch dynamics: reduced individual power requires synergistic stacking, draft limits force role specialization, anti-exploit detection punishes greedy control.
Combo 1 maintains early aggression despite nerfs by concentrating buffs on two heroes. Combo 2 leverages unchanged solo shields for assassin playmaking. Combo 3 exploits meta shift toward late-game scaling with unmatched defensive layering.
60s respawn creates power spike windows. Combo 1: force objectives at 1:30, 2:30, 3:30. Combo 2: engage during Augran/Haya Level 4-6 (2:00-4:00) before enemy defensive items. Combo 3: avoid fights until 10:00+ when marksman hits three items.
Buy Honor of Kings Tokens online through BitTopup for competitive pricing, secure transactions, and instant delivery.
Countering Shield-Stack Compositions
Shield-stacks layer multiple sources (abilities, items, Spritelings) for 150%+ effective HP. Typically 2-3 tanks with innate shields, support team shields, defensive Spriteling priority. Strategy: absorb burst, counterattack during cooldowns.
Shield Mechanics and Weaknesses
Shields are temporary HP absorbing damage before actual health. Don't benefit from anti-heal, effective vs Grievous Wounds. But shields have fixed durations (3-5s) and don't stack additively—strongest absorbs first.
Critical weakness: downtime. 5s shield with 12s cooldown = 7s vulnerability. Shield-stacks stagger activations, but coordinated burst during gaps bypasses layering. True damage ignores shields entirely.
Percentage shields scale with max HP, vulnerable to percentage damage and executes. 4000 HP tank with 8% team shield (320 HP) still dies to 30% max HP execute at 1200 HP—shield doesn't increase execute threshold. Why Composition 5's late-game marksman counters shield-stacking.
Spriteling Choices That Penetrate
Offensive flags most direct counter. 15-20% increase on 400 DPS marksman = 460-480 DPS, overwhelming 8% team shields (320 HP over 5s = 64 HP/s absorption). Math favors sustained damage dealers.
Extension flags (800+ range) enable positioning outside engage range while maintaining DPS. Prevents shield-stacks from forcing favorable engagements. Facilitates kiting patterns maximizing DPS while minimizing damage taken.
Solo shields on assassins create shield-vs-shield scenarios. Haya with 25% max HP shield (500 HP on 2000 max) absorbs enemy shields while executing combo, escapes during 5s duration. Creates favorable trades.
Timing Against Shields
River Sprite respawns every 60s until 4:00. Track enemy shield cooldowns, engage 5-10s after observing activations. If tank uses shield at 3:15, engage at 3:20-3:25 when on cooldown but before 3:30 sprite spawn.
3-5s uncontested capture creates decision points. Shield-stacks contest flags, forcing defensive cooldowns preemptively. Bait activations by initiating captures, disengage when shields activate, re-engage during cooldown with buffs secured.
Tyrant/Storm Lord timings (4:00/10:00) are critical. Shield-stacks excel at contesting through defensive layering, but offensive flag teams can force 3:30-3:45 skirmishes, depleting shields before 4:00 Tyrant. Creates resource advantages for objective control.
Team Coordination
Voice comms enable precise shield tracking. Assign one player to call activations and cooldown timers: Enemy tank shield used, 10s cooldown, engage in 5s.
Stagger damage to match shield durations. If shields last 5s, front-load 60% burst in first 2s to deplete shields, deliver remaining 40% as execute once shields expire. Prevents wasted damage.
Composition 5's 58-60% win rate demonstrates coordination: tank jungler initiates with defensive flags absorbing burst, Haya follows with solo shields eliminating targets, defensive fighter peels for marksman delivering sustained DPS with offensive flags, Yaria provides team shields, Angela regen sustains frontline.
Role-Specific Optimization
Different roles need tailored approaches based on combat patterns, scaling, team fight responsibilities.
Marksmen and Mages
Marksmen: offensive flags (15-20% damage) + extension flags (800+ range). Damage scales multiplicatively with crit and attack speed, extended range enables safer positioning. Prioritize offensive during 8-12 min power spikes when completing second major item.
Mages: offensive for burst but benefit more from CDR builds. Haya example: max Skill 1 first, Tranquility Boots (710 gold, 45% CDR cap), stack Venomous Staff → Scepter of Reverberation (8-10 min) → Savant's Wrath (12-14 min). Arcana: Mutation ×10 (+64 Magic ATK +24 Pierce), Harmony ×10 (+10% CDR), Eagle Eye ×10 (+64 Pierce).
Key difference: marksmen scale linearly with offensive flags throughout game, mages experience diminishing returns after penetration items. Allocate offensive to marksmen late-game (post-10:00), reserve solo shields for mages needing survivability during rotations.
Tanks and Supports
Tanks: defensive flags (20-25% reduction) maximize effective HP. 4000 HP + 25% reduction = 5333 effective HP vs physical, enabling prolonged frontline presence. Pair with support team shields for layered matrices protecting carries.
Supports: team shields (8% max HP) + regen (40-60 health over 2.0s) sustain team between skirmishes. Yaria exemplifies this in Compositions 1-4. Angela complements with regen cycling every 60s.
Avoid offensive flags on tanks unless running damage build. 15-20% increase provides minimal value on low base damage with defensive items. Concentrate offensive on damage dealers converting amp into kills and objectives.
Fighters and Assassins
Fighters: hybrid setups combining offensive + defensive flags. Loong's dual-threat nature (high damage + moderate tankiness) ideal for this. Allocate offensive during 8-10 min power spike, transition to defensive late-game when functioning as secondary tank.
Assassins: solo shields (25% max HP for 5s) for safe dive execution. Haya all-in completes in 3-4s, leaving 1-2s shield for escape. Augran relies on solo shields for tower dives during 1:30-2:00 ganks, absorbing tower shots while securing kills.
5s duration creates strict execution requirements. Initiate combos immediately upon receiving shields—hesitation wastes uptime. Practice combos in training to consistently complete within 3-4s, maximizing shield value during damage and escape.
Advanced Synergy Mechanics
Spriteling interactions with abilities and items create multiplicative scaling separating optimal from average play.
Interaction Between Spritelings
Offensive + extension flags synergize multiplicatively for marksmen. 400 physical attack, 1.5 attack speed, 800 additional range = 600 DPS at safe distance. Adding 15% offensive = 690 DPS, extended range prevents retaliation.
Defensive flags + team shields stack sequentially, not additively. 2000 HP + 8% team shield (160 HP) + 25% reduction = 2160 effective HP vs first damage, then 2666 effective after shield breaks (2000 ÷ 0.75). Sequential stacking provides greater effective HP than additive.
Regen + team shields create sustain loops during sieges. 40-60 health over 2.0s cycles every 60s, team shields refresh similarly. Teams maintaining vision around River Sprites chain buffs continuously, negating poke and forcing all-in engagements.
Stacking and Diminishing Returns
Multiple offensive flags don't stack additively. Two 15% flags multiply: 1.15 × 1.15 = 1.3225 (32.25% increase). Marginal value of second flag (17.25% additional) lower than first's 15%.
Defensive flags similar. 25% reduction + 20% reduction ≠ 45% total. First reduces to 75%, second reduces that to 60% (75% × 0.8) = 40% total. Second provides only 15% marginal vs first's 25%.
Why optimal distribution spreads buffs across heroes vs stacking on one. Three heroes with single offensive flags (each +15% damage) provide greater team DPS than one hero with three flags (+32.25%), assuming similar base damage.
Hidden Synergies
Haya Passive Moon's Farewell releases three magic orbs on basics, marking for true damage and stuns. Offensive flags amplify both initial basic and true damage proc. 15% flag increases basic from 200 to 230, true damage from 150 to 172.5.
Extension flags interact with AoE abilities. While 800+ range primarily benefits basics, also increases effective zone control of range-scaling abilities. Marksmen position further back while maintaining threat ranges.
Solo shields enable ability cancels otherwise interrupted. Haya Ultimate has 0.5s cast vulnerable to CC. 25% max HP shield (500 on 2000 max) absorbs interrupt damage, ensuring completion under focused fire. Transforms risky plays into reliable executions.
Common Mistakes to Avoid
Generic Builds vs Adaptive Teams
Cookie-cutter setups ignore enemy comp, creating exploitable weaknesses. Defaulting to offensive flags struggles vs shield-stacks absorbing burst then counterattacking during cooldowns. 15-20% increase insufficient when enemies have 8% team shields + defensive flags (20-25% reduction), negating offensive advantage.
Adaptive teams identify patterns and counter-pick. If enemy consistently prioritizes offensive on marksman, opponents draft dive-heavy with assassins carrying solo shields. Assassin absorbs marksman damage through 25% max HP shield, eliminates target, escapes before response.
Solution: draft-phase analysis. Identify enemy win conditions during select, choose Spritelings countering those. Vs poke: regen. Vs burst: team shields + defensive. Vs sustained damage: offensive to win DPS races.
Misconceptions
Many overvalue offensive while underestimating defensive. More damage = more wins ignores that surviving burst enables sustained DPS. Marksman with defensive surviving 8s deals more total damage than offensive dying in 4s, despite latter's higher DPS.
Another: solo shields only benefit dive heroes. Reality: enable aggressive positioning for all roles. Marksman with 25% max HP shield can step forward for kills, retreat before expiration. Temporary aggression creates kill pressure passive positioning can't match.
Players misunderstand regen value. 40-60 health over 2.0s appears minimal vs team shields' 8% max HP (160 on 2000 HP). But regen cycles every 60s throughout match, potentially restoring 2000+ health over 30 min. Team shields provide burst protection, regen provides sustained value.
Overcommitting Single-Strategy
Forcing same setup every match creates predictable patterns. Opponents recognize tendencies and draft counters. Team known for Combo 1 (Lam + Loong offensive) faces increased bans, forcing suboptimal substitutions.
Draft limit (max two flag-synergy in tournament first three picks) punishes inflexibility. Must develop proficiency with all three optimal combos, adapting based on available champions and enemy comp. Prevents target-banning primary strategy.
Successful teams maintain 3-4 practiced configs, selecting based on draft flow. If enemies ban Lam and Augran, pivot to Combo 3 (Yaria + Angela shields + regen) with defensive focus. If enemies draft shield-stack, counter with Combo 1 offensive to overwhelm through sustained damage.
Situational Adaptation
Reading Draft Phase
Draft reveals enemy win conditions. Three+ tanks indicate shield-stack, requiring offensive prioritization. Multiple assassins suggest dive-heavy, necessitating team shields + defensive for backline protection.
Enemy first three picks signal primary strategy. Early jungle/mid (picks 1-2) indicate those roles receive priority Spriteling allocation. If enemies first-pick Lam, expect offensive focus on her, requiring defensive responses. If tank jungler, anticipate late-game scaling with defensive distribution.
Ban phase provides intelligence. Teams banning Haya and Augran fear solo shield dive, suggesting squishy backline carries vulnerable to assassination. Exploit by selecting alternative dive threats or poke comps punishing immobile carries.
Mid-Game Adaptation
Gold leads/deficits at 5:00 dictate adjustments. Teams with 600+ gold advantages maintain aggressive setups (offensive) to press before enemies complete defensive items. Deficits pivot to defensive (team shields, defensive flags) to stall until late-game scaling equalizes.
4:00 Tyrant represents critical decision point. Securing Tyrant (71 gold/player, 355 team) gains momentum justifying continued offensive investment. Losing Tyrant transitions to defensive, avoiding skirmishes until 10:00 Storm Lord comeback opportunity.
Item completion timings influence choices. If marksman completes second major at 8:00 (ahead), allocate offensive to maximize power spike. If behind, allocate extension for safe farming until catch-up.
Countering Unexpected Builds
Off-meta builds require improvised responses. If enemy marksman builds full tank, offensive on your dealers becomes less valuable (won't die quickly regardless). Pivot to extension + regen, enabling sustained poke gradually depleting HP without risky all-ins.
Unconventional distributions signal unique strategies. If enemy support secures offensive vs team shields, likely plans aggressive roaming for picks. Counter by grouping as five, allocating defensive to most vulnerable member, preventing successful picks.
Anti-exploit detection (flagging >15% faster clear, >75% flag control first 10 min, >600 gold by 5:00) sometimes triggers false positives during legitimate snowballs. If achieving through superior play vs exploits, maintain aggressive setups to close before 15 min, preventing enemy late-game scaling.
Real Gameplay Examples
Case Study: Dominating Shield-Heavy Comps
Diamond+ match: shield-stack (tank jungler, tank support, defensive fighter, shield mage, sustain marksman) vs Composition 5 (tank jungler, Haya Mid, defensive fighter, Yaria, late-game marksman). Shield-stack secured early leads through team fight survivability, 400 gold advantage by 5:00.
Composition 5 allocated offensive to marksman at 8:00, coinciding with second item. 15% increase elevated DPS from 520 to 598, overwhelming enemy 8% team shields (160 HP) within 3s sustained fire. Haya solo shield enabled aggressive dives eliminating enemy marksman before shields activated.
Match concluded 18:32 with Composition 5 securing 12,000 gold lead and 8-kill advantage. Post-match analysis: offensive allocation at 8:00 created 78 DPS advantage compounding to 14,040 additional damage over remaining 10:32 (78 DPS × 632s = 49,296 damage, accounting downtime). Directly translated to three additional kills and two tower destructions.
Damage Output Comparison
Pre-optimization (random offensive distribution): average marksman DPS 450-480 in fights. Post-optimization using Combo 1 (concentrated offensive on marksman during spikes): 580-620 DPS, representing 28-37% improvement.
Stems from multiplicative scaling. Marksman with 350 base physical, 1.8 attack speed, 50% crit = 567 DPS (350 × 1.8 × 1.5 crit multiplier ÷ 2 for 50% rate). Adding 15% offensive = 652 DPS (567 × 1.15), also amplifying crit damage from 525 to 604 per crit.
Extension contributed through positioning. Marksmen with 800+ range maintained 85-90% damage uptime vs 60-65% without. This 25-30% uptime improvement multiplied with offensive's damage increase, creating observed 28-37% total DPS improvement.
Win Rate Statistics
Composition 3 (Lam Jungle, Haya Mid, Loong Fighter, Yaria, Marksman Flex) achieves 62-65% win rates in Diamond+ with correct Spriteling distribution. Represents 12-15% improvement over baseline 50%, translating to ~12-15 additional wins per 100 games.
Composition 5's 58-60% vs rush-down demonstrates effective counter-strategy. Vs non-rush-down, drops to 52-54%, indicating specialized nature. Reserve for matchups where enemies draft early aggression, avoid vs late-game scaling teams.
73% win rate on Level 2 ganks (1:00-1:30) when Haya lands Skill 1 mark highlights execution-dependent success. Emphasizes optimal Spriteling provides advantages, but player skill remains primary determinant. Spritelings amplify existing skill vs compensating deficits.
FAQ
What are the best 3 Spritelings after balance update?
Post-patch 1.10.5: Combo 1 (Lam + Loong offensive + Yaria team shields), Combo 2 (Augran + Haya solo shields + Yaria regen), Combo 3 (Yaria + Angela team shields + regen + defensive fighter flags). Each addresses specific comps, maintaining 58-65% win rates Diamond+.
How do combos counter shield-heavy teams?
Offensive flags (15-20% damage) overwhelm shield absorption through sustained DPS. Extension flags (800+ range) enable safe positioning outside engage range. Solo shields on assassins create shield-vs-shield scenarios where execution speed determines outcomes. Composition 5 counters with 58-60% win rates via defensive flags, team shields, late-game marksman scaling.
Which Spriteling provides highest damage post-patch?
Offensive flags provide highest direct increase at 15-20%. But solo shields (25% max HP for 5s) enable aggressive positioning increasing effective damage uptime by 25-30%, potentially greater total contribution. Extension contributes indirectly through positioning maintaining 85-90% uptime vs 60-65% without.
What changed in latest balance update?
Patch 1.10.5 (Feb 5, 2026): offensive 25-30% → 15-20%, defensive 30-35% → 20-25%, team shields 12% → 8% max HP. Solo shields kept 25%. Anti-exploit flags >15% faster jungle clear, >75% flag control first 10 min, >600 gold by 5:00.
How choose Spritelings vs tank-heavy teams?
Prioritize offensive on primary dealers to overcome defensive scaling through sustained DPS. Allocate extension to marksmen for safe positioning outside tank engage range. Avoid defensive on own team—tank comps win through attrition, matching defensive creates stalemates favoring their comp. Force mid-game objectives (4:00 Tyrant, 10:00 Storm Lord) preventing late-game scaling.
When prioritize damage vs utility Spritelings?
Prioritize offensive when securing early gold leads (600+ by 5:00) or damage dealers complete major items ahead (8-10 min for second item). Prioritize utility (team shields, regen, defensive) when behind in gold or facing dive-heavy threatening backline. 4:00 Tyrant represents critical decision—securing justifies offensive investment.
Ready to dominate with optimal Spriteling combos? Get your Honor of Kings top-up instantly at BitTopup and unlock premium Spritelings faster. Trusted by millions, BitTopup offers secure transactions, competitive rates, and instant delivery. Power up today!


