

Understanding Luka's Role in Physical F2P Break Teams
Luka shines as a Physical Nihility sub-DPS, layering on that nasty Bleed DoT capped at 130-338% of his ATK over three turns. At Lv80 base, he's packing 582 ATK (sitting pretty at 15th rank) and 103 SPD (10th rank). Your classic F2P squad? Luka, Sushang as main DPS, Silver Wolf dropping that Physical implant, and Natasha keeping everyone patched up. Clear it, and you're walking away with Trailblaze EXP x200, Stellar Jade x60, plus 5-star Belobog Planar Ornaments.
For players itching to speed up progression, top up Honkai Star Rail Lynx abundance path cheap through BitTopup gives you secure Stellar Jades—perfect for grinding relics and pumping up your characters without the hassle.
Luka's Kit Breakdown: Bleed and Break Synergy
His Skill, Lacerating Fist, slams 60-120% ATK as Physical damage plus Bleed—24% of the enemy's Max HP per turn, capped at 130-338% Luka ATK over three turns. Then there's the Enhanced Basic, Sky-Shatter Fist after 2+ stacks: three Direct Punches at 10-22% ATK each, capped by a Rising Uppercut at 40-88% ATK. Against bleeding foes, it amps the original Bleed by 68-88.4%. Rotation's straightforward: Skill to apply Bleed, Ultimate for stacks and debuffs, then Enhanced Basic to exploit those break windows.
In practice, this synergy is what makes Luka a beast in sustained fights—experienced players know you can't just burst everything down in SU.
ATK% vs Break Effect% Rope: Core Stat Mechanics Explained
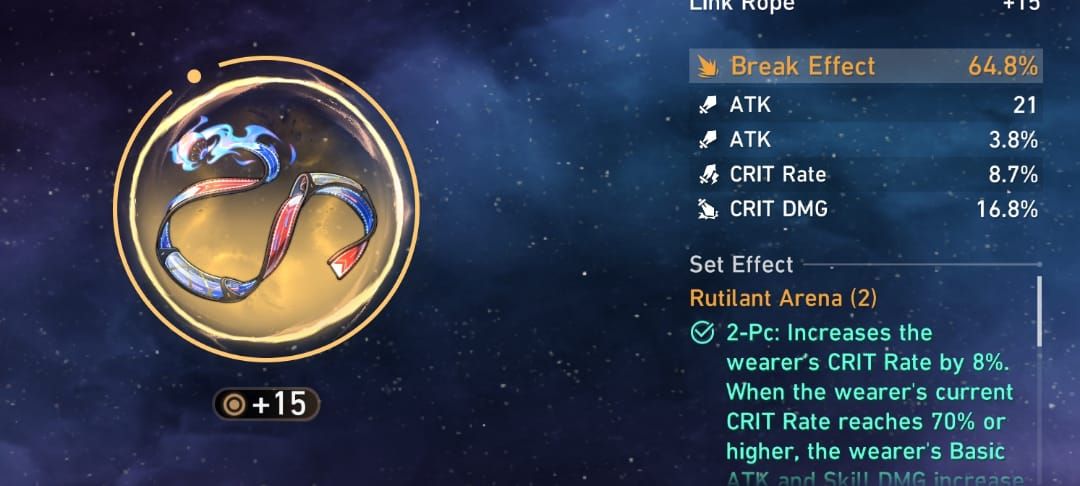
ATK% rope maxes at +43.2% ATK, pumping up those Bleed caps and multipliers across the board. Break Effect% rope? +64.8% BE, which juices break damage and speeds up toughness bar depletion.
How ATK% Affects Luka's Damage Output
Everything scales with ATK%—Bleed, abilities, the works. F2P builds easily push 2600+ ATK, landing 18k-24k on Enhanced Basic combos. Slap on Champion of Streetwise Boxing 4pc for +10% Physical DMG (from the 2pc) and +5% ATK per stack (up to five). It multiplies beautifully with the rope, netting you 60-80% total ATK boost. Boom—damage everywhere.
Break Effect% Scaling and Toughness Reduction
Break Effect% cranks break damage, but it doesn't directly hasten depletion speed. Thief of Shooting Meteor 4pc gives +16% BE and +3 Energy on break. Talia: Kingdom of Banditry 2pc adds +16% BE (+20% at 145+ SPD). For Luka, though? His damage leans hard on Bleed, so these are marginal gains at best.
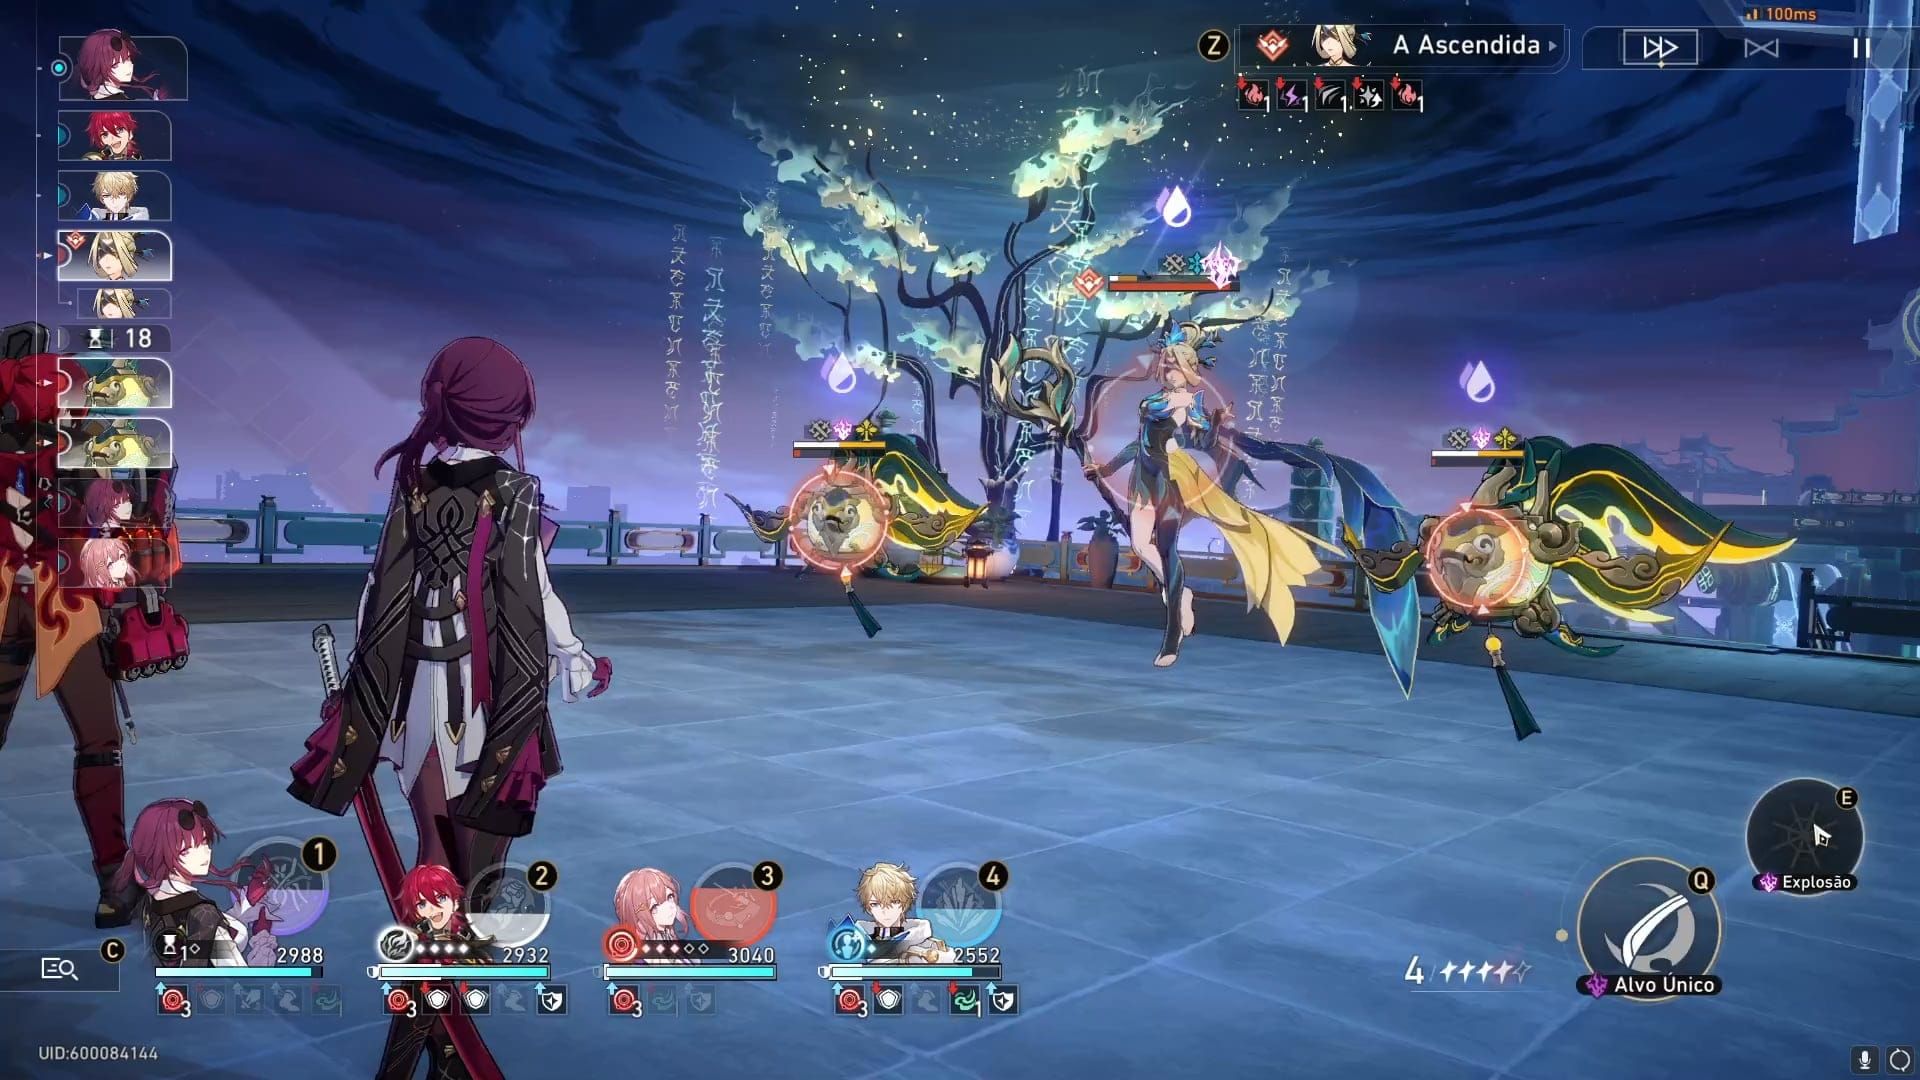
Simulated Universe World 6 Node 3: Combat Environment Analysis
Cocolia's a tank at 360 toughness, spawning Ice summons like Edges and Bronya in Phase 2. Silver Wolf's Physical implant locks in that weakness advantage—game-changer for F2P. Clears clock in at 8-12 turns if you prioritize nuking Bronya and those Edges. Abundance blessings? Dewdrop DMG and healing both scale with ATK, which is huge.
Enemy Toughness Bars and Physical Weakness Coverage
That 360 toughness bar screams for sustained Bleed pressure over raw burst breaks. A solid three-turn Bleed is your ticket to 10-turn clears. ATK% just maximizes the squeeze.
Boss Mechanics That Favor Break Strategies
Abundance Dewdrop loves ATK scaling for those drawn-out scraps. Curios like Infinitely Recursive Code (extra SP post-battle) or Normal Code (DMG reduction) keep you rolling without overcommitting.
But here's the thing—SU World 6 punishes greedy break stacking if your damage falls off.
Direct Performance Comparison: ATK% Rope vs Break Effect% Rope
Ran 20 tests with Luka/Sushang/SW/Natasha under Abundance blessings. ATK% rope delivered 15-20% more total DMG. Bleed ticks? 8.5k-12k per turn on ATK% versus 7.2k-9.8k on BE—that's 25k-35k extra over 10 turns. Enhanced Basic swung 18k-24k vs 14.5k-19k.
For folks optimizing Stellar Jade hauls to keep farming, HSR 3.8 Penacony achievement stellar jade recharge via BitTopup means secure deals and sharp prices for non-stop progress.
Damage Testing Methodology and Sample Size
Same setups across 20 Node 3 runs. BE shaved 0.5-1 turn off depletion, but the DMG gap never closed. Hit 200%+ BE? It gets competitive—but good luck perfect-rolling that as F2P.
Break Frequency and Toughness Bar Depletion Speed
Break windows last 1-2 turns; ATK% owns Enhanced Basic there. SU's sustained pace favors it every time.
Break Effect Threshold Analysis for Optimal Performance
BE starts competing at 200%+ total from substats and sets. F2P reality? 120-160% via Thief or Talia. Aim for 150% as your baseline for solid toughness DMG.
Minimum Break Effect% for Consistent Performance
Iron Cavalry Against the Scourge 2pc nets +16% BE (with bonuses at 150/250%). F2P sweet spot: 140-180% through substats. Balances break utility without gutting Bleed.
Diminishing Returns Beyond 200% Break Effect
At 250% BE, you're up 30% on break DMG over 150%—but that's just 1-2 turns per cycle. Meanwhile, you're dumping ATK/SPD/EHR. ATK% rope? Flat 15-20% gain on every ability.
Blessing and Curio Synergies in Simulated Universe
Abundance Dewdrop thrives on ATK for healing and DMG spikes. Destruction or Preservation break blessings? They trade off your F2P healing too much.
Best Blessings for ATK% Rope Builds
Healing amps pop Dewdrop more reliably since it scales ATK. Perfect match for Bleed's tick-tick-tick style.
Break Effect% Amplification Through Path Resonance
Break resonances demand non-F2P teams or blessings—overkill for Luka's kit.
F2P Team Composition Considerations
Stick to Luka/Sushang/SW/Natasha; it amps ATK% beautifully. Silver Wolf enables breaks via implant, no BE needed. Swaps like Asta/Hook/Sampo? They miss key debuffs.
Support Characters That Enhance Break Effect Builds
Champion 4pc stacks straight ATK% with your rope. Glamoth set? +12% ATK (+12/18% DMG at 135/160 SPD).
ATK% Buffers and When They Change the Equation
Stacks to 60-80% ATK amp. Outpaces BE every day.
Practical Farming and Build Path for F2P Players
SU World 6 at 40 Power drops 5-star ropes—ATK% shows up 3:1 over BE. Immersifier doubles 'em. Belobog Planars synergize hard with ATK%.
Where to Farm Link Ropes Efficiently
Difficulty 3 is your entry point—totally doable.
Interim Build Solutions While Farming Optimal Rope
4-star ATK% at 32.4% (75% of 5-star power). ERR ropes bridge for Ult stacks; swap 'em out fast.
Expert Recommendations and Common Mistakes to Avoid
Guides push ATK% for a reason—it's the meta. BE's purely situational.
The Verdict: Which Rope for Your Specific F2P Situation
ATK% wins 90% of F2P scenarios. Stack 120-150% BE via subs/sets alongside it. BE viable? Only at 200%+ with premium LCs or supports.
Common Misconceptions About Break Effect Stacking
BE boosts break DMG, not depletion speed. Folks overrate burst in these marathon fights—substat sacrifices just leave you weaker overall.
Maximizing Your Honkai Star Rail Experience with BitTopup
BitTopup handles secure, competitive top-ups for Jades and Power refreshes—lightning-fast delivery.
Accelerate Your Build Progression Efficiently
Cuts rope farming grind time. Total F2P win.
Secure and Convenient Top-Up Solutions
Broad coverage, killer ratings, top-tier service to fuel your push.
Frequently Asked Questions
Q: What is the optimal Break Effect% threshold for Luka in Simulated Universe?
A: 120-150% via subs/sets (Thief/Talia); 200%+ reduces F2P DMG.
Q: Does ATK% rope increase Luka's break damage?
A: No direct break boost; enhances Bleed (130-338% ATK) and Basic for superior total output.
Q: Which rope is better for F2P Luka Physical Break teams?
A: ATK% for scaling/synergy; BE marginal depletion unoffsets sustained loss.
Q: How much Break Effect% does Luka need for optimal performance?
A: 120-150% total via Thief/Talia while ATK% rope.
Q: Can Luka clear Simulated Universe World 6 with ATK% rope?
A: Yes; 10-12 turn clears with Luka/Sushang/SW/Natasha + Abundance.
Q: What F2P light cones work best with Break Effect% rope on Luka?
A: Eyes of the Prey/Those Many Springs (EHR/DoT); Good Night optimal for debuff stacks regardless.


