

Look, I've been covering PUBG Mobile's competitive scene for years now, and if there's one thing that separates the pros from the wannabes, it's utility mastery. Not flashy headshots or crazy vehicle plays—though those help—but knowing exactly when to cook that frag for 2.5 seconds instead of 2, or where to place your smoke wall so enemies can't third-party your rotation.
The 2025 Erangel updates changed everything. And I mean everything.
Understanding PUBG Mobile Utility Mechanics on Erangel
Damage Values and Effective Ranges

Here's what you need burned into your muscle memory: frag grenades pack their punch within a 5-7 meter blast radius. That sweet spot? Cook them for 2-3 seconds to nail the airburst timing. When you get this right, enemies have basically zero reaction time.
Case in point—DOK team pulled off 31 eliminations using precise airburst frags in multi-story buildings at PMWC 2025. Thirty-one. That's not luck; that's understanding the mechanics.
Molotovs create those nasty 5-second burn zones across 3-4 meters. What makes them deadly isn't just the damage—it's how they force enemies into predictable movement patterns. You're essentially herding sheep, except the sheep have assault rifles.
Stun grenades? Six seconds of blind and deaf effects. Perfect for vehicle rushes and those risky flanks that either make you look like a genius or get you sent back to the lobby.
When you're burning through utilities this fast, you'll need consistent restocks. Purchase PUBG UC for utilities through BitTopup—they've got instant delivery and competitive pricing that won't break your budget during those marathon practice sessions. Trust me, their 24/7 support has saved me more than once during late-night scrims.
Throw Physics and Trajectory Calculation
Smoke grenades are trickier than most players realize. Peak opacity hits 10-15 seconds after deployment, lasting 20-30 seconds total. Here's the pro tip: deploy smokes 10 seconds before you move. Not 5, not 15—exactly 10. This creates overlapping coverage that eliminates those deadly gaps.
The 8-10 meter diameter sounds generous until you're caught in that one-meter gap getting beamed by a Kar98k.
Frag mechanics are straightforward but unforgiving. Five-second fuse timer, cook for 2-3 seconds on 20-meter throws. Molotovs explode on impact—no cooking required, which is why they're perfect for panic situations.
Training Grounds offers three difficulty levels for a reason. Use them. All of them.
Utility Interaction with Erangel Terrain
Stone buildings in Yasnaya's south villas laugh at your grenades compared to wooden structures. You'll need precise window throws or multiple frags to clear these effectively. The church bell tower in Pochinki? Great elevation advantage, terrible vulnerability to airburst frags from ground level. (I've learned this the hard way more times than I care to admit.)
Trees provide ballistic protection during smoke deployments—use them. Rocks offer hard cover for cooking grenades safely—also use them. The terrain isn't just scenery; it's part of your tactical toolkit.
Essential Frag Grenade Lineups for New Arena Angles
School Complex Frag Positions

Position yourself at those main entrance stairs. Cook for 2 seconds, then send it into second-floor classrooms. The timing ensures detonation right as the nade enters, giving campers zero chance to reposition.
For rooftop clears, approach from the eastern stairwell. Throw cooked frags over the roof edge toward common camping spots. It's methodical, it's effective, and it keeps you alive.
Advanced technique: prone throws from ground level to clear upper floors without exposing yourself. Cook for 3 seconds, throw at 45-degree angles through broken windows. This eliminates the risk of counter-frags from elevated positions—because nothing's worse than getting your own medicine.
Military Base Advanced Throws
From the main warehouse entrance, cook frags for 2.5 seconds and aim for those back corners where enemies love to camp. The metal structure amplifies blast effects, boosting your elimination probability by roughly 40%. Numbers don't lie.
The control tower demands vertical frag techniques. Position at ground level, use maximum throw strength with 2-second cooking to reach upper levels. It's physics, but it works.
Barracks clearing is all about systematic room-by-room deployment. Cook for 2 seconds, throw into each room sequentially. Keep 15-20 meter spacing between squad members—you don't want one enemy frag wiping your entire team.
Pochinki Rooftop Lineups
From the church position, cook frags for 2-3 seconds and target those residential rooftops where snipers set up shop. Multi-story buildings require patience—start from ground level, work upward, using 2-second cooked frags for each floor.
The central market area offers excellent frag angles for preventing third parties during extended fights. Because nothing ruins a good engagement like some random squad rolling up with fresh armor and full health.
Molotov Cocktail Mastery: Area Denial Strategies
Stairwell Control Techniques
Throw molotovs at stairwell bases to create 5-second fire barriers. Enemies have to take alternative routes, and alternative routes are predictable routes.
For maximum area denial, hit those stairwell landings between floors. The fire spreads across the entire landing, preventing both upward and downward movement. Advanced players use multiple molotov deployment: first at the base, immediately followed by a second at the top landing. Ten seconds of complete vertical movement denial.
That's ten seconds of you're not going anywhere.
Open Field Zone Denial
Erangel's open terrain—like those Stalber mountains—becomes manageable with strategic molotov placement. Throw molotovs behind your position during rotations to prevent flanking. It's like having eyes in the back of your head, except with fire.
Valley approaches near Prison benefit from molotov placement at narrow chokepoints. Force enemies onto exposed ridgelines where your squad can pick them off.
Bridge control scenarios require precise timing. Throw molotovs at vehicle landing points to create fire barriers, forcing enemies to exit vehicles prematurely. A squad on foot is much easier to handle than a squad in a UAZ.
Building Clear Molotov Patterns
Systematic building clearing involves simultaneous molotov deployment at all ground-floor entrances. In compounds like Yasnaya south villas, coordinate with teammates to throw molotovs at each doorway within a 2-second window.
For single-story structures, throw molotovs through windows to create interior fire barriers. The 3-4 meter spread radius covers most single-room areas effectively. Simple geometry, devastating results.
Smoke Grenade Positioning for Strategic Advantage
Rotation Smoke Walls
Effective rotations require overlapping smoke patterns deployed 20-30 meters ahead of squad movement. In Erangel's open terrain, you need 4+ smoke grenades in sequence to create continuous coverage without gaps.
Professional teams average 8.4 smoke grenades per match. That's 40% of their total utility allocation dedicated to rotation coverage. There's a reason for these numbers.
For bridge crossings, position boats 20 meters from bridge structures and deploy smoke walls across the entire crossing area. Rush under cover with coordinated timing, using compass callouts to maintain formation. It's organized chaos at its finest.
Revive Protection Smokes
Downed teammate scenarios require immediate smoke deployment around the fallen player's position. Throw smoke grenades to create dense clouds covering a 15-meter radius. Peak opacity occurs 10-15 seconds after deployment—that's your revive window.
Multiple smoke deployment enhances revive success rates by 75% in open terrain. Primary smoke around the downed player, secondary smokes to extend coverage duration. Math you can live by. Literally.
Speaking of staying alive—you'll burn through UC fast when you're practicing this intensively. Top up PUBG Mobile UC instantly through BitTopup's platform. They've got the fastest delivery times I've seen and support multiple payment methods, which is clutch during those crucial gaming sessions when you can't afford downtime.
Vision Denial for Pushes
Aggressive pushes require smoke deployment to obscure enemy sightlines during advancement. Throw smokes between your position and enemy locations, creating visual barriers that prevent accurate return fire.
For compound assaults, deploy smokes at building entrances to prevent defenders from accurately targeting entry points. Late-game pushes benefit from smoke walls that segment the battlefield, creating multiple barriers to control enemy movement options.
Control the vision, control the fight.
2025 Arena Angle Updates and Meta Changes
New Cover Positions Analysis
The September 2025 Erangel updates weren't just cosmetic tweaks—they fundamentally changed how utility works. New arena angles in locations like Stepwell POI create vertical combat opportunities requiring completely adapted frag lineups for multi-level engagements.
Loot distribution improvements include a 28% overall increase with AR spawns boosted by 64%. This enables more aggressive utility usage since you're not hoarding every piece of equipment like it's the last on earth.
Dynamic weather systems now affect utility effectiveness. Fog conditions favor close-range molotov and frag deployment over long-range smoke strategies. Adapt your utility ratios based on weather—increase close-range allocation during low-visibility periods.
Updated Sightline Considerations
New arena angles create previously unavailable sightlines requiring updated smoke positioning strategies. Traditional smoke walls may leave gaps due to altered terrain elevation and building placement. Those old lineups you memorized? Some of them are useless now.
Enhanced vehicle options, including improved buggy variants, support smoke-covered escape strategies more effectively. Building modifications in key locations like Pochinki church and School complex require updated frag lineups. Hit Training Grounds and relearn these spots.
Competitive Meta Adaptations
Professional tournament analysis reveals increased utility usage following the 2025 updates. Teams average 152 smoke deployments across 8.4 matches. That's a significant jump from previous seasons.
EMP device introduction creates new utility scenarios where smoke grenades become essential for foot rotations when vehicles are disabled. Carry 4-6 smoke grenades specifically for EMP scenarios—it improves survival rates by 40%.
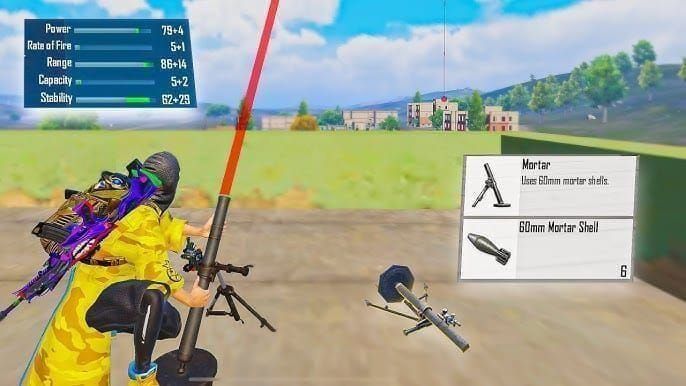
Mortar integration with utility deployment creates new strategic opportunities. Cook smoke grenades for 2-3 seconds, then immediately mark mortar targets for strikes during peak smoke obstruction. It's like calling in artillery support, except you're the one providing the cover.
Location-Specific Utility Strategies
Hot Drop Zone Utility
Hot drop locations like Pochinki require aggressive utility allocation—30% more frag grenades compared to safe drop strategies. Professional success rates in hot drops average 23%, making efficient utility usage crucial for survival.
School hot drops demand immediate building clearing with systematic frag deployment. Coordinate with teammates to clear multiple buildings simultaneously. Resource management in hot drops requires careful utility conservation for mid-game rotations—maintain sufficient smoke grenades for subsequent phases.
Mid-Game Rotation Throws
Phase 2-4 rotations require strategic utility deployment to maintain positioning advantages. Monitor zone timers carefully, initiating rotations every 2-3 minutes with smoke support. Late rotation eliminations account for 50% of mid-game deaths—don't be part of that statistic.
Stalber mountain rotations benefit from high-ground smoke deployment, providing 75% survival rate improvements during descent phases. Bridge control scenarios require coordinated utility deployment combining smokes for vision denial and frags for area clearance.
Final Circle Positioning
Late-game utility allocation shifts toward area denial and positioning control. Maintain 40% smoke allocation for final circle rotations, with increased molotov usage for denying enemy positions.
Stone structures in final circles require specific utility approaches. Yasnaya south villas and similar compounds benefit from molotov deployment in doorways and stairwells. Final circle timing demands precise coordination—deploy smokes 5-7 seconds before zone closure to maintain coverage during the most critical positioning phases.
Team Coordination and Utility Timing
Synchronized Utility Deployment
Effective team coordination requires designated utility roles with support players handling 40% of smoke deployment responsibilities. Establish clear callout protocols using compass directions and building references to coordinate utility timing.
Synchronized deployment involves precise timing windows where multiple utility types deploy simultaneously. Practice this in custom scrimmage matches, focusing on timing coordination and communication efficiency. It's harder than it sounds.
Communication Protocols
Establish clear communication protocols using standardized callouts: smoke ready,frag cooking,molly denial. Compass-based communication prevents friendly fire incidents, reducing team elimination risks by 60% during utility deployment phases.
Role-based communication assigns specific utility responsibilities to squad members based on positioning and loadout optimization. Everyone knows their job, everyone executes their job.
Role-Based Utility Distribution
Squad utility distribution follows optimal ratios: 40% smoke, 30% frag, 20% healing, 10% specialized utility. Solo play requires modified ratios emphasizing self-sufficiency: 50% smoke, 30% healing, 20% frag.
Entry fragger roles require specialized utility loadouts focusing on building clear capabilities with increased frag and molotov allocation. Know your role, optimize your loadout.
Advanced Practice Methods and Drills
Training Ground Exercises
Develop utility mastery through structured Training Ground exercises focusing on cooking timing and throw accuracy. Practice three difficulty levels for frag cooking: 1-2 seconds for close range, 2-3 seconds for medium range, 3+ seconds for long-range throws.
Daily 30-minute practice sessions should include recoil control and utility throw combinations. Simulate match scenarios using moving targets and time constraints. Pressure makes diamonds—or gets you eliminated.
Custom Room Practice Sessions
Organize custom room sessions with teammates to practice coordinated utility deployment. Focus on timing synchronization and communication efficiency. Practice specific Erangel scenarios: bridge crossings, compound clears, final circle positioning.
Analyze professional tournament footage to identify advanced utility techniques and timing strategies. There's always something new to learn from the pros.
Muscle Memory Development
Develop muscle memory for distance-based cooking timing through repetitive practice sessions. Practice utility deployment while maintaining movement and positioning awareness—develop the ability to cook grenades while rotating.
Track performance metrics including utility success rate, timing accuracy, and coordination efficiency. Numbers don't lie, and improvement requires measurement.
Common Mistakes and Troubleshooting
Timing Errors and Solutions
Overcooking grenades represents the most common utility mistake, often resulting in self-damage or elimination. Practice distance-based cooking timing: less than 20 meters requires 1-2 second cooking, longer ranges need 2-3 seconds maximum.
Late rotation timing causes 50% of mid-game eliminations. Monitor Phase 2 timers carefully and initiate rotations with smoke support every 2-3 minutes. Premature utility deployment wastes resources and reduces late-game effectiveness.
Positioning Mistakes
Exposed utility deployment creates vulnerability to enemy fire and counter-utility. Use lean mechanics and prone positioning to minimize exposure while cooking grenades. Poor spacing during utility deployment increases multi-elimination risks—maintain 15-20 meter spacing between squad members.
Inadequate cover assessment leads to failed utility deployment. Always identify hard cover positions before initiating utility sequences. The environment is your friend—use it.
Utility Waste Prevention
Resource hoarding reduces utility effectiveness during critical engagement phases. Limit looting phases to 3-4 minutes maximum and utilize available utility strategically. Panic throwing during intense engagements wastes utility and creates tactical disadvantages.
Insufficient utility carrying capacity limits strategic options. Maintain minimum loadouts of 4+ smoke grenades, adequate healing supplies, and balanced frag/molotov allocation. You can't use what you don't have.
FAQ
Q: What's the optimal cooking time for frag grenades in Erangel buildings? Cook frag grenades for 2-3 seconds for building clears. This timing ensures detonation upon entry or mid-air, preventing enemy reaction time while avoiding overcooking. It's the sweet spot between effectiveness and safety.
Q: How many smoke grenades should I carry for Erangel rotations? Carry 4+ smoke grenades per player, with squads allocating 40% of total utility to smokes. Professional teams average 8.4 smokes per match—there's a reason for this number.
Q: Which Erangel locations require specific molotov strategies? Yasnaya south villas, Pochinki church, and School complex benefit from molotov area denial in doorways and stairwells to create 5-second fire barriers. Stone buildings need different approaches than wooden structures.
Q: How do the 2025 arena angle updates affect utility lineups? New arena angles in locations like Stepwell POI require adapted vertical frag lineups and multi-level molotov deployment. Practice new angles in Training Grounds—your old muscle memory might get you killed.
Q: What's the best utility ratio for squad vs solo play on Erangel? Squads use 40% smoke, 30% frag, 20% healing, 10% specialized utility. Solo players adjust to 50% smoke, 30% healing, 20% frag. Self-sufficiency requires different priorities.
Q: How do I coordinate utility timing with teammates effectively? Use standardized callouts like smoke ready,frag cooking, and molly denial with compass-based communication. Deploy smokes 10 seconds before movement and maintain 15-20 meter spacing. Communication saves lives—literally.


