

What Makes Vourukasha’s Glow Tick
Breaking Down Those Set Effects
Released back in April 2023, Vourukasha’s Glow starts simple with that +20% HP bonus for two pieces. But the 4-piece? That’s where things get interesting—and complicated.
You start with a modest 10% damage boost to your Elemental Skill and Burst. Then every time you take damage, you stack up another 8% (that’s 80% of the original 10%, not a flat addition). Five stacks max, each lasting 5 seconds independently. Do the math and you’re looking at 50% total damage bonus at peak performance.
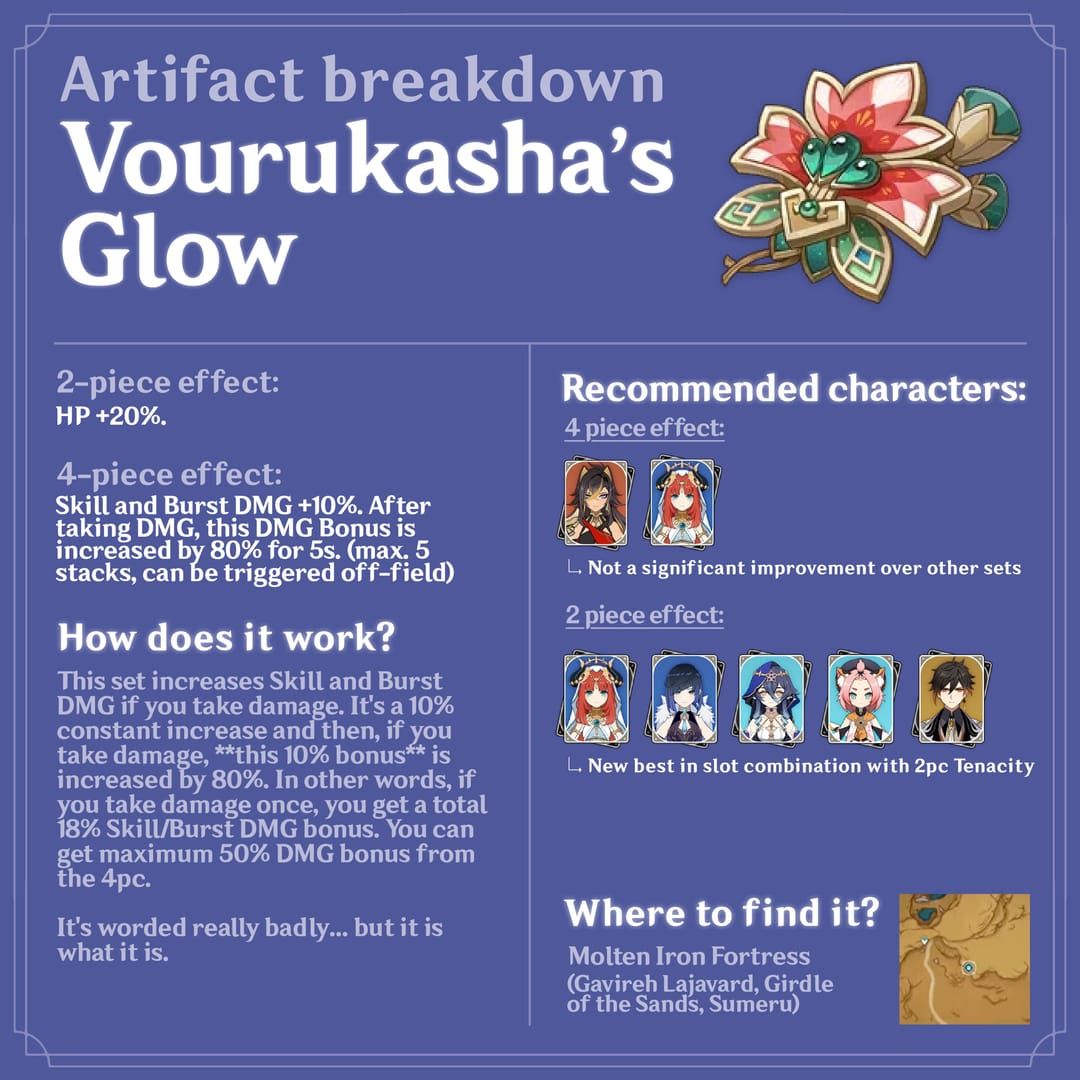
Here’s the kicker though—your character needs to actually take damage to make this work. Even when they’re chilling off-field. It’s not about dodging everything perfectly; sometimes you want to face-tank that hit.
For efficient artifact farming, Genesis Crystals best value deal through BitTopup keeps your resin refreshes affordable. Trust me, you’ll need them.
The Stacking Game
Each stack runs on its own 5-second timer. Miss that window? You’re back to building up again. It’s not like other artifact sets where you trigger an effect and forget about it—this one demands constant attention to your health bar.
Head-to-Head: Vourukasha’s vs Emblem
Raw Numbers Don’t Tell the Whole Story
Sure, that 50% damage bonus at max stacks looks impressive next to EoSF’s typical 25-30% Burst increase. But here’s what the spreadsheets don’t capture—consistency matters more than peak performance in most scenarios.
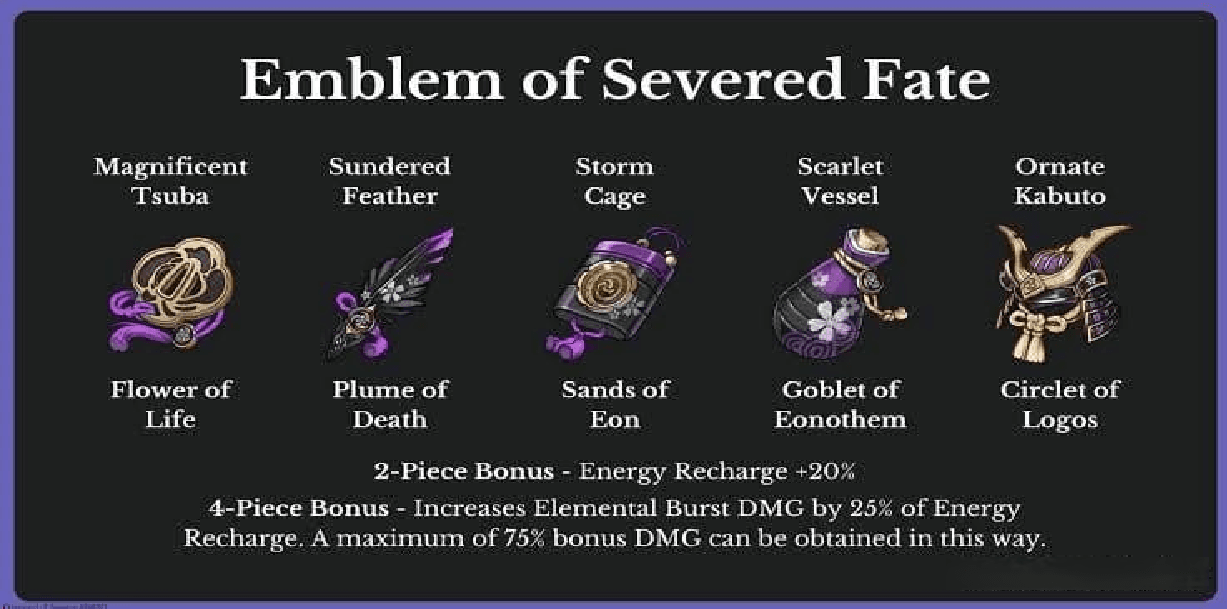
EoSF gives you that sweet 20% Energy Recharge bonus. Characters like Dehya who need 160-180% ER to function properly? They’re suddenly scrambling to find that stat elsewhere when using Vourukasha’s. You end up running Favonius weapons or dedicating a team slot to battery duty.
The energy management headache is real. I’ve seen too many players chase those big damage numbers only to find their rotations falling apart because their Burst isn’t ready when they need it.
Rotation Reality Check
EoSF enables smooth, predictable gameplay loops. With Vourukasha’s, you’re constantly managing two things: your energy economy and your damage intake. Miss either one and your DPS tanks harder than a poorly-built Zhongli.
Who Actually Benefits in 2025?
The S-Tier Pick
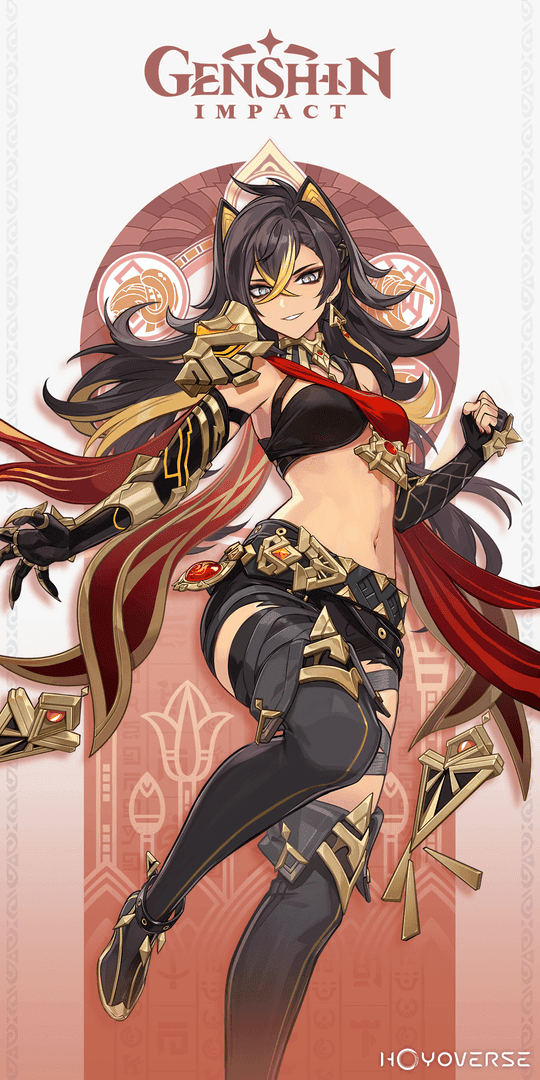
Dehya stands alone as the premier 4-piece user, and it’s not even close. Her Elemental Skill creates this beautiful synergy where she can take damage for your active character, triggering stacks while staying safe off-field.
Build her with ATK% Sands (HP% if you’ve got C1 or higher), Pyro DMG Goblet, and your best CRIT circlet. The stat priority dance goes: CRIT Rate/DMG > ATK%/HP% > Energy Recharge. That last one’s still a pain point, honestly.
Nilou claims the 2-piece crown. That +20% HP translates directly into beefier Bountiful Cores, and with her passive scaling up to 400% damage per 1000 HP above 30k? It’s a no-brainer. Pair it with 2-piece Tenacity and watch those numbers soar.
The Supporting Cast
Kirara gets tankier shields. Yelan’s Skill hits harder. Kokomi heals more. These aren’t game-changing improvements, but they’re solid quality-of-life upgrades for characters already built around HP scaling.
Need those discount Genesis Crystal bundles? BitTopup’s got reliable service and competitive rates for your artifact farming needs.
The Maybe Pile
Baizhu, Candace, Sigewinne—they can use the 2-piece for support builds where every bit of HP helps their utility. The 4-piece on Yelan or Xingqiu though? I’m skeptical. EoSF’s energy benefits are just too valuable to give up.
When Vourukasha’s Actually Wins
Perfect Storm Scenarios
You need three things aligned: external energy sources, consistent damage intake, and high investment. Bennett as your battery, environmental damage ticking away, and artifacts good enough to hit those ER thresholds through substats alone.
C1+ Dehya builds hit this sweet spot. Better energy generation, improved HP scaling, and enough constellation power to justify the farming investment.
Dendro Bloom teams create natural synergy. Those cores exploding in your face? That’s free stack generation right there.
Team Building Around the Set
When you’re running multiple HP-scaling characters, suddenly that domain farming feels worthwhile. Both the 2-piece and 4-piece effects start pulling their weight across your roster instead of just one character.
Stats That Actually Matter
Main Stat Priorities
For damage dealers: C0 Dehya wants ATK% Sands, C1+ can swap to HP% thanks to better scaling. Always grab that Elemental DMG Bonus Goblet—it’s too good to pass up.
HP-scaling supports: Stack that HP% wherever you can, though sometimes an Elemental DMG Goblet still wins out for overall damage.
The Substat Shuffle
Here’s where things get tricky. 4-piece users need 20-30% ER from substats to replace what they’re losing from EoSF. That’s 3-4 pieces with decent ER rolls, which… good luck with that RNG.
CRIT stats follow the usual 1:2 ratio dance. HP-scaling characters prioritize HP% substats, then ER and CRIT based on their role.
DPS Dehya specifically needs that 160-180% ER for consistent Burst uptime. It’s non-negotiable, which makes building her properly a real challenge.
Farming Strategy
Domain Deep Dive
Molten Iron Fortress in Sumeru houses both Vourukasha’s Glow and Nymph’s Dream. The Ley Line Disorder gives 150 EM after Dendro reactions—nice if you’re running those teams, irrelevant otherwise.
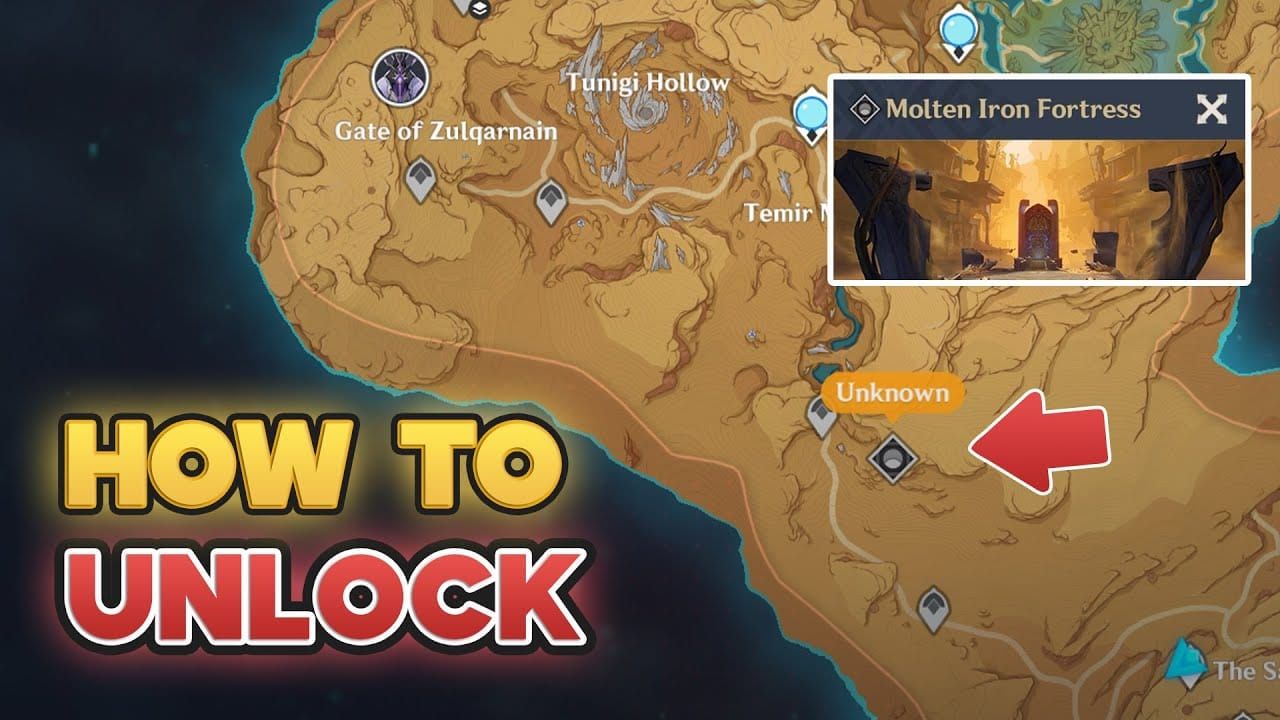
Enemy lineup: two Mitachurls followed by Anemo and Hydro Hilichurl Rogues. Nothing too scary, but the grouping can be awkward.
Smart Farming Approach
Honestly? Consider the Artifact Strongbox instead. This domain’s less resin-efficient than the EoSF domain because both sets serve niche character rosters. Farm universal domains and convert your trash 5-stars.
Only farm directly when you need both sets for multiple characters. Otherwise, you’re better off elsewhere.
Team Synergies That Work
Elemental Reactions
Bloom teams are natural partners—those Dendro Cores exploding create perfect damage intake for stacks. Nilou + Nahida teams can utilize both the 2-piece HP bonus and 4-piece damage scaling beautifully.
Bennett remains the MVP support. Energy generation plus healing management for when you need to take calculated damage. Zhongli creates problems though—his shields prevent the damage intake you actually want.
Abyss Applications
Specific floors with environmental damage or unavoidable attacks favor the set. Multi-wave chambers give better stack uptime. Single-target bosses? You might struggle to maintain stacks consistently.
Making the Switch
Transition Strategy
The biggest hurdle is replacing that 20% ER from EoSF. Secure your energy requirements through substats or weapon swaps before making the jump. Favonius weapons become your friend during this transition.
Prioritize keeping your rotations smooth over chasing maximum damage initially. You need higher-quality artifacts to make Vourukasha’s work compared to the more forgiving EoSF builds.
Success Metrics
A successful transition maintains or improves your overall DPS while keeping rotations consistent. Your Burst should be ready within 15-20 second windows. If you’re waiting longer, something’s wrong with your energy economy.
Meta Reality Check
Where It Stands Now
A-Tier positioning feels right—useful but limited. It’s a specialized optimization tool rather than a broad recommendation. The niche nature keeps it from S-Tier status alongside EoSF and VV.
Future Fontaine characters might expand its viability, especially with the design philosophy leaning into HP-based scaling. Each new HP-scaling character makes that 2-piece bonus more valuable across your account.
Looking Ahead
Long-term viability depends on continued character releases that utilize these unique mechanics. The fundamental energy management challenges aren’t going anywhere though, keeping EoSF as the more practical choice for most players.
FAQ: The Real Questions
Should I farm this domain or use Strongbox? Strongbox wins for efficiency. Farm EoSF domain and convert unwanted pieces. Only farm Molten Iron directly when you need both sets for multiple characters.
Does this work with shields? Nope. The 4-piece needs actual HP damage, which shields prevent. Zhongli users are out of luck for the damage bonus, though the 2-piece HP still helps.
How much better is it than EoSF for Dehya? At perfect conditions with max stacks? About 15-25% higher Skill/Burst damage. But that requires consistent damage intake and hitting ER thresholds through other sources. EoSF gives more reliable performance for most players.
Which characters actually use the 2-piece well? Any HP-scaling character: Nilou for Core damage, Yelan for Skill damage, Kokomi for healing, Kirara for shields. Pair with 2-piece Tenacity for maximum HP stacking.
Worth farming as a new player? Absolutely not. Focus on versatile sets first: EoSF, VV, Noblesse. These benefit multiple characters and provide better account progression. Consider Vourukasha’s only after you’ve got the universal sets covered.
How exactly does the damage calculation work? Start with 10% Elemental Skill/Burst bonus. Each stack adds 8% (that’s 80% of the base 10%). Five stacks max gives you 10% + (5 × 8%) = 50% total. Each stack’s 5-second timer runs independently, so you need consistent damage to maintain maximum effectiveness.


