

Here’s something that trips up a lot of players—the fundamental difference between off-field and on-field DPS characters completely changes how you build teams. Off-field powerhouses like Xiangling keep dealing damage even when they’re not actively on the field, while on-field specialists like Yoimiya need that precious screen time to shine.
This creates vastly different team dynamics. And honestly? It’s why Xiangling has dominated the meta for years while Yoimiya… well, she’s more situational. For optimal team compositions, exploring Primogem plan via crystals through BitTopup’s secure platform ensures you have resources needed to build these powerful Pyro teams efficiently.
Understanding Off-Field vs On-Field Pyro Mechanics
Snapshot Mechanics Explained

This is where things get technical—but stick with me because understanding snapshots is crucial for maximizing Xiangling’s potential.
Xiangling’s Elemental Burst (Pyronado) and Elemental Skill (Guoba Attack) both snapshot buffs. What does that mean? Once you cast these abilities, they remember whatever buffs were active at that moment for their entire duration. So you want to stack every possible buff before hitting that Burst button.
A typical rotation looks like this: Bennett drops his Burst for that juicy ATK buff, your Anemo character swirls for resistance shred, then Xiangling casts her abilities to lock in those powerful but temporary buffs. It’s like taking a photograph of your stats at their peak.
Yoimiya? She’s the complete opposite. Her Pyro-infused Normal Attacks use dynamic scaling—they calculate damage in real-time. Buffs need to stay active while she’s attacking, which makes her much more dependent on supports with long-duration effects.
Pyro Application Rates
Here’s where Xiangling really flexes. Her Pyronado applies Pyro without internal cooldown restrictions after the initial hits, enabling consistent elemental reactions on every single strike. We’re talking about reaction city across multiple enemies simultaneously.
Yoimiya follows standard ICD rules (Internal Cooldown—basically the game’s way of preventing reaction spam). She applies Pyro every 2.5 seconds or every 3 hits. In her 7-hit Normal Attack string, reactions trigger on the 1st, 4th, and 7th hits. Sure, these correspond to her highest damage multipliers, but it’s still way less frequent than Xiangling’s consistent application.
Xiangling Character Analysis: Off-Field Pyro Queen
Skill Rotation and Snapshot Timing
Getting Xiangling’s rotation right is like conducting an orchestra—timing is everything.
The optimal sequence prioritizes buff application: Bennett Burst → Anemo character for VV shred → Xiangling Burst and Skill. This ensures Pyronado snapshots Bennett’s ATK buff and those sweet elemental damage bonuses from Anemo supports.
Pro tip: Don’t sleep on her Elemental Skill. Guoba deals substantial damage comparable to individual Pyronado hits when properly positioned and buffed. I’ve seen too many players treat him like an afterthought.
Bennett’s Burst provides a 12-second buff field, while most Anemo abilities offer 8-10 seconds of resistance shred. That’s your timing window right there.
Constellation Impact on Performance
C4 Xiangling is where the magic happens. This constellation extends Pyronado’s duration from 10 to 14 seconds—that’s a 40% increase in uptime and damage. It literally transforms her from strong support to premier DPS character capable of carrying entire team compositions.
Other notable constellations include C1’s 15% Pyro resistance shred from Guoba and C6’s party-wide 15% Pyro damage bonus. But honestly? C4 is the game-changer.
The beauty of 4-star constellations is accessibility. Most players will eventually hit C4 Xiangling through regular summoning, unlike those wallet-crushing 5-star constellations.
Optimal Artifact and Weapon Builds
4-piece Emblem of Severed Fate is Xiangling’s best friend. This set converts her high Energy Recharge requirements into raw damage—20% ER plus Elemental Burst damage increase of 25% of total ER (capped at 75% bonus). With typical builds reaching 200% ER, you’re looking at a 50% Burst damage increase while solving energy issues. Win-win.
The Catch at R5 is practically made for her: 45.9% Energy Recharge and 32% Elemental Burst damage increase with an additional 12% CRIT Rate for Burst damage. It’s free from fishing, too.
Main stat priorities: Energy Recharge or Elemental Mastery Sands, Pyro Damage Goblet, and CRIT Rate/Damage Circlet. ER requirements range from 185% to over 300% depending on your team—test your rotations to find your sweet spot.
Yoimiya Character Analysis: On-Field Normal Attack Specialist
Normal Attack Combo Optimization

Yoimiya’s damage is all about that Normal Attack string, particularly the 5th attack (7th hit) which accounts for 25-30% of her total combo damage. During her Elemental Skill’s 10-second duration, 92-96% of her damage comes from Normal Attacks. She’s specialized, I’ll give her that.
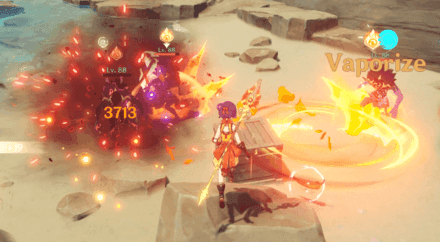
The ICD on her attacks allows Vaporize reactions on her 1st, 4th, and 7th hits—conveniently her strongest attacks. But this requires precise coordination with Hydro applicators like Xingqiu or Yelan.
Support Requirements and Team Positioning
Here’s Yoimiya’s biggest weakness: she desperately needs interruption resistance. Getting staggered mid-combo is a DPS killer.
Zhongli provides unbreakable shield and universal 20% resistance shred—he’s basically Yoimiya’s bodyguard. Xingqiu offers damage reduction and interruption resistance while enabling Vaporize reactions. Alternative protection includes Thoma’s stacking shield, Beidou’s damage reduction, and Dehya’s coordinated attack damage reduction.
Team positioning becomes crucial when using supports with limited range. Bennett’s Burst field isn’t infinite, and various shield abilities require careful positioning throughout Yoimiya’s attack sequences.
Direct Performance Comparison: DPS and Utility
Single Target vs AoE Scenarios
This is where the fundamental difference becomes crystal clear.
Xiangling excels in multi-target scenarios because Pyronado hits everything while applying Pyro for reactions. Her damage scales multiplicatively with enemy count—more enemies equals exponentially more damage. Yoimiya specializes in single-target elimination, capable of quickly deleting individual bosses, but her strict single-target nature significantly reduces effectiveness against grouped enemies.
The performance gap widens dramatically in Xiangling’s favor as enemy count increases. It’s not even close in AoE situations.
Spiral Abyss Performance Analysis
Community tier lists tell the story: Xiangling consistently ranks S or SS tier for off-field DPS, while Yoimiya typically appears in A-C tiers for on-field DPS. Xiangling’s teams, particularly National variants, maintain consistent clear times across diverse Abyss rotations due to their flexibility and high damage output.
Yoimiya’s performance? It fluctuates dramatically based on Abyss composition. Chambers favoring single-target damage showcase her strengths, while multi-target or high-mobility encounters highlight her limitations.
For players serious about Spiral Abyss progression, accessing Genesis Crystals pull saver pack through BitTopup’s competitive pricing ensures optimal character building while maintaining budget efficiency for long-term account development.
Team Synergy and Composition Strategies
Xiangling Core Teams and Variations
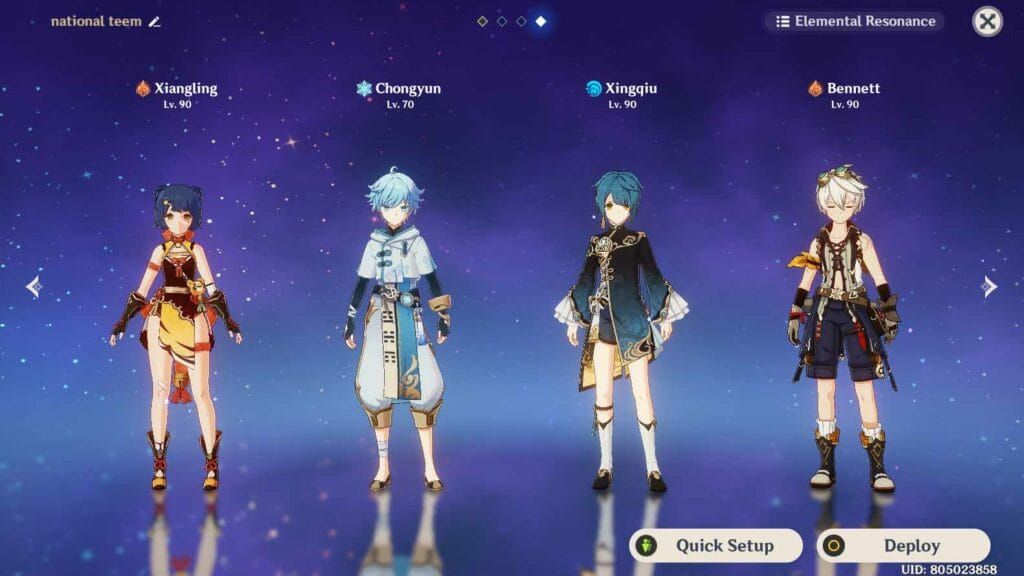
The National Team archetype is Xiangling’s claim to fame: Xiangling, Xingqiu, Bennett, plus a flexible fourth member. This team functions through Xiangling triggering Vaporize on every Pyronado hit from Xingqiu’s off-field Hydro application, all while buffed by Bennett’s ATK boost. Simple concept, devastating execution.
The International variant elevates this by replacing the fourth slot with Tartaglia and Kazuha, creating one of the game’s highest damage ceiling teams. Rational (Raiden National) substitutes Raiden Shogun for the Anemo slot, solving energy issues while adding substantial Electro damage.
These aren’t just good teams—they’re meta-defining compositions that have remained relevant for years.
Yoimiya Optimal Team Compositions
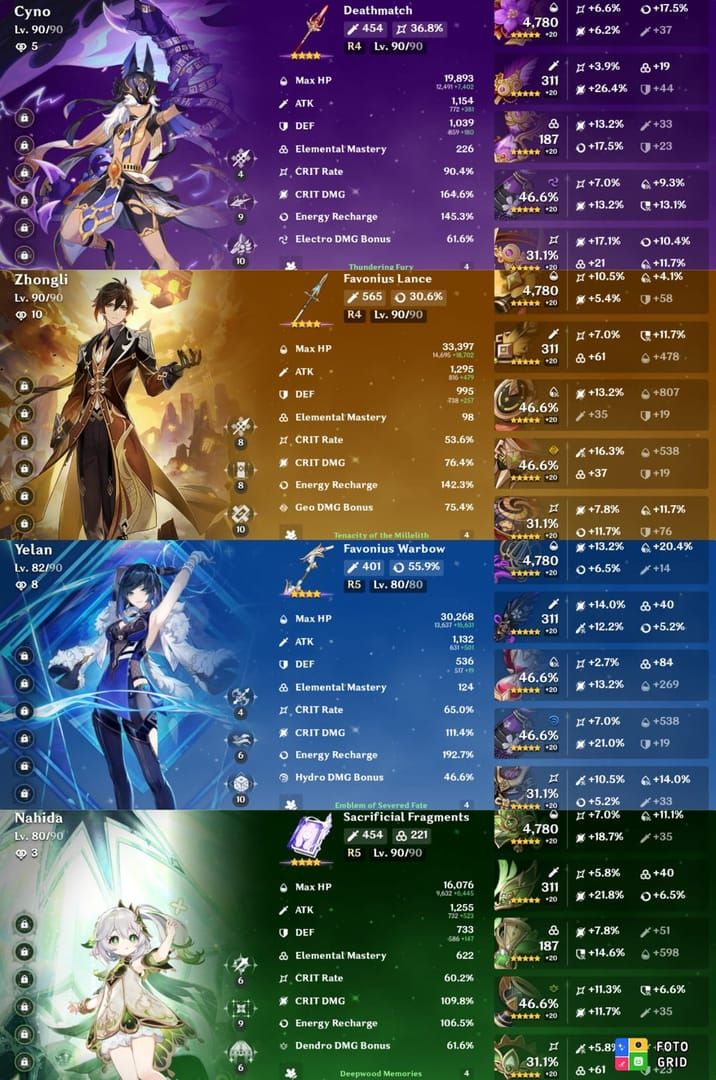
Yoimiya’s Vaporize teams pair her with off-field Hydro applicators like Yelan or Xingqiu, enabling reactions on her strongest Normal Attacks. Typical compositions include Yoimiya, Hydro support, buffer (Yun Jin or Bennett), and shielder (Zhongli).
Overvape teams apply both Hydro and Electro to create Electro-Charged auras, allowing Yoimiya’s Pyro attacks to trigger both Overloaded and Vaporize simultaneously. It’s more complex but can be quite effective.
The introduction of Chevreuse has made Overload teams highly competitive, requiring only Pyro and Electro characters. Teams like Yoimiya, Chevreuse, Fischl, and Bennett provide resistance shred, ATK buffs, and healing while maintaining reaction consistency.
Resource Investment and Prioritization
F2P Player Recommendations
Here’s my honest take as someone who’s guided countless F2P players: Xiangling represents optimal Pyro investment.
She’s free from Spiral Abyss Floor 3, her best weapon (The Catch) is free from fishing, and her core teams use accessible 4-star characters. Her talent priority is straightforward: Elemental Burst first, Elemental Skill second, Normal Attacks can stay at level 1.
Yoimiya requires substantial investment as a 5-star character. While her F2P weapon options like the 3-star Slingshot provide surprising effectiveness when properly supported, overall team investment typically exceeds what F2P players can efficiently manage.
Constellation Investment Priority
C4 Xiangling is the goal. That 40% duration increase on Pyronado transforms her from strong support to premier DPS. Prioritize reaching C4 over other character investments when possible.
Yoimiya’s C2 provides a significant 25% Pyro damage bonus with high uptime, making it her most valuable early constellation. But here’s the thing—the accessibility difference between 4-star and 5-star constellations makes Xiangling’s power spikes achievable for most players.
Meta Analysis and Future Considerations
Current Abyss Meta Positioning
Xiangling maintains consistent meta relevance across Abyss rotations due to her flexibility and team variety. National team variants adapt to different chamber requirements through fourth slot adjustments, maintaining competitive clear times regardless of specific enemy compositions.
Yoimiya’s meta positioning fluctuates based on Abyss design. She performs exceptionally in single-target focused rotations while struggling in AoE-heavy chambers.
The trend toward diverse enemy types and mechanics in recent Abyss rotations generally favors flexible characters like Xiangling over specialized units like Yoimiya. Though specific chambers can still showcase single-target specialists effectively.
Frequently Asked Questions
Is Xiangling better than Yoimiya in Genshin Impact? In most scenarios, yes. Xiangling generally outperforms Yoimiya in meta rankings due to her off-field AoE damage, snapshot mechanics, and team flexibility. She consistently ranks S-tier for off-field DPS while Yoimiya typically places in A-B tiers. Xiangling’s ability to deal damage while off-field allows for higher total team DPS, and her teams adapt better to various Spiral Abyss chambers.
How much Energy Recharge does Xiangling need for optimal performance? Typically 200-220% ER with Bennett as battery and The Catch weapon for consistent Burst uptime. In Raiden teams, requirements drop to 195-205%. Without Bennett or in particle-poor teams, requirements can exceed 300%. Test your rotations to ensure Burst availability every 20-21 seconds—that’s your benchmark.
What are the best team compositions for Xiangling vs Yoimiya? Xiangling’s premier teams include National (Xiangling, Xingqiu, Bennett, flex), International (Childe, Kazuha, Bennett, Xiangling), and Rational (Raiden, Xingqiu, Bennett, Xiangling). Yoimiya’s optimal teams focus on Vaporize (Yoimiya, Yelan/Xingqiu, Bennett, Zhongli) or Overload (Yoimiya, Chevreuse, Fischl, Bennett) compositions.
Which character is more F2P-friendly for new players? Xiangling, hands down. She’s free from Spiral Abyss Floor 3, her best weapon (The Catch) is free from fishing, and her core teams use accessible 4-star characters. Yoimiya requires gacha investment as a 5-star character with teams often including other 5-star supports.
How do constellation levels affect their relative performance? C4 represents Xiangling’s most crucial upgrade—40% Pyronado duration increase that dramatically boosts damage output. Yoimiya’s C2 provides substantial 25% Pyro damage bonus. The key difference? 4-star constellations are more achievable through regular summoning, making Xiangling’s power spikes realistic for most players.
Can Yoimiya replace Xiangling in National team compositions? No, and here’s why: National teams rely on Xiangling’s off-field Pyro application to enable reactions while allowing an on-field driver to contribute additional damage. Yoimiya’s on-field requirements would conflict with this dynamic, reducing overall team effectiveness. They serve fundamentally different roles.


