Understanding Anomaly Support in ZZZ 2.6
Anomaly Support accelerates Anomaly Buildup rates while amplifying attribute damage multipliers—critical for endgame content where maximizing Anomaly triggers determines clear times.
Aria functions as self-sufficient Ether Anomaly DPS. Sunna operates as Physical Support enhancing teammates' Anomaly accumulation. Key difference: Anomaly Mastery scaling directly increases trigger damage, making it the primary stat over ATK%.
Pity system: 0.6% S-Rank rate increases to 6% at soft pity (75 pulls), guaranteed at 90. Securing featured characters demands up to 180 pulls or 28,800 Polychrome. Buy ZZZ Monochrome instant recharge through BitTopup for guaranteed banner pulls with competitive pricing.
What Makes Anomaly Support Different
Traditional supports provide shields, healing, or ATK buffs. Anomaly Support manipulates the Anomaly gauge—a separate damage system triggering elemental reactions when filled.
Anomaly Buildup operates independently from standard damage. Each hit contributes to a hidden gauge that triggers massive attribute damage based on Anomaly Mastery when full. Sunna's kit reduces hits required to trigger by 15-20% in optimized teams.
Team slot allocation shifts: one Anomaly DPS, one Anomaly Support for acceleration, one flex slot for utility or attribute coverage.
Aria and Sunna in Current Meta
Aria's Ether attribute bypasses resistances in Shiyu Defense floors 10-15. Her signature W-Engine provides 30% Anomaly Mastery at level 60, translating to 18-22% increased trigger damage.
Sunna's Special grants allies 12% Anomaly Buildup efficiency per stack (max 3), reducing time-to-trigger by one rotation cycle. Universal application across Physical, Ether, Electric, and Fire teams.
Phase 1 banner (Feb 6-27) provides 21 days. Daily commissions yield 1,260 Polychrome (60/day) plus 300 weekly—only 9-10 pulls without additional resources.
Key Mechanics: Anomaly Buildup and Mastery
Buildup rates:
- Basic attacks: 2-4% per hit
- Special skills: 15-25% per activation
- Ultimate skills: 30-40%
Anomaly Mastery scaling: 300 Mastery deals 2.5x base damage vs 100 Mastery. Highest-priority main stat for Slot 4 Drive Discs, surpassing ATK%.
Aria needs balanced Buildup/Mastery. Sunna prioritizes Energy Regeneration (15-20% Slot 6) for buff uptime over personal damage.
Aria Character Overview

Aria's Basic Attack chain (5 hits) culminates in 18% Anomaly gauge contribution. Basic Attack is highest-priority skill for leveling.
Special skill applies 15% Ether damage debuff for 12 seconds, stacking multiplicatively with Mastery bonuses. Costs 80 energy (6-7 Basic hits without Energy Regen substats).
Ultimate guarantees Anomaly trigger if gauge exceeds 70% before activation. Rewards precise timing.
Skills and Passives
Skill priority: Basic > Special > Ultimate > Dodge > Assist
Passive grants 5% Anomaly Mastery per Ether Anomaly trigger (max 3 stacks). Self-amplifying in 90+ second encounters.
Dodge Counter (0.3s window) refunds 30 energy, reducing Special rotation from 6-7 hits to 4-5 hits.
Team Positioning
Aria needs 8-10 seconds field time for full rotation. Incompatible with quick-swap compositions.
Ideal structure: Aria (primary DPS) + Sunna (support) + flex (secondary Anomaly or defensive utility)
Position Aria in Slot 1 for immediate deployment, gaining 2-3 seconds uptime during spawn animations. Compounds to 10-15 second reduction across multi-wave content.
Best Teammates
Sunna: Reduces Aria's time-to-trigger from 12s to 8-9s, enabling additional procs. Synergizes with Aria's passive stacking.
Nicole: Defense shred stacks multiplicatively with Aria's Ether debuff for 40%+ damage amplification. Sacrifices Sunna's Anomaly acceleration.
Stunners: Create vulnerability windows for uninterrupted rotations, guaranteeing triggers during stun states.
Sunna Character Overview

Sunna's Special applies team buff: 12% Anomaly Buildup efficiency per stack (max 3). Maintaining three stacks requires 60%+ Energy Regeneration.
Ultimate provides Physical burst while refreshing buff durations by 6 seconds. Extension mechanic enables permanent uptime in extended encounters.
Signature W-Engine provides 60% Energy Regeneration at level 60, reducing Special charge from 80 to ~50 energy. Activates buff every 6-7s instead of 9-10s.
Skills and Passives
Skill priority: Special > Ultimate > Basic > Assist > Dodge
Special receives max priority—each level increases buff magnitude (0.8%/level) and duration (0.5s/level). Max level: 15% Buildup for 14 seconds.
Passive generates 3 energy/second when teammates trigger Anomaly. Creates feedback loop—more triggers = more energy = more buffs = faster triggers. Contributes 30-40% total energy in optimized teams.
Ultimate's damage (450% ATK max level) is secondary to buff extension. Time activation to refresh expiring buffs, not maximize damage windows.
Buildup Amplification
Sunna's buffs multiply, not add. Base 20% Buildup becomes:
- 1 stack: 22.4%
- 2 stacks: 24.8%
- 3 stacks: 27.2%
Compounds with character bonuses for 50%+ total amplification.
Practical impact: Reduces rotations from 2.5-3 to 1.5-2 on high-resistance enemies—effectively doubling trigger frequency.
Each 10% Energy Regen reduces Special charge by ~1.5s. 20% Slot 6 + 60% signature W-Engine = near-permanent buff uptime.
Unique Support Mechanics
Traditional supports provide static buffs. Sunna's dynamic system scales with team performance, rewarding optimized rotations with exponential returns.
Physical attribute limitation: Buffs apply universally to all Anomaly Buildup regardless of attribute. Personal damage minimal in non-Physical teams.
Zero survivability utility. Teams must rely on dodge mechanics and stun windows. High skill floor balances exceptional ceiling.
Complete Prefarm Checklist
Per character ascension (0-60):
- 800,000 Denny
- 4 Basic Certification Seals
- 32 Advanced Certification Seals
- 30 Superior Certification Seals
Skill upgrades (all skills 1-10):
- 2,905,000 Denny
- 25 Basic Chips
- 75 Advanced Chips
- 250 Specialized Chips
Both characters total: 7,410,000 Denny minimum
Zenless Zone Zero Monochrome top up through BitTopup provides necessary Polychrome with instant delivery before banner deadlines.
Ascension Materials
Level brackets:
- 10-20: 24,000 Denny + 4 Basic Seals
- 20-30: 56,000 Denny + 12 Advanced Seals
- 30-40: 120,000 Denny + 20 Advanced Seals
- 40-50: 200,000 Denny + 10 Superior Seals
- 50-60: 400,000 Denny + 20 Superior Seals
Hollow Zero yields 200,000-300,000 Denny weekly. Three weekly runs generate one character's ascension Denny across three weeks.
Superior Seals drop from level 50+ Combat Commissions (40 stamina/run, 1-2 seals). 30 seals require 15-30 runs (600-1,200 stamina)—5-10 days natural regeneration.
Skill Chip Farming
Requirements per character:
- Basic: 25 (20 stamina/run, 4-6 drops)
- Advanced: 75 (30 stamina/run, 2-3 drops)
- Specialized: 250 (40 stamina/run, 1-2 drops)
Aria needs Ether chips. Sunna needs Physical chips.
Specialized Chips are primary bottleneck: 250 chips at 1-2/run = 125-250 runs (5,000-10,000 stamina). At 144 daily natural stamina: 35-70 days per character.
Optimal strategy: Farm Specialized days 4-7 weekly (240-320 stamina daily) = 6-16 chips weekly. Requires 16-42 weeks per character.
Advanced (75): 25-38 runs (750-1,140 stamina) Basic (25): 4-7 runs (80-140 stamina)
Boss Materials
Aria: 9 Clouded Crystalline Substance + 60 Higher Dimensional Data: Spiked Corruption Core
Drops from Notorious Hunt (3/clear, max 3 weekly clears). 60 cores demand 20 weeks consistent clears.
Sunna: 9 Clouded Crystalline Substance + 60 Expert Challenge Materials
Expert Challenge drops guaranteed at 40 Battery/run. 60 materials = 60 runs (2,400 Battery) across 4-6 weeks.
W-Engine Materials
Level 0-60 requirements:
- 400,000 Denny
- 4 Basic Components
- 32 Reinforced Components
- 30 Specialized Components
- 200 W-Engine Energy Modules
Energy Modules: 3-5/run from Combat Commissions. 200 modules = 40-67 runs (1,600-2,680 stamina)—11-19 days.
Specialized Components: 15-30 runs (600-1,200 stamina)—4-8 days.
Aria's signature: Base ATK 713, 30% Anomaly Mastery. Translates to 150-180 additional Mastery with Drive Discs = 18-22% trigger damage increase. 15-20% damage over free alternatives.
Sunna's signature: Base ATK 713, 60% Energy Regen. Enables near-permanent buff uptime. 25-30% team damage increase vs free options.
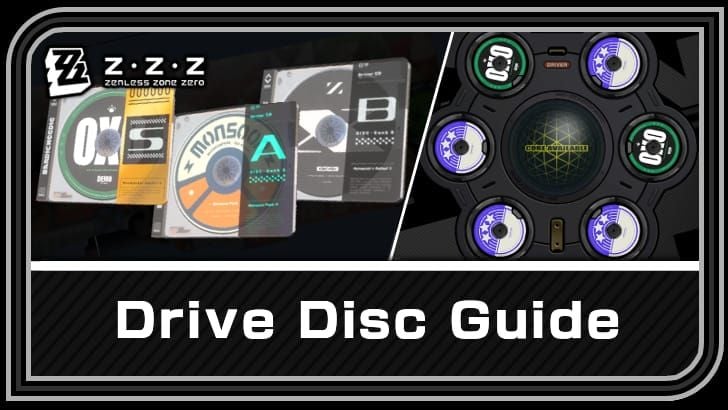
Drive Disc Sets and Main Stats

Six-slot system: 4-piece set + 2 off-pieces OR two 2-piece sets + 2 off-pieces. For Anomaly characters, 4-piece bonuses provide superior value.
Slots 1-3: Fixed stats (HP/ATK/DEF) Slots 4-6: Variable main stats
Slot 4 = highest impact. Anomaly Proficiency provides 2-3x value of ATK% for Anomaly characters.
Best Sets for Aria
Chaos Jazz 4-piece: +30 Anomaly Proficiency = 12-15% Buildup increase. Universal best-in-slot. 2-piece (+15) offers half value—4-piece mandatory.
Hormone Punk 4-piece: +25% ATK above 80% HP. Competitive with Chaos Jazz when Buildup exceeds requirements (with Sunna).
Hybrid (Chaos 2pc + Hormone 2pc): 10-15% damage loss vs optimized 4-piece. Temporary solution only.
Main stats:
- Slot 4: Anomaly Proficiency (mandatory)
- Slot 5: Ether DMG%
- Slot 6: ATK% (or Anomaly Mastery with Sunna)
Best Sets for Sunna
Swing Jazz 4-piece: +15% ally ATK on EX Special (12s duration). Aligns with support role.
Shockstar Disco 4-piece: +6% Impact on Chain/Ultimate. Suits stun-lock strategies—situational.
Freedom Blues 2pc + Swing Jazz 2pc: Hybrid providing 80-85% optimization while farming optimal pieces.
Main stats:
- Slot 4: HP% or DEF% (survivability)
- Slot 5: Physical DMG% (minimal impact)
- Slot 6: Energy Regen 15-20% (mandatory)
Slot 6 Energy Regen most important stat. Each 1% reduces Special charge by ~0.15s. 20% max roll + 60% signature W-Engine = near-permanent uptime.
Substat Priority
Aria:
- Anomaly Mastery
- ATK%
- Crit Rate%/Crit DMG%
- Energy Regen
Sunna:
- Energy Regen (mandatory)
- HP%/DEF%
- ATK%
- Anomaly Mastery (negligible)
Correct main stats before optimizing substats. Wrong Slot 4 main stat loses 30-40% effectiveness regardless of substats.
Target good enough substats (2-3 desired per piece) over perfect rolls. Perfect substats demand hundreds of runs—weeks of stamina.
W-Engine Recommendations
Signature weapons provide 15-30% effectiveness increases over free alternatives. Weapon banner: 80 pulls guarantee featured S-Rank (12,800 Polychrome), no 50/50 loss.
Aria's W-Engines
Signature: Base ATK 713, 30% Anomaly Mastery, +15% Ether DMG after trigger. 18-22% trigger damage increase. Total 15-18% damage over free options.
Rainforest Gourmet (free): Base ATK 594, 24% ATK. Universal scaling, 8-10% lower output.
Weeping Gemini (free): Base ATK 594, 30% Anomaly Proficiency. Faster but weaker procs. Redundant with Sunna.
Investment value: 15-18% damage increase. Worthwhile for primary DPS usage across multiple teams. Skip if situational.
Sunna's W-Engines
Signature: Base ATK 713, 60% Energy Regen. Buff every 6-7s vs 9-10s. 25-30% team damage increase.
Kaboom the Cannon (free): Base ATK 594, 30% Energy Regen. Half signature's bonus = buff every 8-9s. 12-15% less team damage.
Demara Battery Mark II (free): Base ATK 594, 40% Impact. Stun-focused, lacks Energy Regen. Niche only.
Investment value: 25-30% team damage increase—highest value signature in 2.6. Justifies 12,800 Polychrome for Anomaly teams. Scales with account progression.
Investment Priority
Hierarchy:
- Secure characters first
- Evaluate usage frequency
- Calculate opportunity cost
- Consider progression stage
Both characters + both weapons = 57,600 Polychrome (28,800 characters + 25,600 weapons). Exceeds most reserves.
Optimal path: Secure both characters → Sunna's weapon → Aria's weapon (luxury)
Sunna's weapon benefits all Anomaly teammates. Aria's weapon only improves her personal damage.
Weapon pity carries over between banners. 40-60 pity = consider completing during 2.6 to avoid wasted accumulated pity.
Efficient Farming Routes
Daily stamina: 144 (1 per 10 min). Additional via Battery (40 Battery = 40 stamina, max 200 daily).
Weekly reset: Mondays 4 AM server time.
Weekly cycle:
- Days 1-3: Notorious Hunt (3 weekly clears max)
- Days 4-7: Specialized Chips (240-320 stamina daily)
- Days 5-7: Hollow Zero (3 weekly runs)
- Daily: Combat Commissions (Denny + basic materials)
Daily Routes
Combat Commissions: 40 stamina/run, 8,000-12,000 Denny + 6-12 chips. Six daily runs (240 stamina) = 48,000-72,000 Denny.
Prioritize Specialized Chip stages when available → Advanced when unavailable → Basic only when exhausted.
Drive Disc farming: 40 stamina/run, 2-4 drops. Allocate 80-120 stamina daily after meeting Chip quotas.
Battery management: 200 daily max = 200 additional stamina. Regenerates 1 per 6 min (240 daily). Use consistently to avoid cap waste.
Notorious Hunt Priority
3 materials/clear, 3 weekly clears max = 9 materials weekly. 60 materials require 6-7 weeks consistent clears.
Aria: Spiked Corruption Core boss (Mon/Thu/Sun). High Ether resistance—use Physical/Fire DPS.
Sunna: Expert Challenge stages (daily availability, 40 Battery/run). More flexible scheduling.
Farm one boss at a time. Splitting extends timeline for any single character.
Hollow Zero Optimization
200,000-300,000 Denny weekly. Three runs (45-60 min total) = highest Denny-per-time activity.
Additional rewards: 3-5 Hamster Cage Passes + 2-3 Exuvia weekly. Combined value exceeds 100,000 Denny equivalent.
Combat Commission tier selection: Higher tiers = better rewards but longer clears. Efficiency breakpoint at 3+ min clear time—beyond this, lower tiers more efficient.
Denny Management
Both characters: 7,410,000 Denny total (3,705,000 each).
Hollow Zero: 200,000-300,000 weekly = 25-37 weeks for both characters alone. Combat Commissions: 336,000-504,000 weekly = combined 14-22 weeks.
Build one character fully before starting second. Splitting resources extends timeline for either to reach usability.
EXP materials: 420 materials level 1-60. Weekly generation supports one character every 2-3 weeks.
Team Switching Strategy
Standard composition: primary DPS + support/sub-DPS + utility (Stunner/healer/secondary support). Anomaly teams prioritize Buildup over traditional damage distribution.
Switch decision depends on roster and content. Established DPS rosters gain more value adding Sunna for secondary Anomaly teams. Lacking strong DPS = prioritize Aria first.
Shiyu Defense demands two teams. Hollow Zero allows mid-combat switching.
When You Need Anomaly Support
Valuable when teams feature multiple Anomaly characters competing for field time.
Effectiveness threshold: Anomaly triggers contribute 40%+ total team damage. Below this, traditional ATK% supports superior. Above this, Sunna outperforms.
Indicators:
- 2+ Anomaly-capable characters
- Primary DPS deals 40%+ damage via triggers
- Encounters extend beyond 60s
- Enemy resistance negates traditional damage but vulnerable to Anomaly
Meeting 3+ criteria = substantial Anomaly Support value.
Replacement Process
- Track damage distribution across 3-5 encounters
- Identify characters contributing <25% team damage
- Test Sunna in underperforming slot (3-5 encounters)
- Compare total team damage
- Optimize rotation timing for buff uptime
- Finalize Drive Disc/W-Engine allocation
Prevents premature switching based on theory vs practice. Some teams benefit minimally despite appearing synergistic.
Timeline: 2-3 weeks with prepared materials, 6-8 weeks farming from zero. Begin prefarming 4-6 weeks before intended deployment.
Common Mistakes
Insufficient Energy Regen: Sunna requires 60-80% total for functional uptime. Below this = inconsistent value.
Premature benching: Partially-built Sunna (level 40, skill 6) provides insufficient buff to compensate for lost DPS.
Rotation errors: DPS maximize field time. Supports minimize field time, maximize buff application. Don't apply DPS habits to Sunna.
Split resources: 250 Specialized Chips/character demands focused farming. Splitting extends both timelines. Build sequentially.
Shiyu Defense Balance
Two-team requirement demands complementary archetypes.
Team 1 (Anomaly): Aria + Sunna + Flex (Stunner/secondary Anomaly) Team 2 (Traditional): Established DPS + ATK% Support + Defensive Utility
Maximizes effectiveness without resource conflicts.
Drive Disc allocation: Chaos Jazz (Aria) + Swing Jazz (Sunna) + attribute-specific sets (Team 2 DPS).
Dual-team readiness: 8-12 weeks from 2.6 launch. Week 1-4 Aria, 5-8 Sunna, 9-12 optimization.
Advanced Tips
Advanced optimization provides 8-12% improvements through execution vs gear upgrades.
Rotation timing: Sunna's 12s buff must overlap Aria's 8-10s trigger timing. Misalignment wastes 15-20% effectiveness.
Long-term value: Anomaly Support future-proofs well—new Anomaly DPS inherently synergize. Sunna's value increases with each new Anomaly release.
Rotation Patterns
Optimal (8-9s cycle):

- Sunna EX Special (0.0s): First stack
- Aria Basic chain (0.5-3.5s): Begin Buildup
- Sunna EX Special (3.5s): Second stack
- Aria Special (4.0-5.0s): Major Buildup
- Sunna EX Special (6.0s): Third stack (max)
- Aria Ultimate (6.5-7.5s): Trigger with max buff
- Sunna Ultimate (8.0s): Refresh durations
- Repeat (8.5s+)
Demands 240 energy across three EX Specials—requires 60%+ Energy Regen.
Simplified (9s+ cycle):
- Sunna EX Special (0.0s): Single buff
- Aria full rotation (0.5-8.0s): Basic > Special > Ultimate
- Sunna Ultimate (8.5s): Refresh before expiration
- Repeat (9.0s+)
Achieves 70-80% optimal effectiveness with reduced execution demands.
Future-Proofing
Future Anomaly DPS increase Sunna's value over time. Each new character = another teammate benefiting from buffs.
Farm universally applicable sets: Chaos Jazz and Swing Jazz function across multiple Anomaly characters. Character-specific sets risk obsolescence.
W-Engine investments: Sunna's signature remains valuable across all future Anomaly teams. Aria's signature only valuable while she sees regular deployment.
Skill levels: Permanent improvements retaining value regardless of meta. But massive investment (250 Specialized Chips, 60 boss materials) demands confidence in long-term usage.
F2P vs Spender Paths
F2P: Prioritize one Anomaly DPS (Aria) with free W-Engine, delay Sunna until Aria complete. Sequential approach ensures functional deployment within 6-8 weeks.
Accept good enough pieces (correct main stats, 2-3 desired substats) vs perfect rolls. Enables faster completion at 85-90% optimization.
Spenders: Secure both characters + Sunna's signature (41,600 Polychrome total). Aria's signature secondary priority after confirming sustained usage.
Spending efficiency threshold: $50-100 USD secures both characters with reasonable probability. Beyond this shows diminishing returns.
FAQ
What materials do I need to prefarm for Aria in ZZZ 2.6?
800,000 Denny + 66 Certification Seals for ascension 0-60. 2,905,000 Denny + 350 Ether Chips (25 Basic, 75 Advanced, 250 Specialized) + 9 Clouded Crystalline Substance + 60 Spiked Corruption Cores for skills. W-Engine adds 400,000 Denny + 66 Components + 200 Energy Modules. Timeline: 6-8 weeks focused farming.
Is Sunna better than other Anomaly Supports in ZZZ?
Sunna is currently the only dedicated Anomaly Support in 2.6. Her 36% max Anomaly Buildup buff provides unique acceleration unavailable from traditional supports. Outperforms generic ATK% supports when Anomaly triggers contribute 40%+ team damage.
How does Anomaly Support differ from traditional Support?
Traditional supports provide universal buffs (ATK%, DEF shred) or defensive utility benefiting all damage equally. Anomaly Support specifically accelerates Buildup rates and amplifies trigger damage—only valuable to Anomaly-capable teammates. Higher peak effectiveness in optimized teams, zero value in non-Anomaly compositions.
What Drive Disc sets work best for Aria and Sunna?
Aria: Chaos Jazz 4pc (+30 Anomaly Proficiency), Slot 4 Anomaly Proficiency, Slot 5 Ether DMG%, Slot 6 ATK%. Sunna: Swing Jazz 4pc (+15% ally ATK), Slot 4 HP%/DEF%, Slot 6 Energy Regen 15-20%. Provides 90-95% maximum effectiveness.
Should I pull for signature W-Engines?
Sunna's signature provides 25-30% team damage increase (highest value in 2.6). Aria's provides 15-18% personal damage increase. Limited Polychrome = prioritize Sunna's weapon after securing both characters. Aria's weapon worthwhile only for primary DPS usage across multiple teams.
How long to fully build Anomaly Support characters?
6-8 weeks for functional build (level 60, skill 8). 12-16 weeks for maximum optimization (skill 10, perfect Drive Discs). Specialized Chips (250 at 6-16 weekly) are primary bottleneck—16-42 weeks farming per character.
Ready to pull Aria and Sunna in ZZZ 2.6? Top up Polychrome instantly at BitTopup with secure payments, competitive rates, and 24/7 support. Get resources to guarantee your Anomaly Support team—visit BitTopup now for exclusive ZZZ deals!


