Your primary objective in week one of Ragnarok Crush is clearing main campaign Stage 8 to unlock the Elite Dungeon, while banking summon currency until you can hit the 26-pull guarantee on the Goddess Summon banner. Progression stalls when players spread resources thin across low-tier units or waste board moves on standard three-tile matches. Mastering five-match Crush Combos, deploying a balanced four-companion squad, and funneling daily resources into targeted duplicates will carry your team through the early-game wall without burning premium resources unnecessarily.
Master the Board: Combos, Tiers, and Tile Tactics
Treat Ragnarok Crush like standard candy-matching and your run ends early. Raw companion stats mean very little if you mismanage the grid; every tile connection translates directly into unit deployments and offensive rounds on the field.
Basic three-tile matches only synthesize or promote a unit by one tier. While fine for clearing trash waves, settling for triples bleeds turns fast against tight stage timers. Skip that middle tier entirely. As detailed in OSLink's beginner breakdown, aligning five identical basic tiles synthesizes directly into a Tier 2 unit.
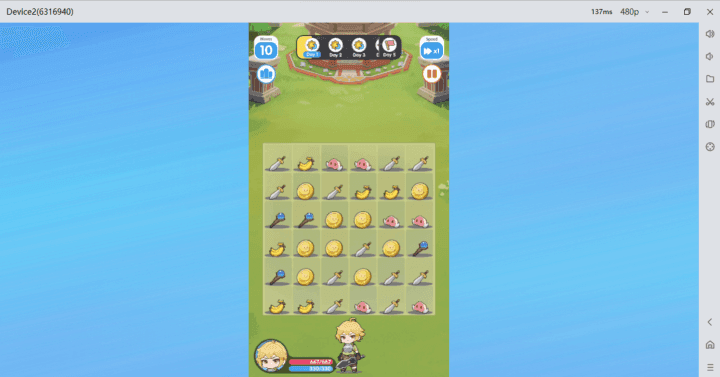
A five-tile match also sparks an automatic Crush Combo: it wipes five additional matching pieces from the board without docking your move counter, then hands you bonus moves to keep your turn alive. Scan the board for these five-match setups before touching a single triple.
Merge chains ramp your output quickly. Progression data from Roonby shows puzzle combos cap out at Level 5, triggering massive burst damage against enemy waves and stage bosses. When a boss flaunts an intimidating health pool, triggering cascading merges into that Level 5 cap is often your only route to beating the enrage timer.
Keep an eye out for gold coin tiles. Merging them halts the battle to give you a choice of three tactical buffs (OSLink). You might pick an attack speed buff or instantly promote Tier 1 companions to Tier 2. That instant promotion stabilizes boards fast whenever low-tier pieces crowd your board space.
| Feature / Combat Mechanic | Activation Requirement | Tactical Effect | Visual Reference |
|---|
| Five-Tile Synthesis | Match 5 identical basic pieces | Creates one Tier 2 unit directly, triggers Crush Combo, awards bonus moves (OSLink) |  |
| Max Level Combo | Chain cascading merges | Hits the Level 5 combo cap for massive burst damage against bosses (Roonby) | |
| Gold Coin Tile Merge | Match gold coin tiles on board | Grants selection of 3 tactical battle buffs, such as instant Tier 2 promotion (OSLink) |  |
| Elite Dungeon Unlock | Clear campaign Stage 8 | Opens primary daily farming for gems and upgrade materials (Roonby) |  |
Squad Building and Class Roles
You deploy four companions behind your hero in every battle (OSLink). The rookie impulse is to pack four glass cannons to burst down waves before they act. That gimmick falls apart the moment late-chapter elites strike back.
Build around a disciplined class distribution instead:
* One Durable Tank: Soaks frontline hits so your board has room to chain.
* Two Damage Dealers: Mix mage AoE with single-target physical burst to shred trash mobs and burn boss health.
* One Support or Crowd-Control Unit: Patches up unit health, delays enemy actions, and interrupts elite casts.
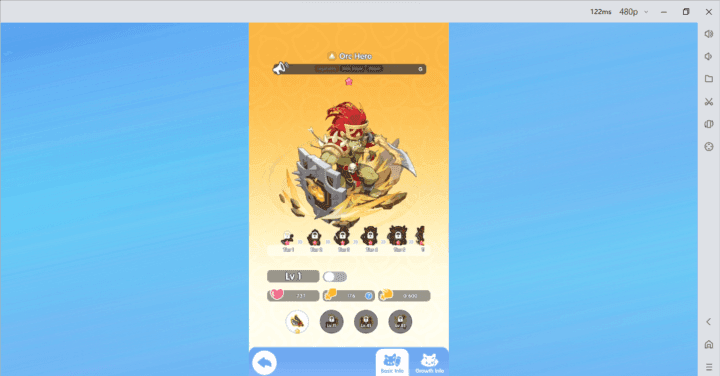
Your main hero commands the front. Early guides note differing initial job pools: coverage from Roonby and OSLink lists five starter classes (Swordsman, Thief, Archer, Merchant, Mage), while other early documentation cites a six-job lineup that includes Acolyte. Pick whichever fits your style; you are not locked in. Switch jobs later in the Hero Menu once you gather alternative gear and need to rebalance team synergy.
First-Week Currency Economy and Summon Strategy
Scatter your currencies across every banner and you will hit a progression wall before day three.
| Currency | Classification & Source | First-Week Priority | Costly Mistake to Avoid |
|---|
| Color Diamonds | Premium; acquired via store recharges (BitTopup) | High-tier hero summons, exclusive growth packs, stamina refills | Burning on standard inventory expansions or single pulls |
| Corite / Free Gems | Freemium; earned via quests, achievements, and events (BitTopup) | Standard summons, basic store purchases, emergency storage | Dispersing across multiple random banners without hitting thresholds |
| Zeny / Gold | Soft currency; campaign clears, daily challenges, idle rewards (BitTopup) | Companion level caps, equipment upgrades, passive skills | Upgrading low-tier, placeholder companions past level caps |
| Stamina / Energy | Action points; regenerates over time, refills with diamonds (BitTopup) | Clearing story to Stage 8, daily material farming, MVP bosses | Letting the stamina bar sit capped at max capacity |
Single pulls waste currency. Roonby's guide notes that 10x pulls guarantee higher-tier companions (SSR and Legendary). Those extra copies are essential: duplicate pulls supply the star promotions that scale base stats and unlock passive skill potencies.
Save your summon stash for specific thresholds. The Goddess Summon banner uses a hard 26-pull pity rule to guarantee a Legendary companion (OSLink). If you lack the currency for 26 pulls, do not roll. Splitting rolls across temporary banners leaves you holding half-filled pity gauges with zero Legendary units to show for it.
Unlock the Prayer System and use it immediately. As outlined by Roonby, this targeting mechanic lets you designate a chosen companion in the gacha pool, cutting down RNG variance when farming star-promotion duplicates. If you pick up extra pulls or stamina resets through a Color Diamonds recharge, feed those summons straight into Prayer targets rather than blind standard banners.
Your Day 1 goal is clear: push campaign progression straight through Stage 8. Clearing Stage 8 unlocks the Elite Dungeon (Roonby), the primary engine for farming daily upgrade materials and gems. Stall before Stage 8 and you sacrifice a full day's worth of farming mats.
Once the dungeon is live, structure each login around five tasks (OSLink):
- Run the Daily Challenge: Sweep every morning for a guaranteed floor of Zeny and EXP potions.
- Burn Daily Stamina in Elite Dungeon: Sweep the highest cleared stage to hoard companion upgrade reagents.
- Climb the Endless Tower: Push as many floors as your squad rating can withstand before the reset.
- Queue Bio Lab Co-op Battles: Team up with other players to bank co-op materials and secondary currencies.
- Prep Weekend MVP Boss Runs: Hold a few stamina recharges toward the weekend to farm time-limited MVP bosses for high-end gear drops.
Three Traps That Stall Early Accounts
Trap 1: Rolling Under the 26-Summon Goddess Threshold. Pulling on the Goddess Summon banner without 26 pulls banked invites failure if the banner expires before you trigger the pity guarantee (OSLink). Bank your soul crystals and gems until you can cash out the guaranteed Legendary in one session.
Trap 2: Mindless Three-Tile Sweeping. Snapping up the first match-3 you spot wastes turns and ruins board setups. Train yourself to look for five-tile alignments first to earn the free Crush Combo wipe and the extra turn.
Trap 3: Over-investing in Four-DPS Squads. Running four damage dealers collapses the moment backline-targeting mobs show up in later chapters. Stick to the 1-tank, 2-DPS, 1-support template from your very first run.
Follow BitTopup for more Ragnarok Crush news~