

Aino Character Overview & Role Analysis
Character Stats & What Actually Matters
Here’s the deal with Aino’s numbers: 11,201 HP, 242 ATK, 607 DEF at Level 90, plus 96 EM from ascension. That attack stat looks pretty sad on paper, but don’t let it fool you—her Structured Power Booster passive converts 50% of her total EM directly into Elemental Burst damage.
This is pure support territory, folks. Low attack, decent bulk, and scaling that screams build me for reactions.

What makes her tick? She’s your ticket to Ascendant Gleam Moonsign (needs 2+ Nod-Krai characters) and delivers consistent off-field Hydro through her 14-second Precision Hydronic Cooler burst. Only costs 50 energy too, which is refreshingly reasonable. She absolutely shines in Bloom, Hyperbloom, Electro-Charged, and those new Lunar-Charged reactions.
The Good, The Bad, and The Why Didn’t They Fix This?
Strengths: That 14-second AoE Hydro application is chef’s kiss. Team-wide EM buffs that actually matter. Ascendant Gleam enablement (huge deal). Her skill gives mobility AND energy generation—rare combo. Early constellations pack serious punch.
Weaknesses: Personal damage without EM investment? Yikes. Needs specific team comps to truly shine. Energy management can get messy without proper ER planning. Outside reaction teams, she’s… fine, I guess?
Planning to chase those constellations when Version 6.0 drops? Buy Genesis Crystals through BitTopup—they’ve got competitive pricing and actually deliver fast. No horror stories here.
Best Weapons for Aino: Complete Tier List
The S-Tier Champion
Favonius Greatsword: This is it. Best-in-Slot for support builds, full stop. ER substat solves energy problems, and that passive generates particles for your whole team. Just need around 60% CRIT Rate to trigger it reliably—totally doable with substats.
A-Tier Alternatives That Actually Work
Flame-Forged Insight: EM mainstat plus 12 Energy back after triggering reactions. Perfect for Bloom builds where Aino’s constantly setting things off.
Makhaira Aquamarine: EM weapon that converts some of that EM into ATK buffs for the team. Personal scaling AND team support? Sign me up.
Sacrificial Greatsword: ER substat with potential skill resets. Using her skill twice per rotation? That’s particle generation heaven right there.
F2P Options (That Don’t Suck)
Forest Regalia (Craftable): ER plus EM-boosting passive for Dendro teams. Costs basic 4-star materials and performs surprisingly well in Bloom/Hyperbloom setups.
Katsuragikiri Nagamasa (Craftable): Solid ER weapon with energy refund mechanics. It’s baseline, but baseline works when you’re starting out.
Optimal Artifact Sets & Stat Distribution
Primary Artifact Recommendations
4-piece Silken Moon’s Serenade (The Crown Jewel): 2-piece gives 20% ER. 4-piece? Party gets +60 EM (Nascent) or +120 EM (Ascendant Gleam) for 8 seconds after Elemental damage hits. PLUS your party gains 10% Lunar Reaction damage per active Gleaming Moon effect.
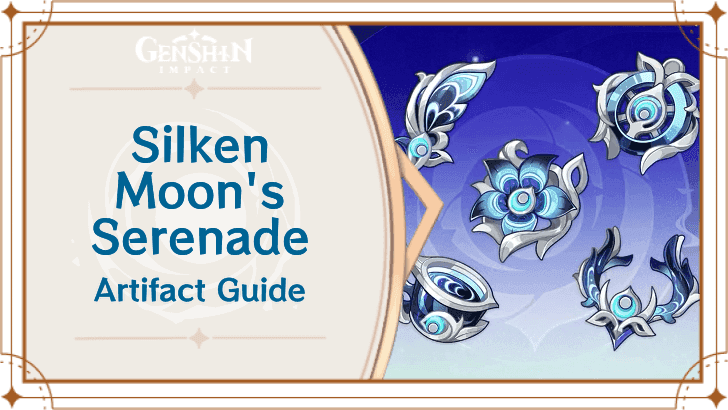
This set is why Aino exists, honestly.
4-piece Noblesse Oblige: Classic 20% ATK buff to party after burst. Use this when someone else is already running Silken Moon’s Serenade—no point doubling up.
4-piece Flower of Paradise Lost: 80 EM baseline plus massive Bloom/Hyperbloom/Burgeon damage bonuses. Perfect when Aino’s your primary Bloom trigger.
Main Stat Priorities (Don’t Overthink This)
Sands: Elemental Mastery. Only go ER if you absolutely can’t hit 160-180% through substats and weapon. Goblet: Elemental Mastery. Hydro DMG% only works in Freeze teams—and honestly, why are you running Aino in Freeze? Circlet: Elemental Mastery. Exception: CRIT Rate for Favonius users who need that passive reliability.
Substat Priority: ER (until you hit threshold) > EM > CRIT Rate (Favonius users) > HP%/DEF%
Critical Stat Thresholds & Benchmarks
Energy Recharge: The Make-or-Break Stat
Target: 160-180% ER for consistent burst uptime. This isn’t negotiable in standard teams. C4 owners can relax to 140-160% thanks to that sweet 10 flat energy every 10 seconds. Favonius and Sacrificial weapons lower these requirements through their energy generation—one of many reasons why Favonius is S-tier.
Elemental Mastery: Where the Magic Happens
Minimum: 850+ EM for respectable reaction damage and team support. Optimal: 900+ EM maximizes everything—personal damage (0.5% burst damage per EM point) AND team reaction damage.
You’ll need EM main stats on Sands, Goblet, AND Circlet with decent substats to hit these numbers. It’s artifact farming hell, but the payoff is worth it.
CRIT Rate Note: ~60% when using Favonius Greatsword. This isn’t for damage—it’s for reliable passive triggering.
Need efficient artifact farming and weapon upgrades? Genshin Impact Top Up through BitTopup gives excellent resin value with secure transactions and 24/7 support that actually responds.
Talent Priority & Leveling Guide
Priority: Elemental Burst > Elemental Skill > Normal Attack
Elemental Burst (Level 10): Your bread and butter. Primary Hydro application and damage source. Each level bumps base damage (starts at 36.2% ATK at Level 1) and improves that EM scaling effectiveness.
Elemental Skill (Level 10): Mobility, 3 Hydro particles, additional application. Essential for energy management—don’t sleep on this.
Normal Attack (Level 6): Minimal use in off-field role. Level 6 gives adequate scaling while saving resources for what matters.
Material Requirements (Start Farming Now)
Weekly Boss: 18 Silken Feathers from The Knave—3 attempts weekly, so plan accordingly Talent Books: Elysium series (Tue/Fri/Sun) - 9 Teachings, 63 Guides, 114 Philosophies per talent Enemy Drops: Drive Shaft series from those Landcruiser enemies - 6 Broken, 22 Reinforced, 31 Precision per talent
Constellation Analysis & Value Assessment
C1 (Highest Priority): Aino gains 80 EM, party gains 80 EM for 15 seconds after Skill/Burst. This is THE game-changer. Transforms team reaction damage completely.
C2 (Excellent Bang for Buck): Off-field burst fires additional water balls when your active character hits opponents. 25% ATK + 100% EM damage every 5 seconds. Hydro application goes from good to incredible.
C4 (Energy Problems? What Energy Problems?): Skill hits restore 10 flat energy every 10 seconds. Eliminates energy management headaches entirely. Lets you go full aggressive on EM investment.
C6 (The Ultimate Support): 15 seconds after burst, nearby characters’ Electro-Charged/Bloom/Lunar reactions gain 15% damage (35% with Ascendant Gleam). Top-tier reaction support status achieved.
Recommended Stops: C1 for most players, C2 for optimal value, C4 if you want luxury energy management.
Team Compositions & Synergies
Meta Teams That Actually Work
Lunar-Charged Core: Aino + Flins + Ineffa + Anemo support. Maximizes Nod-Krai Moonsign potential with that current Spiral Abyss 75% Lunar-Charged damage bonus. This is THE team right now.
Lunar-Bloom: Aino + Lauma + Nilou + Nahida. Combines Nod-Krai synergies with Bloom mechanics and Nilou’s Bountiful Core enhancement. Expensive but devastating.
Hyperbloom: Aino + Nahida/Lauma + Fischl/Raiden + Kuki Shinobu. Creates Dendro Cores through Aino’s Hydro, triggers Hyperbloom with Electro characters. Classic and effective.
F2P Hyperbloom: Aino + Dendro Traveler + Kuki Shinobu + Kaveh. Entirely 4-star composition that still delivers solid Hyperbloom performance. Your wallet will thank you.
Rotation Guide & Combat Strategies
Standard Rotation: Aino Burst → Aino Skill → Anemo Support → Main DPS. Maximizes that precious 14-second burst uptime with proper setup.
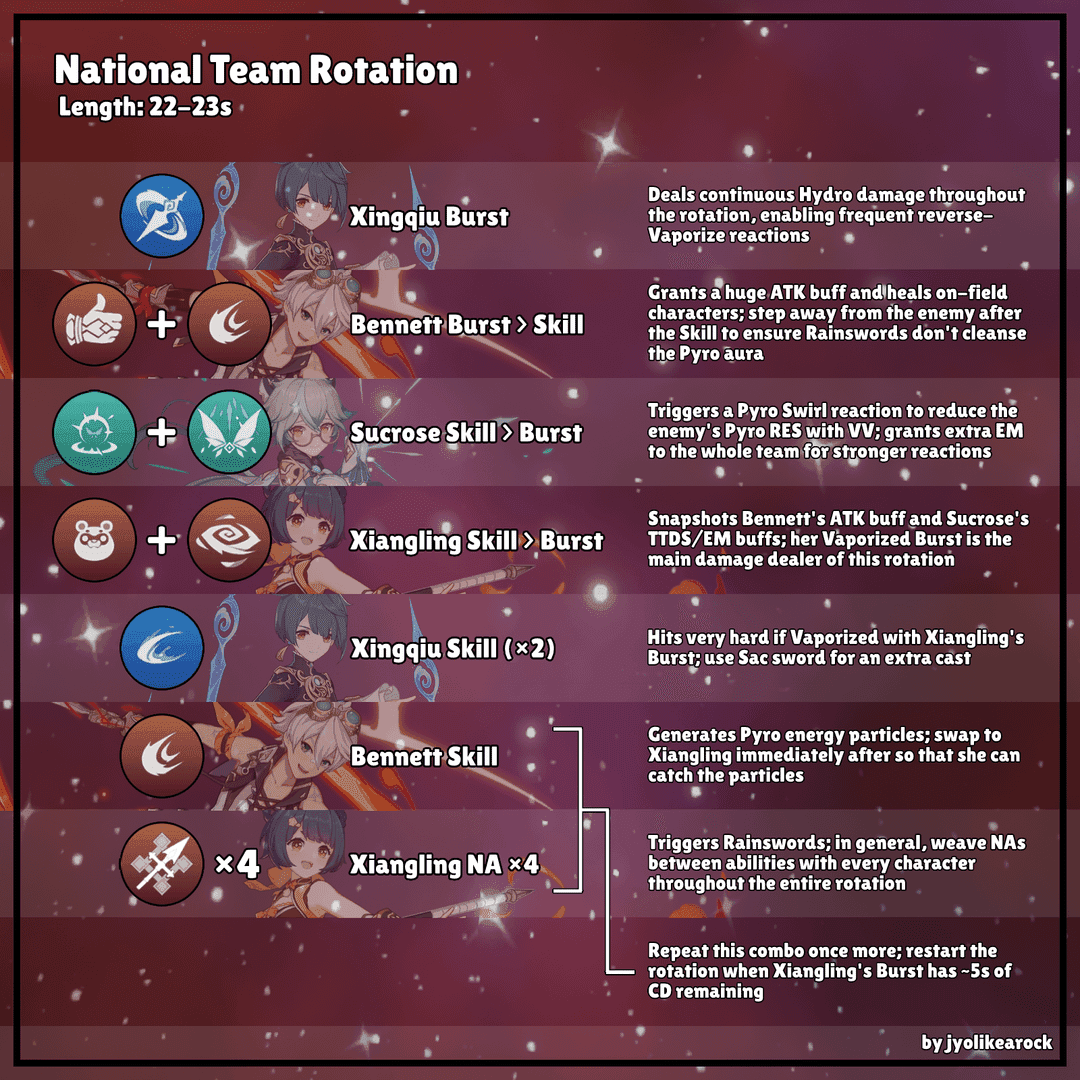
Energy Priority Tip: Aino Skill → Aino Burst → Swap. This lets Aino catch her own particles before swapping out—small detail, big impact.
Sacrificial Rotation: Aino Skill → Wait for reset → Aino Skill → Aino Burst → Swap. Maximizes particle generation when you need every bit of energy.
Position that burst to cover maximum enemy area. Use her skill’s mobility for repositioning and gap closing—don’t just stand there! Maintain Moonsign effect range for Ascendant Gleam benefits.
Investment Guide & Resource Planning
Ascension Materials (The Shopping List)
Total Mora: 420,000 (ascension) + 4,957,500 (talents)—yes, it’s expensive Gems: 1 Sliver, 9 Fragments, 9 Chunks, 6 Gemstones (Varunada Lazurite) Boss Materials: 46 Precision Kuuvahki Stamping D-uck-ie from that Knuckle Duckle world boss Local Specialty: 168 Portable Bearing from Nod-Krai region Enemy Drops: 18 Broken, 30 Reinforced, 36 Precision Drive Shaft from Landcruiser enemies
Artifact Farming Reality Check
Silken Moon’s Serenade Domain: Budget 3-4 weeks of dedicated resin (roughly 3,000-4,000 resin) for a complete set with acceptable substats. Domain’s located in Nod-Krai—convenient!
Build Timeline: Week 1-2 (ascension + 6/6/6 talents), Week 3-4 (artifact main stats), Week 5-8 (optimization + 10/10/6 talents). Plan accordingly.
Common Mistakes & Troubleshooting
What NOT to Do
Avoid: Over-investing in ATK stats (her scaling is EM-based), ignoring ER requirements (you NEED 160-180%), choosing wrong weapons (utility beats DPS stats here).
Quick Fixes
Low Hydro Application? Ensure Ascendant Gleam activation with proper team comp. Energy Problems? Switch to Favonius/Sacrificial weapons, add ER substats. Balance Issues? Adjust EM vs ER based on your weapon choice.
Team Building Mistakes: Missing that second Nod-Krai character wastes Aino’s primary value. Avoid redundant support effects and reaction interference—more isn’t always better.
FAQ
What minimum stats does Aino need for endgame viability? 160% ER minimum and 700+ EM for effective reaction support. Favonius Greatsword makes hitting these thresholds way easier.
How does Aino stack up against other Hydro supports? Unique advantages through Moonsign mechanics and EM buffs, especially at C1. Better AoE reactions than Xingqiu, more accessible constellations than Kokomi. Different niche entirely.
Should I prioritize constellations or new characters? C1 provides exceptional value with those team-wide EM buffs. C2 improves application substantially. Beyond C2? New characters typically offer better account progression.
Which team maximizes Aino’s potential? Lunar-Charged teams (Aino + Flins + Ineffa + Anemo) for optimal Moonsign usage and current Abyss bonuses. Bloom teams with Lauma/Nahida are also excellent choices.
Most efficient artifact farming approach? Hit that Silken Moon’s Serenade domain for 3-4 weeks. Prioritize main stats over perfect substats initially—you can always optimize later. Consider Noblesse alternatives if another character’s already using the optimal set.
How much does the signature set actually improve performance? 15-25% team damage improvement over alternatives in optimal compositions. That’s through ER, EM buffs (60-120), and 10% Lunar Reaction damage per effect. Worth the farming investment? Absolutely.


