

The Real Deal: Why Claw Layouts Separate Casual Players from Competitors
Here’s the thing about PUBG Mobile – if you’re still using thumbs only, you’re essentially bringing a knife to a gunfight. I’ve been covering mobile gaming strategies for years, and the performance gap between thumb players and claw users isn’t just noticeable. It’s game-changing.
Claw layouts let you use 3-6 fingers across your screen instead of just two thumbs. Sounds simple? The execution is anything but. This setup enables simultaneous camera movement, aiming, shooting, and crouching – combinations that are literally impossible with standard controls.
Think about it: when was the last time you saw a pro tournament where someone was playing with thumbs? Exactly. Almost every competitive player uses 4-finger claw minimum because the math is simple – more fingers mean more simultaneous actions.
The Science Behind the Advantage
4-finger claw controls four directions simultaneously with the fastest movement speeds possible. But here’s where it gets interesting – advanced techniques like crouch-firing become second nature. You’re crouching, standing, then crouching again while spraying to manage recoil in close-range fights. Your hitbox shrinks while your accuracy stays consistent.
That’s not luck. That’s mechanical advantage.
Who Should Actually Use Claw Layouts (And Who Shouldn’t)
Let me be honest here – claw isn’t for everyone. Your finger length, screen size, and flexibility matter more than your ego. Short fingers on a small screen? Stick with 3-finger claw. Long fingers on a tablet? You might be ready for 6-finger madness.
The progression path I recommend to players: 2-finger (casual weekend gaming) → 3-finger (getting serious) → 4-finger (competitive ranked) → 5-6 finger (tournament aspirations).
Don’t skip steps. Trust me on this one.
Ready-to-Copy Claw Layout Codes That Actually Work
4-Finger Claw Layout Codes
Layout Code 1: 6974-6998-1946-2820-026
This is my go-to recommendation for most players. Balanced distribution, optimized for medium-to-large phones, and I’ve personally tested it in ranked matches. It just works.
Layout Code 2: 6960-4897-8808-0654-298
Enhanced fire button accessibility with improved scope switching. AR specialists swear by this one – and for good reason.
Layout Code 3: 6960-4897-8808-0564-299
Sniper-optimized layout with better scope control and reduced accidental presses. Because nothing ruins a perfect headshot like hitting the wrong button.
2025 Updated Code: 7275-1794-4178-8556-303
Latest meta optimization with evenly distributed actions. Compatible with current version updates (because yes, layout codes can break with patches).
Essential settings you’ll need: Scope Mode: Hold, Peek & Fire: On, Peek Mode: Mixed, Peek & Open Scope: Disable, Camera Rotation while Leaning: Disable.
6-Finger Advanced Claw Codes
Professional Layout Code: 6960-4887-1407-8797-709
This divides functions into six sectors and is suitable only for large-screen phones and tablets. Fair warning – this requires significant practice time, but the precision is unmatched once you master it.
Critical settings: Show Left Fire Button: Always On, Scope Mode: Hold, Camera Rotation while ADS: Disable, Jump/Climb: Separate.
Device-Specific Layout Codes
3-Finger Starter: 6916-3084-8580-4664-088
Two fingers left side, simplified transition. No sensitivity changes required, which makes the learning curve much gentler.
5-Finger Advanced: 7275-2058-0453-0602-607
Three fingers right side – this is what Team INDsnax and Fnatic Franky use. Enables ADS + crouch + shoot simultaneously, which is basically cheating (legally).
Beginner 2-Finger: 6937-0903-0518-5811-333
Standard thumb configuration for casual play only. If you’re reading this guide, you’re probably ready to move beyond this.
For enhanced PUBG Mobile experience, Cheap PUBG Mobile UC top up offers provide excellent value for unlocking content that complements your improved gameplay skills.
Step-by-Step Setup (The Part Everyone Messes Up)
Importing Layout Codes
Open PUBG Mobile → Settings → ‘Customize Buttons’ → ‘Customize’
Click layout management icon → ‘Search Method’
Paste your chosen layout code → ‘Search’ → ‘Apply’
Important note: New codes replace existing layout slots and invalidate old share codes. Save your current setup first if you want to revert.
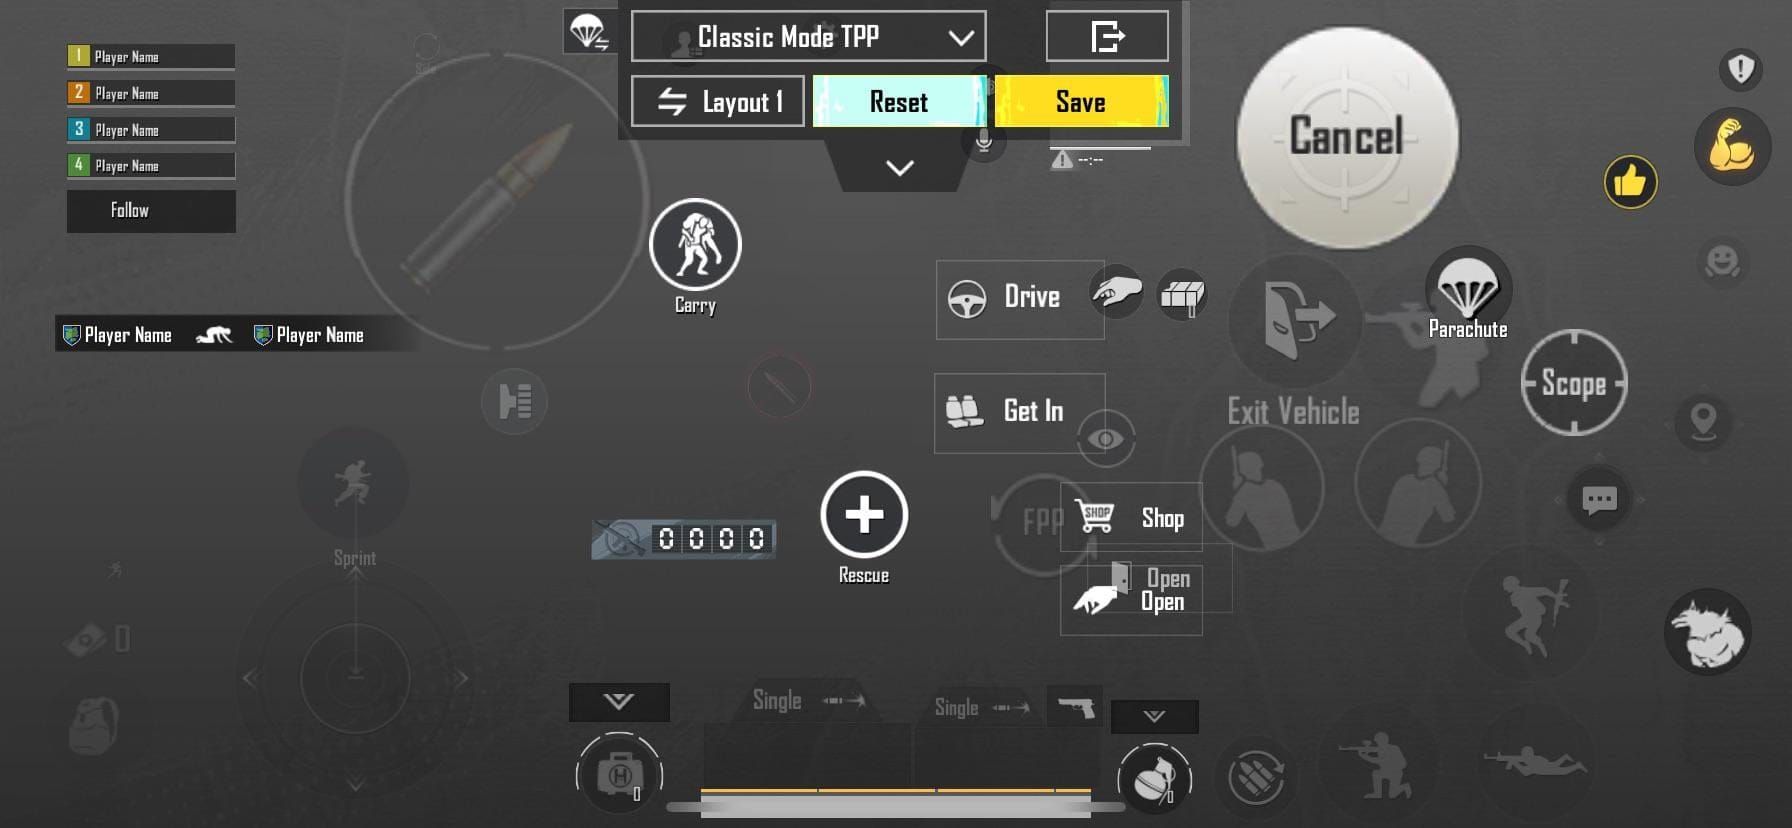
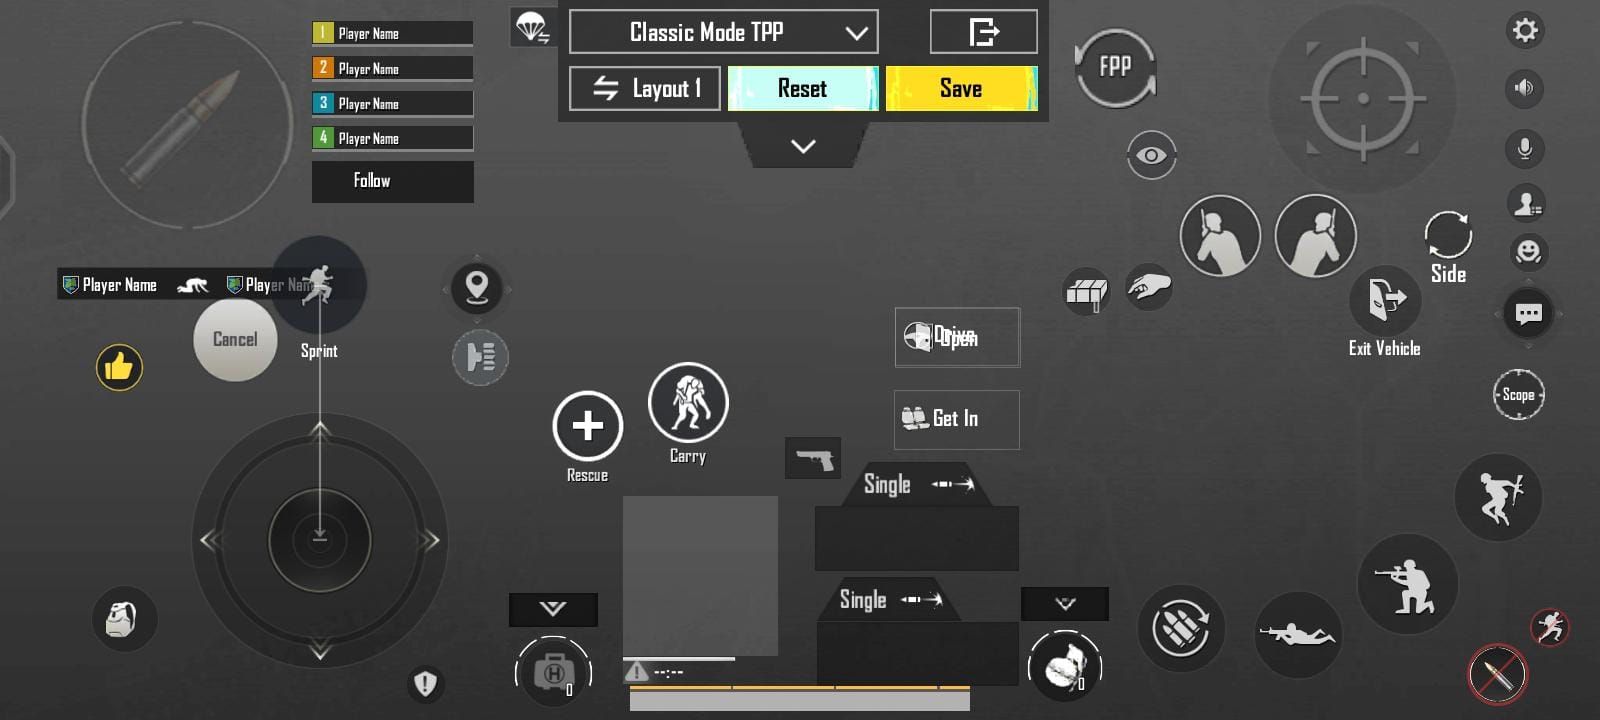
Customizing Button Positions
Here’s where most guides get it wrong. Adjust fire buttons to 120-140% default size for easier combat access, but keep scope buttons at 100% to prevent accidental activation.
Place primary fire buttons where your fingers naturally rest – not where they look good. Maintain 15% button width minimum spacing between interactive elements because fat-fingering controls in the final circle is embarrassing.
Tablet layouts need wider spacing; phone layouts require tighter clustering. And yes, 18:9 and 19:9 aspect ratios need vertical repositioning versus 16:9 screens.
What the Pros Actually Use (Not What They Say They Use)
PMGC Champion Layouts
5-Finger Specialists: Team INDsnax and Fnatic Franky utilize 5-finger layouts that enable exceptional reaction times. Their configuration allows simultaneous open ADS + crouch + shoot combinations – providing significant competitive advantages that casual players simply can’t match.
3-Finger Masters: SouL Regaltos and Fnatic Ronak prove that 3-finger setups can achieve professional performance. Their layouts enable shoot+crouch and shoot+prone combinations while maintaining accessibility.
Assault Rifle Specialists typically favor 4-finger layouts with enhanced fire button accessibility and optimized scope switching. Sniper Specialists often use 5-6 finger setups with precise scope control and reduced accidental presses.
The pattern? More specialized roles require more complex layouts.
4-Finger vs 6-Finger: The Honest Comparison
Performance Differences
4-Finger Advantages: Most flexible setup available. Controls four directions simultaneously with fastest movement speed. Shorter mastery time (3-4 days for basic proficiency). Works on virtually any device.
6-Finger Advantages: Maximum simultaneous actions possible. Precise control over all elements. Professional tournament viability. Superior recoil management that’s almost unfair.
6-Finger Disadvantages: 2-3 month mastery period (seriously). Requires large screens. Significant hand fatigue during extended sessions. Complex muscle memory requirements that’ll make your brain hurt.
Choose 4-Finger If: You have medium devices (5.5-6.5 inches), want competitive performance without going pro, or prioritize balanced gameplay.
Choose 6-Finger If: You have tablets/large phones (6.7+ inches), compete professionally, or need maximum control precision.
Device-Specific Optimization (Size Matters)
iPad and Tablet Layouts
6-finger layouts become practical with three fingers per side. Increase button sizes to 130-150% versus phone layouts. Maintain 20-25% button width spacing between elements – tablets have the real estate, so use it.
iPhone and Small Screen Setups
4-finger maximum for most iPhones. 5-finger might work on Pro Max with extensive customization, but it’s pushing it. Utilize screen edges aggressively and reduce button sizes to 90-95% default.
Android Device Configurations
Samsung Galaxy: Large devices support 5-6 finger effectively, but curved edges require careful placement to avoid palm rejection issues.
Budget Devices: Touch latency requires simplified 3-4 finger layouts with larger buttons for reliable input. Don’t fight your hardware.
Buy UC online for Lucky Spin opportunities provide chances to unlock rare items that showcase your improved skills.
Sensitivity Settings That Actually Work
3-Finger Claw Camera Sensitivity
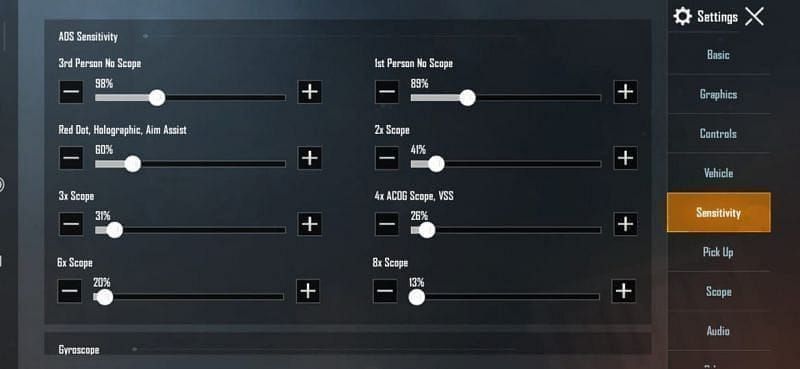
3rd Person No Scope: 190%
1st Person No Scope: 130%
Red Dot/Holographic: 50%
2x Scope: 80%, 3x Scope: 100%
4x Scope: 20%, 6x Scope: 10%, 8x Scope: 5%
3-Finger Claw ADS Sensitivity
TPP No Scope: 95-100%, FPP No Scope: 100-120%
Red Dot/Holographic: 55-60%
2x Scope: 37-45%, 3x Scope: 30-35%
4x Scope: 25-30%, 6x Scope: 20-23%, 8x Scope: 10-13%
Gyroscope Integration
3-Finger Gyroscope: TPP/FPP No Scope through 2x: 300%, 3x: 240%, 4x: 210%, 6x: 100%, 8x: 50%.
Gyroscope enables smoother tracking through device tilting rather than screen swiping. It perfectly complements claw layouts – once you get used to it, going back feels primitive.
Common Mistakes (That I See Constantly)
Button Placement Errors: Maintain 20% button width spacing between fire and movement controls. Place scope controls in deliberate reach zones, not natural rest positions. You want to think before scoping, not do it accidentally.
Sensitivity Mismatches: Implement layout-specific profiles. Claw layouts require 15-25% lower ADS sensitivity due to improved precision. Start gyroscope at 200%, then increase to 300% as you adapt.
Ergonomic Issues: Match complexity to device size – 3-4 finger maximum for phones under 6 inches. Spend minimum 3-4 days in TDM with each layout before advancing. Your fingers need time to learn.
Mastering Your Setup: The Practice Nobody Talks About
Training Routines
Phase 1 (Days 1-4): TDM mode exclusively for muscle memory. Focus on movement while aiming, shooting while crouching, scope switching. 30-45 minutes daily – no more, no less.
Phase 2 (Days 5-14): Training Room spray patterns and recoil control. Practice crouch-firing technique until it’s automatic. Gradually introduce ranked matches.
Phase 3 (Weeks 3-4): Master simultaneous combinations. 4-finger: movement + aim + fire + crouch. 5-6 finger: add prone and grenades to the mix.
Performance Tracking
Realistic Expectations: Week 1: 20-30% performance decrease (completely normal). Week 2: return to baseline. Week 3-4: 15-25% improvement. Month 2+: 30-50% potential improvement.
Make 5-10% sensitivity adjustments weekly. Move buttons 1-2% at a time for optimization. Always test modifications in Training Room before taking them into matches.
Midasbuy UC top up tips and tricks help maximize in-game purchase value while building competitive setups.
FAQ: The Questions Everyone Asks
How long does it take to master a 4-finger claw layout?
Basic proficiency within 3-4 days of TDM practice, competitive viability over 2-3 weeks. Practice 30-45 minutes daily in Training Room/TDM before ranked matches. Expect a 20-30% decrease in week 1, return to baseline in week 2, and 15-25% improvement in weeks 3-4.
Can I use 6-finger claw layouts on a regular smartphone?
Only recommended for 6.7+ inch screens or tablets. Regular smartphones lack screen space for comfortable 6-finger placement. Code 6960-4887-1407-8797-709 works on large devices but requires manual adjustment for smaller screens.
What sensitivity settings work best with claw layouts?
Claw requires 15-25% lower ADS sensitivity than thumbs due to improved precision. 3-finger: TPP No Scope 95-100%, Red Dot 55-60%, 4x Scope 25-30%. Gyroscope 300% for close-range, 100-120% for 6x-8x scopes.
Should I change my layout if I’m already performing well with thumbs?
Depends on your competitive goals. Thumbs limit simultaneous actions essential at higher ranks. Almost all pros use 4-finger+ because thumbs simply cannot execute complex combinations. Casual play: thumbs are viable. Competitive advancement: requires claw.
How do I share my customized claw layout with friends?
Settings > Customize Buttons > Customize > ‘Scheme’ > select layout > share icon > ‘OK’ > ‘Copy’. Note: changing your layout or generating a new code invalidates previous ones.
What’s the difference between pro player layouts and regular claw setups?
Pros like Team INDsnax use specialized 5-finger configurations enabling simultaneous ADS + crouch + shoot combinations impossible with standard setups. This requires 2-3 months of dedicated practice. Regular 4-finger layouts balance performance with reasonable learning curves.


