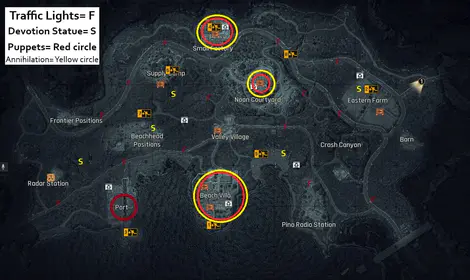
Understanding 7-Safe Key Routes in Arena Breakout Mobile
A 7-safe key route targets locked safes requiring specific keys, guaranteeing access to high-value loot pools. Airport features 8 locked safes alongside 12 free safes. Unlike free safes that spawn randomly, locked safes remain accessible throughout the 35-minute raid, allowing efficient pathing that minimizes exposure while maximizing loot value.
For consistent key inventory, Arena Breakout Mobile Bonds top up through BitTopup ensures you never miss profitable raid windows.
What Defines a Complete 7-Safe Route
Optimal Airport route targets seven specific safes:
- AOK Archives: 250k-500k Koens
- Control Tower Fountain: 150k-300k Koens
- AOK Control: 150k-300k Koens
- Fuel Depot Between Tanks: 120k-220k Koens
- Exhibition Main Building: 100k-200k Koens
- Cargo Center Hangar: 100k-180k Koens
- Parking Lot Car: 80k-150k Koens
Route efficiency depends on safe interaction time (12-18 seconds standard, 15-22 seconds electronic), travel distance, and extraction accessibility. The 7-safe selection excludes lower-value targets to preserve inventory space for premium loot.
Key Mechanics and Durability System
Keys function as consumables with limited durability. AOK Archives Key, Executive Lounge Key 2F, and VIP Reception Key 2F form the core of premium Airport routes. If an AOK Archives Key costs 200k Koens with 5 uses, each raid must yield 40k+ Koens from that safe to break even. Track key expenses versus loot extracted to identify which safes deliver positive returns.
Why Route Selection Impacts Profit Margins
Route selection determines survival probability—the multiplier converting theoretical loot into actual profit. A 400k Koen route with 30% extraction success loses to a 250k route with 70% success through consistency.
Airport Lockdown offers two tiers:
- Standard: 150k+ Koens gear, 20k entry fee
- Premium: 300k+ Koens gear, 50k entry fee
Forbidden Zone's flat 300k Koens entry filters players, creating higher baseline competition where every opponent represents a serious threat.
Airport Lockdown 7-Safe Route Breakdown
Airport unlocks at Level 25, hosts 12-player raids lasting 35 minutes on 72 tick rate servers. Higher tick rates reward skilled players through responsive gunplay rather than pure gear advantages.
Complete Safe Location Map and Pathing
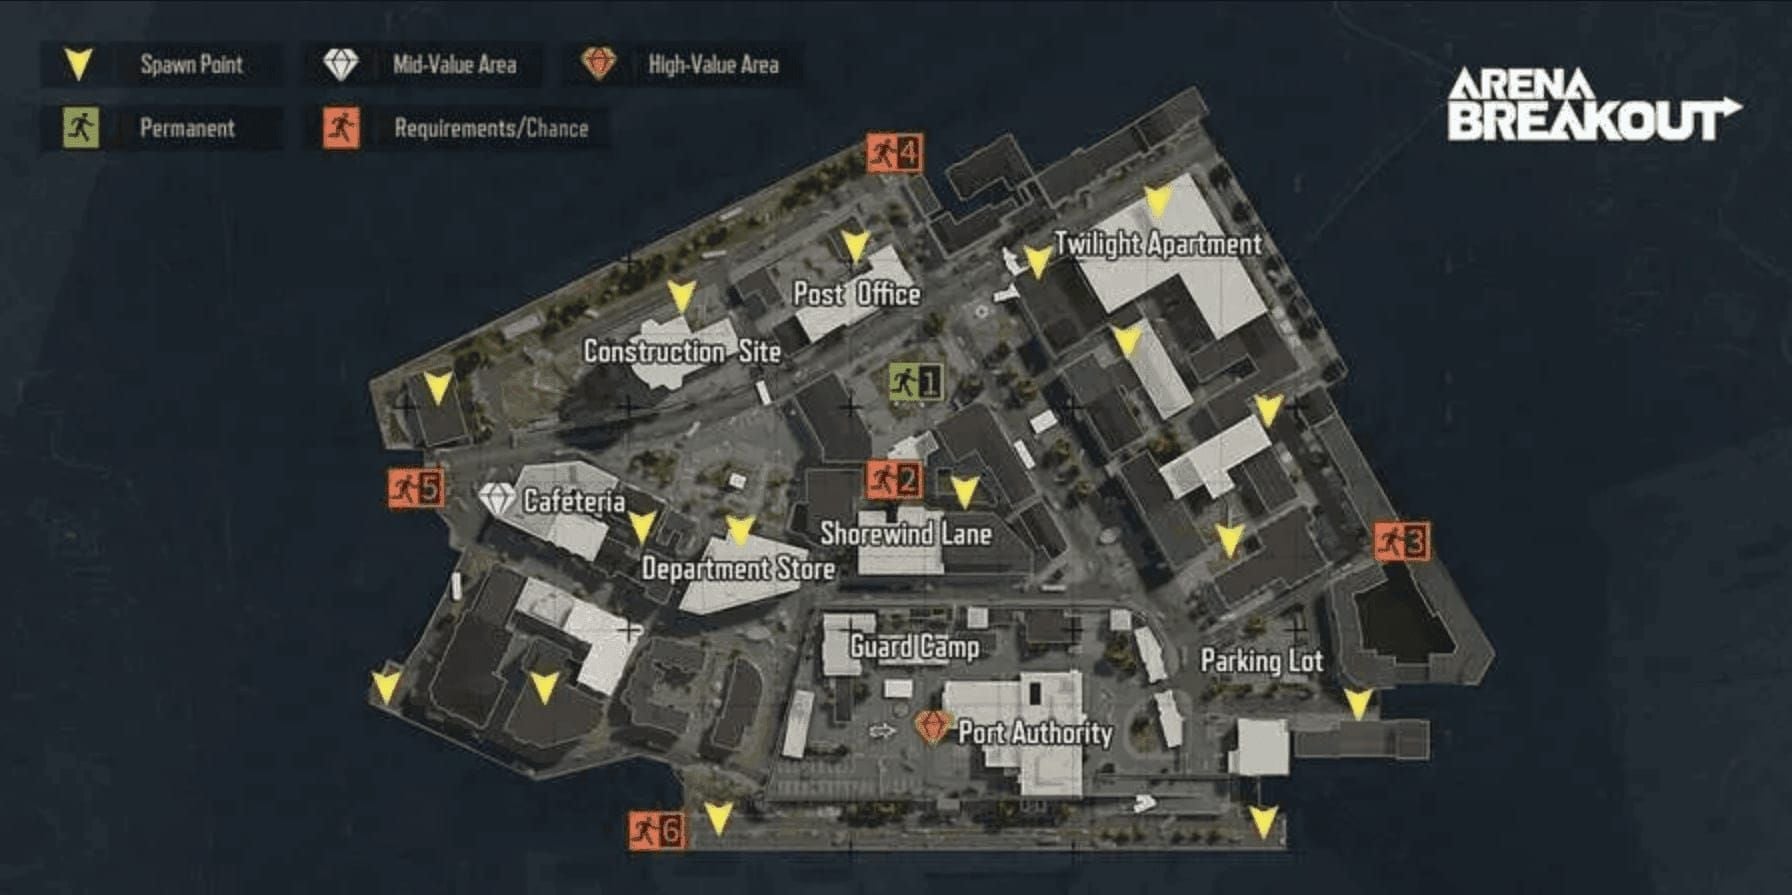
Optimal sequence: AOK Archives → AOK Control → Control Tower Fountain → Fuel Depot Between Tanks → Exhibition Main Building → Cargo Center Hangar → Parking Lot Car.
AOK Archives sits in the northwestern section. After looting, move directly to AOK Control on the same building's second floor, eliminating travel time between the two highest-value safes. From AOK Control, proceed to Control Tower Fountain—the route's highest-risk segment due to limited stairwell cover.
Final segment sweeps clockwise around Airport's perimeter, keeping players near external extracts like Access Bridge and Drainage Pipe for rapid exits.
Average Loot Value Per Safe
Seven safes generate combined theoretical yields of 950k-1,850k Koens per raid, with actual realized values averaging 1,200k-1,400k Koens after inventory constraints. AOK Archives alone contributes 20-35% of total earnings.
Control Tower Fountain and AOK Control (150k-300k each) represent the secondary profit tier, consistently spawning weapon attachments, medical supplies, and crafting materials.
Lower-tier safes function as inventory fillers ensuring minimum profitability when premium safes yield below-average loot.
PvP Hotspots and Risk Assessment
PvP concentrates around three zones: AOK building complex, Control Tower, and Cargo Center. AOK building attracts key route runners, creating inevitable player intersections. Approach from eastern perimeter using exterior staircases that offer escape routes.
Control Tower's central stairwell forces close-quarters engagements favoring high-rate-of-fire weapons. Pre-clear upper floors before looting Fountain safe.
Cargo Center represents lowest-risk segment, positioned away from high-traffic areas. Open layout provides excellent sightlines for spotting threats at 100+ meters.
Optimal Gear Loadout
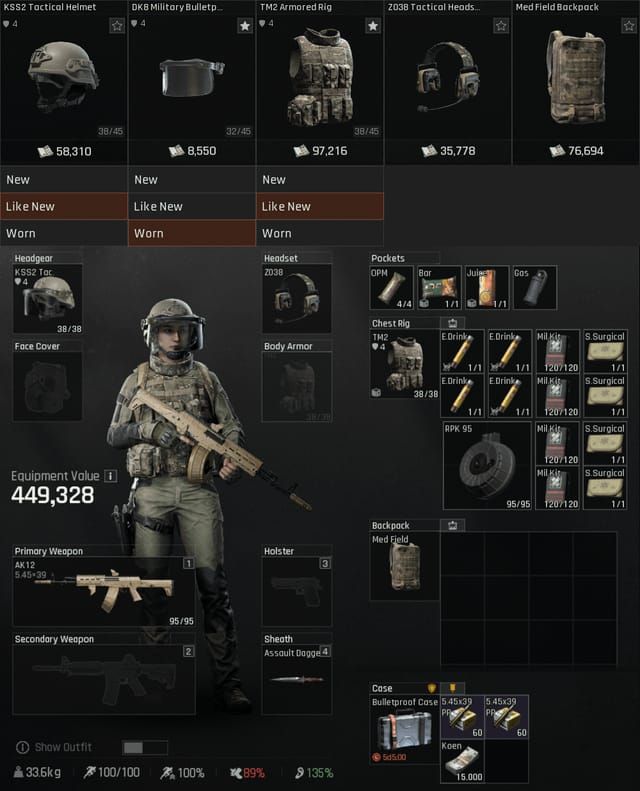
Standard Lockdown (150k+ Koens):
- SEK Composite Body Armor (70 durability)
- Mid-tier weapon with 90+ rounds
- 2 medkits, 4 bandages, 2 painkillers
- Tactical backpack
- Total cost: 120k-180k Koens
Premium Lockdown (300k+ Koens):
- Sentry 308 Armored Rig (60 durability, 20 slots)
- Tier-4 helmet
- Weapon capable of penetrating level-4 armor
- 3 medkits, 6 bandages, 3 painkillers
- Total cost: 280k-350k Koens
Time Efficiency and Speed Run Strategies
Full 7-safe route requires 18-24 minutes, leaving 11-17 minutes for extraction. Access Bridge extract activates at 25 minutes with 4-6 minutes travel time—position near bridge by minute 24.
Speed running focuses on movement optimization and pre-planned routes through buildings. Develop mental timers for safe interaction, knowing when to abort if audio cues indicate threats.
Forbidden Zone 7-Safe Route Breakdown
Forbidden Zone demands 300k Koens entry, creating higher stakes than Airport's tiered system. Safe distribution spreads across greater distances, increasing route completion to 22-28 minutes and elevating PvP encounter probability.
Safe Spawn Locations and Optimal Routing
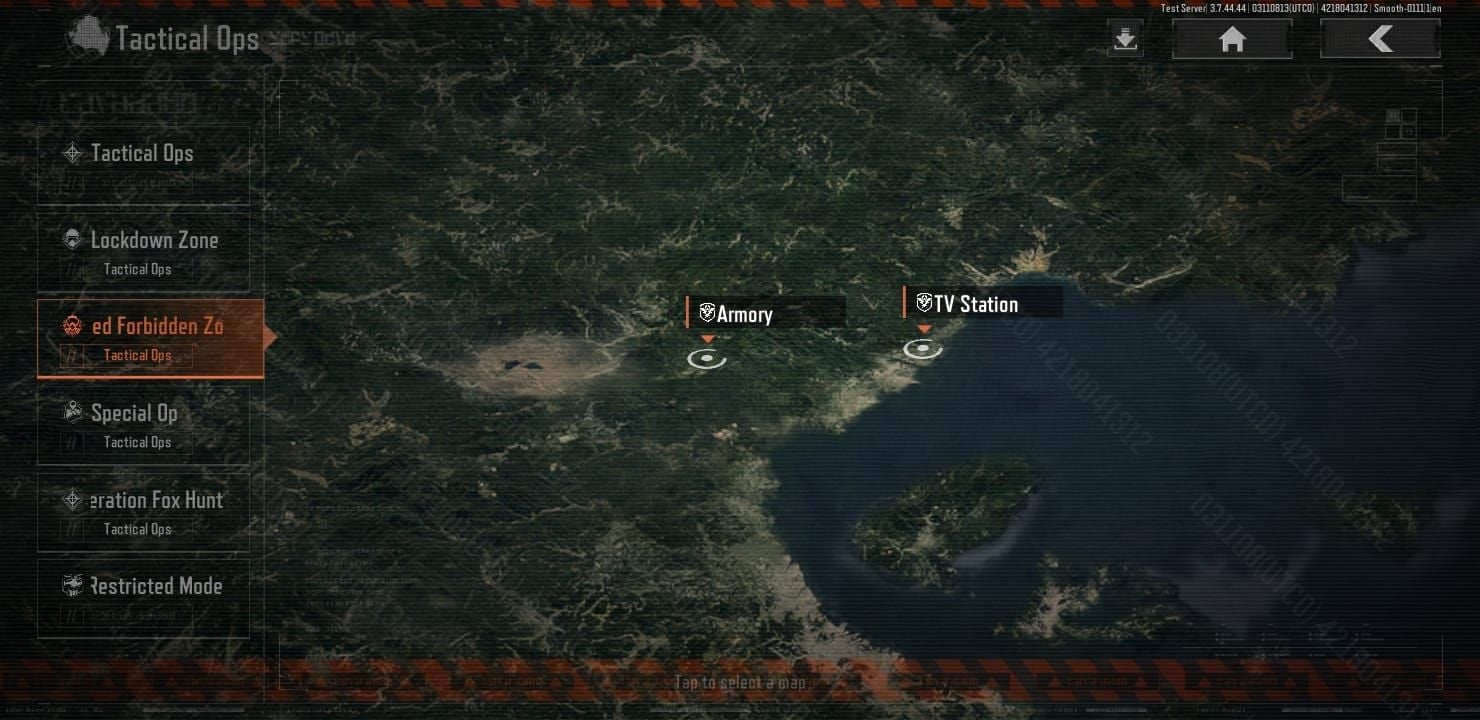
Premium safes distribute across distinct map sectors, requiring traversal of high-traffic corridors. Geographic spread makes route memorization critical—navigation errors compound into significant time losses.
Extract points activate on varied timers with specific restrictions. Track raid time meticulously and position proactively for extraction windows.
Loot Quality Analysis and Koen Projections
Top-tier safes produce 200k-450k Koens, mid-tier yield 100k-250k Koens. Critical difference: Forbidden Zone spawns higher percentages of rare crafting materials requiring Hideout upgrades to utilize effectively.
The 300k entry fee establishes higher profitability threshold. Successful raids must yield 400k+ Koens to match Airport Standard Lockdown's net profit. Players maintaining 60%+ extraction success outperform Airport farmers; those below 50% lose money.
Enemy AI Density and PvP Encounter Rates
Higher AI density forces players to engage NPCs while remaining alert for human opponents. Gunfire from AI combat attracts opportunistic players, turning routine encounters into PvP traps.
The 300k entry barrier filters toward experienced, well-equipped opponents. Forbidden Zone attracts proportionally more squads than solo operators.
PvP concentrates in raid's middle phase (minutes 10-20) when players complete initial looting and rotate toward extracts.
Recommended Equipment and Armor Class
Gear loadouts in 280k-350k Koens range:
- Level-4 armor with 80+ durability
- Sentry 308 Armored Rig (60 durability, 20 slots)
- Versatile rifle effective at 50-150 meters
- 120-150 rounds ammunition
- 3-4 medkits, 6-8 bandages, 3 painkillers
Extraction Point Accessibility
Drainage Pipe: Activates at 10 minutes, prohibits backpacks. Choose between early extraction with limited loot or continuing with full inventory.
Northern Outpost: Requires 1 kill, max 2 players, activates 10-20 minutes. Favors aggressive players; 2-player limit creates extraction competition.
Southern Blockade: Requires 2000 Koens payment, reducing net profitability. Lower traffic makes it valuable for prioritizing survival.
Direct Profit Comparison: Airport vs Forbidden Zone
Airport Standard Lockdown:
- Gross loot: 1,200k-1,400k Koens
- Extraction success: 55-65%
- Entry fee: 20k Koens
- Key costs: 180k-220k Koens
- Net profit per successful extraction: 460k-690k Koens
- Net profit per attempt (including failures): 250k-450k Koens
- Raids per hour: 2.5-3
- Hourly earnings: 625k-1,350k Koens
Forbidden Zone:
- Gross loot: 1,400k-1,800k Koens
- Extraction success: 40-50%
- Entry fee: 300k Koens
- Key costs: 180k-220k Koens
- Net profit per successful extraction: 880k-1,280k Koens
- Net profit per attempt (including failures): 350k-640k Koens
- Raids per hour: 2-2.5
- Hourly earnings: 700k-1,600k Koens
Crossover point: 48% extraction success. Above this, Forbidden Zone profits more; below it, Airport delivers better returns.
For maintaining key inventory across raids, Arena Breakout Bonds recharge instant through BitTopup provides reliable access without interrupting farming momentum.
Key Cost vs Profit Margin Analysis
Key investment represents 15-18% of gross loot value. AOK Archives Key, Executive Lounge Key 2F, and VIP Reception Key 2F cost 450k-600k Koens with 5-7 uses each, producing per-raid costs of 65k-85k Koens for three premium safes. Total key costs: 180k-220k Koens per raid.
Forbidden Zone mirrors Airport's key costs but higher 300k entry fee increases total operational costs to 480k-520k Koens per raid, demanding higher gross loot values for profitability.
High-Value Item Drop Rate Comparison
Premium safes spawn:
- Rare weapon attachments: 30-40% probability
- Valuable medical supplies: 20-30%
- Rare crafting materials: 15-25%
Airport favors immediately-liquid items with consistent market demand. Forbidden Zone spawns specialized components requiring Hideout processing, creating profitability timing differences.
Success Rate and Survival Statistics
Airport's 55-65% extraction success stems from multiple accessible extracts, lower opponent skill level, and forgiving entry costs. Forbidden Zone's 40-50% survival reflects concentrated player skill, limited extraction options, and high entry cost encouraging aggressive loot maximization.
Improving survival rates yields exponential gains. Increasing Airport success from 55% to 65% improves hourly earnings by 18%. Same 10-point improvement in Forbidden Zone (40% to 50%) increases hourly profit by 25%.
PvP Risk Assessment: Which Route Is Safer?
Airport's tiered entry creates natural player segmentation. Standard Lockdown attracts players meeting 150k+ Koens minimum, producing predictable opponent pools. Players entering with 200k-250k Koens loadouts gain meaningful gear advantages.
Forbidden Zone's flat 300k entry eliminates segmentation. Players must invest 350k-400k Koens for meaningful edges.
Solo players favor Airport's vertical design and interior-focused safes for close-quarters combat. Forbidden Zone's open terrain disadvantages solo players against coordinated squads.
Player Traffic Patterns
Airport phases:
- Minutes 0-8: Free safe competition
- Minutes 8-20: Key safe farming
- Minutes 20-35: Extraction convergence
Forbidden Zone: Players move directly toward high-value safes, creating earlier PvP encounters (minutes 5-8). Drainage Pipe's 10-minute activation creates traffic surge during minutes 8-12.
Common Ambush Points
Airport:
- AOK building main entrance
- Control Tower stairwell (most dangerous)
- Cargo Center approach corridors
Avoid by using exterior staircases, tower perimeter approaches, and wide flanking paths.
Forbidden Zone: Ambush points concentrate around mandatory chokepoints between safes and extracts. Open terrain limits close-range ambushes but enables long-range overwatch positions.
Solo vs Squad Safety
Solo players in Airport benefit from superior mobility and reduced audio signature. Interior design provides numerous cover positions and escape routes.
Squad players gain advantages in Forbidden Zone's open terrain through coordinated crossfire. Two-player teams represent efficiency sweet spot—tactical advantages while maintaining acceptable per-player profitability.
Defensive Positioning During Safe Looting
Position safe between player and most likely threat approach angle, using safe's physical model as cover while maintaining sightlines on secondary vectors.
Develop ability to distinguish footstep audio from ambient sound at 30-40 meters, allowing abort before opponents enter effective combat range.
When looting AOK Archives (250k-500k Koens), complete interaction even with nearby audio cues—loot value justifies risk. When looting lower-value safes with full inventory, abort at first threat indication.
When to Switch Between Routes: Decision Framework
Early wipe (weeks 1-2): Airport optimal. Lower opponent gear quality, affordable key prices, PvP favors positioning over gear.
Mid-wipe (weeks 3-5): Transition window. Run parallel testing, alternating between routes while tracking profitability metrics.
Late-wipe (weeks 6+): Forbidden Zone optimal. Key price inflation reduces Airport profitability; Forbidden Zone maintains profitability through higher per-safe yields.
Gear Level Breakpoints
150k-250k Koens loadouts: Airport Standard Lockdown exclusively
300k-350k Koens capability: Begin testing Forbidden Zone, track survival rates over 20-30 raids
350k-400k Koens loadouts: Transition to Forbidden Zone primary farming
Skip Premium Lockdown—jump directly from Standard to Forbidden Zone once reaching 300k threshold.
Server Population and Prime Time
High-population servers during prime time create 10-12 active Airport players. Low-population periods feature 6-8 players with reduced competition, affecting profitability by 20-30%.
Forbidden Zone's higher entry creates less dramatic population swings. Off-peak farming offers best risk-reward for solo operators—high loot yields with reduced PvP interference.
Prioritize servers offering sub-50ms latency. Higher ping disadvantages PvP through delayed hit registration and movement desync.
Personal Skill Level Considerations
Players with 60%+ PvP win rates can profitably farm Forbidden Zone with minimum-threshold gear. Players with 30% win rates lose money regardless of equipment quality.
Route knowledge and safe memorization improve profitability without requiring combat excellence. Players struggling with PvP can achieve 50-55% Airport extraction through superior positioning and threat avoidance.
Engage favorable encounters (superior positioning, numerical advantage, surprise) while avoiding unfavorable situations (open terrain, multiple opponents, uncertain threats).
Advanced Optimization Strategies
Inventory Management for Maximum Loot Capacity
Sentry 308's 20 slots + tactical backpack's 16-20 slots = 36-40 total capacity.
Prioritize high-value compact items:
- Weapon attachments: 1-2 slots, 30k-80k Koens
- Medical supplies: 1 slot, 15k-40k Koens
- Avoid weapons: 4-6 slots, 60k-120k Koens (poor value-per-slot)
Position high-value items in rig slots rather than backpacks for extracts prohibiting backpacks.
Speed Running Techniques
Pre-plan exact movement paths using landmarks. Approach safes from specific angles providing cover during looting while maintaining sightlines on threat vectors.
Skip safes based on time constraints and inventory value. If reaching seventh safe requires crossing high-risk terrain with 90% inventory, extract immediately.
Key Priority System
Safe sequencing:
- AOK Archives (250k-500k) - always first 2-3. Control Tower Fountain, AOK Control (150k-300k each) 4-6. Fuel Depot, Exhibition, Cargo Center (100k-220k)
- Parking Lot Car (80k-150k) - optional
Adapt mid-route to PvP activity. If heavy gunfire around Control Tower, skip Fountain temporarily and proceed to Fuel Depot.
Final 1-2 safes represent optional profit maximization. Complete with 80%+ inventory and favorable positioning; extract directly with full inventory or elevated PvP pressure.
Backup Route Planning
Pre-plan alternatives for contested areas. If AOK building contains active PvP, redirect toward Control Tower or Fuel Depot.
Identify 2-3 viable extraction points before entering, tracking activation timers throughout route.
Extend or shorten routes based on loot quality. First three safes yielding 600k+ Koens? Extract early with strong profits. Early safes yielding 200k? Extend to 8-9 safes.
Common Mistakes and Misconceptions
Why More Safes Doesn't Mean More Profit
Each additional safe adds 2-3 minutes travel and looting time, reducing raids per hour and increasing PvP exposure. Safes 8+ generate marginal gains with disproportionate risk.
Completing 7 safes in 20 minutes with 60% survival generates higher hourly Koens than 10 safes in 32 minutes with 45% survival.
Hidden Costs of Low Survival Rates
Player with 40% survival must generate 2.5x the per-raid profit of 60% survival player for equivalent hourly earnings.
Single Forbidden Zone death costs 830k Koens (300k entry + 350k gear + 180k keys). Recovering requires 2-3 successful raids.
Overvaluing Loot Tier vs Market Value
Tier-3 items in high demand often sell for more than tier-4 items with limited utility. Prioritize market prices over tier ratings.
Maintain mental price databases for common items, updated weekly. Enable real-time inventory decisions maximizing value-per-slot.
Timing Errors
Access Bridge activates at 25 minutes with 4-6 minutes travel. Begin extraction approach at minute 19-21. Stopping at minute 17 sacrifices 4 minutes looting; continuing past minute 21 risks missing activation.
Invest 30-60 seconds in area reconnaissance before starting safe interactions, ensuring looting window doesn't coincide with opponent arrivals.
Practical Loadout and Preparation Guide
Minimum Gear Requirements
Airport Standard (150k+ Koens):
- SEK Composite Body Armor
- Tier-2 weapon, 90 rounds
- 2 medkits, 4 bandages
- Tactical backpack
- Cost: 150k-180k Koens
Forbidden Zone (300k+ Koens):
- Sentry 308 Armored Rig
- Tier-3 weapon, 120 rounds
- Level-4 helmet
- 3 medkits, 6 bandages, 2 painkillers
- Cost: 300k-350k Koens
Cost-Effective Loadouts
Investing 200k in Airport gear (50k above minimum) improves survival by 8-12%, generating additional 80k-120k Koens per 10 raids through reduced deaths.
Forbidden Zone: upgrading from 300k to 400k gear improves survival only 4-6%. Focus on meeting 300k threshold efficiently.
Consumables Checklist
Medical: 2-3 medkits, 4-6 bandages, 2 painkillers
Ammunition: 90-150 rounds (120-150 for automatic, 90-120 for semi-automatic)
Utility: Skip grenades except 1-2 smokes for Forbidden Zone extraction
Pre-Raid Hideout Preparation
Maintain 3-5 complete key sets for primary route, enabling 15-35 consecutive raids.
Maintain 500k-1M Koens liquid capital for 5-10 consecutive raids without selling loot mid-session.
Organize stash with designated sections for keys, consumables, gear sets. Saves 2-3 minutes per raid in preparation.
Track key durability in spreadsheets, replacing proactively before breaking mid-raid.
Maximizing Profits with BitTopup
Consistent farming requires reliable Koens for entry fees, keys, and gear replacement. Supply interruptions cost 300k-600k Koens per hour in lost earnings.
BitTopup provides instant Bond delivery, competitive pricing, and secure transactions. Replenish Koen reserves between raids without leaving game, maintaining momentum during hot streaks.
Securing More Keys for Continuous Farming
Maintain 3-5 complete key sets for 15-35 consecutive raids before replenishment.
BitTopup's Bond top-up enables rapid key acquisition through in-game market. Immediately reinvest earnings into additional keys, compounding profits through continuous operation.
Purchase keys during off-peak hours when prices are lower. Stockpile for prime-time farming when competition decreases.
Cost-Effective Koen Top-Up Strategies
Replenish after depleting 60-70% of capital, maintaining buffer while avoiding excessive unused capital.
BitTopup's instant delivery enables just-in-time acquisition. Operate with 500k-1M Koens and top up as needed, freeing capital for productive investments.
Calculate weekly Koen consumption and purchase in bulk, reducing per-Koen costs through volume discounts.
Maintaining Momentum During Profit Runs
Hot streaks with 70%+ survival across 5-6 raids represent critical wealth accumulation. Extend sessions to 8-12 consecutive raids. BitTopup ensures supplies don't interrupt profitable periods.
After 3+ consecutive failed raids, stop and analyze failure patterns. BitTopup's reliable service ensures returning doesn't require lengthy preparation.
FAQ
Which map generates more profit per hour?
Airport: 625k-1,350k Koens hourly (2.5-3 raids/hour, 55-65% survival). Forbidden Zone: 700k-1,600k Koens hourly (2-2.5 raids/hour, 40-50% survival). Forbidden Zone offers higher ceiling but requires 50%+ survival to exceed Airport.
What survival rate makes Forbidden Zone more profitable?
48% extraction success. Above 50% favors Forbidden Zone; below 45% favors Airport. Between 45-50%, test both over 20-30 raids.
How long does a 7-safe route take?
Airport: 18-24 minutes. Forbidden Zone: 22-28 minutes. Both exclude extended combat.
Should I run Premium Lockdown or jump to Forbidden Zone?
Skip Premium Lockdown. Transition directly from Standard to Forbidden Zone once reaching 300k+ gear capability. Premium requires Forbidden Zone gear while offering Airport yields.
What inventory size is needed?
36-40 slots (Sentry 308's 20 + tactical backpack's 16-20). Prioritize compact high-value items over large weapons.
When should I extract early?
Extract at 90%+ inventory with high-value items, when PvP intensifies around remaining safes, or when raid time exceeds 22 minutes with distant extracts. Flexible extraction generates higher hourly profits than rigid completion.
Ready to dominate both routes? Stock up efficiently through BitTopup—instant delivery, secure transactions, competitive rates. Visit BitTopup now and maximize your farming potential!


