

Understanding Season 4 Airport Hunt Extraction Crisis
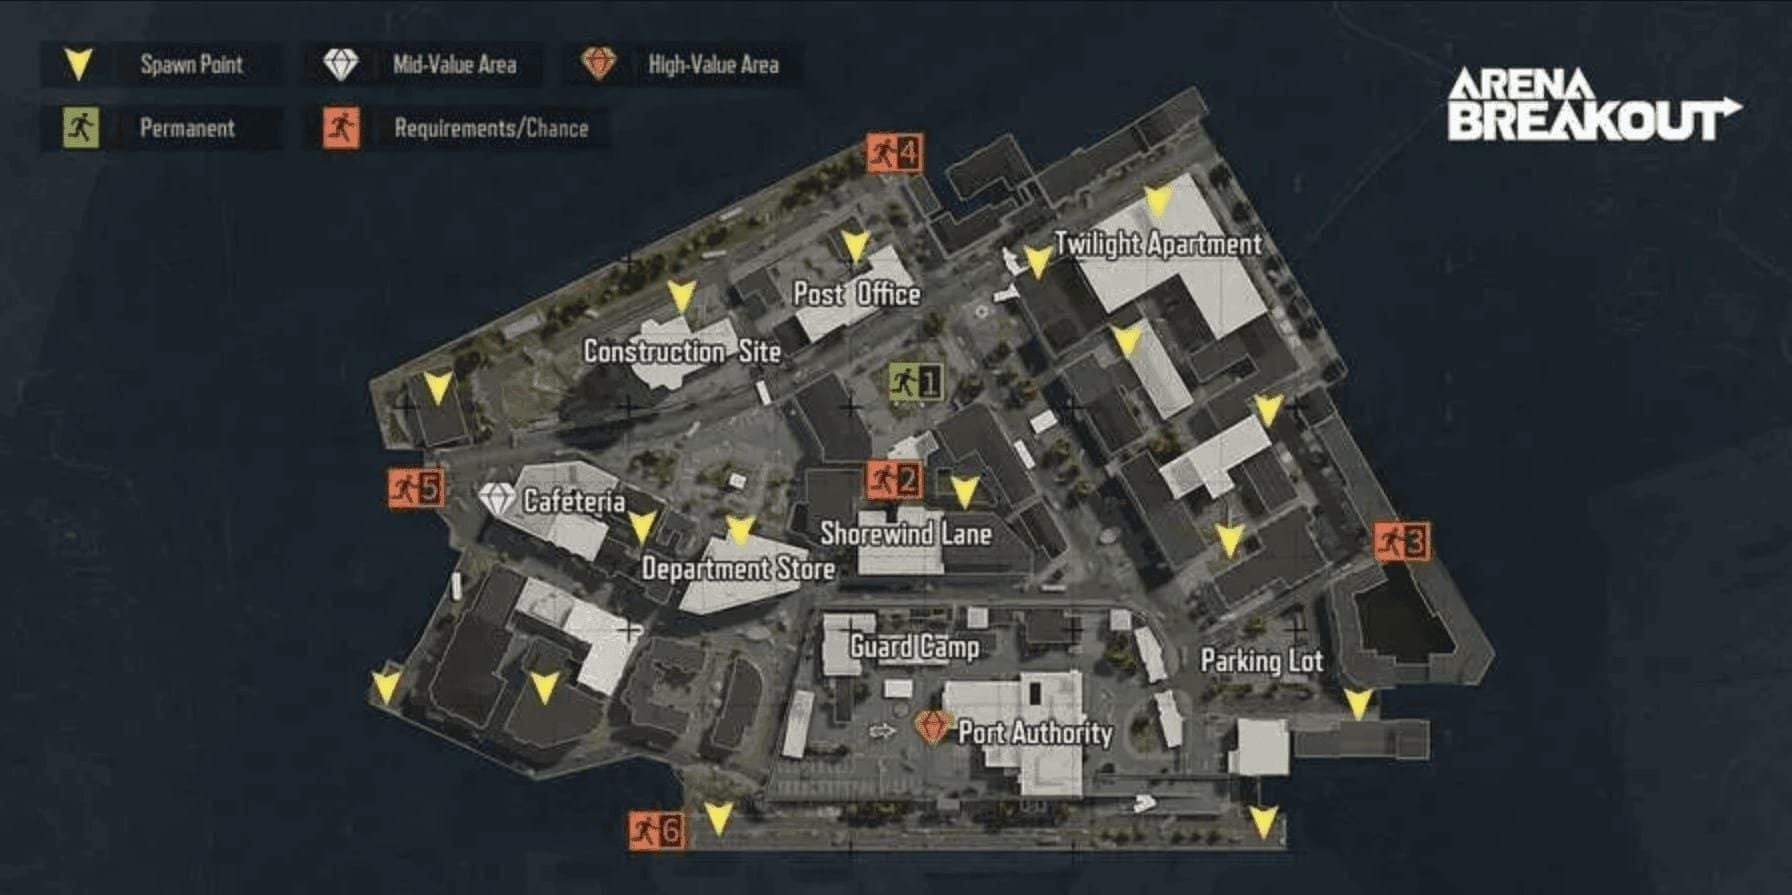
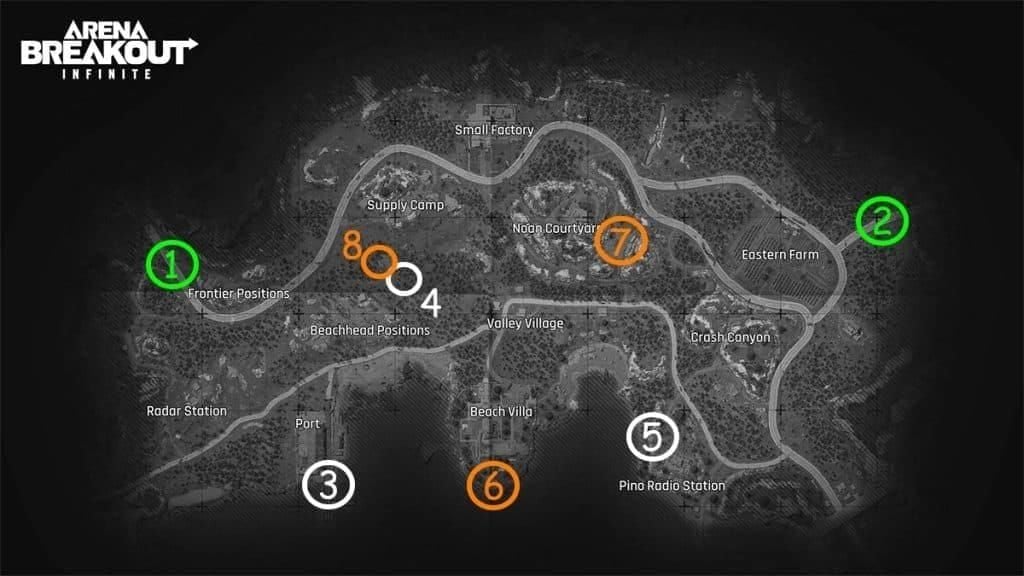
Season 4 launched January 8, 2026 at 6PM EST, introducing Guoyapos Airport as a Level 25-unlocked map with 12-player raids on 72 tick rate servers. The extraction system combines 13 distinct points with conditional requirements, creating predictable player movement patterns that skilled campers exploit.
The crisis stems from three factors: limited unconditional extracts, high-value loot concentrations near popular exfil zones, and weapon meta dominance. Players carrying 150-250k Koens from Motel safes or 50-80k from Stables become priority targets during final raid minutes. For competitive loadouts without risking in-raid losses, Arena Breakout Bonds top up through BitTopup provides fast, secure currency access.
Why Extraction Camping Dominates
Extraction camping thrives because most players default to Boulder Wall and Outpost—the only fixed, unconditional extracts. Boulder Wall's central location attracts 40-50% of surviving players, creating guaranteed engagement opportunities for campers positioned 100+ meters out with long-range setups.
The 15-Minute Cluster (Destination Extract, Recycling Station Truck, Road Meet-Up Point, Road to the Port, Western Path) activates simultaneously at minute 15 with 20-second timers. This predictable activation creates chokepoints where campers pre-position before the timer appears.
AI patrol cycles every 3-5 minutes provide audio cover for campers repositioning between routes. Experienced campers synchronize movement with AI gunfire, masking footsteps during critical phases.
M61/Tapper Combination Explained
The MPX firing 9x19mm AP6.3 T3 ammo delivers 679.68 damage with 424.8 penetration at 850 RPM, shredding SEK Composite Body Armor (70 durability, 5% movement penalty) and Sentry 308 Armored Rigs (60 durability, 20 storage slots, 6% movement penalty) within 2-3 shots.
The Tapper platform provides controllable recoil at 200+ meter engagement distances—precisely where extraction zones force players into open approaches. This combination eliminates traditional armor advantage, making positioning and route selection more critical than gear quality.
Counter-loadouts require 60+ total armor durability minimum, but even this provides only 1-2 additional seconds of survival against sustained M61 fire.
Risk Assessment Framework
Low-risk routes share four characteristics: multiple approach angles, natural cover within 50m of extraction, activation windows that disperse player traffic, and positioning that avoids high-loot area sightlines.
High-risk extractions include Boulder Wall (fixed location, central position), Outpost (200m from Motel loot concentration), and Southern Blockade (2000 Koens payment requirement). These concentrate 60-70% of extraction attempts despite representing only 23% of available options.
Timing windows fundamentally alter risk profiles. Drainage Pipe (0-10 minutes, no backpack) sees minimal traffic because most players spend 8-12 minutes looting. Northern Outpost (10-20 minutes, requires 1 kill, max 2 players) attracts aggressive players but the kill requirement filters out passive looters.
Route 1: Grain Trade Center to Outpost Loot Chain
This route prioritizes economic efficiency, targeting three high-value loot locations before extracting at Outpost.
Navigation Guide
From eastern spawns, crouch-walk 150m northwest to Grain Trade Center. The initial 90-120 seconds provide silent movement before AI patrols spawn.
Loot 2 ammo boxes at Grain Trade Center in 20-30 seconds. Ammo boxes yield 60-120 rounds of premium ammunition worth 15-25k Koens.
Move 200m south to Stables, entering through western door to avoid Motel sightlines. The upstairs safe requires a 2011 key and yields 50-80k Koens in 12-18 seconds. Position near window during cracking to monitor approaches.
Transit 150m east to Motel. Sprint this segment in 18-22 seconds during AI patrol cycles to mask footsteps. Motel contains 3 safes requiring 2011 keys, yielding 150-250k Koens total in 3-4 minutes.
Extract at Outpost 200m northwest of Motel. Crouch-walk final approach to avoid detection. Arrive minutes 8-12 for optimal timing.

Cover Positions
Grain Trade Center's northwestern corner provides 270-degree visibility while looting. Position with corner at your back for quick retreat.
Stables' upstairs window overlooks Motel approach, creating 6-8 second early warning. If movement appears during safe-cracking, abandon loot and exit east.
Motel's three safes sit in separate rooms. Clear northern room first (farthest from Outpost), then work backward toward southern exit.
The Outpost approach from Motel offers minimal natural cover. Use terrain depression 80m northwest of Motel to break sightlines, then sprint final 120m during AI engagement audio.
Counter-Camping Strategies
Campers position in three locations: Grain Trade Center's eastern approach, Motel-to-Outpost corridor, and Outpost's perimeter.
Counter Grain Trade Center campers by approaching from northwest rather than direct eastern path. This adds 30-40 seconds but avoids primary sightlines.
The Motel-to-Outpost corridor requires audio discipline. Never sprint unless AI patrols are actively engaging within 100m. Audio cover lasts 8-12 seconds per AI engagement.
Outpost perimeter campers position 100-150m out with scoped weapons. Approach from southwestern angle, using terrain roll to break long sightlines. Observe extraction point for 30-45 seconds from 120m before committing.
Route 2: Speed-Run Drainage Pipe Extraction
Drainage Pipe activates minutes 0-10 and prohibits backpacks, creating fastest possible extraction at cost of loot capacity.
Optimal Timing and Movement
From southern spawns, sprint 400-500m to Drainage Pipe in 6-7 minutes total. First 200m uses full sprint to maximize distance during spawn invulnerability window.
Switch to crouch-walk after 200m to reduce footstep noise by 60%. This covers 200-300m in 4-5 minutes, arriving minutes 6-7.
Backpack prohibition limits loot to rig slots (20 slots for Sentry 308 Armored Rig) plus pockets (4-6 slots). Prioritize high-value-per-slot items: keys (1 slot, 30-80k value), premium ammo stacks (1 slot, 8-15k value).
Discard backpack 50m before Drainage Pipe rather than at extraction point. This prevents 3-5 second stationary animation where campers pre-aim.
Audio Discipline
Drainage Pipe sits in natural sound funnel where footsteps echo 40-50% louder. Crouch-walking becomes mandatory within 100m.
Avoid jumping or vaulting within 150m. These generate distinct audio cues that experienced players recognize as extraction-bound movement.
Time final approach during AI patrol cycles if possible. AI spawns near Valley Port create gunfire audio every 3-5 minutes, providing 8-12 second windows of audio cover.
Emergency Fallback
If you encounter resistance within 100m of Drainage Pipe, abort and redirect to Hunter's Path extraction (requires backpack discard). Since you've already dropped backpack for Drainage Pipe, you meet Hunter's Path requirements.
Hunter's Path sits 300-400m west of Drainage Pipe, requiring 2-3 minutes of repositioning. Use southern perimeter route, staying within 50m of map boundary.
Emergency fallback decision point occurs at minute 8. If you're not within 100m of Drainage Pipe by minute 8, redirect immediately rather than rushing into compromised position.
Route 3: Western Perimeter to Southern Blockade
Southern Blockade requires 2000 Koens payment, creating financial barrier that reduces traffic by 50-60%.
Low-Visibility Approach
Approach from western perimeter rather than central map routes. This adds 200-300m but avoids sightlines from Sewage Plant (3 safes), Campus Services (2 safes), and Valley Beach Villa (2 safes, 10 weapon crates).
Maintain 100+ meter distance during initial approach. Observation phase lasts 60-90 seconds, watching for scope glint or player movement.
Payment interface requires 5-8 seconds of stationary interaction. Pre-position smoke throwables (minimum 1 required). Deploy smoke between your approach vector and likely camper positions (northeastern elevated positions).
Execute payment during smoke deployment, using 8-12 second concealment window to complete transaction and begin extraction. Extraction timer starts immediately after payment, typically lasting 8-10 seconds.
Navigation Markers
Western perimeter route uses three markers: western map boundary wall (continuous landmark), southern treeline (100m from Southern Blockade, final concealment), and payment terminal structure (distinctive blue-painted concrete bunker).
Navigate by keeping western boundary wall within 30-50m on your left while moving south. Boundary wall features distinctive graffiti every 80-100m, providing progress checkpoints.
Southern treeline marks transition from concealed approach to open ground. Stop here for 60-90 second observation phase, scanning payment terminal area and elevated positions.
Payment terminal sits in concrete bunker with 270-degree exposure. Only hard cover exists on western side—position here during payment to minimize exposure angles.
Unexpected Encounters
If you encounter players during western perimeter approach, you have three options: engage if you have positional advantage, retreat north toward Campus Services and redirect to alternative extractions, or go prone in dense vegetation.
If players appear during observation phase at treeline, abort Southern Blockade immediately. The 2000 Koens payment becomes liability if contested.
Players appearing during payment create highest-risk scenario. Complete payment if you're more than 50% through interaction timer. Deploy smoke immediately, complete payment, and use extraction timer within smoke concealment.
Route 4: Access Bridge Timed Positioning
Access Bridge activates at minute 25, creating hard timing threshold. Positioning within 100m by minute 24 provides first-mover advantage.
Long-Range Approach
Access Bridge's 25-minute activation allows 20+ minutes of looting before extraction pressure. This suits players running Northridge Hotel (8 safes) or Valley Beach Villa (2 safes, 10 weapon crates) routes.
Long-range approach from northern loot zones covers 600-800m, requiring 8-12 minutes of travel. Depart final loot location by minute 16-17, allowing 7-8 minutes of travel plus 1-2 minutes of final positioning.
Early positioning (arriving minute 22-23) provides choice of cover positions. Claim western pillars for optimal sightlines toward common approach vectors from Northridge Hotel and central map.
Late positioning (arriving minute 25-26) forces you into secondary cover positions. If running late, consider waiting until minute 27-28 when early extractors have left.
Sightline Management
Access Bridge support pillars provide hard cover against rifle fire. Elevated bridge deck creates vertical cover against ground-level approaches.
Position on western side during minutes 22-24, monitoring approaches from Northridge Hotel (northeast), Grain Trade Center (east), and central map (southeast). These vectors account for 70-80% of Access Bridge traffic.
Rotate between pillars every 45-60 seconds during waiting phase to prevent predictable positioning. Moving between pillars forces campers to reacquire targets.
During final minute before extraction (minute 24-25), commit to single pillar position with optimal cover toward most threatened approach vector.
Solo vs Squad Execution
Solo players benefit from Access Bridge's hard cover and single-player extraction capacity. Arrive early, position quietly, extract immediately at minute 25.
Squad execution requires coordination. Position in defensive perimeter around bridge rather than clustering at extraction point. Assign one player to monitor each major approach vector.
Squad timing differs from solo. Arrive by minute 23 rather than minute 24 to allow time for perimeter setup. Squads can suppress campers attempting to contest extraction.
Designate one player as extraction caller who monitors all approach vectors and makes final decision to extract or reposition. Extract in pairs with 5-second spacing to prevent squad-wipe.
Route 5: 15-Minute Cluster Chaos Extraction
The 15-Minute Cluster activates simultaneously at minute 15 with 20-second timers across five locations, dispersing camper attention.
High-Risk Segments
High-risk segments include final 50m approach to each extraction point during minutes 14:30-15:00. Players sprint to reach extraction points before activation, creating audio signatures detectable from 80-100m.
Mitigate approach risk by positioning within 100m of chosen extraction point by minute 14:00. This provides 60-second buffer to observe, identify threats, and adjust positioning.
The 20-second extraction timer creates second high-risk segment. Deploy smoke throwables at timer start, creating concealment for full 20-second duration. Position at edge of smoke rather than center.
Speed vs Stealth Trade-off
Optimal execution balances both: stealth during minutes 13:00-14:30 (positioning phase), speed during minutes 14:30-15:00 (final approach), then stealth during 20-second timer.
Positioning phase uses crouch-walking to reach 100m perimeter. Invest 90-120 seconds in this phase for maximum stealth benefit.
Final approach phase uses tactical sprinting—short 3-5 second sprints between cover points. Each sprint covers 20-30m, then pause for 2-3 seconds to listen for reactive movement.
Timer phase returns to stealth. Once extraction timer starts, minimize movement to essential repositioning within smoke. Avoid jumping, vaulting, or sprinting during these 20 seconds.
Equipment Loadout
15-Minute Cluster extractions require: 60+ total armor durability, 120+ rounds of ammunition, 4+ medical items, and 1+ smoke throwable (mandatory).
MPX (850 RPM, 9x19mm AP6.3 T3 ammo, 679.68 damage, 424.8 penetration) suits close-range extraction defense. Load 120+ rounds across three magazines.
AK-74N (630 RPM, 5.45x39mm Level 5 BP ammo, 60-round magazines) offers sustained fire for squad extractions. Carry 120-180 rounds total across two magazines.
Medical items should include 2 bandages (stopping bleeding during extraction timers), 1 medkit (healing between engagements), and 1 painkiller (maintaining mobility if hit).
Smoke throwables are non-negotiable. Carry 1-2 smokes, deploying one at extraction timer start. Smoke duration (8-12 seconds) doesn't cover full 20-second timer, so position at smoke edge.
Route 6: Northern Outpost Kill-Requirement Route
Northern Outpost activates minutes 10-20, requires 1 enemy kill, and limits capacity to 2 players maximum. These conditions filter out passive players and large squads, reducing traffic by 60-70%.
Avoiding High-Traffic Chokepoints
Northern Outpost sits in map's northern sector, away from premium loot zones. This geographic isolation reduces incidental traffic.
Approach from northwestern map boundary rather than central map routes. Boundary approach adds 100-150m but avoids chokepoints near Grain Trade Center and Stables.
Kill requirement creates secondary filter. Players must secure 1 kill before accessing Northern Outpost, meaning everyone approaching has demonstrated combat capability.
2-player maximum capacity prevents squad extractions, eliminating 3-4 player teams. Solo and duo players gain exclusive access, reducing competition by 40-50%.
Mid-Raid Timing Advantages
The 10-20 minute activation window aligns with post-loot, pre-extraction-rush timing. This creates calm period where map traffic decreases.
Optimal Northern Outpost timing is minutes 12-15. Arrive by minute 12 after securing required kill during spawn-area PvP phase (minutes 0-5) or against AI patrols (minutes 5-10).
Early timing (minutes 10-11) risks encountering other players with same strategy. Delay 2-3 minutes to let initial rush clear.
Late timing (minutes 18-20) creates urgency as window closes. Players who haven't secured kills yet become desperate. Avoid minutes 18-20 unless confident in combat ability.
Loot-and-Extract Efficiency
Northern Outpost's northern location limits nearby loot opportunities. Closest significant loot sits at Grain Trade Center (2 ammo boxes) 400m south.
Optimize by securing kill requirement near northern spawn points, looting immediate spawn area (1-2 weapon crates or supply boxes), then moving directly to Northern Outpost. This completes in 8-10 minutes total.
Alternative optimization targets AI patrols for kill requirement rather than players. AI patrols cycle every 3-5 minutes and provide guaranteed kills without player combat risk.
2-player capacity limit enables duo coordination. Both players can extract simultaneously, splitting loot and sharing security. Duos should assign roles: one focuses on securing kill requirement while other handles loot collection.
Route 7: Valley Helipad Dogtag Extraction
Valley Helipad requires 2 dogtags, creating highest barrier to entry. This filters out 80-90% of players, making it lowest-traffic extraction despite having no time restrictions.
Emergency Extraction Options
Valley Helipad serves as emergency extraction when conventional routes are compromised. If you've accumulated 2+ kills and find yourself unable to reach standard extractions due to campers, map position, or time constraints, Valley Helipad provides alternative.
Dogtag requirement means you've already engaged in PvP successfully, indicating combat-capable gear and skills. This self-selection creates psychological advantage.
Use Valley Helipad when carrying high-value loot (200k+ Koens) that justifies risk of traveling to remote extraction point. Reduced traffic makes longer travel distance worthwhile.
Emergency timing for Valley Helipad occurs during minutes 25-30 when Access Bridge and 15-Minute Cluster extractions have concluded. Remaining players concentrate at Boulder Wall, Outpost, and Southern Blockade.
Survival-First Mindset
Valley Helipad extraction requires abandoning loot-maximization in favor of survival-first decision-making. The 2-dogtag requirement means you've already secured kills—primary objective shifts to protecting what you have.
Survival-first mindset avoids unnecessary engagements during extraction phase. If you encounter players while moving toward Valley Helipad, disengage unless they directly block your path.
Route selection prioritizes concealment over speed. Path to Valley Helipad from central map covers 500-700m. Use perimeter routes that add 100-200m of distance but avoid high-traffic areas.
Gear preservation becomes critical. If you take damage during engagement, heal immediately rather than continuing with reduced health. Arrive at Valley Helipad with full or near-full health.
Minimizing Stash Value Loss
Valley Helipad's remote location and dogtag requirement create opportunities for insurance fraud—intentionally hiding insured gear before extraction to recover it later while extracting with maximum loot value.
Insurance fraud works by dropping insured armor, rigs, and weapons in concealed locations 100-200m from Valley Helipad, then extracting with only high-value loot in pockets. Insurance system returns hidden gear after 12-24 hours.
Optimal insurance fraud locations include dense vegetation patches, interior rooms of abandoned structures, and terrain depressions that prevent casual discovery.
Time insurance fraud for minutes 28-32 when most surviving players have extracted or died. Dropping gear earlier risks discovery by players still looting.
Calculate insurance fraud value by comparing insured gear worth versus loot capacity. If insured loadout totals 150k Koens and you're carrying 200k in loot, insurance fraud gains 150k in recovered gear.
Countering M61/Tapper Meta at Extraction Zones
M61 ammunition and Tapper weapon combination dominates Season 4 extraction camping. Countering this meta requires specific armor choices, movement techniques, and pre-extraction procedures.
Armor Selection
SEK Composite Body Armor (70 durability, 5% movement penalty) represents minimum viable armor against M61 rounds. 70 durability provides 2-3 shots of protection, giving 1.5-2 seconds of survival time.
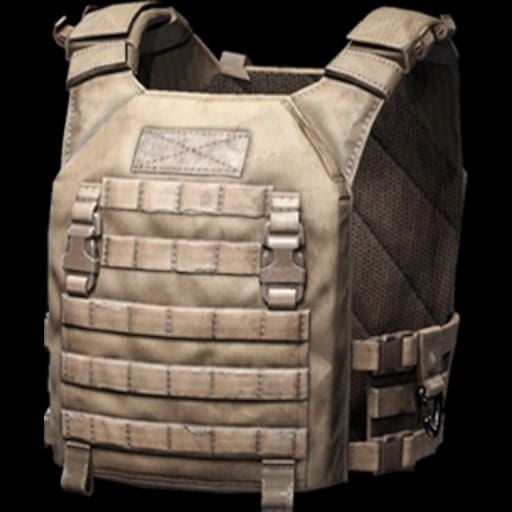
Sentry 308 Armored Rig (60 durability, 20 storage slots, 6% movement penalty) offers inferior protection but superior storage capacity. 60 durability provides 2 shots of protection.
Layered armor configurations (body armor + armored rig) provide 120-130 total durability, extending survival time to 4-5 shots or 3-4 seconds. Combined movement penalty (11% total) reduces sprint speed but provides meaningful survivability improvement.
Helmet selection matters less against M61 meta because headshots bypass most helmet protection. Budget loadouts can skip helmets, investing those Koens in higher-tier body armor.
Movement Techniques
M61 campers pre-aim head-level positions along common approach vectors. Counter this by varying vertical positioning through crouching, prone movement, and jump-spotting.
Crouch-walking during final extraction approaches (final 100m) reduces vertical profile by 40-50cm, forcing campers to adjust pre-aimed positions. This adjustment requires 0.5-1 second of mouse movement.
Prone movement in vegetation provides maximum concealment but reduces mobility by 70-80%. Use prone movement for final 20-30m of approach when you've identified likely camper positions.
Jump-spotting involves briefly jumping to gain elevation and visibility, then immediately crouching or going prone. This exposes you for 0.3-0.5 seconds but provides 360-degree visibility. Use jump-spotting from behind hard cover.
Lateral movement during extraction timers prevents stationary targeting. Strafe left-right within 2-3 meter radius. This doesn't cancel extraction but forces campers to track moving target, reducing accuracy by 30-40%.
Pre-Extraction Zone Clearing
Clearing extraction zones before committing reduces ambush risk by 60-70%. Clearing procedure requires 60-90 seconds but identifies camper positions before you're committed.
Step 1: Approach to 150m from extraction point. Observe for 30-45 seconds, looking for movement, scope glint, or unnatural positioning.
Step 2: Reposition 50-80m laterally, then observe again for 20-30 seconds. This second observation from different angle reveals campers concealed from first position.
Step 3: If both observations show no threats, approach to 50m and conduct final 10-15 second observation. At 50m, you can hear movement audio and see subtle positioning adjustments.
Step 4: Deploy smoke between your position and most likely camper locations. Approach through smoke, reaching extraction point with smoke concealment still active.
If any observation phase reveals threats, abort extraction attempt and redirect to alternative points.
Advanced Extraction Tactics
Reading Player Behavior
Looted players move with purpose toward extraction points during minutes 20-30, following efficient routes that minimize exposure. They avoid unnecessary detours and maintain consistent movement speed.
Campers exhibit stationary or repetitive movement patterns. They claim positions with sightlines to extraction points, then remain there for 2-5 minutes. Watch for players who move to position, stop, then don't move again for 60+ seconds.
Desperate players make audio mistakes during final minutes (30-35). They sprint when they should crouch-walk, vault obstacles unnecessarily, and reload in open areas.
Squad coordination creates distinctive audio signatures. Multiple players moving together generate overlapping footsteps, synchronized reloads, and coordinated position changes.
Insurance Fraud Considerations
High-value gear insurance (150k+ Koens per loadout) justifies fraud tactics when carrying 200k+ in loot. For players seeking to maintain competitive loadouts while maximizing profit, buy Arena Breakout Bonds through BitTopup's secure platform with fast delivery and competitive pricing.
Drop insured armor, rigs, and weapons in concealed locations, extract with loot-only, then recover insured gear through insurance system 12-24 hours later. This effectively doubles profit per raid.
Optimal fraud locations share three characteristics: concealment from casual observation, distance from high-traffic routes, and memorable landmarks for recovery.
Fraud timing matters critically. Drop gear during minutes 28-32 when most players have extracted or died.
Season 4 Meta Adaptation
Route rotation: Don't use same extraction route more than 2-3 raids consecutively. Rotating between all seven routes prevents predictability and reduces camper effectiveness by 40-50%.
Off-peak timing: Extract during unconventional raid phases rather than standard minute 25-30 window. Early extractions (minutes 10-15) and late extractions (minutes 32-35) encounter fewer campers.
Loadout flexibility: Maintain 3-4 different loadout configurations for different extraction strategies. Speed-run loadouts suit Drainage Pipe. Tank loadouts suit contested extractions like Southern Blockade.
Information gathering: Spend first 2-3 minutes of each raid observing player movement patterns and listening for engagement audio. Adjust raid plan based on early intelligence.
FAQ
What are the safest extraction points in Airport Hunt Season 4? Valley Helipad (requires 2 dogtags) and Northern Outpost (requires 1 kill, active minutes 10-20) are safest due to conditional requirements that filter 70-90% of players. Drainage Pipe (active minutes 0-10, no backpack) offers safety through timing, seeing minimal traffic because most players are still looting.
How do you counter M61 ammunition? Counter M61 through layered armor (120+ total durability), movement variation (crouch-walking, prone positioning, lateral strafing during extraction timers), and smoke deployment during final approaches. M61 penetrates most armor within 2-3 shots, so survival depends on minimizing exposure time.
Where do extraction campers hide? Campers position 100-150m from extraction points at elevated positions with clear sightlines. Common locations include northeastern elevated terrain overlooking Southern Blockade, Grain Trade Center positions monitoring Outpost approaches, and perimeter positions around Access Bridge.
What is the Tapper meta? The Tapper meta combines Tapper weapons with M61 high-penetration ammunition, providing controllable recoil at 200+ meter ranges with armor-penetrating capability. This dominates extraction camping because it allows campers to engage from safe distances while negating target armor advantages.
How to avoid getting killed at extraction? Avoid extraction deaths through three-phase clearing: observe from 150m for 30-45 seconds, reposition laterally and observe again for 20-30 seconds, then approach to 50m for final 10-15 second check. Deploy smoke before final approach, use crouch-walking to reduce audio signatures by 60%, and extract during off-peak timing.
Which extraction route has highest survival rate? Northern Outpost (minutes 10-20, requires 1 kill, max 2 players) achieves 70-80% survival rates due to conditional requirements, geographic isolation from premium loot zones, and mid-raid timing that avoids both spawn-area PvP and final extraction rush.
Maximize your Arena Breakout Season 4 success with BitTopup! Get instant Koen currency top-ups to secure the best extraction loadouts and armor against the M61 meta. BitTopup offers competitive pricing, fast delivery, secure transactions, and excellent customer service. Visit BitTopup now and gain the competitive edge you need to survive Airport Hunt extractions!


