

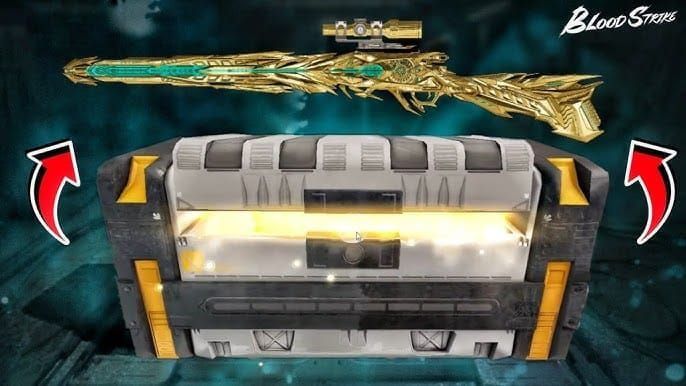
What is Restore Energy in Blood Strike?
Restore Energy fundamentally changes competitive sustainability. Unlike manual medkit usage requiring vulnerable recovery windows, Restore Energy drops automatically from Loot Crates after eliminations, instantly restoring health/armor while granting Evolution energy and reducing skill cooldowns. This rewards aggressive playstyles that chain kills.
Launches January 15, 2026 in Battle Royale Ranked and Peak modes (following January 8, 2026 release in Matchmaking/Room modes). For premium resources, Blood Strike Golds top up through BitTopup provides secure transactions and instant delivery.
Core Mechanics
Three interconnected systems create a self-sustaining combat loop:
Restoration Component: Scales with enemy armor level—Level 3 armor yields maximum recovery, incentivizing engagements against well-equipped enemies.
Auto-Pickup Threshold: Triggers when health drops below 30% or armor depletes, ensuring critical survivability without manual activation.
Evolution Energy: Accumulates across eliminations, unlocking three tiers:

- Tier 1: 100 points, baseline benefits
- Tier 2: 250 points, 15% cooldown reduction
- Tier 3: 500 points, 25% enhanced effect bonuses
Cooldown reduction impact: Ghost's 25-second cooldown drops by 8 seconds per pickup while maintaining 8-second invisibility. Sparkle's healing drone reduces from 30 to 22 seconds, healing 40 HP over 5 seconds.
January 15, 2026 Patch Changes
Ranked/Peak implementation introduces real-time point tracking displays for Evolution tier progression. Dark Take Strike Pass launches simultaneously—free track grants P90 Burst Bolt attachment (level 100 unlock). Elite Strike Pass provides 520 Gold for premium attachments.
Restore Energy vs Traditional Healing
Traditional medkits require 3-5 second vulnerable recovery windows, telegraphing position and forcing defensive play. Restore Energy provides instant restoration upon pickup, maintaining offensive momentum. Resource economy shifts—medkits occupy inventory and deplete, while Restore Energy generates infinitely through eliminations.
However, Restore Energy demands consistent elimination performance. Players struggling to secure kills face sustainability gaps that traditional healing covers through inventory stockpiling.
Understanding the Ranked/Peak Loop
The engagement cycle operates on three phases: initiate combat with full resources, secure elimination to trigger Loot Crate, collect Restore Energy for immediate re-engagement. This compresses downtime from 15-20 seconds (traditional healing) to 2-3 seconds (Restore pickup).
The Energy Cycle Breakdown
Phase 1: Optimal positioning using high ground/cover. P90 SMG's 900 RPM and 50-round magazine enable sustained pressure. Securing elimination triggers Loot Crate spawn at death location.
Phase 2: Tactical movement to Loot Crate while maintaining awareness for third parties. Auto-pickup threshold provides safety nets, but manually collecting at higher health preserves auto-pickup for emergencies.
Phase 3: Leverage restored health/armor/reduced cooldowns to immediately pressure nearby opponents. Each successive elimination strengthens combat effectiveness—Tier 2's 15% cooldown reduction enables ability usage every 1.5 engagements instead of 2.
Optimal Loop Timing
Peak efficiency requires eliminating opponents every 20-30 seconds to maintain Evolution tier benefits. P90's effective range of 15-25 meters (30m with Extended Barrel) dictates engagement distances. Burst firing 8-12 rounds at 25+ meters conserves ammo while maintaining 18 damage per shot (21 in S8/S9).
Cooldown management synchronizes with engagement loop—use Ghost's invisibility to initiate, secure elimination during 8-second window, collect Restore Energy to reduce next cooldown by 8 seconds, reposition during shortened 17-second wait.
Peak Mode Modifications
Real-time point tracking creates pressure to maintain elimination consistency. Higher-skilled opponents wear superior armor, which benefits Restore Energy users—Level 3 armor eliminations provide maximum restoration. Buy Blood Strike Gold online through BitTopup for premium loadout configurations.
Condensed match timings (15-20 minutes vs 25-30 in Ranked) demand faster Evolution tier progression. Aggressive early-game rotations toward high-traffic areas accelerate 100/250/500 point thresholds.
Best Loadouts for Ranked Mode
Restore Energy loadouts prioritize: high rate of fire, manageable recoil, magazine capacity for multiple opponents without reloading.
Top-Tier Weapon Choices
P90 SMG Configuration
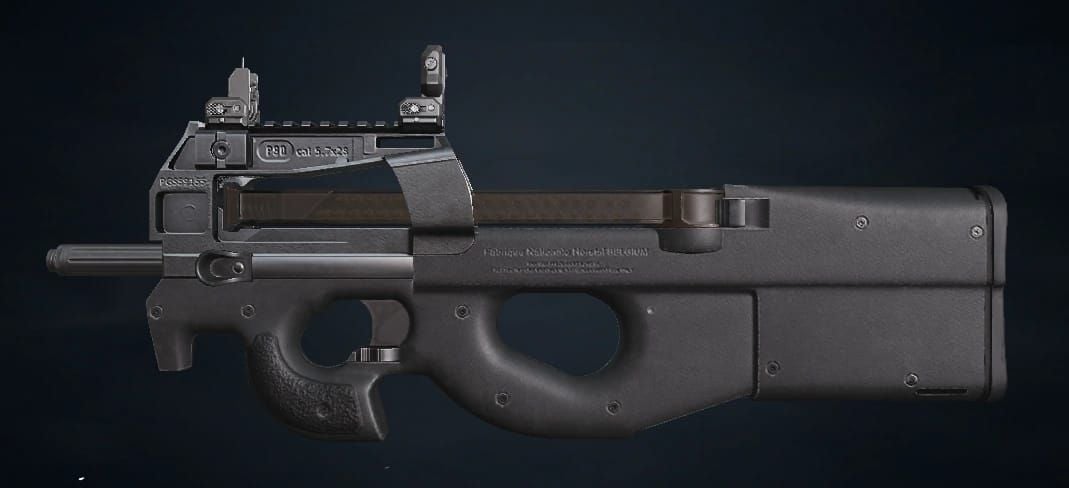
- Fire rate: 900 RPM, 50-round magazine
- Attachments: Compensator (15% vertical recoil reduction), Extended Barrel (20% range increase to 30m), Vertical Foregrip (12% recoil reduction), Tactical Stock (8% ADS speed)
- Damage: 18 base (21 in S8/S9), requires 6-7 shots for elimination in 0.4-0.47 seconds
- Burst Bolt attachment from Dark Take Strike Pass enhances 25+ meter effectiveness
Bizon SMG Configuration
- 64-round magazine (largest SMG capacity)
- Attachments: Flash Hider (10% recoil reduction), Lightweight Barrel (15% mobility), Angled Foregrip (14% horizontal recoil reduction), Skeleton Stock (6% movement speed)
- Fire rate: 750 RPM, 16 damage per shot, 7-8 hits for elimination
- Effective range: 12-22 meters
- Mobility bonuses enable rapid repositioning between pickups
RPK LMG Configuration
- 24 base damage (34 body damage in S11), 75-round magazine
- Attachments: Heavy Compensator (18% vertical recoil reduction), Heavy Barrel (8% damage increase, 25% range extension to 43m), Bipod (20% recoil reduction prone/crouched), Padded Stock (10% recoil reduction)
- Fire rate: 600 RPM (650 in S11), 4-5 shots for elimination in 0.4-0.5 seconds
- Extended 20-35 meter effective range (43m with Heavy Barrel)
Essential Perk Combinations
Primary perks: Damage-increasing perks accelerate time-to-kill. Health-boosting perks raise 30% auto-pickup threshold—with 120 health from perks, threshold becomes 36 HP vs 30 HP base.
Secondary perks: Movement speed bonuses reduce exposure during Loot Crate collection. Detection perks identify third-party threats approaching during pickup animation.
Equipment Synergies
- Frag grenades force opponents from cover, creating elimination opportunities
- Smoke grenades provide concealment for Loot Crate collection in exposed locations
- Flashbangs synergize with Ghost's invisibility—deploy flash before 8-second window expires, creating 17-second cycle (reduced from 25 seconds)
Loadout Variations by Ranked Tier
Gold: P90 configurations capitalize on close-quarters chaos. 50-round magazine handles multiple elimination attempts without reloading.
Platinum: Bizon's mobility advantages flank established positions. 64-round magazine provides safety margins for trading damage.
Diamond+: RPK's mid-range control challenges sightlines before opponents establish crossfires. 43-meter effective range enables pre-firing common angles.
Advanced Energy Management
Positioning Tactics
Pre-engagement positioning should account for Loot Crate spawn at enemy death points. Initiate combat near cover for immediate collection while maintaining protection. High ground creates natural cover during pickup animation.
Avoid initiating in open areas without nearby cover—even successful eliminations leave you exposed during collection. Force opponents toward terrain features providing post-elimination cover.
When to Disengage
Energy economy tracking: At 480 Evolution points (20 from Tier 3), calculated engagement risks become justified. At 120 points (130 from Tier 2), conservative play preserves advantages.
Health percentages dictate decisions:
- Above 70% health with full armor: aggressive pushes
- 30-70% health: tactical engagements near cover
- Below 30% health: disengage unless auto-pickup will trigger
Map-Specific Tips
Urban maps: Bizon configurations—mobility enables rapid building-to-building movement. 64-round magazine handles indoor multi-opponent scenarios.
Open terrain: RPK setups control sightlines. 43-meter range enables eliminations spawning Loot Crates in mid-range positions. 75-round magazine sustains long-range trades.
Mixed terrain: P90 versatility—Extended Barrel's 30-meter range handles mid-range while 900 RPM dominates close quarters.
Perk Deep Dive
Primary Perks
Damage-increasing perks reduce shots-to-kill. P90's 18 base damage becomes 20-21 with perks, reducing required hits from 6-7 to 5-6 shots—0.1-0.15 second improvement.
Health-boosting perks raise 30% auto-pickup threshold. With 120 health from perks, threshold becomes 36 HP vs 30 HP base—6 HP buffer frequently determines survival.
Secondary Perk Synergies
Aggressive: Movement speed perks accelerate repositioning. Bizon's 6% Skeleton Stock bonus stacks with movement perks for 15-20% total speed increases.
Defensive: Detection perks identify third-party threats during collection. Knowing opponent approaches from 30 meters allows aborting pickup to establish defensive positioning.
Meta Analysis: Strengths & Weaknesses
Why Restore Energy Dominates
Elimination-based scoring in Ranked/Peak creates natural synergy. Each kill provides ranking points and sustainability resources. Evolution tier system rewards consistency—maintaining 20-30 second elimination intervals reaches Tier 3 by mid-game, establishing 25% enhanced effect bonuses persisting through final circles.
Vulnerabilities
Coordinated teams focus-firing during sub-30% health window exploit auto-pickup timing. Multiple opponents damaging simultaneously make single Restore Energy pickup insufficient.
Long-range specialists using sniper rifles eliminate before you close to effective SMG/LMG ranges. P90's 30-meter max range leaves 20+ meter vulnerability windows against Kar98k users. Kar98k's Precision Suppressor, Sniper Rifle Barrel, Sports Cheek Riser, 5-round Fast Mag provides 72 Recoil Control for accurate follow-ups preventing collection.
Situational Limitations
Final circle scenarios with 3+ remaining teams create crossfire situations where collection becomes impossible. 2-3 second pickup animation draws fire from multiple angles. Traditional healing builds with stockpiled medkits gain advantage through flexible recovery timing.
Low-elimination matches where opponents avoid engagements prevent Evolution tier progression. Without reaching 250+ points for Tier 2's 15% cooldown reduction, Restore Energy provides minimal advantage.
Team Composition & Communication
Ideal Squad Roles
2-1-1 composition: Two Restore Energy fraggers (P90/Bizon), one RPK controller, one support with traditional healing. Primary fraggers initiate engagements and collect Loot Crates. RPK controls mid-range sightlines preventing third parties. Support provides backup sustainability when loops break down.
Coordinating Engagements
Callouts include Evolution tier status—Tier 2 active, 15% cooldown reduction informs ability availability for coordinated pushes. When reaching Tier 3, 25% enhanced effects enable aggressive plays teammates support through crossfire positioning.
Ghost timing requires coordination—8-second invisibility creates flanking opportunities. Ghost active, flanking right allows teammates to draw attention while you reposition.
Callout Strategies
Loot Crate locations require immediate callouts—Loot Crate northwest, covering alerts teammates to provide suppressive fire during collection.
Health percentage callouts inform when auto-pickup triggers—35% health, auto-pickup ready signals calculated risks knowing safety net exists.
Common Mistakes
Misconception: Auto-Restore Means Invincibility
30% health auto-pickup provides emergency restoration, not invincibility. Overextending into 1v3 situations expecting auto-pickup to save you ignores limitations—one pickup against three opponents' sustained damage proves insufficient.
Full armor depletion activates auto-pickup, but if health remains above 30%, you're still vulnerable to immediate elimination before restoration completes.
Timing Errors
Collecting Loot Crates immediately after elimination without checking surroundings creates predictable vulnerability. Third parties pre-aim Loot Crate location. Delaying collection 1-2 seconds to scan prevents deaths while maintaining loop viability.
Forcing engagements during ability cooldowns wastes advantages. If Ghost's invisibility remains on 15-second cooldown, initiating combat sacrifices tactical advantage. Waiting 5-10 seconds for ability availability transforms marginal engagements into favorable trades.
Loadout Mistakes
Running low-capacity weapons like 30-round assault rifles creates reload vulnerabilities. Aggressive playstyle demands high-capacity magazines—P90's 50 rounds, Bizon's 64 rounds, RPK's 75 rounds.
Neglecting recoil control attachments reduces elimination consistency, breaking loops. Missing shots extends time-to-kill, increasing damage received. P90's Compensator and Vertical Foregrip ensure accuracy during sustained fire.
Performance Metrics
Key Stats to Track
K/D Ratio: Above 2.0 indicates consistent elimination chains. Below 1.5 suggests engagement timing or loadout issues.
Sustain Duration: Time between manual healing usage. Restore Energy builds should extend to 3-5 minutes during active combat vs 45-90 seconds traditional builds.
Engagement Frequency: Eliminations per minute. Optimal play achieves 2-3 eliminations/minute mid-game. Below 1.5 suggests overly passive play.
Meta Benchmarks
- Diamond+: 2.5+ K/D, Tier 3 by 12-15 minutes
- Platinum: 1.8-2.2 K/D, Tier 2 by 15-18 minutes
- Gold: 1.3-1.7 K/D, inconsistent tier progression
When to Adjust Loadout
Consistently losing mid-range engagements (15-30m): Switch Bizon to P90. Extended Barrel addresses vulnerability while maintaining close-quarters effectiveness.
Frequent deaths during collection: Favor Bizon's movement speed bonuses. Skeleton Stock and Lightweight Barrel reduce exposure time.
Struggling against armored opponents: Adopt RPK. 34 body damage in S11 overcomes armor damage reduction, maintaining competitive time-to-kill against Level 3 armor.
Counter-Strategies
Identifying Enemy Restore Builds
Opponents exhibiting aggressive re-engagement within 5-10 seconds of eliminations likely run Restore Energy. Traditional healing requires 15-20 second recovery windows.
Players collecting Loot Crates immediately after eliminations confirm usage. Observe behavior to predict next movement, enabling ambush positioning.
Aggressive Push Timing
Immediately after Restore Energy players collect Loot Crates, auto-pickup enters cooldown. Pushing during this 15-20 second window forces engagements without safety net.
Target during ability cooldowns. If Ghost's invisibility was used 5 seconds ago, remaining 12-17 second cooldown creates vulnerability windows.
Counter Loadouts
Long-range weapons like Kar98k with Precision Suppressor and Sniper Rifle Barrel eliminate before they close to effective SMG/LMG ranges. 72 Recoil Control enables accurate follow-ups preventing collection.
High burst-damage weapons exceeding 30% health threshold in single engagements prevent auto-pickup activation. Shotguns and high-caliber DMRs eliminate before restoration triggers.
Future-Proofing Your Playstyle
Anticipated Meta Shifts
Current aggressive meta may face cooldown adjustments if Restore Energy proves dominant. Potential changes: extending auto-pickup cooldowns or reducing restoration amounts from lower-tier armor eliminations.
Evolution tier thresholds might increase—raising Tier 2 from 250 to 300 points, Tier 3 from 500 to 600 points would slow snowball effects while maintaining end-game power spikes.
Adapting as Season Progresses
Early season: Experimental builds as players explore configurations. Mid-season: Counter-strategies emerge requiring loadout refinements. Late season: Refined builds incorporating lessons from thousands of matches.
Staying Updated
Official patch notes provide definitive information on modifications. Community testing following patches identifies practical implications. Professional players discover optimal configurations within 48-72 hours of updates.
FAQ
What is Restore Energy in Blood Strike? Sustainability system dropping from Loot Crates after defeating enemies, instantly restoring health/armor while granting Evolution energy and reducing skill cooldowns. Auto-activates when health drops below 30% or armor depletes, scaling restoration based on enemy armor level.
How does auto-restore work in ranked mode? Triggers automatically when health falls below 30% or armor reaches zero, collecting nearby Restore Energy without manual input. Enters cooldown after activation requiring 15-20 seconds before next automatic pickup.
What are the best loadouts for Restore Energy in 2026? P90 SMG with Compensator, Extended Barrel, Vertical Foregrip, Tactical Stock (900 RPM, 50 rounds, 30m range). Bizon SMG for mobility (64 rounds). RPK LMG for mid-range control (75 rounds, 43m effective range with Heavy Barrel).
Is Restore Energy better than medkits? Excels for aggressive players maintaining consistent eliminations, providing instant restoration without vulnerable animations. Medkits suit defensive playstyles and final circle scenarios where collection becomes impossible. Optimal play combines both.
How long does Restore Energy cooldown take? Auto-pickup cooldown lasts 15-20 seconds after activation. Manual collection remains available immediately. Skill cooldowns reduce by 8 seconds per pickup—Ghost drops from 25 to 17 seconds, Sparkle from 30 to 22 seconds. Tier 2 provides additional 15% cooldown reduction, Tier 3 grants 25% enhanced effects.
Which perks synergize with Restore Energy builds? Damage-increasing perks reduce time-to-kill. Movement speed perks compress repositioning time. Health-boosting perks raise 30% auto-pickup threshold in absolute terms, providing additional damage absorption before automatic restoration activates.
Ready to dominate Blood Strike ranked mode? Power up your account with exclusive in-game resources at BitTopup—the trusted platform for competitive players seeking instant delivery and secure transactions. Unlock your full potential today!


