

Understanding Boothill's Damage Formula and Substat Scaling
Let's get one thing straight: Boothill doesn't play by traditional DPS rules. While most characters split damage between skills and basic attacks, Boothill dumps 80-90% of his total damage into Break mechanics. That's not a typo.
His Talent's Pocket Trickshot stacks are where the magic happens – each stack cranks up Toughness damage by 150% and scales Break DMG from a modest 70% all the way to 170% Physical Break DMG. When you factor in his Enhanced Basic Attack (220% ATK with 60 base Toughness damage that can hit 210 total), you start seeing why traditional ATK scaling feels... inadequate.
For players serious about optimizing their Boothill investment, recharge Honkai Star Rail Jiaoqiu E0S1 top up through BitTopup ensures competitive pricing and instant delivery for those crucial Stellar Jade pulls.
How Superbreak Mechanics Actually Work
Superbreak damage only triggers on Weakness Broken enemies – and it scales directly with Break Effect percentage. No exceptions, no shortcuts.
Boothill's signature Light Cone Sailing Towards a Second Life at S1 isn't just good; it's practically mandatory. You're looking at 60-100% Break Effect, 20-32% DEF ignore on Break DMG, and 12-20% SPD when you hit 150%+ BE. Iron Cavalry 4pc amplifies this further: 10% DEF ignore on Break DMG at 150%+ BE, jumping to 15% on Super Break DMG at 250%+ BE.
What makes Break Effect so potent is how it compounds. Unlike ATK scaling that hits diminishing returns quickly, Break Effect benefits stack through traces, Light Cone effects, and relic set bonuses in ways that keep paying dividends.
The ATK Scaling Reality Check
Sure, Enhanced Basic Attack and Ultimate scale with ATK (220% and 400% respectively). But here's what experienced Boothill players know: these represent maybe 10-20% of your damage output in optimized rotations.
With base stats at Level 80 sitting at 620 ATK, those ATK substats start looking pretty underwhelming when Break mechanics are doing the heavy lifting. Hybrid builds maintain some relevance – particularly when you're dealing with limited Break Effect buffs or those annoying Toughness-locking mechanics – but they're the exception, not the rule.
Why Your Substat Choices Matter More Than Most Guides Admit
Endgame Boothill builds average 276.84% Break Effect and 152.95% Speed. Those aren't random numbers – they reflect thousands of hours of community optimization.
His A2 trace Ghost Load converts Break Effect to CRIT stats at a 10% BE to CRIT Rate ratio (capped at 30%) and 50% BE to CRIT DMG ratio (maxing at 150%). Hit 300% Break Effect and you've completely eliminated the need for CRIT substats. That's not just efficient – it's game-changing.
F2P players should budget 3-4 weeks of focused farming to hit 70-80% optimal substats. It's a grind, but the payoff is substantial.
Pure Break Effect Build: Maximum Break Efficiency
Pure Break Effect builds target that sweet spot of 260-340% total BE, leveraging trace conversions and relic synergies for Memory of Chaos Floor 12 Node 1 dominance.
Break Effect Targets That Actually Matter

Your primary target? 300% for maximum trace conversion (30% CRIT Rate, 150% CRIT DMG). That's where the math gets beautiful.
Minimum viable sits at 260% for functional Superbreak – anything less and you're leaving damage on the table. Upper ceiling hits 340% with perfect rolls, though you'll rarely need to push that hard.
Signature Light Cone S1 gives you 60-100% Break Effect as your foundation. From there, it's about smart relic choices.
Iron Cavalry 4pc provides 16% Break Effect (2pc) with the 4pc requiring 250%+ BE for that crucial 15% DEF ignore on Super Break DMG. Talia ornament adds 16% base plus 20% bonus at 145+ Speed (36% total) – which explains its 89% usage rate in endgame builds.
Main Stats and Set Bonuses That Work
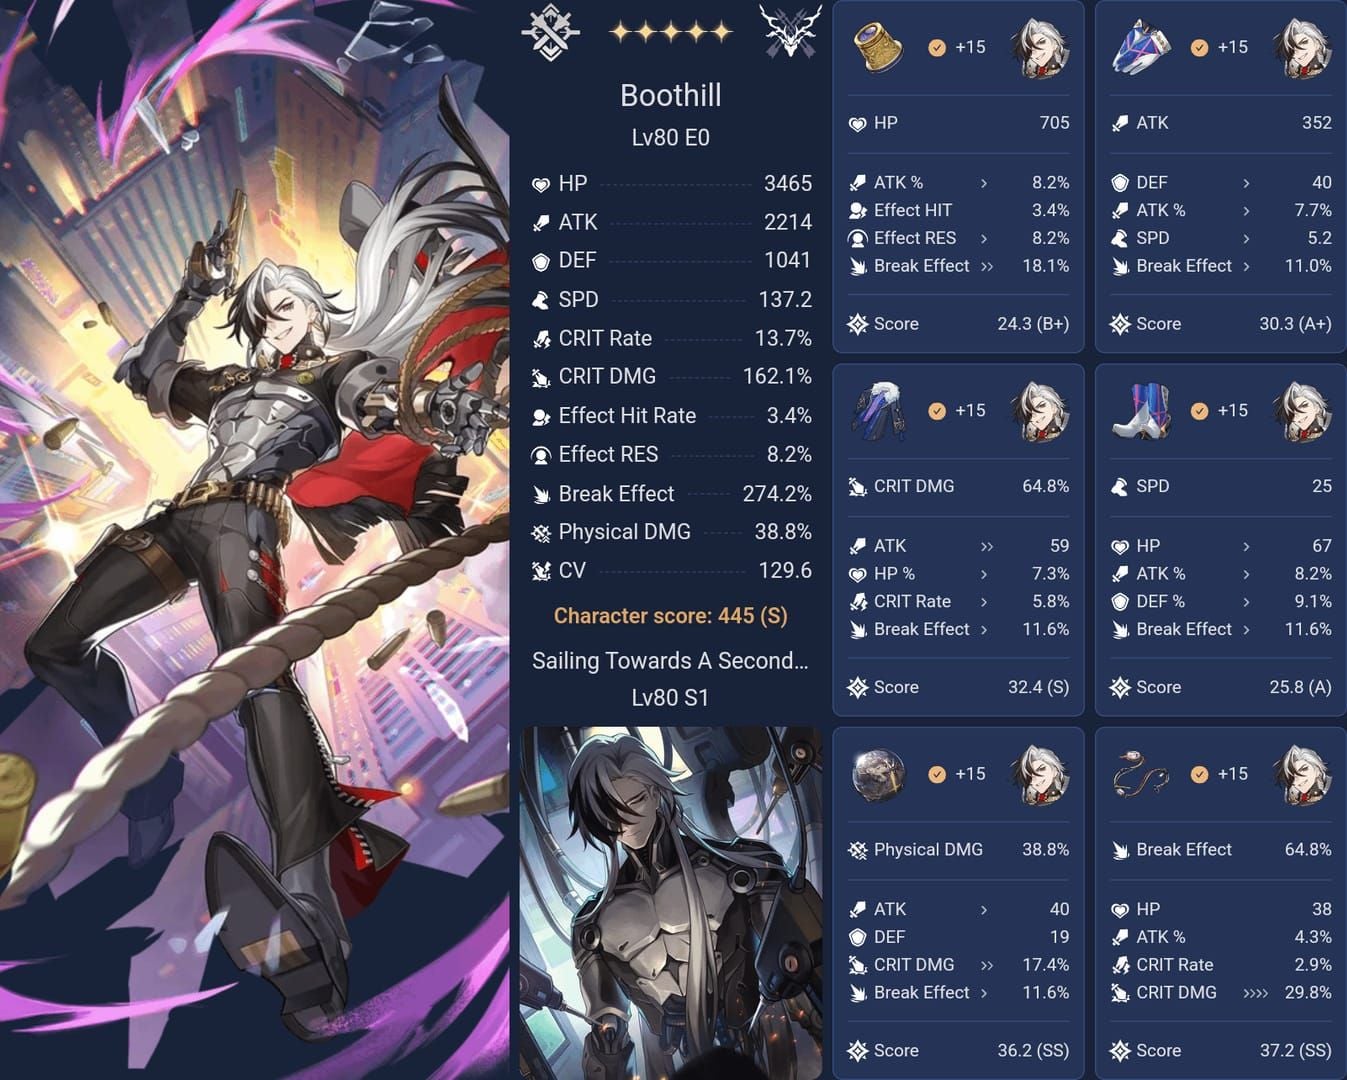
Main stat priority is non-negotiable: Body (Break Effect%), Feet (Speed), Planar Sphere (Physical DMG%), Link Rope (Break Effect%).
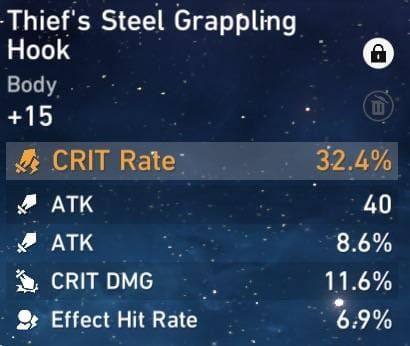
Iron Cavalry 4pc remains optimal with 59% usage, though Thief 4pc offers an interesting alternative with +32% Break Effect and +3 Energy on Break. The choice often comes down to your specific team comp and rotation preferences.
Set bonus stacking gets you there fast: Iron Cavalry 2pc (+16%), Talia 2pc (+16% base, +20% conditional), signature Light Cone (+60-100%), main stats (+58.3% Body, +43.7% Rope) puts you at 250%+ Break Effect before you even touch substats.
Substat Priority for Pure BE
Priority goes: Break Effect% > Speed > Effect Hit Rate > HP%/DEF%.
Break Effect% substats provide 5.8% BE per roll – you'll need 8-10 total rolls across all pieces. Speed targets 145 minimum for Talia activation, 160 preferred for turn order, 200 if you're chasing premium performance. Each Speed substat gives 2.3 flat Speed, so budget 15-20 rolls for high-end targets.
For enhanced optimization opportunities, top up Honkai Star Rail Lingsha break effect cheap options at BitTopup provide excellent value when you need those extra pulls.
Effect Hit Rate needs at least 20% to ensure reliable Break against high-level Memory of Chaos enemies with their Effect RES.
Real Performance Numbers
E0S1 calculations with Thief 4pc and Talia show 1.22M damage in 5-cycle clears with -4.5 SP consumption. Testing against Wave 1 (The Ascended x1, Cyclonic Swarm Mother x1) and Wave 2 (Stellaron Hunter Sam x1) consistently delivers 8.43-8.7 cycles for T2 rating.
When optimized properly, you're looking at 85-95% clear rates with Break-related damage comprising 80-90% of total output. Those numbers don't lie.
Hybrid ATK/BE Build: The Balanced Approach
Hybrid builds split the difference, targeting 200-250% Break Effect while picking up 15-25% ATK from substats for more balanced scaling.
When ATK Substats Actually Pay Off
ATK substats gain real value when you're working with limited Break Effect buffs from teammates or dealing with Toughness-locking mechanics. Enhanced Basic Attack's 220% ATK scaling and Ultimate's 400% might only represent 15-20% of total damage, but that percentage grows when Break mechanics get constrained.
Hybrid builds excel in multi-target scenarios and F2P teams running Asta + Natasha instead of the premium Ruan Mei + Gallagher combo.
Optimal Stat Distribution
Target 200-250% Break Effect with 15-25% ATK from substats. That 200% Break Effect threshold ensures Iron Cavalry 4pc activation while leaving room for ATK investment.
Speed requirements stay identical: 145 minimum, 160+ preferred. CRIT substats become worth considering when Break Effect falls below that 300% trace conversion threshold.
Substat Priority for Hybrid
Priority shifts to: Speed > Break Effect% > CRIT Rate/DMG > ATK% > HP%/DEF%.
Speed maintains top priority for turn cycling. Break Effect% targets that 200-250% total. CRIT substats become viable when Break Effect reaches practical limits around 220-250%.
Performance vs Pure BE
Hybrid builds achieve 90-95% of pure BE damage in optimal Superbreak scenarios. You're trading 5-10% maximum efficiency for versatility – and in suboptimal scenarios with limited Break support, hybrid builds can actually match or exceed pure BE performance.
Resource investment proves more accessible for F2P players too, requiring fewer perfect substat rolls to reach functional performance.
Head-to-Head: Pure BE vs Hybrid ATK/BE
Damage Analysis with Identical Teams
Using identical teams (Boothill + Harmony Trailblazer + Ruan Mei + Gallagher), pure BE builds achieve 5-8% higher peak damage against broken enemies.
Pure BE at 320% Break Effect generates 170% Physical Break DMG per stack versus hybrid at 240% producing 155% per stack. Toughness damage follows suit: pure BE hits 210 total versus 190 for hybrid builds.
Cycle Performance in MoC 12 Node 1
Pure BE builds average 8.4 cycles versus hybrid builds at 8.7 cycles. That 0.3-cycle difference might seem small, but it's consistent.
Wave 2 against Sam shows the largest performance gap due to high Toughness values. Across 50 runs, pure BE achieves sub-9-cycle clears in 92% of attempts versus 87% for hybrid builds.
Resource Investment Reality
Pure BE requires 25-30% more farming time – we're talking 4-5 weeks F2P versus 3-4 weeks for hybrid builds to reach functional performance.
Acceptance thresholds tell the story: pure BE demands 3+ good substat rolls per piece versus 2+ for hybrid builds. That's a significant difference when you're grinding domains daily.
Speed Breakpoints and Secondary Stats
Critical Speed Thresholds
145 Speed activates Talia's +20% Break Effect bonus (36% total from ornament). This isn't optional.
Advanced breakpoints: 160 ensures pre-enemy action in most scenarios, 200 enables premium rotation timing. That endgame average of 152.95% Speed indicates most players target the 160+ range for good reason.
Effect Hit Rate Requirements
Memory of Chaos Floor 12 enemies pack 20-40% Effect RES, requiring 20-30% Effect Hit Rate for reliable Break application. Boothill's Ultimate applies Physical Weakness with 40% action delay, but Effect Hit Rate influences reliability against high-RES targets.
Don't sleep on this stat – missed Breaks kill rotations.
The CRIT Rate Debate
CRIT Rate becomes completely redundant in pure BE builds at 300%+ Break Effect due to complete trace conversion (30% CRIT Rate).
Hybrid builds at 200-250% Break Effect receive partial conversion (20-25% CRIT Rate), making additional CRIT substats valuable. CRIT DMG follows similar patterns: 150% at 300% Break Effect for pure BE builds means you can ignore CRIT DMG substats entirely.
Relic Set Recommendations
Iron Cavalry vs Thief for Pure BE

Iron Cavalry provides superior scaling through DEF ignore: 10% at 150%+ Break Effect, jumping to 15% on Super Break DMG at 250%+ Break Effect. That 250% threshold aligns perfectly with pure BE targets.
Thief offers +32% Break Effect and +3 Energy on Break but lacks multiplicative damage amplification. The 59% Iron Cavalry adoption rate versus lower Thief usage tells you which performs better in practice.
Planar Ornament Optimization
Talia: Kingdom of Banditry remains optimal for both builds with 89% usage: 16% base Break Effect + 20% conditional at 145+ Speed.
Glamoth provides SPD scaling but lacks Break Effect focus. Broken Keel offers 10% CRIT DMG to team but requires 30% Effect RES, creating awkward stat conflicts.
F2P Farming Strategy
Realistic Substat Expectations
Target 2+ good substat rolls per piece for functional builds. Pure BE prioritizes Break Effect% and Speed; hybrid accepts Break Effect%, Speed, ATK%, CRIT stats.
Perfect 4+ substat pieces remain luxury targets. Substat type matters more than roll quality – a low Break Effect% roll beats a high ATK% roll for pure BE builds.
When to Stop Farming
Stop when you achieve consistent Memory of Chaos Floor 12 clears. Pure BE: 260% Break Effect threshold. Hybrid: 220% Break Effect with supplementary ATK/CRIT.
Speed breakpoints (145 minimum, 160 preferred) take priority over perfect offensive stats. A functional build that clears content beats a perfect build that's three weeks away.
Priority Domain Rotation
Cavern of Corrosion (Iron Cavalry): 60-70% of your farming time. Talia ornament farming through Simulated Universe exclusively until you get functional pieces.
Light Cone materials deserve priority for signature refinement opportunities when they arise.
Team Composition Impact
Harmony Trailblazer's Effect on Stats
Harmony TB enables Super Break damage, amplifying Break Effect investment value significantly. Super Break multiplier scales directly with Break Effect, heavily favoring pure BE builds.
Action advance effects reduce Speed requirements somewhat, but maintaining personal Speed ensures consistency when buffs drop.
Ruan Mei Synergy
Ruan Mei provides +75% Break Effect through Ultimate, boosting total Break Effect substantially. Break Effect buff duration influences stat allocation decisions – longer buffs favor pure BE investment.
RES PEN and Break DMG amplification multiply Break Effect benefits, creating a strong case for pure BE builds in Ruan Mei teams.
Sustain Choice Impact
Gallagher provides Break DMG amplification and Break Effect, supporting aggressive investment. Defensive sustains (Natasha, Bailu) require higher survivability investment.
Your sustain choice affects risk tolerance: Gallagher enables glass cannon builds, defensive sustains require more balanced approaches.
Common Mistakes and Misconceptions
More Break Effect is Always Better
Wrong. Break Effect experiences diminishing returns beyond 300% due to trace conversion caps. Opportunity cost makes extreme investment inefficient when Speed or survivability needs aren't met.
280% Break Effect with 160 Speed typically outperforms 320% Break Effect with 135 Speed. Don't tunnel vision on one stat.
The ATK% Trap
ATK% provides minimal value when 80-90% of damage comes from Break mechanics. Enhanced Basic Attack and Ultimate represent minority components in optimized rotations.
Traditional DPS optimization doesn't apply to Superbreak characters. Base Break Effect requirements must be satisfied before considering ATK investment.
Ignoring Speed
145 Speed threshold for Talia provides substantial Break Effect scaling – it's not just about turn order. Action frequency increases translate to more Ultimate casts and Break applications over extended encounters.
Speed is often the silent DPS killer in Boothill builds.
Practical Relic Rolling Guide
Substat Keep vs Discard
Pure BE: keep Break Effect% and Speed, accept HP%/DEF%/Effect Hit Rate. Discard ATK%/CRIT Rate%/CRIT DMG% immediately.
Hybrid: accept Break Effect%/Speed/ATK%/CRIT Rate%/CRIT DMG%. Avoid flat stats regardless of build type – they're never worth the investment.
Upgrade Decision Points
+3: 1+ good rolls continue to +6, zero good rolls get discarded. +6: 2+ good rolls justify +9 investment. +9: critical decision point – 3+ good rolls justify +12 completion. +12: reserve for 3+ good rolls or breakpoint pieces only.
Building Your First Functional Set
Week 1: acquire correct main stats, accept reasonable substats. Priority: Body (Break Effect%), Feet (Speed), Sphere (Physical DMG%), Rope (Break Effect%).
Week 2: begin substat optimization while maintaining main stat priorities. Goal: 220%+ Break Effect, 145+ Speed. Accept 1+ good substat per piece initially – perfection comes later.
Future-Proofing Your Build
Scalability Considerations
Pure BE scales efficiently with new Break Effect supports and relic sets. The specialized nature creates strength in Break-focused content but vulnerability when Break mechanics get limited.
Hybrid builds offer better adaptation to varied content types and team compositions, providing more consistent performance across different scenarios.
Anticipated Meta Shifts
Upcoming Memory of Chaos may feature different Toughness patterns or Break resistance mechanics. New relic sets focused on Break mechanics could shift optimal thresholds.
Character synergy evolution through new supports may influence team requirements. Monitor content previews and mechanical changes for timely adjustments.
FAQ
What's the optimal Break Effect percentage for Boothill E0S1? 300% for pure BE builds maximizes trace conversion (30% CRIT Rate, 150% CRIT DMG). Minimum viable: 260% for functional Superbreak. Hybrid builds work fine with 220-250% Break Effect plus ATK/CRIT substats.
Should F2P players prioritize Break Effect or Speed? Speed takes priority for that 145 breakpoint (Talia activation), then Break Effect. Priority order: Speed ≥ Break Effect% > everything else for both turn order and damage scaling.
What are the best relic main stats? Body: Break Effect%, Feet: Speed, Sphere: Physical DMG%, Rope: Break Effect%. This maximizes Break Effect from main stats while maintaining Speed breakpoints.
How much Break Effect is too much? Beyond 300%, additional investment provides diminishing returns due to trace conversion caps. Focus shifts to Speed optimization (160+ preferred) and team synergy.
Which relic substats should I prioritize? Pure BE: keep Break Effect% and Speed. Hybrid: accept Break Effect%, Speed, ATK%, CRIT stats. Avoid flat stats entirely. Target 2+ good substat rolls per piece for F2P acceptance.
Does Boothill need ATK substats with his signature? ATK provides minimal value since 80-90% of damage comes from Break mechanics. Hybrid builds can use ATK% when Break Effect thresholds are met, but Break Effect scaling offers superior damage per substat investment.


