Aftershock Map Overview: Understanding Morphosis Warfare Layout
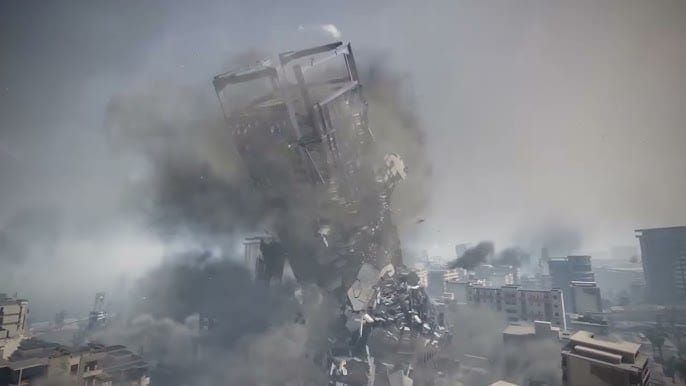
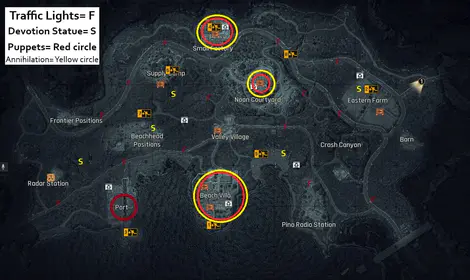
Aftershock introduces 95% destructible buildings across 550 unique object types. The map divides into three zones: CBD central with two dominant skyscrapers, commercial districts with medium-density structures, and peripheral industrial areas offering stable shelter.
Major earthquakes occur every 8-12 minutes, reshaping the battlefield. First earthquake strikes 8-10 minutes after match start, with subsequent tremors following 8-12 minute intervals (minimum 6-minute cooldown). Standard 25-30 minute matches experience 2-3 complete earthquake cycles.
To maximize loadout potential and unlock premium operators, Delta Force top up through BitTopup provides instant currency delivery with secure transactions.
Complete Map Zones and Objective Locations
CBD Central: Two skyscrapers attract 4-6 squads in 60% of matches. Offers 60-90 seconds uncontested loot but generates 150-meter debris fields when collapsed. Buildings within 30 meters of fault lines face 80%+ collapse probability during Active Earthquake phases (25-40 seconds).
Commercial Districts: Surround CBD core. Require 90-120 seconds for thorough looting with 40-50% contest probability. Provide critical rotation corridors aligned northeast-southwest and northwest-southeast—primary destruction lanes exploited during 90-second Post-Event Stabilization windows.
Industrial Zones: Rally Point Alpha (industrial northeast) positioned 120 meters from nearest fault line serves as safest shelter. Structures withstand earthquake damage reliably, making them essential fallback positions.
Spawn Point Distribution
Phase 1 demands 200+ meter movements within 2-4 minutes post-landing to reach contested objectives before earthquake cycles begin. Teams spawning near CBD face 30-40% lobby elimination within 90 seconds but gain superior equipment advantages. Peripheral spawns offer safer progression but require longer rotations.
Stay 100+ meters from fault lines during Active Earthquake phases—closer positioning guarantees structural collapse and elimination.
Critical Terrain Features
Natural elevation changes create dominant sightlines across destruction lanes. Rubble cover appears every 20-30 meters post-earthquake. Dust clouds last 15-20 seconds following major collapses, creating temporary concealment.
Wooden structures collapse with single C4 (3-second arming). Concrete walls demand 2-3 C4 for breach creation.
High-Traffic Engagement Zones
Week-1 data shows hotspots at CBD skyscrapers, commercial district intersections, and Rally Point Alpha. These zones concentrate 70%+ of early-game eliminations.
Limit engagements to 15-20 seconds to prevent overextension during earthquake cycles. Meta emphasizes 30-60 second rotation intervals using destruction lanes during Stabilization phases.
Optimal Spawn-to-Objective Routes
North Spawn: Rally Point Alpha (1:15)
Most direct access to Rally Point Alpha. Follow northeastern destruction lane maintaining 100+ meter fault line distance.

Execution:
- 0:00-0:25: 80-meter sprint through low-contest peripheral zone
- 0:25-0:50: Transition through commercial district edge, pre-aim eastern approaches
- 0:50-1:15: Final 60-meter push with flashbang prep for enemy contact
Pre-place flashbangs at commercial transition for 8-10 second disorientation if contested.
South Spawn: CBD Skyscrapers (0:55)
High-risk CBD route offers 60-90 seconds uncontested loot but attracts 4-6 squads.
Aggressive Route:
- 0:00-0:18: Sprint to first commercial building
- 0:18-0:35: Shoulder-peek CBD approach angles
- 0:35-0:55: Commit to skyscraper entry if no enemy audio detected
Conservative players should rotate through southern commercial districts (90-120 second looting) before repositioning toward destruction lanes.
East Spawn: Flanking Corridors
Provides unique flanking access to CBD and industrial zones via southeastern destruction lane. Use 0:30-0:45 window to identify enemy rotation directions through audio cues, then commit to flanking routes.
Position at destruction lane intersections where rubble cover (every 20-30 meters post-quake) provides defensive advantages. Butterfly Rescue Drone (55-meter radius) critical for maintaining squad cohesion during aggressive flanks.
West Spawn: Indirect Route Preferred
Direct routes to CBD cover 180-220 meters with minimal cover, creating exposure during 0:40-1:10 window. Indirect routes through northwestern commercial districts add 30-40 seconds but provide superior cover.
Optimal Strategy:
- 0:00-0:45: Commercial district looting
- 0:45-1:30: Rotation toward destruction lanes with pre-aimed angles
- 1:30+: Aggressive positioning based on first earthquake timing
Central Spawn: Multi-Objective Access
Equidistant access to all objectives but highest-contest zones. Demands aggressive execution—hesitation results in getting sandwiched.
Execution:
- 0:00-0:15: Immediate 50-meter sprint to nearest commercial structure
- 0:15-0:35: Establish crossfire angles covering multiple vectors
- 0:35-1:00: Commit to CBD push or destruction lane rotation based on contact
Plan fallback routes to industrial zones before 60-second Pre-Quake Warning triggers.
5 Essential Smoke Timings
#1: CBD Skyscraper Entry (0:55-1:05)
Deploy smokes at ground-level entrances between 0:55-1:05 to conceal entry from opposite spawns. Throw from 15-20 meters outside target entrance. Coordinate with flashbangs thrown immediately after smoke—enemies suffer 8-10 seconds disorientation.
Position one teammate outside smoke covering enemy approach routes.
#2: Destruction Lane Crossing (Post-Stabilization +5-10s)
Deploy crossing smokes 5-10 seconds after 90-second Stabilization begins, when dust clouds (15-20 seconds) have cleared. Throw at lane midpoints, not near origin/destination. Coordinate crossings in 2-second intervals to avoid clustering.
Maintain 100+ meter fault line distance even during Stabilization.
#3: Rally Point Alpha Defense (8:00-8:30)
As first earthquake approaches (8-10 minutes), deploy defensive smokes at 8:00-8:30. Position 30-40 meters outside perimeter, forcing enemies to push through smoke or rotate around (adding 20-30 seconds).
Coordinate with C4 placement on wooden approach structures. Detonate pre-placed C4 (3-second arming) when enemies push through smoke.
#4: Mid-Game Rotation (12:00-18:00)
Use smokes during 30-60 second rotation windows between Stabilization phases. Deploy in series—create smoke corridors covering 40-60 meters of exposed routes.
Reserve at least one smoke for emergency extractions. Combine with Butterfly Rescue Drone's 55-meter radius for survival opportunities.
#5: Late-Game Objective Contest (20:00+)
Deploy smokes 5-8 seconds before committing to objective pushes. Throw from multiple angles creating overlapping concealment. Limit engagements to 15-20 seconds to avoid third-party eliminations or earthquake casualties.
Exact Throw Positions
Use pre-earthquake building corners, industrial equipment, and natural rock formations as lineup references—these persist through earthquake cycles. Practice in custom matches for 90%+ accuracy. Document lineups with screenshots showing positioning, crosshair placement, and landing zones.

First Fight Positioning
Pre-Aiming Common Angles
Identify three most likely enemy approach angles. Assign teammates to pre-aim each vector. Position crosshairs at head height for 15-25 meter distances. Adjust every 15-20 seconds to prevent pattern recognition.
Sound Cue Recognition
Sprinting through wooden structures produces sharper sounds than concrete movement. Use 60-second Pre-Quake Warning as tactical timer—enemies make predictable rotations toward safe zones.
C4 arming produces 3-second audio cue audible within 25-30 meters, indicating breach attempts.
Crossfire Setup
Establish positions where teammates cover same zone from 45-90 degree angles. Maintain 20-35 meter spacing. Use rubble cover (every 20-30 meters) to anchor positions.
Communicate using cardinal directions relative to map features, not left/right callouts.
Fallback Positions
Pre-plan two fallback positions: tactical retreat and emergency extraction. Maintain 100+ meter fault line distance with cover every 15-20 meters. Use 90-second Post-Event Stabilization to reestablish defensive positions.
Week-1 Meta Analysis
Dominant Weapon Loadouts
Close-to-medium range weapons dominate due to 30-60 meter destruction lane distances and 15-20 second engagement limits. Prioritize high burst damage and mobility.
Equip at least one squad member with breach capability. For competitive advantages through premium unlocks, buy Delta Force currency instant delivery from BitTopup.
Operator Selection
Vlinder (Battle Pass level 15): High selection due to Butterfly Rescue Drone's 55-meter radius. Essential for squad cohesion during rotations and emergency extraction.
Mobility-enhancing operators gain priority over static defensive specialists. Information-gathering operators provide secondary value by identifying positions before earthquake warnings.
Utility Prioritization
Flashbangs (8-10 second disorientation) see maximum value. Prioritize over smokes in early rounds. C4 becomes essential mid-game for breach opportunities. Reserve utility for earthquake cycle transitions—60-second Pre-Quake Warning and 90-second Post-Event Stabilization create high-value windows.
Team Composition
Balanced compositions: mobility specialist, information gatherer, breach expert, support operator. Assign earthquake-phase responsibilities: safe-zone navigators tracking fault line distances, utility managers controlling deployment timing, engagement leaders making push/fallback decisions.
Practice communication protocols for 25-40 second Active Earthquake phases when environmental audio drowns voice comms.
Advanced Route Execution
Movement Speed Optimization
25-40 second Active Earthquake phases mask sprinting audio within 40-50 meters. 15-20 second dust clouds combine visual concealment with audio masking for optimal flanking.
Alternate sprinting and tactical movement in 3-5 second intervals during normal phases.
Shoulder-Peeking
Execute peeks in 0.3-0.5 second exposures. Use destruction to create new peek angles—breach wooden structures with single C4 for custom sightlines. Coordinate peeks with teammate utility deployment.
Utility Pre-Placement
Pre-place C4 (3-second arming) on wooden structures along common routes. Position flashbangs at corners for remote triggering when audio indicates approaches. Mark placements for teammates using ping systems.
Adapting Routes
Develop three variations: primary (fastest), secondary (safest), tertiary (unpredictable). Select based on enemy intelligence. Track enemy utility usage—teams expending early lack late-game defensive options.
Common Route Mistakes
Over-Committing to Contested Chokepoints
CBD skyscrapers attract 4-6 squads but create 30-40% lobby elimination within 90 seconds. Set 15-20 second time limits for contested engagements—disengage if position control not secured.
Ignoring Flank Security
Assign one squad member as dedicated flank security during rushes. Maintain 15-25 meter spacing behind main group. Use Butterfly Rescue Drone's 55-meter radius to cover rear quadrant.
Poor Smoke Timing
Deploy 3-5 seconds before reaching target zone. Position in cover before deployment. Deploy smokes in series for extended corridors, not single throws.
Predictable Patterns
Rotate through route variations to prevent pattern recognition. Vary timing—if typically reaching Rally Point Alpha at 1:15, occasionally delay to 1:45 or accelerate to 0:55. Change utility deployment patterns between matches.
Counter-Strategies
Early Aggression
Push toward enemy spawns during 0:30-0:50 to intercept initial rotations. Target commercial district transition points. Limit to 15-20 second engagements, then fallback before earthquake cycles.
Utility Placement for Route Denial
Pre-place C4 on wooden structures along common routes. Position flashbangs at chokepoints. Use smokes defensively to deny sightlines.
Information Gathering
Deploy reconnaissance during 60-second Pre-Quake Warning when enemies focus on positioning. Use audio cues—C4 arming (3-second), sprinting through structures, utility deployment. Coordinate with Butterfly Rescue Drone's 55-meter coverage.
Adaptive Defense
Identify enemy spawns during first 30-45 seconds through audio/visual. Against CBD spawns, expect aggressive early pushes—establish commercial district edge positions. Against peripheral spawns, expect delayed rotations—establish destruction lane positions before arrival.
Practical Training Drills
Solo Time Trials
Execute each route repeatedly, timing spawn to objective arrival. Establish benchmarks, optimize to reduce times by 5-10 seconds. Practice under different earthquake scenarios. Record sessions to identify inefficiencies.
Team Coordination
Practice synchronized pushes maintaining 2-5 meter spacing. Drill utility sequences: smoke thrower, flashbang support, breach specialist, rear security. Simulate third-party scenarios.
Smoke Lineup Consistency
Throw each lineup 20-30 times until muscle memory develops. Track success rates. Practice under movement conditions, not static positions. Create time-limit challenges (5-8 seconds decision to deployment).
Live Match Application
Apply one new route/timing per match. Record and review VOD analyzing execution, timing, decision-making. Compare against professional VODs when available.
FAQ
What are the fastest routes from spawn to objectives?
North spawn to Rally Point Alpha: 1:15 via northeastern destruction lane. South spawn to CBD skyscrapers: 0:55 aggressive direct route. East spawn flanking to industrial: 1:20-1:40. All routes maintain 100+ meter fault line distance.
How do earthquake timings affect route selection?
First earthquake: 8-10 minutes post-start. Subsequent: every 8-12 minutes. Plan rotations during 90-second Post-Event Stabilization. Avoid extended rotations during 60-second Pre-Quake Warning and 25-40 second Active Earthquake phases unless 100+ meters from fault lines.
Which operators provide best advantages?
Vlinder (Battle Pass level 15): Butterfly Rescue Drone covers 55-meter radius, essential for squad cohesion. Mobility-focused operators outperform static specialists. Information-gathering operators identify positions before earthquake cycles.
What are most contested areas requiring smoke coverage?
CBD skyscrapers (4-6 squads, 60% of matches). Destruction lane crossings during Post-Event Stabilization. Rally Point Alpha at 8:00-8:30 as teams rotate to earthquake-safe positions.
How should teams adapt when earthquakes destroy planned paths?
Maintain three route variations: primary, secondary, tertiary. Transition immediately without hesitation. Use 15-20 second dust clouds for concealed repositioning. Pre-identify rally points in industrial zones 120+ meters from fault lines.
What utility loadout best supports aggressive execution?
Flashbangs (8-10 second disorientation) for entries/holds. Minimum 2-3 smokes for rotations/pushes. C4 for breach—wooden structures need 1 charge, concrete walls need 2-3. Reserve one smoke for emergency extractions.


