

Delta Force Season Ahsarah: The Weapon Meta Overview
Season Ahsarah hit the scene November 18, 2025, and honestly? It's shaken up weapon balance more than I expected. That suppressor enhancement giving +9% range bonus plus 15-20% stealth build improvements in Operations mode – that's game-changing stuff right there.
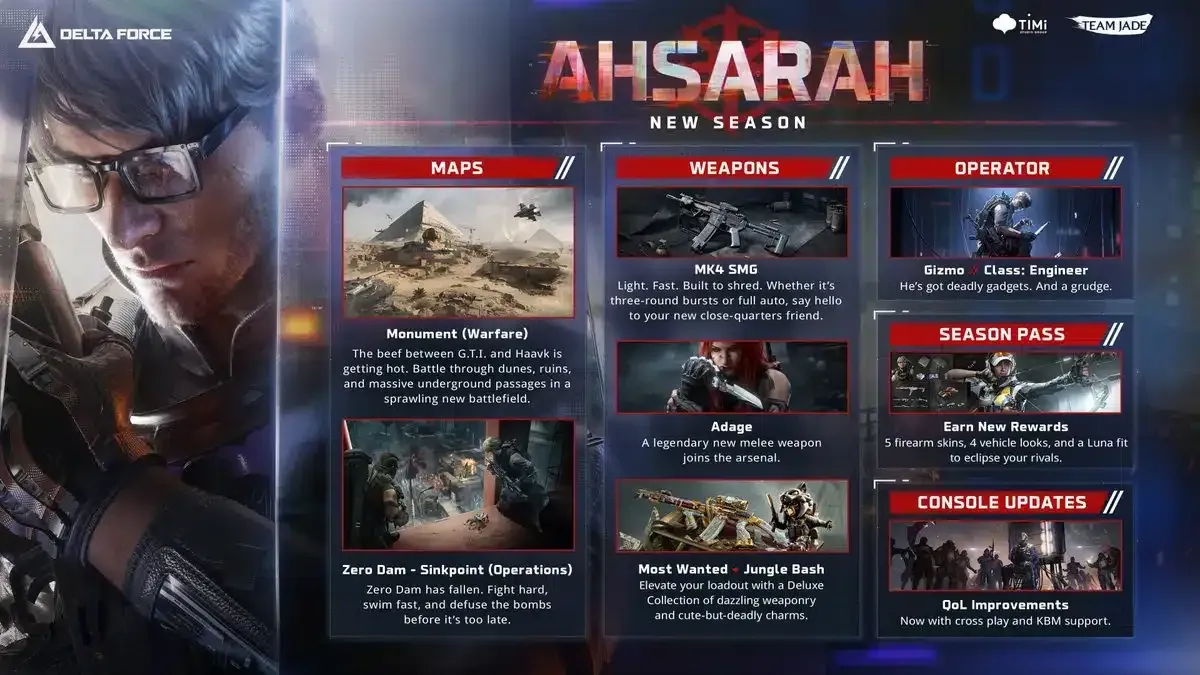
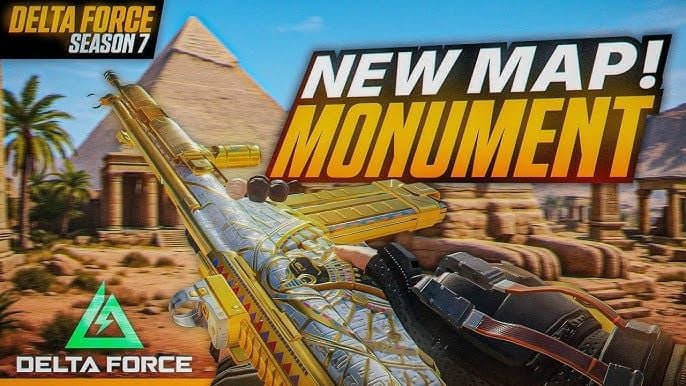
This 78-day season brings Monument map (which is absolutely gorgeous, by the way) and operator Gizmo for area denial tactics. And let me tell you, Gizmo's kit is wild.
I'm evaluating weapons using five core metrics: TTK efficiency, DPS output, effective range, mobility, and cross-scenario versatility. S-tier weapons? They're maintaining 6%+ pick rates in competitive play across both Warfare Ranked and Operations extraction scenarios. That's the real test.
Quick note on premium currency – if you're looking to optimize your loadouts fast, Delta Force Hawk Coins Recharge through BitTopup gets you instant weapon customization access. Their pricing's competitive, transactions are secure, and they've got 24/7 support for immediate meta build acquisition.
Understanding the 2025 Balance Update
The ASh-12 Battle Rifle got some serious love this update. Damage jumped from 34 to 50 (massive), fire rate adjusted from 500 to 400 RPM, and muzzle velocity boosted from 340 to 500 m/s. That's not a tweak – that's a complete overhaul.
New 4.6x30mm Ultra SX ammo delivers 25% armor damage with full bypass against sub-level 5 armor. MP7 users, you're eating good this season. And don't get me started on .50 AE AP ammo enabling one-shot kills on Level 4 helmets – absolute madness.
Havoc Warfare vs. Hazard Operations: Meta Differences
Here's where things get interesting. Operations mode heavily favors suppressed weapons because of stealth requirements and NPC detection mechanics. CI-19 with Advanced Multicaliber Suppressor absolutely dominates extraction scenarios, while QJB201 provides that crucial Sinkpoint suppression. Monument's flooded dam environment demands high mobility and underwater maneuverability (yes, underwater combat is a thing now).
Warfare Ranked? Different beast entirely. It prioritizes versatility for those sustained engagements. M4A1 and CI-19 maintain their dominance through predictable recoil patterns and solid 50m+ effective ranges. Hot Zone 3v3v3 favors SMGs like Vector and SMG-45 for those intense 10-15m engagements where every millisecond counts.
S-Tier: The Absolute Best Weapons (God Tier)
S-tier weapons aren't just good – they're demonstrating 6%+ pick rates with optimal damage, range, and recoil combinations that work for both aggressive pushers and defensive anchors.
The King of ARs: CI-19 Assault Rifle Analysis
CI-19 leads the pack with a 9.5% pick rate and 55m effective range using the New Leviathan Barrel. That 60-round drum? Pure poetry for Monument's extended engagements where you're fighting multiple squads.

Optimal loadout code: 6HLOANO09MFFCME3G7LT2
This includes Secret Order Bevel Foregrip and Sandstorm Vertical Compensator – trust me on this combo.
What makes CI-19 special is its adaptability. High-capacity magazine supports aggressive A-zone pushes, maintains consistent damage in B-zone dunes with minimal bullet drop. Pro teams love pairing CI-19 with Gizmo's Firewall trait for improved handling near deployables and those terrifying Crawler Nest spiders.
Close Range Dominator: SMG-45 Performance
SMG-45 pulls a solid 5.3% pick rate with superior CQC performance out to 40m. That 40-round capacity and exceptional stability make it absolutely perfect for Hot Zone 3v3v3 chaos.
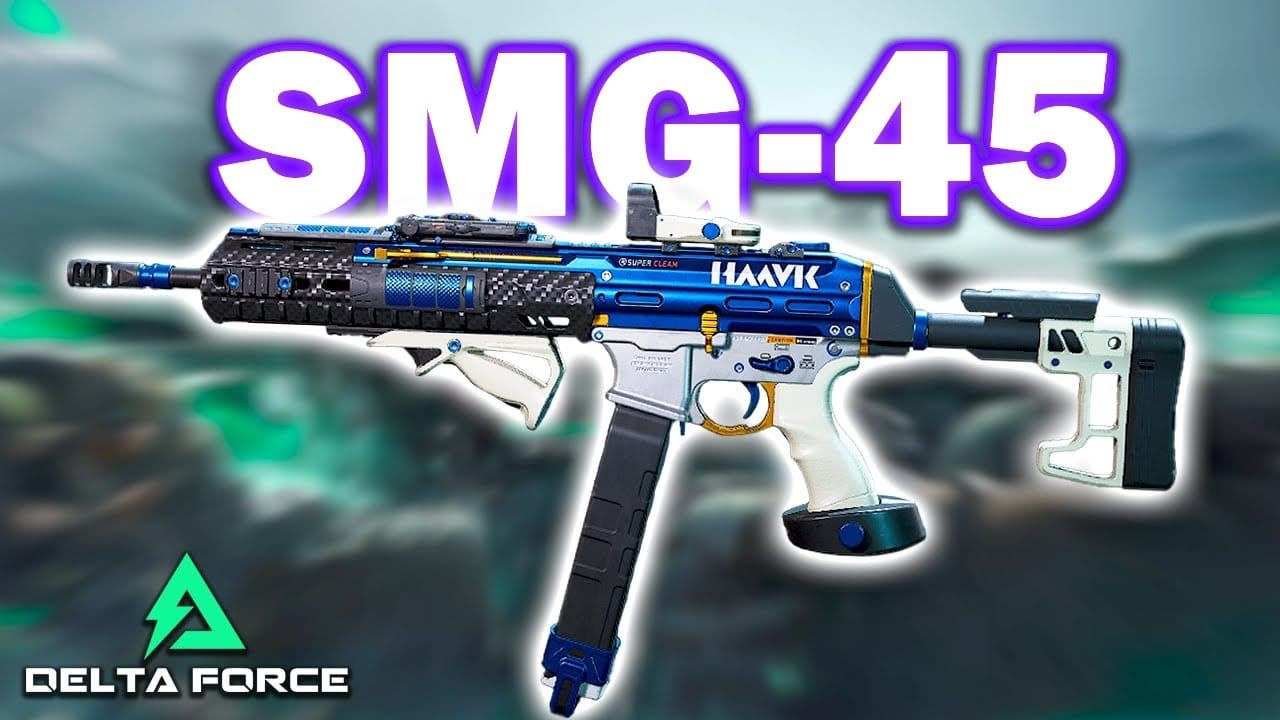
Build code: 6HLOBLC09MFFCME3G7LT2
The SMG Echo Suppressor here provides stealth and recoil reduction – it's a two-for-one deal.
This thing excels in Monument A-zone breaching scenarios. Fast sprint-to-fire enables those aggressive flanks through destructible environments (and there are a lot of them). Manageable recoil allows accurate hip-fire in smoke or confined spaces. Pairs beautifully with Stinger's healing for extended aggressive positioning.
One-Shot Wonder: AWM Sniper Rifle
AWM maintains a 3.4% pick rate while delivering 100 damage chest shots to 30m for consistent one-shot eliminations. Essential for Monument B-zone elevated positions.
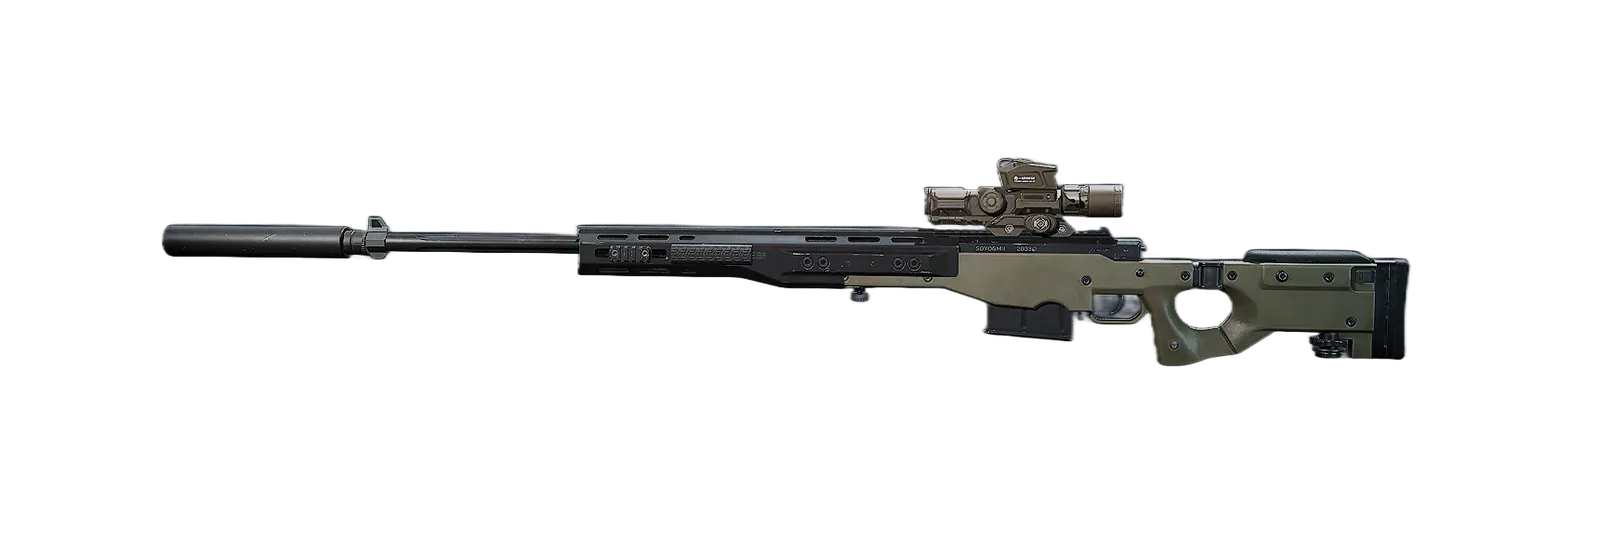
Professional loadout code: 6F50VEC0CH8TK2MI8PG7U
This maxes out effectiveness with AWM Skyline Long Barrel, Resonant Suppressor, and ACOG 6x optic. The Skyline Long Barrel (Level 35 unlock – grind for it) extends range significantly while Resonant Suppressor maintains stealth positioning. Synergizes perfectly with Luna's Detection Arrow for coordinated team pushes.
Best S+ Loadouts & Attachment Guides
CI-19 Laser Beam Build (Zero Recoil)
New Leviathan Barrel provides range extension and velocity improvements that you'll actually notice. Sandstorm Vertical Compensator adds +9 recoil control for sustained fire accuracy – this is where the magic happens. Secret Order Bevel Foregrip contributes stability while maintaining mobility (because what's the point of accuracy if you can't reposition?).
That 60-round drum ensures sustained engagement without frequent reloads. Nothing worse than running dry mid-fight.
This configuration absolutely shines in Monument's transitional zones with minimal recoil for accurate target tracking during movement. Extended magazine supports multiple target engagements without those risky tactical reloads.
For enhanced customization options, Delta Force Top Up Global through BitTopup enables immediate premium attachment access with secure transactions and instant delivery.
QJB201 LMG Suppression Build
QJB201 dominates area denial with its 125-round magazine and 785 RPM. When I say suppression, I mean actual nobody's moving through this chokepoint suppression.
Loadout code: 6FIAMCA005E7GMC01NIUGE
This optimizes for Monument Sinkpoint suppression scenarios. Newtype Sledgehammer Barrel and Sandstorm Vertical Compensator provide essential recoil management. 550 m/s muzzle velocity ensures consistent bullet travel across varied distances.
The real magic happens when you synergize with Gizmo's Crawler Nest deployables. Corrosion effect from spider attacks increases bullet damage to affected targets – it's like having a damage multiplier for your suppression capability in Operations chokepoints.
AWM Long-Range Extraction Build
Resonant Suppressor maintains concealment while Skyline Long Barrel maximizes range potential. ACOG 6x provides magnification for Monument's extended sight lines (and trust me, some of these sight lines are ridiculous).
Enables one-shot chest eliminations under 30m, expanding to headshot potential at longer ranges. DBAL-X2 laser improves target acquisition speed for those quick-scope moments.
Monument B-zone elevated positions provide optimal overwatch opportunities when coordinated with team movements through A-zone objectives. Communication is key here.
A-Tier: Competitive Alternatives
M4A1 Assault Rifle Reliability
M4A1 achieves a 9.3% pick rate through exceptional versatility and beginner-friendly characteristics. It's the weapon I recommend to anyone asking what should I main?
Delivers 25 damage per round at 672 RPM with predictable recoil patterns that won't fight you. Effective range exceeds 50m with AR Gabriel Long Combo barrel.
Import code: 6FINC4G0CQTV1IBVCBQVT
Balanced statistics suit mixed engagement scenarios where adaptability proves more valuable than specialized performance. The forgiving nature allows you to focus on positioning and team coordination rather than wrestling with mechanical recoil management.
M7 Battle Rifle Precision
M7 maintains a solid 7% pick rate with four-shot kill capability and +10% range using Practical Long Combo barrel. Handles 80% of engagement scenarios effectively but – and this is important – demands recoil mastery.
Excels in Monument vertical engagements and C-zone transitional play. Higher damage per shot reduces TTK against armored targets, which becomes crucial in late-game scenarios.
B-Tier & C-Tier: Niche & Situational Picks
AS Val Stealth Integration
AS Val achieves a 3% pick rate with built-in suppressor for stealth infiltration. Uses VSS 30-round magazines with VSS Tsunami Long Barrel Combo.
Code: 6FIN6LS0CQTV1IBVCBQVT
Perfect for flanking capability scenarios. That integrated suppressor suits Operations mode where stealth prioritizes over raw damage output. Sometimes you need finesse over firepower.
Pairs effectively with NOX for enhanced stealth positioning, synergizing with smoke deployments and flanking routes through Monument's surprisingly complex terrain.
MK4 Submachine Gun Innovation
The new MK4 SMG features 3-round burst convertible to full auto via exclusive barrel attachment. It's an interesting concept that I'm still testing.
Base specs: 24-round magazine, 793 RPM, 34 damage, 475 m/s velocity, 300m sound propagation. Provides 58 hip-fire accuracy, 51 aiming stability, 20m effective range, 46 recoil control.
That unique burst-to-auto conversion offers tactical flexibility for building clearance and aggressive positioning. Still figuring out optimal use cases, but the potential's there.
Operator Synergy: Matching Guns to Heroes
Gizmo Engineer Combinations
Gizmo's Firewall trait improves weapon handling near deployables, making high-recoil weapons like QJB201 actually manageable. Defensive Vanguard enhances recoil management and stability near friendly devices – it's like having built-in weapon attachments.
Crawler Nest's three Sentinel Spiders trigger Corrosion, increasing bullet damage to affected targets. This benefits sustained-fire weapons enormously.
Ultimate ability Hunting Spider webs and slows corroded targets while disabling gadgets. Perfect setup for precise weapon usage against immobilized enemies.
Luna Recon Optimization
Luna's Detection Arrow provides persistent intel that enhances sniper effectiveness dramatically. AWM builds benefit from guaranteed target location information for pre-positioning and angle preparation.
Intel gathering supports team coordination with precision weapons for coordinated pushes following key eliminations. It's all about timing.
Economy Guide: Best Budget Loadouts for Extraction
High Value, Low Cost Builds
M4A1 represents optimal budget assault rifle choice – competitive performance with minimal attachment requirements. Basic configurations provide 80% of premium build effectiveness at reduced cost. Can't argue with that math.
SMG-45 serves as excellent budget CQC option requiring only essential attachments.
Budget sniper builds focus on R93 over AWM, offering similar elimination potential with faster handling at reduced cost. Lower-tier weapons provide better insurance value due to reduced replacement costs – important consideration for extraction modes.
Insurance Considerations
Budget builds enable aggressive positioning since weapon loss carries reduced economic impact. Cost-effective ammunition focuses on standard rounds providing 85% effectiveness at significantly reduced expense while preserving resources for essential upgrades.
Smart economy management wins games.
How to Master Recoil Patterns in Season Ahsarah
Fundamental Recoil Control Techniques
Vertical recoil requires downward aim compensation during sustained fire. Pull down during the weapon's vertical kick phase in first 5-10 rounds – this is muscle memory territory.
Horizontal recoil demands 3-5 round bursts for targets beyond 30m, allowing recoil reset between bursts. Don't fight the weapon; work with it.
Crouching and prone positions provide significant stability bonuses reducing overall recoil magnitude. Incorporate positional changes into engagement sequences, particularly with high-recoil weapons like QJB201 or M7.
Attachment Optimization for Recoil
Sandstorm Vertical Compensator provides +9 recoil control across multiple platforms. Pair with Resonant Ergonomic Grip for +16% moving stability during repositioning.
Avoid stacking similar benefits due to diminishing returns – I see this mistake constantly. Secret Order Bevel provides essential stability for sustained fire weapons.
Conclusion: Final Recommendations for Ranking Up
Season Ahsarah's meta rewards versatility and tactical positioning over pure mechanical skill. Master S-tier weapons CI-19 and M4A1 for consistent competitive performance. Prioritize attachment unlocks through focused progression and practice those recoil patterns in Hot Zone 3v3v3.
Build loadouts complementing your preferred operators: Gizmo synergies with LMGs for area denial, Luna combinations with snipers for precision elimination. Adapt weapon selection based on map zones and game modes.
Maintain flexibility for upcoming balance changes while developing transferable mechanical skills. The meta will shift – good fundamentals won't.
FAQ
What's the best assault rifle in Delta Force Season Ahsarah? CI-19 leads with 9.5% pick rate, 55m effective range, and 60-round capacity. Use code 6HLOANO09MFFCME3G7LT2 with New Leviathan Barrel and Sandstorm Vertical Compensator.
Which SMG dominates close-quarters combat? SMG-45 achieves 5.3% pick rate with 40m effective range and superior stability. Excels in Hot Zone 3v3v3 and Monument A-zone breaching with SMG Echo Suppressor.
How do I control recoil effectively? Pull down during vertical kick, use burst fire for horizontal control, crouch for stability. Sandstorm Vertical Compensator provides +9 control, Secret Order Bevel Foregrip adds stability.
What's the difference between Warfare and Operations weapon meta? Operations emphasizes suppressed weapons like CI-19 with Advanced Multicaliber Suppressor for stealth. Warfare prioritizes versatility with M4A1/CI-19 for sustained engagements.
Which sniper rifle offers the best performance? AWM delivers 100 damage chest shots to 30m with one-shot potential. Use code 6F50VEC0CH8TK2MI8PG7U with Skyline Long Barrel and Resonant Suppressor.
How does Gizmo synergize with weapons? Firewall trait improves handling near deployables, benefiting high-recoil weapons like QJB201. Crawler Nest Corrosion increases bullet damage while Defensive Vanguard enhances stability near friendly devices.


