

Understanding Helicopter Exfil Mechanics on Cracked Map
Helicopter extraction activates through lever mechanisms, not signal flares. Unlike ground-based exfils with fixed requirements, helicopters operate on timed countdowns that create predictable interception windows.
Zero Dam's Helicopter Extraction uses two levers at the rooftop landing zone near the dam's main tower, achieving only 58% success rate—lowest among all Zero Dam methods. Compare this to Dam Summit's 81% and Underground Tunnel's 73%, making helicopter the highest-risk option.
For consistent success, Delta force credits top up through BitTopup ensures adequate resources for multiple attempts with secure transactions and instant delivery.
Server Alert System
Server alerts don't trigger from activation itself—they result from combat engagement and proximity detection. The countdown creates a predictable timeline that experienced players monitor, converging on known landing zones.
Audio cues extend 150-200 meters from activation points. Visual helicopter presence becomes detectable across larger distances. Rotor sounds penetrate most environmental audio, making complete stealth impossible once airborne.
Helicopter vs Ground Extraction
Ground extractions on Zero Dam:
- River Bank: 10,000 payment required, 64% success rate
- Dam Summit: Under 30kg weight limit, 81% success rate
- Repair Pathway: Complete backpack removal required
- Industrial Elevator: 3-minute lever activation + 3-minute extraction timer (6 minutes total)
Helicopter eliminates equipment restrictions but introduces temporal vulnerability. The fixed countdown creates known interception windows where enemies prepare ambushes with full loadouts.
Detection Ranges
Lever activation produces minimal audio—30-40 meters maximum. Critical exposure begins when helicopter enters airspace, broadcasting position to anyone within visual range.
Ongoing gunfights within 300 meters mask activation sounds. Quiet server states amplify every noise. Weather and time-of-day settings alter visual detection by 15-25%.
Helicopter Landing Zone Map
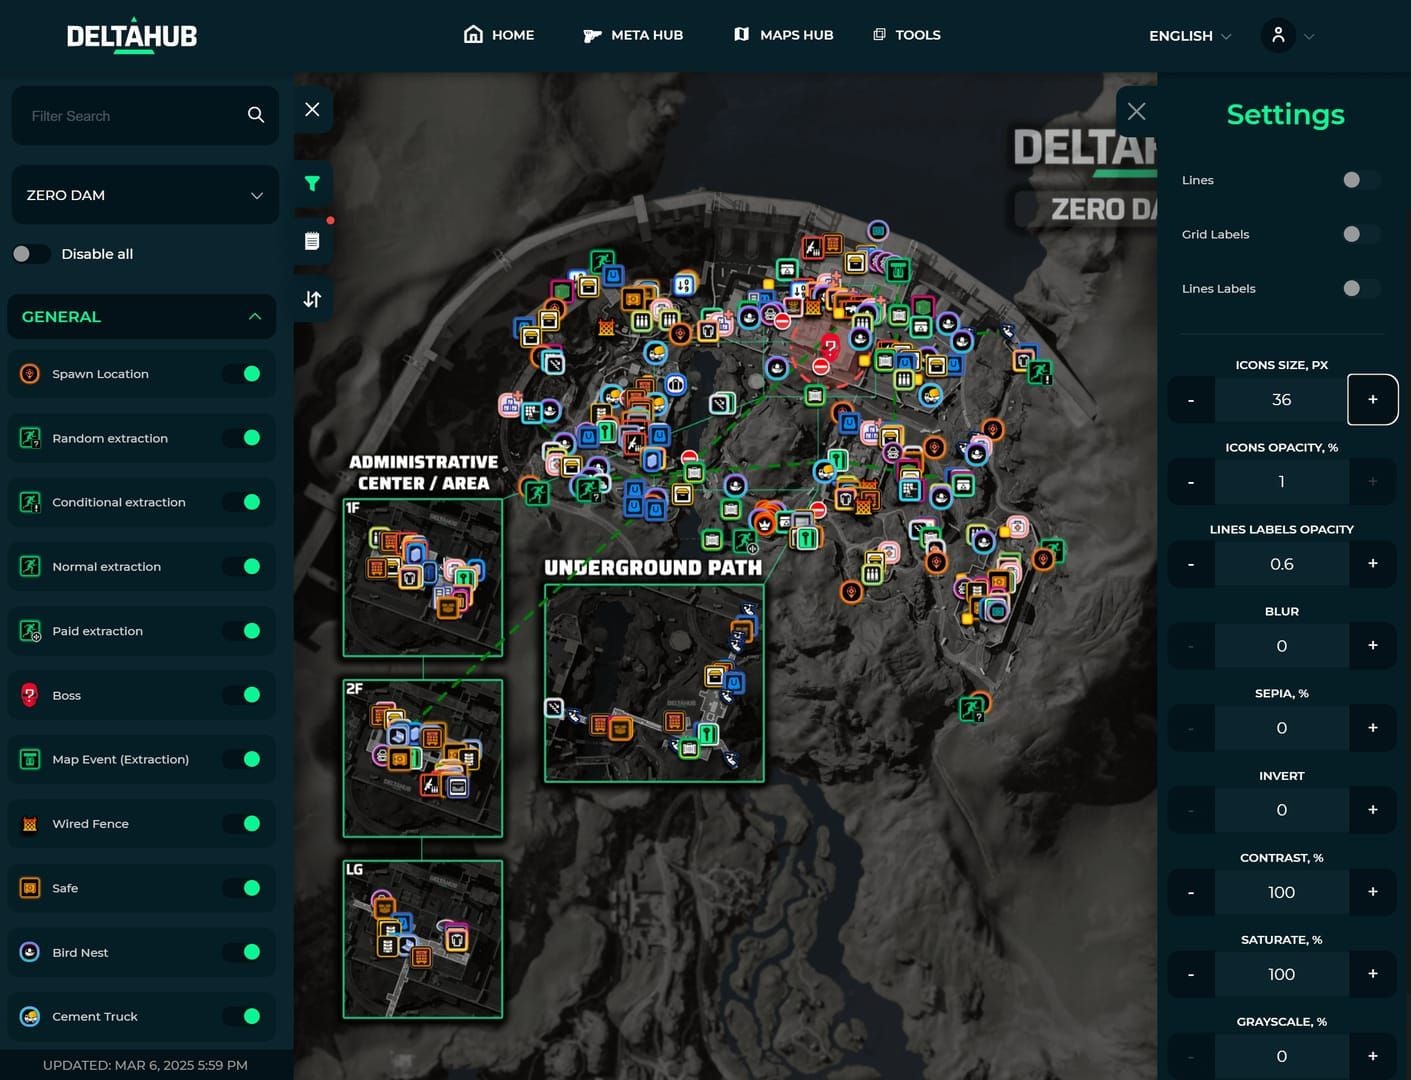
Zero Dam's helicopter LZ occupies rooftop area adjacent to dam's main tower, accessible through multiple vertical routes. Two-lever activation requires sequential interaction—both levers pulled within specific timeframe. Levers sit 15-20 meters apart.
Primary LZ Coordinates
Main landing zone features concrete helipad with surrounding low-wall cover providing minimal protection. Three approach routes:
- Eastern stairwell: Narrow vertical access with chokepoints
- Western maintenance ladder: Exposed climb, no cover
- Northern roof access: Requires key card through Administrative District
Surrounding buildings provide overwatch positions 40-80 meters distant, creating crossfire opportunities. Dam structure blocks western approaches, channeling threats from predictable directions.
Backup Extraction Points
When helicopter becomes compromised:
- Underground Tunnel (73%): Multiple entry points, better concealment
- Dam Summit (81%): Requires weight management, highest success probability
- West Tunnel (Season 2): Alternative route, moderate traffic
Identify backup route before activating levers. Pre-positioning near alternatives reduces decision time under fire.
Brakkesh Helicopter Mechanics
Brakkesh offers unlimited-use extraction via different lever systems. Helicopter Extract positions middle outside Babel Towers:
- Royal Museum basement lever: Small room, multi-level navigation required
- New Tower of Babel server room lever: Near technical equipment, faster access
Both trigger 4-minute countdown with unlimited capacity. Buy delta force currency at BitTopup for tactical flexibility across both maps.
Silent Activation Process
Successful extraction requires methodical preparation 8-10 minutes before activation. Rushing increases detection probability by 40%.
Pre-Extraction Checklist
- Inventory optimization: Ensure weight compliance for potential ground exfil switch
- Ammunition: Minimum 120 rounds primary, 60 secondary
- Medical supplies: 2+ medkits, 3+ bandages
- Key card assessment: Verify remaining uses (standard=20, replicated=4)
- Squad coordination: Establish communication and fallback positions
- Route reconnaissance: Clear threats within 100-meter radius
Key cards consume uses by difficulty: Easy=1, Normal=2, Hard=4. Max 4 cards per raid, increasing to 6 after Black Hawk Down completion.
Optimal Timing
Zero Dam uses lever activation, not flares. Approach levers during maximum server distraction:
- Active firefight audio: Gunfire within 250-300 meters masks sounds
- Extraction rush: Final 8-10 minutes when multiple teams extract
- Post-airdrop chaos: 90-120 seconds after supply drops
Time activation for 6-7 minutes remaining on raid timer—provides countdown buffer while pressuring competing teams.
Audio Masking Techniques
Lever activation produces clicking audible within 30-40 meters. Masking methods:
- Suppressed weapon fire: Single shots create audio overlap
- Grenade detonation: Timed explosives 50-70 meters away
- Environmental interaction: Door breaching, vehicle movement
- Coordinated distraction: Squad creates audio diversion opposite activation
Boarding Sequence
Countdown becomes irreversible once activated. Zero Dam provides 45-60 seconds for boarding after touchdown. Missing this window forfeits extraction.
Boarding priority in contested scenarios:
- Lowest health player first
- Heaviest loot carrier second
- Combat specialist last
- Staggered entry: 2-3 second intervals prevent clustering
58% success rate reflects this vulnerability. Ground methods offer better odds: Dam Summit (81%), Underground Tunnel (73%), River Bank (64%).

Loadout Optimization
Best Suppressed Weapons

Primary weapon priorities:
- Suppressed assault rifles: 5.56mm or 7.62mm platforms
- Effective range 100-150 meters
- Magazine capacity 30+ rounds
- Optic magnification 2-4x
Secondary weapons:
- Suppressed SMG or pistol for close-range
- High ammunition capacity (20+ round magazines)
- Fast draw speed
Avoid unsuppressed weapons—muzzle flash and report compromise position immediately.
Essential Equipment
- Smoke grenades (2-3): Visual cover during boarding
- Flashbangs (1-2): Disable ambushers
- Breaching charges: Alternative route creation
- Tactical vest with plate carrier: Minimum Level 3 protection
Key cards spawn at match initialization with no respawns. Optimal 10-minute key loop covers:
- Barracks 2F: Desk opposite drawing board
- Cement Plant Office: Desk and clothing shelf (90 seconds from Barracks)
- Administrative Center 1F Library: Guaranteed spawn
- Major Substation Tech Room 2F: Right side of safe
Additional spawns: Substation Dormitory desk, Vault desk, Visitor Center 3F, East Wing Manager's Office, West Wing Control Room.
Inventory Management
Weight management critical for Dam Summit fallback (30kg limit). Pre-extraction audit:
- Drop non-essential items
- Consolidate ammunition
- Prioritize high-value loot
- Verify medical supplies without excess weight
Saeed Black Card unlocks one key room but cannot extract—drop before boarding.
Audio Cue Management
Natural Sound Cover
Leverage server activity for activation timing:
- Distant firefights: 200+ meters indicates attention elsewhere
- Vehicle movement: Engine noise masks sounds within 100 meters
- Airdrop events: 30-45 second masking window
- Storm weather: Reduces audio detection by 20-30%
Monitor kill feed for engagement patterns. Multiple eliminations in specific zones indicate concentrated activity away from your position.
Server Event Timing
Coordinate with predictable events:
- Raid timer milestones: 10-minute and 5-minute marks
- Boss spawn timers: High-value targets draw concentration
- Supply drop announcements: 15-20 second divided attention window
Brakkesh's 4-minute countdown provides more flexibility than Zero Dam's lever system.
Communication Discipline
Voice communication creates vulnerabilities. Pre-raid protocols:
- Radio silence within 150 meters of LZ
- Coded brevity terms: Package ready vs activating helicopter
- Directional threat calls: Clock positions
- Suppressed acknowledgments: Single clicks vs verbal
Squad coordination improves success by 25-35% vs solo, but only with disciplined communication.
Tactical Positioning
360-Degree Security
Solo positioning:
- Cover with 270-degree visibility
- Back against solid structure
- 15-20 meters from landing point
- Escape route within 5-second sprint
Two-player squad:
- 180-degree separation
- Visual contact maintained
- Crossfire zone covering primary approach
- Designated boarder and security roles
Three-four player squad:
- Cardinal direction coverage (N/S/E/W)
- One player elevated if possible
- 10-15 meter spacing prevents grenade wipes
- Rotate boarding based on threat assessment
Cover Positions
Effective cover at Zero Dam helicopter LZ:
- Helipad low walls: Concealment but limited protection vs elevated fire
- Ventilation structures: Hard cover, restricted mobility
- Stairwell entrances: Quick retreat but chokepoint vulnerability
- Adjacent rooftop edges: Prone positioning with observation angles
Don't position directly on LZ—helicopter downwash creates visual obstruction enemies exploit.
Pre-Boarding Check
Final security check before boarding:
- Scan all approach vectors (2-3 seconds)
- Verify squad positions and status
- Check ammunition (minimum 30 rounds loaded)
- Assess threats within 50 meters
- Confirm escape route clear
- Deploy smoke if uncertain
Boarding commitment occurs when helicopter settles. 45-60 second window allows deliberate assessment.
Common Mistakes
Premature Activation
Activating with 15+ minutes remaining maximizes enemy response time, increasing interception by 60-70%. Optimal timing: 6-8 minutes remaining creates pressure while limiting response windows.
Poor LZ Selection
Brakkesh provides two activation points (Royal Museum basement, Tower server room). Selection criteria:
- Current player concentration zones
- Personal positioning
- Escape route quality
- Squad positioning
Unlimited-use nature means previous activations don't restrict access, but popular LZs accumulate campers.
Loadout Errors
Equipment mistakes increasing detection:
- Unsuppressed weapons: Flash visible 400+ meters, report audible 500+ meters
- Heavy armor: Reduces escape capability 15-20%
- Insufficient medical supplies: Forces risky looting
- Excessive weight: Prevents Dam Summit fallback (30kg limit)
False Beliefs
Myth: Activation sends server-wide notification
Reality: No automatic alert—detection from audio/visual observation
Myth: Suppressors eliminate all detection
Reality: Reduce range but don't eliminate signature—effective within 80-100 meters
Myth: Solo extractions succeed more than squad
Reality: Coordinated squads achieve 25-35% higher success with proper discipline
58% helicopter success on Zero Dam reflects inherent vulnerability, not just player error. 81% Dam Summit success demonstrates statistical disadvantage of helicopter method.
Counter-Ambush Tactics
Identifying Enemy Positioning
Pre-activation reconnaissance reveals threats:
- Unnatural audio silence: No footsteps in trafficked areas
- Partially opened doors: Recent player passage
- Loot scatter patterns: Dropped items suggest hasty positioning
- Eliminated bodies: Fresh corpses indicate active combat
Thermal optics detect body heat through concealment. Drone reconnaissance provides overhead observation but announces presence.
Emergency Evasion Routes
From Zero Dam helicopter LZ:
- Eastern stairwell descent to Administrative District
- Maintenance tunnel access (requires key card)
- Roof-to-roof movement (risky but unpredictable)
- Vertical drop with damage mitigation (10-15 meters)
Fallback extraction priorities:
- Underground Tunnel (73%, multiple entries)
- Dam Summit (81%, requires weight drop to 30kg)
- West Tunnel (Season 2, moderate traffic)
Maintain mental map of nearest alternative throughout activation. Decision time under fire: 2-3 seconds—pre-planning enables immediate execution.
Abort Criteria
Abandon helicopter when:
- 3+ enemy players confirmed within 100 meters
- Elevated positions occupied with clear LZ sightlines
- Squad casualties reducing defensive capability below 50%
- Ammunition below 60 rounds primary
- Medical supplies exhausted with health below 60%
58% success rate means nearly half fail. Recognizing unwinnable scenarios preserves loot. Alternative extractions with 73-81% success offer better odds.
Real Gameplay Examples
Solo Silent Extraction

Scenario: Solo, high-value loot, 7 minutes remaining, moderate activity
Execution:
- Positioned 150 meters from LZ, monitored kill feed 90 seconds
- Identified firefight 300 meters northwest—audio masking opportunity
- Advanced during engagement peak, activated levers during gunfire
- Established position behind ventilation with 270-degree visibility
- Deployed smoke at 30-second mark before arrival
- Boarded during smoke cover, extracted successfully
Key factors: Timing with existing gunfight, conservative positioning, smoke deployment.
Squad Coordination
Scenario: Four-player squad, mixed loot, 6 minutes remaining, high population
Execution:
- Designated roles: Leader (activation), Security-1 (north), Security-2 (east), Overwatch (elevated)
- Staggered approach over 45 seconds avoiding grouped detection
- Leader activated while security established perimeter
- Overwatch eliminated approaching threat at 150 meters
- Coordinated smoke screen during descent
- Boarded in health-priority sequence
Success factors: Role designation, staggered positioning, coordinated smoke, disciplined boarding.
High-Loot Under Pressure
Scenario: Solo, 38kg inventory (exceeds 30kg limit), 5 minutes remaining, contested
Execution:
- Assessed inventory—identified 8kg droppable items
- Created cache 100 meters from LZ
- Reduced to 30kg, maintained helicopter primary but Dam Summit backup
- Approached LZ, detected two-player camping team
- Aborted helicopter, moved to Dam Summit
- Extracted via ground method with 81% success advantage
Critical decision: Recognizing compromised LZ, maintaining backup through weight management, accepting lower loot for higher success probability.
Optimizing with BitTopup
Essential Items
Priority purchases:
- Suppressed weapon platforms
- High-tier armor (Level 3+)
- Medical supply stockpiles
- Key card inventory (20 uses standard, 4 replicated)
- Tactical equipment (smoke, flashbangs, breaching charges)
Key spawns include guaranteed (West Rear Grip Road Entrance, East Rear Grip Tunnel) and 50% probability spawns. Efficient 10-minute loop maximizes secured route access.
Premium Equipment Impact
Statistical correlation with extraction success:
- Suppressed weapons: Increase stealth success 30-40%
- Level 4 armor: Improve ambush survival 25-35%
- Advanced medical: Reduce elimination from sustained combat 40-50%
- Tactical grenades: Enable escape from compromised positions 60-70% more effectively
Premium loadouts achieve 15-20% higher success across all methods.
Secure Top-Up
BitTopup provides reliable resource acquisition with competitive pricing and instant delivery. Maintaining adequate currency ensures you never enter raids under-equipped.
Platform advantages: secure transactions, 24/7 customer service, trusted by 500,000+ players worldwide.
FAQ
How long does helicopter take to arrive after activation on Zero Dam?
Zero Dam uses lever-based system. After activating both levers, helicopter follows fixed countdown. Total exposure mirrors Industrial Elevator's 6-minute total (3-minute activation + 3-minute extraction), though exact arrival varies by 30-45 seconds. Brakkesh uses confirmed 4-minute countdown after lever activation.
What triggers server-wide alerts during helicopter extraction?
No automatic server-wide notification exists. Detection occurs through direct audio observation (lever activation audible 30-40 meters, helicopter rotors detectable 400+ meters) and visual identification. Combat near extraction creates indirect alerts through kill feed and gunfire audio.
Where are all helicopter landing zones on Zero Dam?
Zero Dam features single helicopter extraction at rooftop landing zone near dam's main tower. Activation requires two levers 15-20 meters apart. Access routes: eastern stairwell, western maintenance ladder, northern roof access (key card required through Administrative District).
What loadout is best for silent helicopter exfil?
Suppressed primary (5.56mm/7.62mm assault rifle), suppressed secondary (SMG/pistol), Level 3+ armor, 2-3 smoke grenades, 1-2 flashbangs. Carry minimum 120 rounds primary, 60 secondary. Maintain weight below 30kg for Dam Summit backup. Include 2+ medkits, 3+ bandages.
Can you cancel helicopter exfil after activation?
No. Once levers activated, countdown becomes irreversible on both maps. Helicopter arrives regardless of changing situations. Premature engagement with 15+ minutes remaining increases interception 60-70%. If compromised after activation, abandon helicopter for alternatives like Underground Tunnel (73%) or Dam Summit (81%).
How many players can board one helicopter?
Brakkesh supports unlimited capacity during 4-minute countdown. Zero Dam doesn't specify limits, but 45-60 second boarding window and 58% success rate suggest practical limitations. Squad extractions require coordinated boarding: lowest health first, high-value loot carriers second, combat specialists last.
Master every extraction on Cracked Map with the right equipment. Top up your Delta Force account securely at BitTopup for instant access to tactical gear, weapon upgrades, and essential supplies. Fast delivery, trusted by 500,000+ players worldwide. Get your competitive edge now!


