

Understanding CC-Immunity in Genshin 6.3 Spiral Abyss
What Crowd Control Immunity Actually Means
CC-immunity refers to enemies with maximum poise values preventing displacement, stagger, or freeze. These enemies can't be pulled by Venti's Burst, frozen, or grouped by Anemo abilities—but still take full elemental damage and react to non-movement reactions. The poise system determines interruption force thresholds; CC-immune enemies have infinite poise against displacement while maintaining full damage susceptibility.
Version 6.3 launches January 14, 2026, with Spiral Abyss Blessing Reset January 16, 2026 at 04:00 server time.
Players strengthening rosters can Genshin Genesis Crystals top up through BitTopup for competitive pricing and instant delivery.
Which Chambers Feature CC-Immune Enemies
Floor 12 configurations:
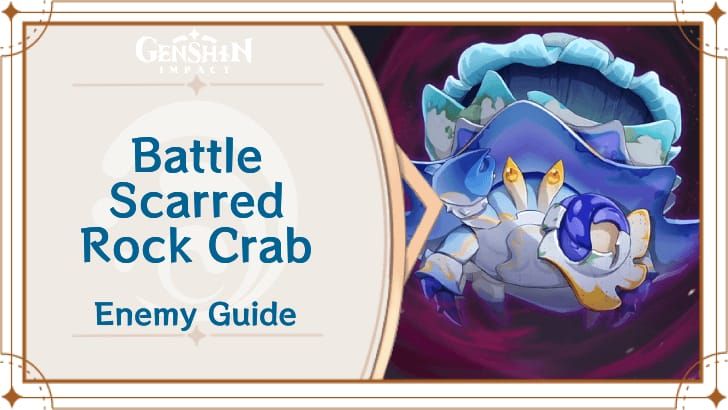
- Battle-Scarred Rock Crab: 4,409,072 HP—demands sustained DPS over burst windows
- Fireblade Shock Troopers: 4,765,990 HP with three shield layers (285,959 HP each, +200% RES). Breaking all shields within 30s triggers vulnerability: -50% All RES, -60% Electro RES for 30s
- Primordial Bathysmal Vishap: Activates Hydro Armor after 30s (+80% RES, drains 10 Energy every 0.5s from active character)
- Wilderness Hunters: 2,008,523 HP each
- Tainted Water-Splitting Phantasms: 851,787 HP
- Assault Specialist Meks: 817,716 HP
Poise and Interruption Resistance System
Poise operates on hidden thresholds determining when enemies can be interrupted or displaced. Standard enemies have low poise allowing Anemo grouping; CC-immune enemies feature maximum poise completely negating displacement from Venti's Burst, Kazuha's Skill, or Sucrose's grouping.
Interruption resistance affects attack animation cancellation, not displacement. Some CC-immune enemies can have attacks interrupted through rapid elemental application despite being immovable. Stagger resistance determines consecutive hits before brief vulnerability states (0.5-1s vs. 3-5s from traditional CC).
How CC-Immune Mechanics Change the Abyss Meta
Traditional CC-Reliant Teams: What Still Works
Freeze teams lose core mechanics entirely. Ganyu/Ayaka freeze compositions must transition to melt-focused builds to maintain viability.
Anemo grouping teams require adaptation, not abandonment. Kazuha retains exceptional value through Elemental DMG Bonus buffs and Viridescent Venerer 4pc (-40% elemental RES regardless of displacement). His personal damage and elemental absorption remain fully effective.
Venti experiences most significant value reduction—grouping and energy refund mechanics requiring lifted enemies become unreliable. His Burst still deals damage and applies auras, but signature utility disappears.
Sucrose maintains viability through A4 passive sharing 200 EM with teammates. In Hyperbloom/Bloom teams, this EM sharing provides substantial damage increases independent of grouping. VV application and Thrilling Tales buffing remain functional.
The Anemo Character Debate: Obsolete or Adaptable?
Anemo characters remain valuable through elemental shred, damage amplification, and reaction facilitation. VV 4pc applies -40% elemental RES for 10s regardless of grouping, translating to 20-25% damage increases.
Kazuha excels via A4 passive granting 0.04% Elemental DMG Bonus per EM point. At 800-1000 EM, this provides 32-40% Elemental DMG Bonus. Double-swirl mechanics enable simultaneous multi-element buffing.
For version 6.3 preparation, buy Genshin Genesis Crystals online through BitTopup to secure Kazuha—the most adaptable Anemo option for CC-immune content.
Energy Management Without Grouping Windows
ER requirements increase substantially due to lost particle generation from grouped kills and extended combat:
- Kuki Shinobu (Hyperbloom): 180%+ ER, 200+ EM minimum
- Nahida: 140-160% ER for Burst uptime (250 EM buff to active character)
- Yelan/Xingqiu: 180-200% ER for Burst rotations
- Bennett: 180-200% ER for 15s buff with 12s field duration
Ley Line Disorder Optimization
Floor 12 Ley Line configurations (verify upon release):
- First Half: Bloom DMG +200%, Lunar-Bloom DMG +75%
- Second Half: Electro-Charged DMG +200%, Lunar-Charged DMG +75%
200% boost triples base damage, making reaction teams dramatically more effective. Electro-Charged deals 600% damage to shields—exceptional against Fireblade Shock Troopers' three-layer shields.
Top Team Compositions for CC-Immune Chambers
Hyperbloom Teams: Consistent Damage Without CC
Nahida + Kuki Shinobu + Xingqiu + Yelan
Premier Hyperbloom composition. Nahida applies Dendro via Skill to marked enemies, creating Dendro Cores with Xingqiu/Yelan's Hydro. Kuki triggers Hyperbloom every 1.5s via Skill's Electro application.
Builds:
- Kuki: 180%+ ER, 200+ EM, EM/EM/EM
- Nahida: 140-160% ER, EM/EM/EM
- Xingqiu/Yelan: 180-200% ER, Emblem 4pc
Rotation: Nahida Skill → Yelan Burst → Xingqiu Burst → Kuki Skill → Nahida Burst → normal attacks
Benefits: Dendro Resonance (+50 EM), Hydro Resonance (+25% Max HP for Yelan scaling)
Alternative Hyperbloom: Kaveh Configuration
Nahida + Kaveh + Xingqiu + Kuki Shinobu
Kaveh's Bloom conversion transforms 6 Hermit Seeds at 500% Bloom damage each (1.5M damage cap per rotation). Burst-oriented vs. sustained damage pattern.
Kaveh: Deepwood Memories 4pc (-30% Dendro RES), 160-180% ER. Excels against Wilderness Hunters requiring 6 Hermit Seed conversions.
Aggravate Compositions: Single-Target Excellence
Nahida + Fischl + Kazuha + Kuki Shinobu
Fischl's Oz maintains 100% uptime (12s duration) for consistent Electro. Nahida's Skill creates Quicken auras enabling Aggravate from Electro instances.
Kazuha provides Electro DMG Bonus + VV shred for double-amplification. Kuki serves as healer + additional Electro applicator.
Builds: EM focus on Fischl/Kuki for Aggravate scaling. Fischl needs 120-140% ER, Kazuha 160-180% ER.
Melt Teams: Burst Damage Strategies
Bennett + Xiangling + Rosaria + Kazuha
Bennett's Burst grants +25% ATK (Pyro Resonance) + base ATK scaling. Rosaria applies Cryo for 2x Melt multiplier while sharing CRIT Rate (A4 passive).
Kazuha absorbs Pyro for Pyro DMG Bonus + VV shred. Xiangling needs 180-200% ER for Pyronado uptime.
Excels during Fireblade Shock Trooper vulnerability windows (-50% All RES, -60% Electro RES for 30s).
Mono-Element Hypercarry Teams
Raiden Shogun + Sara + Kazuha + Bennett
Mono-Electro hypercarry. Raiden's Burst scales with energy consumed by teammates—exceptional in high-ER compositions. Sara provides ATK buffs + CRIT DMG (C6), Bennett adds base ATK scaling.
Kazuha applies VV Electro shred + Electro DMG Bonus. Benefits from Pyro Resonance (+25% ATK).
ER requirements: Sara/Bennett 180-200%, Kazuha 160-180% (low Burst cost).
Character Tier List: CC-Immune Content Performance
S-Tier Main DPS
Nahida: Persistent Dendro application (marks 8 enemies), 250 EM Burst buff, EM scaling simplifies artifacts. Essential for Bloom/Hyperbloom/Aggravate.
Raiden Shogun: Energy generation + Burst scaling independent of CC. Coordinated attacks vs. mobile enemies. 200% Electro-Charged Ley Line boost amplifies damage.
Neuvillette: Charged Attack mechanics don't require positioning. Self-sufficient kit (damage + healing). Sustained output vs. 4.8M HP enemies.
Best Sub-DPS
Fischl: 100% Oz uptime (12s duration) for consistent Electro. No grouping requirements increase value vs. standard Abyss.
Xingqiu/Yelan: Premier Hydro duo. Damage reduction + interruption resistance improve survivability. 180-200% ER aligns with Emblem 4pc optimization.
Xiangling: Pyronado's persistent Pyro + snapshot mechanics. Off-field damage during shield-breaking/positioning.
Support Characters
Kazuha: 32-40% Elemental DMG Bonus at 800-1000 EM. Double-swirl enables multi-element buffing. Transitions from grouping to damage amplification.
Bennett: ATK scaling buff + healing independent of positioning. Pyro Resonance (+25% ATK) + energy generation. Level 90 for max base ATK. Talents: 1/9/9 minimum.
Kuki Shinobu: Healer + Hyperbloom trigger. 1.5s Electro application interval. Requires 180%+ ER, 200+ EM.
Characters to Avoid/Reconsider
Venti: Loses grouping + energy refund from lifted enemies. Maintain for standard content; invest in Kazuha/Sucrose for CC-immune scenarios.
Freeze DPS (Ayaka/Ganyu): Require composition pivots. Ayaka transitions to Melt (Bennett + Xiangling). Ganyu maintains charged shot damage but loses freeze's defensive utility.
Sucrose: Reduced but not eliminated value. EM sharing (200 EM) + VV application remain relevant. Less efficient than Kazuha in most CC-immune scenarios—budget alternative.
Building Characters for CC-Immune Encounters
Artifact Set Priority
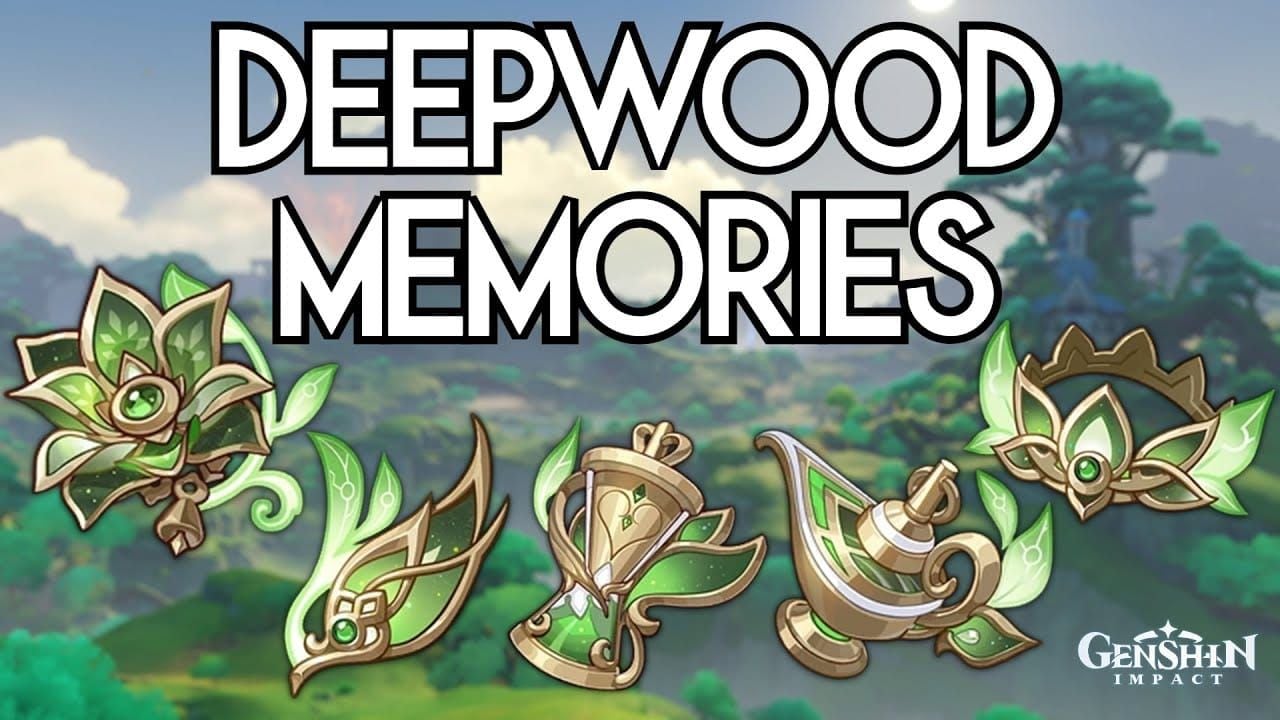
Deepwood Memories 4pc: -30% Dendro RES for Bloom/Hyperbloom/Aggravate. Nahida carries in Hyperbloom teams; Kaveh in specialized Bloom teams.
Viridescent Venerer 4pc: -40% elemental RES (independent of grouping). 20-25% damage increase. 10s duration. Maintain on Kazuha/Sucrose/Venti.
Emblem of Severed Fate 4pc: Converts ER to Burst DMG. At 180-200% ER, provides 45-50% Burst DMG bonus. Optimal for Xingqiu/Yelan/Xiangling.
Gilded Dreams 4pc: Alternative for Hyperbloom triggers (Kuki). Provides up to 230 EM when triggering reactions with different-element teammates.
Main Stat and Substat Optimization
Hyperbloom triggers: EM/EM/EM with 180%+ ER substats. Kuki needs this for max Hyperbloom damage + 1.5s Electro application.
Nahida: EM/EM/EM, 140-160% ER substats. No CRIT investment needed.
Traditional DPS: ATK%/Elemental DMG/CRIT. ER substats gain importance. Raiden uses ER Sands (Burst scales with energy consumed). Target 60% CRIT Rate minimum, 1:2 CRIT Rate:CRIT DMG ratio.
Supports: ER Sands to reach rotation thresholds. Bennett uses HP%/ER% (ATK buff scales from base ATK only). Sara needs ATK%/CRIT if built for personal damage.
Weapon Recommendations by Role
Kazuha: Freedom-Sworn (20% ATK, 16% Normal/Charged/Plunging DMG buff) > Iron Sting (F2P EM) > Xiphos' Moonlight (ER support).
Kuki Shinobu: Freedom-Sworn (team buffing) > Iron Sting (EM maximization) > Key of Khaj-Nisut (EM scaling but competes with HP).
Nahida: A Thousand Floating Dreams (signature) > Sacrificial Fragments (EM + Skill reset) > Magic Guide (3-star EM).
Xingqiu/Yelan: Sacrificial Sword/Favonius Warbow (energy generation, reduces artifact ER requirements) vs. signature weapons (higher damage ceiling).
Advanced Combat Strategies
I-Frame Dodging Techniques
Burst animations provide invincibility frames for damage avoidance without rotation interruption. Time Bursts to coincide with enemy attacks. Raiden/Ayaka have long animations avoiding entire attack sequences.
Dash i-frames last ~0.4s. Precise timing avoids attacks without wasting stamina. Preserve stamina for critical dodges vs. excessive dashing.
Certain Skills provide i-frames (Mona/Yelan Skill). Hold for defensive timing vs. immediate damage cast.
Positioning and Kiting Tactics
Maintain optimal distance—ranged characters (catalyst/bow) kite around chamber edges for safe damage windows without shields/healing.
Utilize environmental obstacles to break line-of-sight, resetting aggro. Position behind pillars/terrain for complete damage negation.
Direct aggro toward high-defense characters (Zhongli/Neuvillette) by controlling rotation positioning.
Animation Cancel Optimization
Normal attack canceling (dash/jump) reduces animation lock. Hu Tao/Diluc gain substantial DPS increases. Manage stamina carefully.
Skill animation canceling via character swaps reduces dead time. Understand snapshot vs. dynamic buff mechanics—premature swapping loses snapshot damage.
Burst animation skipping through precise swap timings reduces rotation duration. Some Bursts allow swaps before animation completes while maintaining damage/buffs.
Shield vs Healer
Shields: Interruption resistance maintains DPS uptime. Zhongli offers -20% All RES + shielding. Prevents attack animation cancellation.
Healers: Enable aggressive playstyles trading HP for positioning/DPS. Bennett provides healing + ATK buffs (consolidates support roles).
Optimal choice depends on skill level and enemy patterns. Skilled players minimize damage via i-frames/positioning (healing sufficient). Less experienced benefit from consistent shield protection. Against Primordial Bathysmal Vishap's energy drain, shields prevent interruption leading to energy loss.
F2P and Low-Spender Team Options
4-Star Character Compositions
Sucrose + Xingqiu + Fischl + Kuki Shinobu
Fully 4-star Hyperbloom. Sucrose shares 200 EM (A4) + VV shred. Xingqiu provides Hydro + damage reduction. Fischl offers Electro. Kuki triggers Hyperbloom + heals.
4-star weapons: Sucrose (Sacrificial Fragments/Thrilling Tales), Xingqiu (Sacrificial Sword), Fischl (Stringless/Favonius Warbow), Kuki (Iron Sting).
Artifacts: VV for Sucrose, Emblem for Xingqiu, full EM for Kuki.
Handles all CC-immune types via sustained Hyperbloom. Reliable clear times vs. 4.4M HP enemies without perfect execution/high constellations.
National Team Variants
Xiangling + Xingqiu + Bennett + Sucrose
Classic National adapted for CC-immune. Xiangling's Pyronado triggers Vaporize from Xingqiu. Bennett provides ATK buffs + Pyro Resonance. Sucrose amplifies via EM sharing + VV shred.
All characters accessible: Xiangling (free from Abyss), Xingqiu (events/Starglitter shop), Bennett (Starglitter shop), Sucrose (4-star).
Rotation: Bennett Burst → Sucrose Skill (swirl Pyro) → Xingqiu Burst → Xiangling Burst → normal attacks for Vaporize.
Resource Investment Priority
Xingqiu first: Irreplaceable Hydro for Vaporize/Bloom/Electro-Charged. C6 adds Hydro Swords + energy. Talents: 1/9/9 minimum.
Bennett: Level 90 for max base ATK. Talents: 1/9/9. C1 removes HP restriction (high-priority constellation).
Fischl: Level 90 for Aggravate scaling. Talents: 1/9/9. C6 transforms to S-tier sub-DPS; functions at C0. Stringless provides EM scaling + Skill/Burst DMG.
Sucrose: Level 90 for max EM sharing (scales with total EM). Talents: 1/6/6 (value from VV + EM sharing, not personal damage). Sacrificial Fragments for EM + Skill reset.
Common Mistakes and Misconceptions
Why Anemo Characters Aren't Useless
VV 4pc provides -40% elemental RES regardless of grouping = 20-25% damage increase. Essential for optimized teams.
Kazuha's Elemental DMG Bonus (32-40% at typical EM) functions independently of positioning. Multiplicative with other damage sources.
Sucrose's EM sharing (200 EM via A4) amplifies Hyperbloom/Bloom/Aggravate. Doesn't require grouping. Level 90 investment valuable.
Over-Investing in Crowd Control Stats
CC duration/grouping radius stats provide zero value. Constellations enhancing grouping (Venti's) offer reduced value. Evaluate constellations based on CC-independent benefits.
Weapons emphasizing grouping utility become suboptimal. Prioritize EM/ER/direct damage buffs maintaining value regardless of CC-immunity.
Team Composition Balance Errors
Insufficient ER creates rotation gaps compounding over extended encounters. 180%+ ER represents minimum thresholds, not optimal targets.
Neglecting survivability forces defensive playstyles reducing DPS uptime. CC-immune enemies maintain full mobility creating consistent damage pressure.
Ignoring Ley Line Disorder bonuses wastes 200% damage amplification (tripling reaction damage). Teams not triggering boosted reactions compete at significant disadvantage.
Preparing Your Account for 6.3 Abyss
Which Characters to Build
Nahida: Highest priority. Central to Bloom/Hyperbloom/Aggravate. Persistent Dendro + EM buffing. Irreplaceable in reaction teams dominating 200% Ley Line boosts.
Kazuha: Most versatile Anemo. Maintains value via damage amplification. Double-swirl + Elemental DMG Bonus work in multiple archetypes.
Kuki Shinobu: Essential for Hyperbloom. Healing + consistent Electro. 4-star accessibility. Build to 180%+ ER, 200+ EM.
Xingqiu/Yelan: Premier Hydro duo. At least one essential for Bloom/Hyperbloom/Vaporize. Xingqiu's 4-star rarity + event availability = accessible. Building both enables dual Hydro maximizing reaction consistency.
Resin-Efficient Farming Routes
Emblem domain: Artifacts for Xingqiu/Yelan/Xiangling simultaneously. Most resin-efficient for National variants. Shimenawa's benefits certain DPS. Prioritize until 180-200% ER with acceptable offensive substats.
Deepwood domain: Essential for Dendro teams. Nahida carries 4pc in Hyperbloom. Lower priority than Emblem. Farm after securing Emblem sets.
VV domain: High priority for Anemo supports despite CC-immunity. Kazuha/Sucrose both require VV. Maiden Beloved provides minimal value (reduces efficiency vs. Emblem).
Talent books: Prioritize Burst talents for characters whose value comes from Burst damage/buffs. Xingqiu/Yelan/Xiangling/Bennett/Nahida need level 9 Burst minimum. Skills can remain 6-8 for most supports (exception: Fischl's Skill).
Constellation and Weapon Investment
Xingqiu C6: Substantial damage + energy improvements. Additional Hydro Swords + energy regen. Use Starglitter for shop purchases.
Bennett C1: Removes HP restriction. One of most impactful upgrades. Worth Starglitter purchase. Higher constellations provide minimal value; C6 reduces flexibility.
Fischl C6: Transforms to premium sub-DPS via additional coordinated attacks. Significant damage in Aggravate/Electro-Charged. Functions at C0 for pure Electro application.
Weapons: Prioritize highest field time/damage contribution characters. Nahida benefits from A Thousand Floating Dreams; Magic Guide = functional 3-star alternative. Xingqiu's Sacrificial Sword + Fischl's Stringless = high-value 4-stars.
Optimizing Genesis Crystal Spending with BitTopup
Evaluate banner priorities based on CC-immune requirements vs. general meta. Nahida/Kazuha = highest-value pulls enabling multiple archetypes. Weapon banners provide lower value unless optimal character rosters exist.
BitTopup offers competitive pricing, instant delivery, secure transactions. Wide game coverage + excellent customer service. High user ratings indicate consistent quality.
Budget players: Prioritize guaranteed character acquisitions over weapon pulls. 4-star weapons provide 70-80% of 5-star performance at lower cost. Save Crystals for Nahida/Kazuha/premier Hydro/Electro supports.
Welkin Moon + Battle Pass = most efficient Crystal/resource acquisition for low-spenders. Maintain subscriptions while saving for high-priority banners vs. impulsive spending.
Future-Proofing Your Spiral Abyss Strategy
Long-Term Character Investment
Reaction-based characters maintain value across meta shifts (reactions scale independently of enemy mechanics). Nahida/Fischl/Xingqiu/Xiangling provide consistent value regardless of future content emphasis.
Universal supports (Bennett/Kazuha) transcend specific meta requirements via damage amplification. Bennett's ATK buff scales with any ATK-based DPS. Kazuha's Elemental DMG Bonus works with any elemental source. Safe long-term investments maintaining relevance across version cycles.
Avoid over-specialization in single archetypes. Exclusive freeze investment faces adaptation challenges in CC-immune content. Diverse rosters pivot between Hyperbloom/Aggravate/Melt/Vaporize. Build multiple archetypes for flexibility.
Adapting to Evolving Abyss Mechanics
Monitor beta tests + leak communities for advance notice of mechanical changes. Version 6.3's CC-immunity rewards players who prepared reaction teams pre-launch. Follow reliable leak sources for strategic resource allocation.
Maintain artifact inventory across multiple sets preventing farming bottlenecks. Pre-farmed Deepwood/VV/Emblem enables quick adaptation without waiting. Reduces time gap between meta shifts and account readiness.
Flexible weapon investments working across multiple characters provide better long-term value. Sacrificial Sword/Favonius series/Stringless work on multiple characters within weapon type. Reduces total weapon investment for meta-relevant teams.
Building Flexible Team Rosters
Maintain at least two complete compositions per Abyss half for adaptability. One optimized team faces challenges when mechanics counter composition. Multiple options select most effective matchups. Critical when Ley Line Disorders favor specific reactions.
Invest in multi-archetype characters maximizing resource efficiency. Kazuha works in Hyperbloom/Aggravate/Melt/Vaporize. Xingqiu enables Vaporize/Bloom/Electro-Charged. Flexibility provides better ROI than specialists.
Balance constellation investments across multiple characters preventing over-investment in singles potentially losing relevance. Spread resources bringing multiple characters to functional levels (C0-C2 for 5-stars, C4-C6 for 4-stars). Creates roster depth adapting to meta changes vs. hyper-investing in C6 5-stars.
FAQ
What does CC-immune mean in Genshin Impact Spiral Abyss?
Enemies with maximum poise preventing displacement, stagger, or freeze. Can't be pulled by Venti's Burst, frozen, or grouped by Anemo abilities. Still take full elemental damage and react to non-movement reactions. Eliminates CC utility while maintaining damage-dealing capabilities.
Are Anemo characters useless in 6.3 Spiral Abyss?
No. VV 4pc resistance shred (-40% elemental RES) + damage amplification buffs function independently of grouping. Kazuha provides 32-40% Elemental DMG Bonus. Sucrose shares 200 EM. Only grouping-focused characters (Venti) experience significant value reduction.
Which teams can clear CC-immune chambers in Genshin 6.3?
Hyperbloom (Nahida + Kuki + Xingqiu + Yelan), Aggravate (Nahida + Fischl + Kazuha + Kuki), National variants (Xiangling + Xingqiu + Bennett + Sucrose). Focus on sustained reaction damage. 200% Ley Line boosts to Bloom/Electro-Charged make reaction teams significantly more effective than raw damage scaling.
How do CC-immune enemies affect freeze teams?
Lose offensive + defensive utility simultaneously—frozen enemies can't be immobilized. Ganyu/Ayaka require pivots to Melt builds (Bennett + Xiangling). Core freeze mechanic becomes ineffective, forcing reliance on alternative damage sources + defensive options (shields/healing) vs. enemy immobilization.
What is the best DPS for CC-resistant bosses?
Nahida dominates via persistent Dendro enabling Bloom/Hyperbloom (200% Ley Line boost). Raiden excels through energy generation + Burst scaling. Neuvillette maintains exceptional single-target via Charged Attacks. Provide sustained damage over extended rotations vs. requiring burst windows from CC.
Should I pull for characters before 6.3 Abyss changes?
Prioritize Nahida/Kazuha if lacking. Enable multiple archetypes dominating CC-immune content. Nahida's Dendro + EM buffing essential for reactions. Kazuha's damage amplification works independently of grouping. Kuki provides 4-star Hyperbloom alternative. Avoid pulling grouping-focused characters (Venti) specifically for 6.3.
Preparing for Genshin 6.3 Spiral Abyss? Secure characters and weapons with Genesis Crystals from BitTopup. Instant delivery, competitive rates, secure transactions. Power up your account and dominate CC-immune chambers when version 6.3 arrives!


