

Floor 12-2 Enemy Swap Overview
Version 6.3 fundamentally reshapes Floor 12-2 by replacing groupable enemies with boss-tier opponents possessing inherent CC immunity. This represents one of the most significant meta disruptions in recent cycles.
First Half: Battle-Scarred Rock Crab (4,409,072 HP) requiring Dendro Core conversion, Fireblade Shock Trooper (4,765,990 HP) with triple-layered shields. Second Half: Primordial Bathysmal Vishaps (2,085,774 HP each) activating Hydro Armor after 30s, granting +80% RES and draining 10 Energy/0.5s.
These level 95-100 enemies demand optimized single-target damage, not AoE grouping. For building counter teams, Genshin Genesis Crystals top up through BitTopup provides fast, secure access with competitive pricing.
What Changed: Enemy Lineup Comparison

6.2 Floor 12-2 featured groupable Treasure Hoarders, Hilichurls, and Fatui Skirmishers susceptible to Venti/Kazuha pulls and freeze reactions.
6.3 replaces everything with boss-classification enemies (0.5 endurance multiplier) completely immune to displacement. Rock Crab requires converting 6 Hermit Seeds via Dendro Cores—no bypass. Shock Trooper has three shields (285,959 HP each) granting +200% RES until broken. Breaking all within 30s triggers -50% All RES and -60% Electro RES.
Second Half's Wilderness Hunters (2,008,523 HP each), Tainted Water-Splitting Phantasm (851,787 HP), and Assault Specialist Mek (817,716 HP) gain zero benefit from grouping. Mek loses Pyro enhancement after two Ousia hits for 25s.
Why This Impacts Meta
This directly targets Morgana and Venti-dependent teams. Boss enemies have 2000 poise length, refill 100 poise/second—stagger impossible. Shields apply 0.0 poise damage multiplier.
Ley Line Disorders emphasize the shift: First Half gives 200% Bloom DMG Bonus + 75% Lunar-Bloom DMG Bonus. Second Half gives 200% Electro-Charged DMG Bonus + 75% Lunar-Charged DMG Bonus. Electro-Charged deals 600% shield damage—optimal for Shock Trooper.
3-star requires >420s remaining per chamber. Players clearing in 30-40s via Venti grouping now face 60-90s, requiring complete team restructuring.
Understanding Anti-CC Mechanics
Enemy Weight Classes and Boss Properties
Standard enemies weigh 50-100 units. Venti pulls up to 100 weight, Kazuha up to 80. Boss-classification enemies have infinite weight—zero displacement regardless of ability strength.
All Floor 12-2 enemies carry boss-type classification. Rock Crab, Shock Trooper, Vishaps, and Mek cannot be pulled, lifted, or displaced. They possess unique animation states preventing interruption during attacks.
Boss-tier enemies feature 0.5 endurance multiplier (halves stagger effectiveness), 2000 poise length, 100 poise/second regeneration. Requires sustained focused damage, not burst windows from grouping.
Freeze Immunity vs Resistance
Freeze duration calculates from Cryo/Hydro application strength. Standard enemies freeze 2-10s. Boss-classification enemies have inherent freeze immunity—status doesn't apply regardless of gauge strength.
Primordial Bathysmal Vishaps possess boss-type classification (preventing freeze) AND Hydro Armor after 30s (+80% RES). Morgana teams (Mona/Ganyu/Venti/Diona) completely ineffective—lose Blizzard Strayer 4pc bonus (+40% CRIT vs frozen) and time extension. Hydro Armor's Energy drain (10/0.5s) punishes extended combat.
Grouping Mechanics Failure

Anemo grouping applies vacuum force pulling enemies to center. Requires displacement vulnerability.
Against Floor 12-2 bosses, abilities provide only elemental application and damage—grouping activates but produces zero tactical benefit. Venti's burst applies Anemo/Swirl but enemies stay in original positions. Dramatically reduces character value.
Energy refund mechanics suffer. Venti's burst refunds 15 Energy on end, but assumes damage dealt—mobile bosses may exit burst area. Kazuha's skill generates particles based on hits, but no grouping means fewer enemies in radius.
Complete Enemy Breakdown
First Half Composition
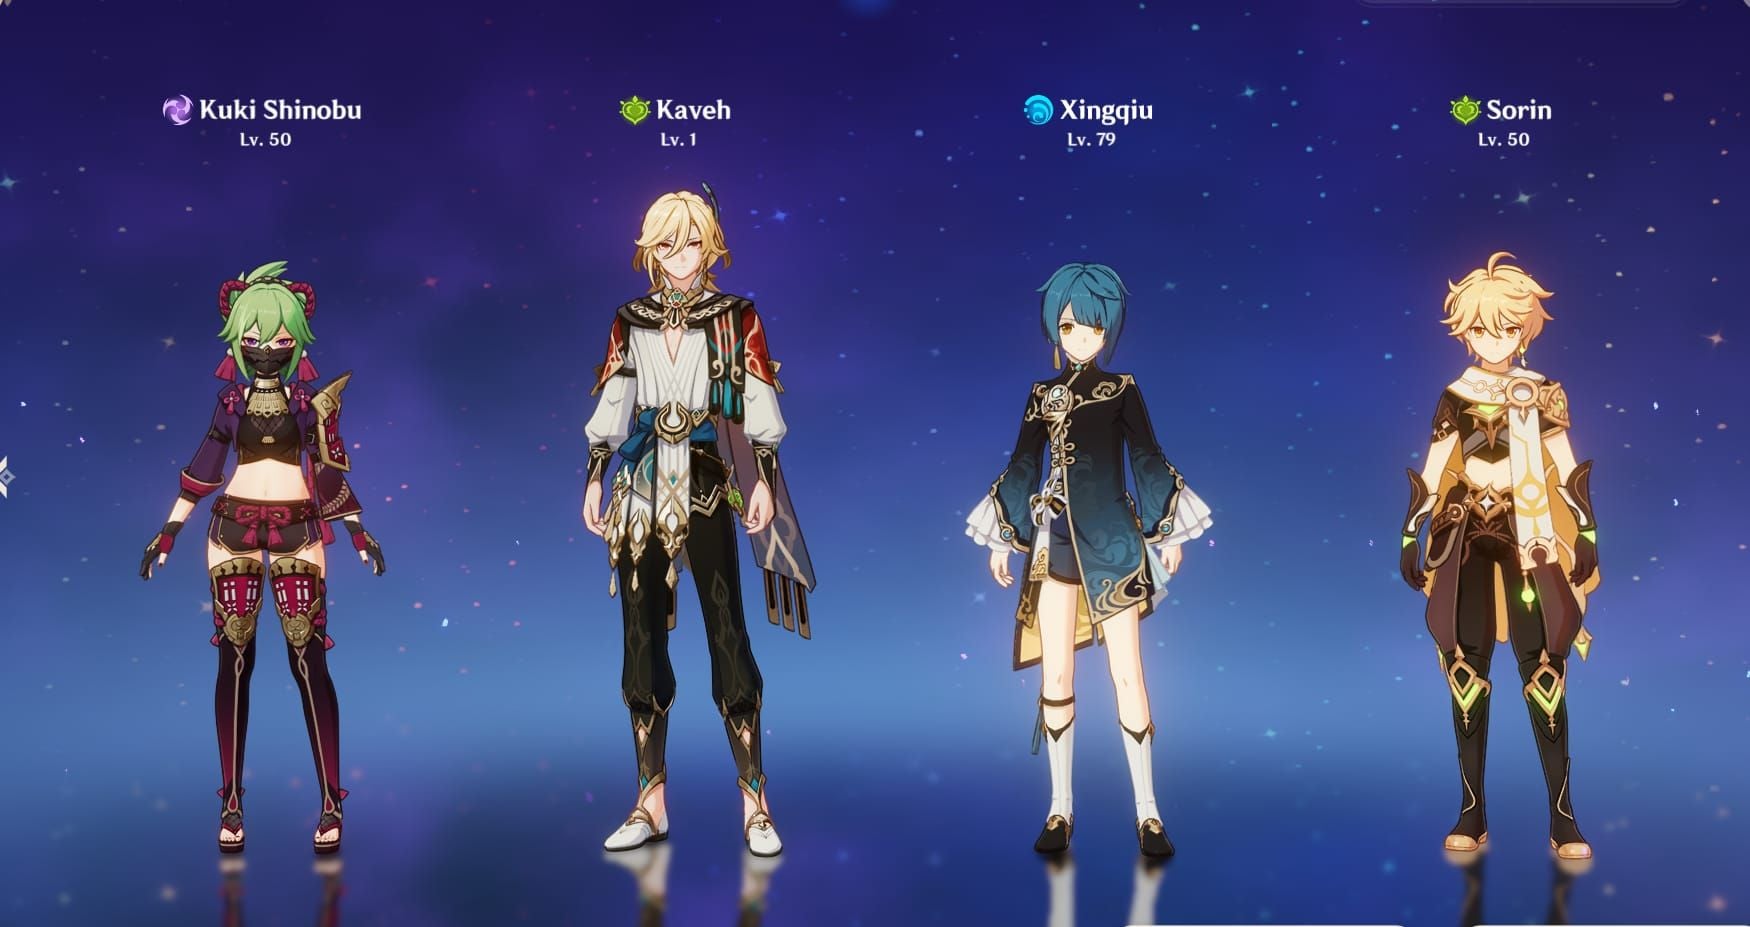
Battle-Scarred Rock Crab (4,409,072 HP): Enters defensive Hermit Seed state requiring 6 seed conversion via Dendro Cores. Kaveh's Bloom-based burst converts all 6 simultaneously, dealing 500% Bloom DMG per seed with 200% bonus. Without proper Core generation, enemy stays invulnerable.
Optimal: Nahida skill (marks 8 enemies) + Hydro applicator (Xingqiu/Yelan). Nahida burst buffs 250 EM, amplifying Bloom damage. Hyperbloom needs 180%+ ER and 200+ EM on triggers like Kuki (skill applies Electro/1.5s).
Fireblade Shock Trooper (4,765,990 HP): Three shields (285,959 HP each = 857,877 total). Active shields grant +200% RES. 30s timer to break all—success triggers -50% All RES and -60% Electro RES.
Electro-Charged deals 600% shield damage (6x standard attacks). Fischl/Beidou/Raiden + Xingqiu/Kokomi breaks all shields in 15-20s. Second Half's 200% Electro-Charged bonus applies here too.
Second Half Composition
Primordial Bathysmal Vishaps (2,085,774 HP each): Activate Hydro Armor after 30s (+80% RES, drains 10 Energy/0.5s from active character). Punishes slow clears and energy-hungry teams.
Optimal: Eliminate both before 30s armor activation (4,171,548 combined HP). Hyperbloom teams (Nahida/Kuki/Xingqiu/flex) consistently achieve this. Deepwood Memories 4pc shreds 30% Dendro RES.
Wilderness Hunters (2,008,523 HP each): Appear with Tainted Water-Splitting Phantasm (851,787 HP) and Assault Specialist Mek (817,716 HP). Boss-tier prevents displacement—requires manual targeting.
Mek's Pyro enhancement removed with two Ousia hits (disabled 25s). Neuvillette/Freminet provide this utility. Phantasm has lowest HP—priority elimination target.
DPS Thresholds
3-star requires >420s remaining across chambers. 180s timer per chamber = <90s clears.
- First Half Total: 9,175,062 HP → 101,945 DPS over 90s
- Second Half Total: 7,765,397 HP → 86,282 DPS over 90s
Practical requirement: 120,000-130,000 DPS for comfortable clears. Below 100,000 sustained DPS struggles without exceptional execution.
Teams to Avoid
Morgana and Freeze Variants
Morgana (Mona/Ganyu/Venti/Diona) dominated previous cycles via freezing enemies, triggering Blizzard Strayer 4pc, and grouping for concentrated Ganyu Charged Shots.
Against Floor 12-2: Every mechanic fails. Freeze immunity eliminates CC, Blizzard Strayer bonus never activates, Venti grouping provides zero benefit. Ganyu's effective DPS drops 40-60% without freeze extension and concentration.
Ayaka/Wriothesley/Freminet freeze variants face identical issues. Forcing freeze teams produces 120s+ clear times, failing 3-star requirements.
Venti-Dependent Compositions
Teams built around Venti's burst grouping (Venti National, Venti Taser) lose primary value. Burst generates energy and applies Anemo, but 15 Energy refund unreliable when enemies exit vortex.
Opportunity cost: Kazuha provides elemental DMG bonuses (even without grouping), Sucrose offers EM sharing + Thrilling Tales buffing, Zhongli provides universal RES shred + shield. Venti offers minimal benefit beyond basic VV 4pc shredding (any Anemo provides this).
Sucrose Taser Limitations
Sucrose Taser (Sucrose/Fischl/Beidou/Xingqiu) excels via grouping for Beidou burst chain lightning and concentrated Electro-Charged.
Floor 12-2's ungroupable enemies reduce Beidou burst effectiveness ~50%—chain lightning hits 1-2 targets instead of optimal 3-4. Dramatically reduces energy generation and damage.
Sucrose's EM sharing remains functional, Electro-Charged benefits from 200% bonus. But overall performance drops below dedicated single-target (Aggravate/Hyperbloom). Consider replacing Sucrose with Nahida or Kazuha.
Why CC Characters Underperform
Venti Burst vs Heavy Enemies
Venti's burst creates stationary vortex pulling enemies ≤100 weight, dealing continuous Anemo damage. 8s duration allows 14-15 instances triggering Swirl. Against groupable enemies, concentrates opponents for AoE while generating energy.
Boss-tier enemies ignore vacuum entirely, staying in original positions. Anemo damage and Swirl still apply, but tactical positioning disappears. Becomes stationary DoT ability, not CC tool.
15 Energy refund requires burst dealing damage. Mobile bosses (Vishaps) may swim/dash outside vortex, causing misses. Reduces damage and energy, creating rotation inconsistencies.
Kazuha Skill Limitations
Kazuha's skill plunges, pulling nearby enemies to impact point. 6s cooldown, 60 Energy burst. More flexible than Venti for quick-swap. Burst provides elemental DMG bonus (0.04% per EM point).
Against Floor 12-2: Skill pull affects zero targets, but plunge damage and Swirl remain. Critical difference: Burst buff. 800-1000 EM = 32-40% elemental DMG bonus, functions regardless of weight class.
Makes Kazuha significantly more viable than Venti, though suboptimal vs supports offering direct amplification or defense. Default to Kazuha for elemental buffing.
Sucrose Grouping Failures
Sucrose's Normal Attacks (1st/4th) include vacuum effects. Skill creates small vacuum, burst generates larger persistent field. Synergizes with EM sharing (20% of her EM) and Thrilling Tales.
Floor 12-2 bosses ignore all vacuum, reducing Sucrose to EM buffer + Thrilling Tales carrier. Personal damage significantly below Kazuha/Anemo Traveler. EM sharing valuable for reactions, but Nahida/Albedo provide superior EM buffing with damage contribution.
Evaluate if EM sharing justifies slot. Hyperbloom: Nahida's 250 EM buff + superior Dendro application strictly better. Electro-Charged: Kazuha's elemental DMG bonus typically outperforms.
Best Alternative Teams
Hyperbloom: Single-Target Excellence
Hyperbloom combines Dendro + Hydro (Dendro Cores) + Electro trigger for explosive single-target damage. Scales with trigger's EM and level. Floor 12-2's 200% Bloom bonus makes Hyperbloom optimal both halves.
Optimal: Nahida (Dendro) / Xingqiu (Hydro) / Kuki Shinobu (Electro trigger) / Zhongli (shield/RES shred)
Nahida skill marks 8 enemies, applies Dendro/1.9s. Burst buffs 250 EM, extends duration. Xingqiu burst applies Hydro per Normal Attack, generating Cores. Kuki skill applies Electro/1.5s, triggering Hyperbloom consistently.
Requires: 180%+ ER (Nahida/Xingqiu), 200+ EM (Kuki). Deepwood 4pc (Nahida) shreds 30% Dendro RES. Kuki uses Gilded Dreams or Flower of Paradise 4pc.
Rock Crab: 6 Cores convert all seeds while dealing damage. Shock Trooper: Electro-Charged (alongside Hyperbloom) deals 600% shield damage, breaking layers in 15-20s.
Aggravate: Consistent Damage
Aggravate applies Dendro + Electro (Quicken) + additional Electro (Aggravate) for amplified Electro damage. Scales with ATK and EM. Single-target focus ideal for Floor 12-2 bosses.
Optimal: Nahida (Dendro) / Fischl (Electro) / Yae Miko (Electro DPS) / Zhongli (shield/RES shred)
Nahida maintains Quicken via continuous Dendro. Fischl's Oz + Yae's Sesshou Sakura provide persistent Electro for Aggravate. Fischl A4 triggers additional damage on Electro reactions. Yae's skill turrets deal damage off-field.
Requires: 140-160% ER (Nahida), 120-140% ER (Fischl/Yae), balanced ATK/EM. Yae: ATK% sands with EM substats. Fischl: ATK%/Electro DMG%/CRIT. Nahida: EM/EM/EM with Deepwood.
Vishaps: Consistent damage enables elimination before 30s armor. Energy-efficient rotations minimize armor's Energy drain. For character acquisitions, buy Genshin Genesis Crystals online via BitTopup for instant access with secure transactions.
Vaporize: Burst Windows
Vaporize applies Hydro + Pyro for 1.5x (Forward) or 2.0x (Reverse) amplification. Multiplicative scaling effective for high burst damage, particularly Shock Trooper's time-sensitive windows.
Optimal: Hu Tao (Pyro DPS) / Xingqiu (Hydro) / Yelan (Hydro/sub-DPS) / Zhongli (shield/RES shred)
Hu Tao skill converts Normal/Charged to Pyro, scales with HP. Xingqiu + Yelan combined Hydro ensures consistent Vaporize on Charged Attacks. Zhongli prevents interruption, shreds 20% universal RES.
Requires: 100-120% ER (Hu Tao), 180-200% ER (Xingqiu with Sac Sword), 160-180% ER (Yelan with Fav/signature). Hu Tao: Crimson Witch or Shimenawa 4pc.
Shock Trooper: -60% Electro RES doesn't benefit Vaporize, but -50% All RES provides amplification. Break shields with Electro-Charged, swap to Hu Tao for damage window. Vishaps: Single-target burst enables pre-armor elimination.
Melt: Rotation Timing
Melt applies Cryo + Pyro for 1.5x (Reverse) or 2.0x (Forward) amplification. High multiplier competitive with Vaporize for burst scenarios.
Optimal: Ganyu (Cryo DPS) / Bennett (Pyro/ATK buffer) / Xiangling (Pyro) / Zhongli (shield/RES shred)
Ganyu Charged Shots apply Cryo AoE. Bennett burst + Xiangling burst apply Pyro persistently, enabling Reverse Melt (1.5x) on Ganyu shots. Bennett ATK buff amplifies damage. Zhongli prevents interruption.
Requires: 180-200% ER (Xiangling), 160-180% ER (Bennett). Ganyu: Wanderer's or Shimenawa 4pc, ATK%/Cryo DMG%/CRIT. Xiangling: Emblem 4pc.
Floor 12-2: Spread enemies require manual aiming vs grouping for AoE. Viable but requires superior execution vs Hyperbloom/Aggravate auto-targeting.
Character Performance Analysis
Top 5 DPS Characters
1. Nahida: Unmatched Dendro application (Tri-Karma Purification), enables Hyperbloom/Aggravate. 250 EM buff amplifies reactions. Off-field allows flexible comps. 800-1000 EM with Deepwood 4pc (30% Dendro RES shred).
2. Hu Tao: Exceptional single-target burst via Vaporize. HP-scaling damage, animation-cancellable Charged Attacks. Requires Xingqiu/Yelan + Zhongli.
3. Raiden Shogun: Electro application (Hyperbloom/Electro-Charged) + burst damage. Energy restoration benefits teammates. Electro-Charged deals 600% shield damage vs Shock Trooper. Balance ATK%/Electro DMG%/CRIT with 200-250% ER.
4. Ayaka: High burst damage via concentrated Cryo, though freeze immunity reduces effectiveness. Works in Melt (Bennett/Xiangling) or Mono-Cryo (Shenhe/Kazuha).
5. Neuvillette: Consistent Hydro damage via Charged Attack, provides Ousia hits for Mek's Pyro enhancement. Self-sufficient, minimal support investment.
Supports That Work
Zhongli: Universal RES shred (20% all elements), interruption-proof shields. Enables aggressive positioning, prevents damage loss vs Vishaps' high damage.
Kazuha: Elemental DMG buffing (32-40% at 800-1000 EM) amplifies team damage without grouping. VV 4pc shreds 40% Swirled element RES. Viable despite grouping failure.
Bennett: ATK buffing (800-1000 ATK at lv90 with high base ATK weapons) + healing. Pyro enables Vaporize/Melt. Energy generation supports teammates.
Xingqiu: Consistent Hydro via burst enables Vaporize/Electro-Charged/Hyperbloom. Damage reduction + interruption resistance. Requires 180-200% ER with Sac Sword.
Fischl: Persistent Electro (Oz) enables Aggravate/Electro-Charged/Hyperbloom. A4 passive triggers additional damage on Electro reactions. Minimal field time.
4-Star Budget Options
Kuki Shinobu: Optimal Hyperbloom trigger (Electro/1.5s area). Healing provides survivability. 200+ EM with Gilded Dreams or Flower of Paradise 4pc.
Xiangling: Highest off-field Pyro (burst) enables Vaporize/Melt. Requires 180-200% ER, exceptional damage with investment. Emblem 4pc.
Beidou: Substantial AoE Electro (burst), effectiveness drops vs spread enemies. Viable Electro-Charged for Shock Trooper shields. 160-180% ER.
Sucrose: EM sharing (20% of hers) benefits reactions, Thrilling Tales gives 48% ATK (R5). Less effective than Kazuha/Nahida but accessible F2P. 800+ EM with VV 4pc.
Chevreute: Hydro application + healing enables Vaporize/Electro-Charged/Hyperbloom. Less consistent than Xingqiu but offers AoE healing. 140-160% ER with HP% stats.
Strategies for 36-Star Clears
Positioning and Manipulation
Bosses can't be grouped, but AI manipulable. Vishaps swim toward active character—stand between both for cleave damage. Shock Trooper follows player, allowing positioning near others for incidental AoE.
Rock Crab stays stationary during Hermit Seed phase. Position Core generators (Nahida + Hydro) adjacent to Crab, minimizing trigger distance. Reduces reaction delay, maximizes Hyperbloom during conversion.
Wilderness Hunters: Eliminate Phantasm first (lowest HP: 851,787). Reduces incoming damage before focusing Hunters. Mek receives two Ousia hits immediately (disables Pyro 25s), reducing damage and eliminating shield.
Rotation Timing
Without grouping, prioritize sustained application over synchronized bursts. Hyperbloom maintains continuous Dendro/Hydro with periodic Electro, not synchronized abilities.
Hyperbloom Rotation: Nahida Skill → Xingqiu Burst → Kuki Skill → Nahida Burst → Normal Attacks (generate cores) → Kuki Skill (trigger) → repeat
Maintains Quicken while generating Cores. Kuki's 1.5s interval aligns with Core generation, maximizing triggers. Nahida burst extends duration, buffs EM.
Aggravate Rotation: Nahida Skill → Fischl Skill → Yae 3x Skill → Nahida Burst → Yae Burst → Fischl Burst → repeat
Establishes Quicken, layers Electro for continuous Aggravate. Yae turrets + Fischl Oz provide persistent Electro. Energy-efficient, consistent burst uptime.
Energy Management
Vishaps' Hydro Armor drains 10 Energy/0.5s (20/s) from active character. Punishes slow clears and energy-hungry teams. Eliminate both before 30s avoids mechanic.
Quick-swap minimizes drain—<2s on-field per character limits loss to 40 Energy max (manageable with ER investment). Off-field abilities (Fischl Oz, Xingqiu burst, Nahida Tri-Karma) maintain damage during swaps.
Particle collection critical. Fischl Oz generates 0.67 Electro particles/s, Xingqiu skill generates 5 Hydro (6 with Sac proc), Nahida skill generates 3-4 Dendro. Collect on character needing energy (same element = 3x value).
Iframe Usage
Burst animations provide iframes preventing damage. Time bursts with enemy attacks. Vishaps' diving attack has 1.5s telegraph—any burst during window avoids damage.
Shock Trooper's shield slam has clear telegraph. Dash through or use burst iframes. Rock Crab's spin avoided by dashing perpendicular or burst iframes.
Short animations (Xingqiu/Yelan/Fischl) provide flexible iframe timing vs long (Raiden/Ayaka/Ganyu). Quick-swap benefits from multiple short bursts, enabling frequent iframes without DPS loss.
When to Reset
Recognize failures early. Rock Crab seeds not converted within 20s = likely fails 3-star timing—reset. Shock Trooper shields not broken within 40s = insufficient damage—reset.
Vishaps: Both >50% HP at 30s mark = armor imminent. Evaluate if team sustains through drain or reset. If armor activates, focus-fire armored enemy (armor's +80% RES makes it sponge).
Energy failures manifest as burst downtime. Key bursts (Xingqiu/Nahida/Raiden) unavailable on cooldown = rotations desynchronize, DPS drops. Reset early vs struggling through suboptimal rotations.
Common Mistakes
Forcing CC Teams
Players with invested Venti/Kazuha/freeze attempt forcing comps despite counters. Sunk cost fallacy—previous investment creates reluctance to build alternatives. Results in 90-120s clears failing 3-star.
Solution: Accept investment doesn't guarantee universal viability. Abyss intentionally rotates compositions favoring different archetypes. Build 2-3 distinct teams (Hyperbloom/Aggravate/Vaporize) for consistent 36-star regardless of rotation.
Evaluate objectively—if clears exceed 90s despite optimal rotations, comp fundamentally unsuited. Switch to alternatives, even lower investment, often produces faster clears.
Ignoring Attack Patterns
Boss enemies have complex patterns with clear telegraphs and punishable windows. Ignoring patterns wastes healing, loses DPS to interruption. Vishaps' dive, Shock Trooper slam, Rock Crab spin all have 1-2s telegraphs enabling avoidance.
Learn patterns: 2-3 practice attempts focusing observation over damage. Identify sequences, recognize telegraphs, practice dodge timing. Once learned, avoidance becomes automatic.
Mek's Pyro enhancement has clear visual—remove with two Ousia hits immediately. Ignoring faces higher damage, wastes time breaking shield. Rock Crab's Hermit Seed requires immediate Core conversion—delaying extends invulnerability.
Poor ER Investment
ER most common artifact failure. Players prioritize CRIT/ATK% while neglecting ER, causing burst downtime and desynchronization. Hyperbloom needs 180%+ ER (Nahida/Xingqiu), Aggravate needs 140-160% (Dendro/Electro applicators).
Vishaps' drain exacerbates issues. Insufficient ER faces complete downtime after armor, eliminating damage. Creates failure spiral: extended duration → armor → drain → extends further.
Optimal ER varies by character/team. Xingqiu with Sac Sword: 180-200%. With Fav: 200-220%. Nahida in Hyperbloom: 180-200%. In Aggravate: 140-160%. Use calculators or practice rotations for precise requirements.
Suboptimal Main Stats
Players use ATK% sands on characters benefiting from EM/ER. Kuki in Hyperbloom should use EM/EM/EM—Hyperbloom scales exclusively with EM and level, not ATK%. Nahida should use EM/EM/EM in reaction teams, not ATK%/Dendro DMG%/CRIT.
Conversely: Hu Tao benefits from HP% (HP-scaling damage), Raiden optimizes with ATK% or ER sands (weapon-dependent). Xiangling requires ER sands for burst uptime, Fischl uses ATK% for personal damage.
200% Bloom + 200% Electro-Charged bonuses amplify reactions substantially—build for reaction damage over personal damage. Shift from traditional DPS (ATK%/Element DMG%/CRIT) to reaction-focused (EM/EM/EM or EM/Element DMG%/EM).
Optimization Tips
Artifact Stat Priority
Reaction teams prioritize different substats. Hyperbloom: EM > ER > HP% > rest on Electro trigger. Kuki with 1000 EM deals ~35k per Hyperbloom with 200% bonus—higher than personal damage.
Aggravate balances ATK%/EM/CRIT. Yae: ATK% sands, Electro DMG% goblet, CRIT circlet, EM substats. Target 1500-1800 ATK, 150-250 EM, 60/120 CRIT. Fischl similar but can sacrifice CRIT for EM if substats allow.
Vaporize/Melt prioritize CRIT (multiplicative scaling). Hu Tao: 30k+ HP, 200+ EM, 70/140 CRIT minimum. Ganyu: 2000+ ATK, 30+ EM, 60/200 CRIT for Melt (higher CRIT DMG from Cryo resonance/ascension).
Weapon Selection
Single-target favors high base ATK and damage passives over utility. Xingqiu performs better with Jade Cutter/Mistsplitter vs Sac Sword, though energy loss requires ER substats.
Nahida's weapon impacts team damage. A Thousand Floating Dreams provides EM + elemental bonuses to teammates (15-20% team damage). Kagura's Verity offers higher personal damage, no team buffing. Hyperbloom: Dreams optimizes team. Aggravate: Kagura's personal damage.
Kuki in Hyperbloom optimizes with Freedom-Sworn (EM + team buffing) or Iron Sting (pure EM). Avoid healing weapons—role prioritizes Hyperbloom over healing.
Food Buffs
Food provides substantial temporary increases. Adeptus' Temptation: +260-372 ATK and +8-12% CRIT Rate for 300s (15-25% damage increase). Jade Parcels: +260-372 ATK and +8-12% CRIT DMG alternative.
Elemental Potions: +25% elemental damage for 300s, stacks multiplicatively. Electro potions amplify Aggravate/Electro-Charged, Dendro potions amplify Hyperbloom/Bloom. Minimal craft cost, 20-30% damage increases.
Offensive foods typically better than defensive—eliminating faster reduces total incoming damage more than DEF increases.
Constellation Breakpoints
Certain constellations provide disproportionate power. Nahida C2: -30% DEF shred (Quicken/Burning), amplifies team damage 25-35%. Transforms her from excellent to dominant.
Xingqiu C6: +50% Hydro DMG during burst, regenerates 3 Energy on Sword Rain hits. Enables lower ER (160-180% vs 180-200%), increases personal damage 30-40%.
Fischl C6: Additional Electro damage when active character triggers Electro reactions. Increases damage 40-60% in reaction teams, competitive with 5-stars.
Kuki C2: +3s skill duration, extends area (consistency improvement). C6: Massive EM scaling on skill, requires HP <25%—impractical most content.
Resource Planning
Character Priority
Prioritize broad viability across archetypes/cycles. Nahida functions in Hyperbloom/Aggravate/Bloom/Burgeon—highest-priority Dendro. Performance consistent regardless of composition.
Xingqiu provides Hydro for Vaporize/Electro-Charged/Hyperbloom/Bloom + defensive utility. 4-star makes constellations accessible. Build to 80/90 with 8/8/8 talents minimum.
Fischl offers Electro for Aggravate/Electro-Charged/Hyperbloom/Overload, minimal field time. A4 provides substantial off-field damage, energy generation supports teammates. Build to 80/90 with 1/8/8 (Normal Attack minimal value).
Bennett universally valuable (ATK buffing/healing), though value decreases in reaction teams where EM > ATK. Build to 80/90 with 1/8/8, prioritize high base ATK weapons.
Zhongli provides universal RES shred + interruption-proof shields, enables aggressive positioning. Value increases on mobile (precise dodging harder). Build to 80/90 with 1/8/8, HP%/HP%/HP%.
Resin Efficiency
Artifact farming most resin-intensive with high variance. Prioritize domains providing sets for multiple roster characters. Deepwood/Gilded Dreams gives optimal sets for Nahida (Deepwood) and Kuki (Gilded)—highly efficient for Hyperbloom.
Emblem/Shimenawa provides universal sets for burst-focused (Xingqiu/Xiangling/Raiden) and Normal/Charged DPS (Hu Tao/Yoimiya). Highest efficiency from broad applicability.
Avoid character-specific domains (Blizzard/Heart, Crimson Witch) until functional 4pc for core members. Mediocre 4pc Emblem (50/100 CRIT) outperforms excellent 2pc combo (70/140 CRIT) for burst characters due to 4pc multiplicative scaling.
Use strongbox for unwanted 5-stars into targeted sets. Prioritize VV (Anemo supports), Noblesse (burst buffers), Tenacity (shield/buff supports). Provides deterministic acquisition without resin.
Talent Investment
Talents provide guaranteed increases with deterministic costs—more efficient than artifacts for initial building. Prioritize talents contributing most to damage—Burst (burst-focused), Skill (skill-focused), Normal Attack (on-field DPS).
Hyperbloom Priorities: Nahida 1/8/8 (Skill/Burst value), Xingqiu 1/8/8 (Burst value), Kuki 1/8/1 (Skill value; Hyperbloom scales EM/level not talents), Zhongli 1/8/8 (Skill shield/shred).
Aggravate Priorities: Nahida 1/8/8, Fischl 1/8/8 (A4 scales talents), Yae 1/8/8 (Skill/Burst damage), Zhongli 1/8/8.
Vaporize Priorities: Hu Tao 8/8/8 (all contribute), Xingqiu 1/8/8, Yelan 1/8/8, Zhongli 1/8/8.
Crown (lv10) only with excess Crowns and long-term investment. Lv9→10 increase (~5-7%) rarely justifies cost vs building additional characters/improving artifacts.
Maximizing Primogems
Abyss provides 600 Primos per reset (twice monthly)—300 for Floor 9-12 clears, 300 for 36-star. 7,200 Primos annually = 45 pulls ≈ one 5-star/year from Abyss alone.
Consistent 36-star requires 2-3 optimized comps covering different enemy types/mechanics. Investment for consistent clears (2-3 months focused resin on 8-12 characters) pays for itself in 6-8 months via Primo rewards.
Currently 33-34 stars: Identify specific failure points—typically one Floor 12 chamber failing 3-star timing. Focus optimization on struggling team vs broadly improving both. Targeted improvements (better artifacts on one DPS, leveling one talent, acquiring one weapon) often push 33→36.
Chamber Bounty: 25k Mora per chamber (75k/floor, 300k Floor 9-12). 3-star: 50 Primos/chamber (150/floor). 9-star bonus: +100 Primos/floor. Resets twice monthly for consistent income.
FAQ
What enemies are in Floor 12-2 in Genshin 6.3?
First Half: Battle-Scarred Rock Crab (4,409,072 HP), Fireblade Shock Trooper (4,765,990 HP). Second Half: Two Primordial Bathysmal Vishaps (2,085,774 HP each), two Wilderness Hunters (2,008,523 HP each), Tainted Water-Splitting Phantasm (851,787 HP), Assault Specialist Mek (817,716 HP). All boss-tier with CC immunity.
Why don't CC teams work in 6.3 Floor 12-2?
All enemies possess boss-tier classification: 2000 poise, 100 poise/s regen, 0.5 endurance multiplier. Complete immunity to displacement from Venti/Kazuha/Sucrose grouping. Freeze reactions fail due to inherent freeze immunity on boss-classification, rendering Morgana/freeze teams ineffective.
What teams are best for Floor 12-2 in 6.3?
Hyperbloom (Nahida/Xingqiu/Kuki/Zhongli) excels from 200% Bloom bonus + single-target focus. Aggravate (Nahida/Fischl/Yae/Zhongli) provides consistent damage vs bosses. Vaporize (Hu Tao/Xingqiu/Yelan/Zhongli) delivers high burst for time-sensitive windows. All achieve comfortable 3-star with proper investment/execution.
How do you beat Floor 12-2 without CC?
Focus single-target reaction teams. Convert Rock Crab's 6 Hermit Seeds via Dendro Cores, break Shock Trooper shields within 30s using Electro-Charged (600% shield damage), eliminate Vishaps before 30s Hydro Armor. Prioritize ER investment (180%+ on key characters), optimize rotations for sustained damage vs burst windows.
Is Venti still good in Floor 12 version 6.3?
Venti's value drops significantly in Floor 12-2 from boss-tier grouping immunity. Burst provides only Anemo damage and VV RES shred—utility Kazuha/Sucrose provide with additional benefits (elemental DMG buffing/EM sharing). Venti remains viable Floors 9-11 and previous Floor 12 chambers with groupable enemies, but alternatives outperform in 12-2.
What's the DPS requirement for Floor 12-2 in 6.3?
First Half: ~101,945 sustained DPS over 90s (9,175,062 total HP). Second Half: ~86,282 sustained DPS (7,765,397 total HP). Practical requirements ~120k-130k DPS accounting for invulnerability/mechanics. Teams below 100k sustained DPS struggle for 3-star without exceptional execution/optimization.
Need Genesis Crystals for perfect Floor 12-2 counters? BitTopup offers instant delivery, secure transactions, competitive prices for all Genshin top-ups. Get Genesis Crystals now and dominate Spiral Abyss!


