

Genshin Impact 6.1 Meta Overview & Tier List Methodology
Luna II Abyss Impact on Character Rankings
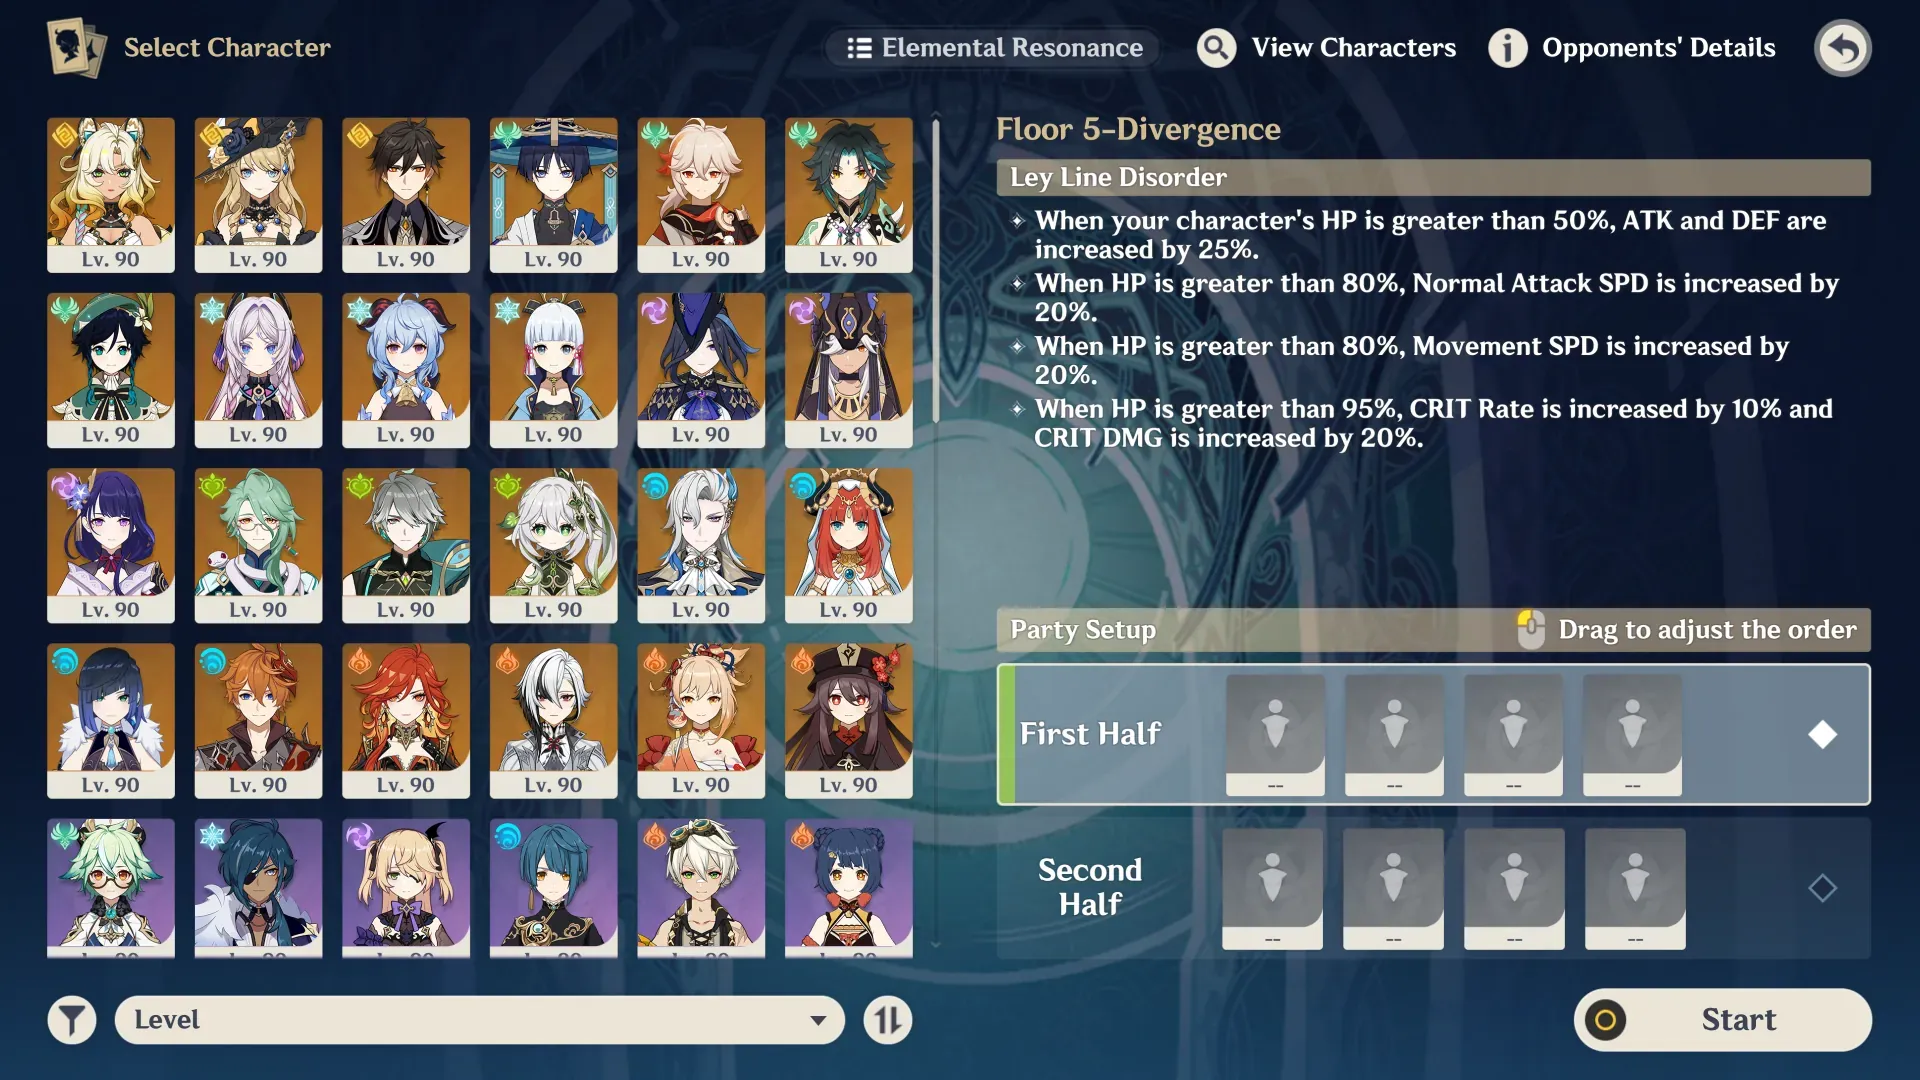
Version 6.1 dropped on October 22nd, 2025, and honestly? It's been a wild ride. The Luna II Spiral Abyss mechanics have completely transformed how we think about team building. November's rotation went live on November 16th at 04:00, bringing those insane 200% Bloom and Electro-Charged damage bonuses plus 75% Lunar reaction bonuses on Floor 12.
But here's the kicker – enemy HP jumped 375% across all 6.x content. Yeah, you read that right.
Lunar reactions scale based on your party's damage distribution: 100% from your highest-damage character, 50% from second-highest, and just 1/12 from the others. This completely rewards balanced team compositions over the old hypercarry strategies we've been used to. It's fundamentally changed how I evaluate characters for this list.
For premium resources, Genshin Impact Genesis Crystals top up through BitTopup offers competitive pricing and instant delivery – essential when you're chasing these meta-defining characters and their weapons.
Tier List Criteria and Evaluation Standards
My rankings reflect real-world performance across four key areas: damage output, team synergy, elemental reaction enablement, and investment efficiency. S-tier characters excel in at least two categories while consistently achieving 36-star Abyss clears with moderate investment (level 80/90, 8/8/8 talents, +16 artifacts).
A-tier characters excel in specific roles but need higher investment or more restrictive team compositions. B-tier? Solid performers with clear limitations. C-tier requires significant investment for marginal returns – and frankly, your resin is probably better spent elsewhere.
Meta Shifts from Version 6.0 to 6.1
Traditional hypercarry teams took a massive hit. Neuvillette and Arlecchino dropped from SS to A-tier despite their strong single-target performance. Bloom teams absolutely dominate now, with Lunar-Bloom variants achieving 75% damage increases that make my calculator weep.
Energy requirements have intensified too – we're talking 160-180% ER on main DPS characters, 180%+ on Burst-dependent units. That increased enemy HP demands sustained damage over those quick burst windows we used to rely on.
S-Tier Characters: The Meta Defining Elite
S-Tier DPS Characters Analysis
Mavuika (Pyro, Claymore) leads the pack through her incredible synergy with Bennett's ATK buffs and Xilonen's RES shred.
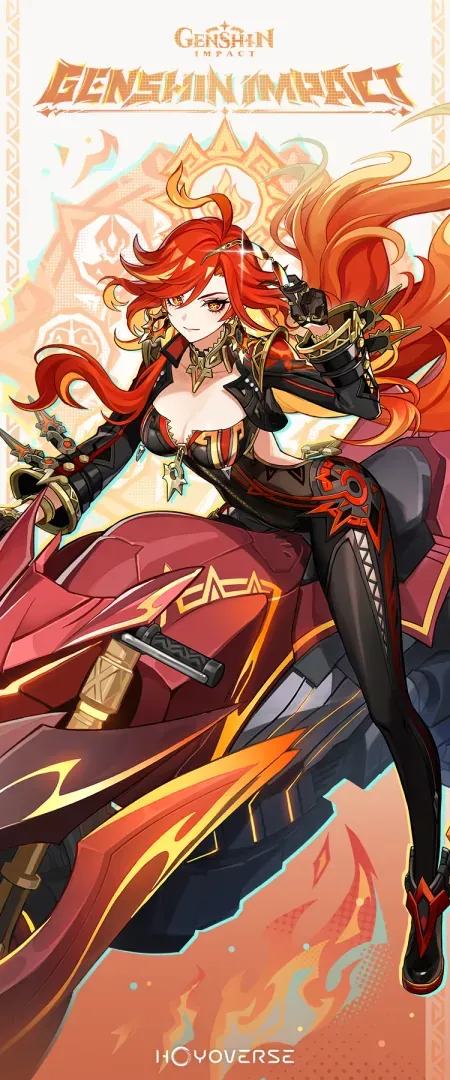
You'll want her at level 80/90 with 8/8/8 talents, targeting 2000+ ATK and 60-70% CRIT with A Thousand Blazing Suns and Obsidian Codex 4-piece.
Nefer (Dendro, Catalyst) specializes in Lunar-Bloom with an impressive 88.2% CRIT DMG and 16% CRIT Rate in optimized builds.

She uses the Reliquary of Truth set with that crucial EM/CRIT balance for Bloom-to-CRIT conversions. Teams with Hydro enablers and Lauma are achieving sub-90 second Floor 12 clears – it's honestly ridiculous.
Flins (Electro, Polearm) dominates Electro-Charged through Bloodsoaked Ruins synergy. Target 2000-2200+ ATK, 60-70% CRIT Rate, and 160-180% ER (140-160% at C2). All three achieve consistent 36-star performance at C0 with moderate investment – which is exactly what we want to see.
S-Tier Support Characters Breakdown
Bennett (Pyro, Sword) – do I even need to explain this one? Premier ATK buffing through Skyward Blade and Noblesse Oblige 4-piece. C6 adds Pyro infusion but remains optional (and controversial, as always).
Furina (Hydro, Sword) offers unparalleled off-field Hydro through Golden Troupe 4-piece. Her Fanfare stacking provides team-wide damage bonuses with consistent elemental application that just works.
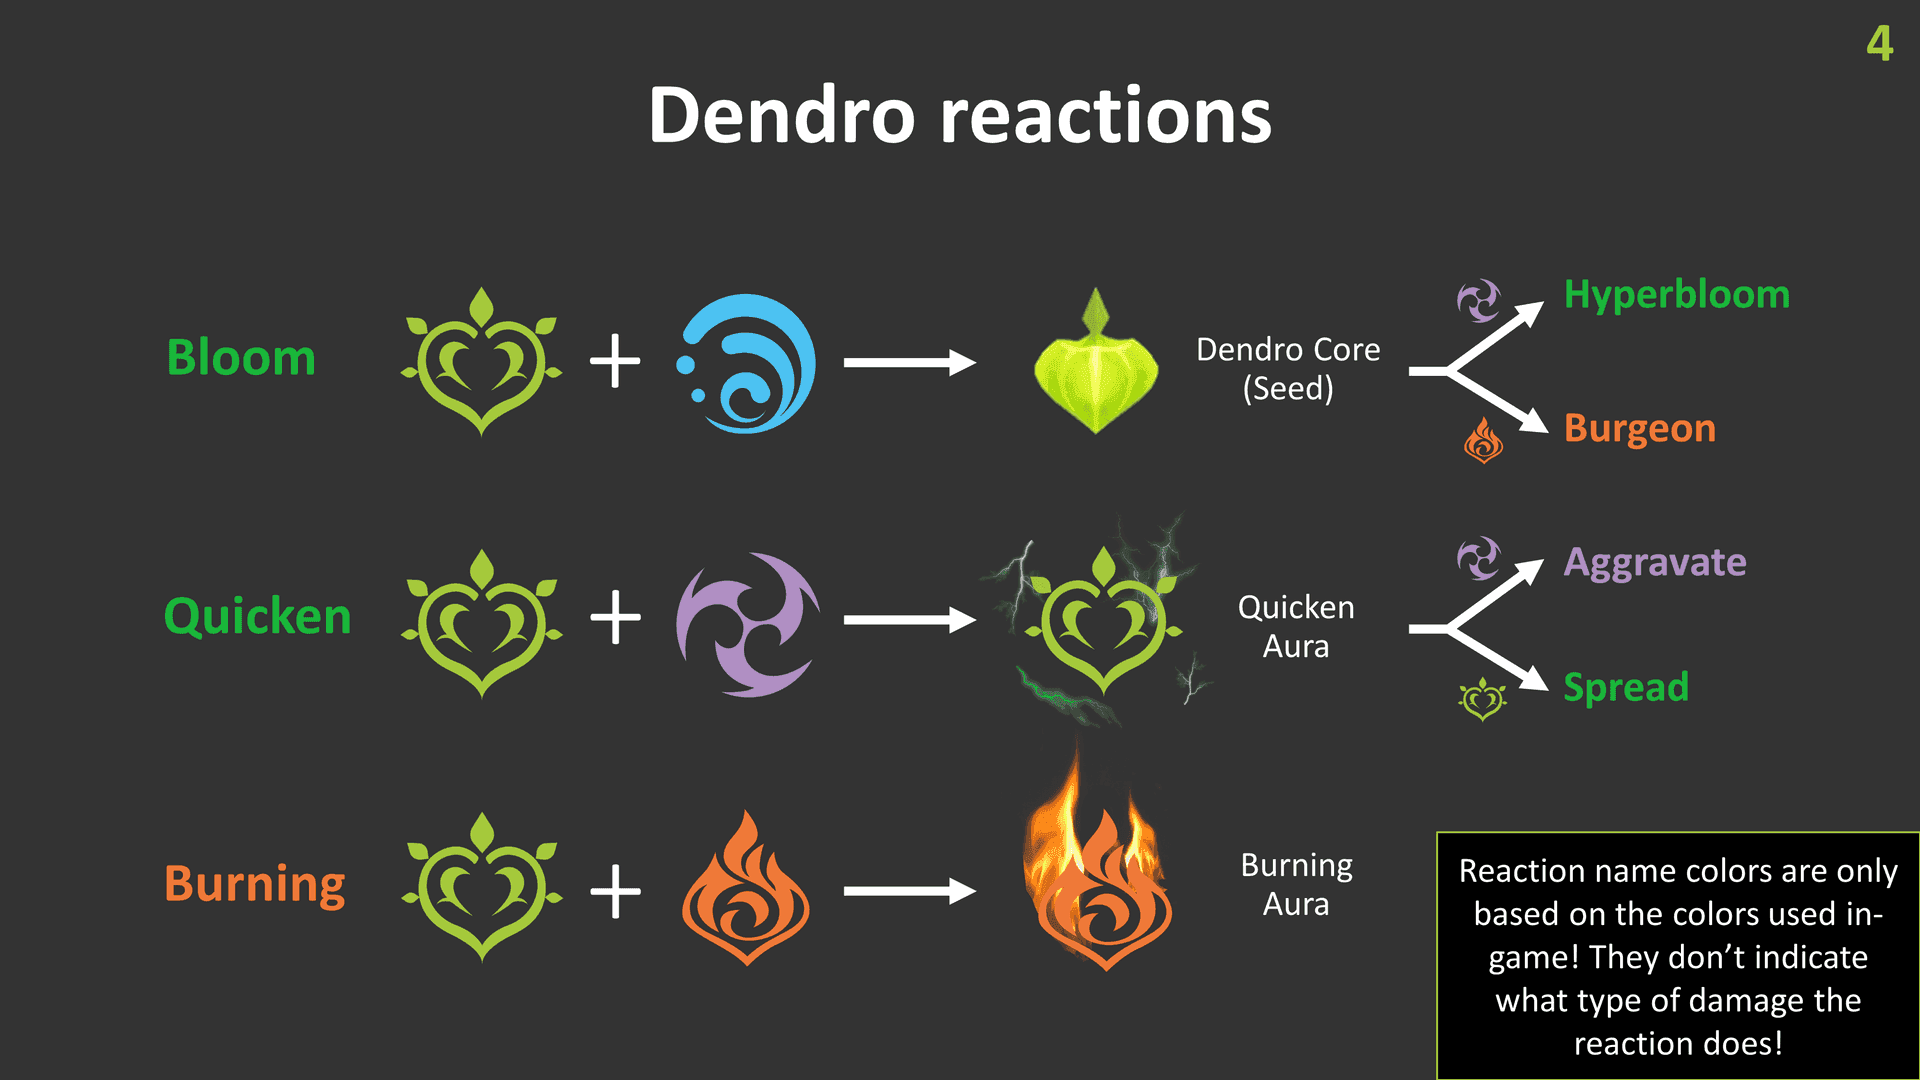
Lauma (Dendro, Catalyst) enables Lunar-Bloom through 100% Dendro uptime and 25% RES shred via Nightweaver's Looking Glass. She transforms Bloom reactions into enhanced variants that ignore DEF, scale with CRIT, have reduced timing (1.2s vs 2s), and expanded AoE (3.5m vs 2m). Game-changing stuff.
For essential support acquisition, buy cheap Genshin Impact crystals from BitTopup provides cost-effective wish access with verified security – because let's face it, you need these characters.
Why These Characters Dominate the Meta
S-tier characters achieve 80-90% of their maximum potential at C0 with 4-star weapons. They enable or enhance Lunar reactions for those necessary damage multipliers against the 375% HP increases. Most importantly? They maintain versatility across team compositions for 6-week patch adaptability.
A-Tier Characters: Excellent Performers with Minor Limitations
A-Tier DPS Options and Performance
Alhaitham (Dendro, Sword) remains a powerful Hyperbloom enabler with consistent Dendro application. Teams with Nahida, Xingqiu, and Kuki achieve 8:30+ clears with proper investment – still very respectable.
Arlecchino (Pyro, Polearm) maintains Mono-Pyro relevance but lacks Lunar synergy. She excels at single-target but struggles with multi-wave encounters that define the current Abyss.
Neuvillette (Hydro, Catalyst) performs well in Hypercarry teams with Furina, Kazuha, and Bennett. His self-healing provides sustainability, but that single-target focus reduces AoE effectiveness in the current meta.
These characters require level 70/80, 6/6/6 talents, and about 2000-3000 resin investment to shine.
A-Tier Support Utility Analysis
Nahida (Dendro, Catalyst) provides that crucial 25-second Skill duration. Her C2's 250 EM burst with Gilded Dreams 4-piece is still incredible. A Thousand Floating Dreams creates EM-sharing for reaction teams that can't be understated.
Xilonen (Geo, Sword) offers universal RES shred and healing with crystallize shields – supporting both offensive and defensive needs in one package.
Sucrose (Anemo, Catalyst) delivers Viridescent Venerer RES shred and crowd control through Sacrificial Fragments. Her EM sharing benefits reactions despite 4-star stat limitations.
Investment Value Assessment
A-tier characters require 15,000-25,000 resin for optimization but excel in specialized scenarios. Constellation priorities vary significantly: Nahida benefits massively from C2, while Alhaitham performs adequately at C0. Players should carefully evaluate constellation value against new character acquisition – it's not always worth it.
B-Tier Characters: Solid Choices for Most Content
B-Tier Character Strengths and Weaknesses
Ayaka (Cryo, Sword) shows strong burst potential limited by energy requirements and positioning challenges. Frozen teams remain effective against appropriate enemies but struggle with Cryo-resistant encounters.
Hu Tao (Pyro, Polearm) maintains excellent single-target performance but faces challenges in this AoE-focused meta. HP management requires careful play, and she lacks Lunar synergy entirely.
Yae Miko (Electro, Catalyst) provides consistent off-field Electro but suffers from energy issues and vulnerability during Skill placement. Still viable, just requires more babysitting.
Niche Uses and Specialized Teams
Freeze teams (Ayaka, Mona, Venti, Diona) remain effective against freezable enemies with crowd control and burst windows. Electrocharged teams (Yae, Kokomi, Kazuha, Fischl) actually benefit from those 200% damage bonuses. Traditional Vaporize (Hu Tao, Xingqiu, Zhongli, Albedo) provides reliable damage with survivability – sometimes the old ways work.
Constellation Impact on B-Tier Rankings
Hu Tao's C1 eliminates Charged Attack stamina consumption, elevating her performance to A-tier levels. Ayaka's C2 provides additional Frostflake hits, addressing her base kit limitations. Players should evaluate constellation investment (150-180 pulls, 24,000-28,800 Primogems) against roster diversification – it's a tough call.
C-Tier and Below: Situational or Underperforming Characters
Why These Characters Rank Lower
Diluc (Pyro, Claymore) lacks the complexity and synergy of newer characters. He simply fails current DPS requirements without exceptional investment – and even then, why bother?
Qiqi (Cryo, Catalyst) provides excessive healing at the cost of damage. She lacks energy generation for time-sensitive content where every second counts.
Albedo (Geo, Sword) suffers from Geo limitations and construct vulnerability. His contribution falls short of alternatives in almost every scenario.
Potential Buffs and Future Improvements
HoYoverse historically buffs underperforming characters through artifact sets, weapons, or kit modifications. Night of Sky's Unveiling and Silken Moon's Serenade demonstrate how new gear creates unexpected synergies. Signature weapons often address kit limitations through passive effects – there's always hope.
Still Viable Scenarios
C-tier characters maintain viability in overworld exploration, co-op play, and early-game progression where tier rankings matter less. Some excel in niche roles potentially relevant in future content. If you've got significant investments in these characters, optimize builds and team compositions rather than abandoning them entirely.
Best Team Compositions for Luna II Spiral Abyss
Top Meta Teams for Floor 12
Nilou/Lauma/Aino/Baizhu achieves 500% Bloom damage with a 1.5M cap per core.
The rotation is smooth: Lauma Skill (Dendro), Aino Burst (Hydro), Nilou triple Skill (core generation). This converts 6 Hermit Seeds with 40% RES reduction for sub-90 second clears that feel almost unfair.
Flins/Ineffa/Aino/Sucrose dominates Lunar-Charged with 600% Electro-Charged damage. Breaks multiple shields within 30 seconds. Rotation: Aino Skill, Flins Skill, Ineffa Burst, Sucrose Burst for maximum reaction frequency.
Mavuika/Bennett/Furina/Xilonen provides burst versatility across encounters. Mavuika scales beautifully with Bennett buffs, Furina handles off-field Hydro, and Xilonen provides universal RES shred.
F2P Friendly Team Alternatives
Dendro Traveler/Xingqiu/Kuki Shinobu/Fischl offers accessible Hyperbloom requiring level 90, 800+ EM, and 180%+ ER.
The rotation flows: Traveler Skill (cores), Xingqiu Burst (Hydro), Kuki Skill (Hyperbloom every 3s), while Fischl provides additional Electro and energy.
Collei/Yaoyao/Barbara/Aino represents budget Bloom requiring 400+ EM and 180% ER. Investment priorities: character levels (90/90 for triggers), EM artifacts, ER substats over CRIT. Use Flower of Paradise Lost and Gilded Dreams 4-piece when available – your wallet will thank you.
Elemental Reaction Synergy Teams
Aggravate compositions (Fischl, Yae, Nahida, Kazuha) benefit from 60% damage bonuses with consistent Quicken reactions and Electro resonance energy efficiency.
Hybrid Electro-Charged teams (Varesa, Iansan, Furina, Xianyun) offer versatility with reaction damage plus Anemo crowd control for multi-wave encounters. Flexibility is key here.
Character Investment Priority Guide
Must-Have Characters for New Players
Bennett (universal ATK buffing, healing, minimal constellation needs) – seriously, just get him. Xingqiu (essential Hydro application, damage reduction, 4-star accessibility). Fischl (off-field Electro, energy generation, Hyperbloom synergy).
For 5-stars: Kazuha (crowd control, elemental bonuses, Viridescent Venerer access) remains the gold standard.
Constellation Priority Rankings
High-value C1: Kazuha (additional Skill), Hu Tao (stamina management), Raiden (energy restoration) address kit limitations with quality-of-life improvements that actually matter.
Game-changing C2: Nahida (250 EM), Raiden (DEF ignore), Ayaka (additional hits) often double effectiveness but require 150-180 pulls. Expensive, but sometimes worth it.
Avoid these traps: Qiqi C6, Zhongli C2 provide minimal value. However, C6 4-stars (Bennett Pyro infusion, Xingqiu additional swords, Fischl enhanced Oz) accumulate naturally with substantial power increases.
Weapon and Artifact Investment Tips
Weapon priority: signature weapons for main DPS, 4-star alternatives with strong passives, support weapons with utility. Favonius weapons deserve serious consideration for energy generation – don't sleep on them.
Artifact enhancement strategy: upgrade to +16 before +20 (those final 4 levels consume disproportionate resources). Prioritize Sands/Goblet over Circlets for larger stat contributions.
Domain efficiency matters. Focus on domains serving multiple characters. Nod-Krai offers Night of Sky's Unveiling and Silken Moon's Serenade for current meta characters. Substat priorities: DPS need CRIT/ATK%, supports need ER/utility, reaction triggers need EM above everything else.
Meta Predictions and Future-Proofing Strategies
Upcoming Character Impact Analysis
Version 6.2 will likely introduce characters that further develop Lunar mechanics with new elemental combinations. Nod-Krai development suggests characters synergizing with current Lunar mechanics, requiring 2+ Nod-Krai members for Ascendant Gleam effects.
Archon release patterns suggest a major debut within 2-3 patches with significant meta shifts. History tells us these releases shake everything up.
Long-term Investment Recommendations
Future-proof investments: characters with broad elemental synergy, flexible positioning, and scaling potential. Bennett, Kazuha, and Xingqiu maintain relevance across meta shifts – they're the cockroaches of Genshin (in the best way).
Avoid over-specialization in narrow archetypes. Maintain resource flexibility through roster diversity over constellation depth. Prioritize versatile artifact sets (Viridescent Venerer, Noblesse Oblige, Tenacity of Millelith) that work across multiple characters.
Patch 6.2 Meta Expectations
Likely introduces new Spiral Abyss mechanics challenging Bloom-centric strategies, potentially favoring different reactions. New artifact sets may elevate underperforming characters – we've seen this pattern before.
New weekly bosses may require specific capabilities, influencing rankings through utility rather than raw damage. Flexibility and adaptability will prove more valuable than raw optimization. Plan accordingly.
Common Tier List Mistakes and How to Avoid Them
Misunderstanding Character Roles
Support characters like Bennett can't compare directly to DPS like Mavuika – they contribute through different mechanisms entirely. Sub-DPS like Yelan provide off-field damage while enabling reactions, making their value difficult to quantify through damage metrics alone.
Utility characters like Zhongli may rank lower while providing essential functions that enable higher-tier character potential. Context matters more than raw numbers.
Overlooking Team Synergy
Individual strength means nothing without team context. S-tier characters underperform in poor teams while lower-tier characters excel with optimal support. Elemental reaction requirements often determine viability more than individual power.
Energy management represents a critical consideration often overlooked – high ER characters struggle without battery support regardless of theoretical potential. Don't ignore the fundamentals.
Investment vs Performance Balance
Tier lists assume optimal investment levels that don't reflect practical constraints. Characters requiring expensive weapons or rare artifacts may rank highly while providing poor value for most players.
Constellation requirements impact accessibility significantly. Characters dependent on high constellations for tier placement mislead about C0 viability. Artifact farming time varies dramatically, potentially requiring months for optimal performance.
FAQ
Who are the best DPS characters in Genshin Impact 6.1? Mavuika, Nefer, and Flins lead S-tier DPS. Mavuika excels with Bennett support, Nefer specializes in Lunar-Bloom, and Flins dominates Electro-Charged. All perform optimally at C0 with moderate investment – exactly what you want.
How has the meta changed from version 6.0 to 6.1? Lunar reactions and 200% Bloom bonuses shifted the meta from hypercarry to reaction-based teams. Traditional DPS like Neuvillette dropped from SS to A-tier while Bloom specialists like Nilou gained massive prominence.
Which support characters are essential for Spiral Abyss? Bennett (universal ATK buffing), Furina (off-field Hydro), and Lauma (Lunar-Bloom enablement) are absolutely essential. Kazuha provides crowd control and elemental bonuses, while Xingqiu offers accessible Hydro support.
What teams work best for Luna II Abyss floors? Nilou/Lauma/Aino/Baizhu dominates with 500% Bloom damage. Flins/Ineffa/Aino/Sucrose excels at Lunar-Charged. For F2P: Dendro Traveler/Xingqiu/Kuki/Fischl provides solid Hyperbloom performance.
Should I prioritize constellations or new characters? New character acquisition typically provides more value. Focus constellations only for game-changing improvements like Nahida C2 or Kazuha C1, prioritizing roster diversity over constellation depth.
How often do tier lists change significantly? Major shifts occur every 2-3 patches with new characters and mechanics. Minor adjustments happen with Abyss rotations (every 2 weeks), though core rankings remain stable between major updates. Stay flexible, but don't panic with every small change.


