

Understanding Version 6.2 Abyss Meta: What Changed for Returning Players
So here's what happened while you were gone. Version 6.2 dropped December 3rd, and honestly? The Abyss changes are pretty dramatic. Floor 12's Leyline Disorders now heavily favor Dendro/Hydro combinations for the first half, while the second half practically throws Pyro damage bonuses at you.
What this means in practice – you don't need those hyper-invested, perfectly-rolled artifact sets anymore. The meta's shifted toward reaction-based teams that can work with good enough gear.
For resource optimization, Genshin Impact welkin moon for returning players through BitTopup provides competitive pricing and instant delivery.
New Enemy Lineups and Elemental Shield Mechanics in Floor 11-12

Chamber 1's gotten interesting. Wave 1 throws Pyro-shielded Crabs at you – and here's where experienced players have an edge. These things melt (literally) to Hydro application, but the timing matters more than raw damage. Wave 2's Rock Crabs come with Stoneborne Seeds that activate through Bloom reactions.
Pro tip: Characters like Lauma can trigger seed detonation for rapid shield breaks. It's not about brute force anymore.
Chamber 2 splits the difference. First half showcases Frostnight Herra enemies with resistance bars that fill faster against Lunar teams – which sounds counterintuitive until you realize how much faster these comps clear. Second half features Gluttonous Yumkasaur with enhanced Pyro damage reception. Translation: your Pyro carries finally get to shine again.
Chamber 3's where things get spicy. Wild Hunt enemies enter Grief-Stricken states that end faster against Lunar compositions, while Geo Vishaps demand proper shielding support and benefit massively from Pyro damage amplification.
DPS Check Thresholds: Minimum Damage Requirements Per Chamber
Let's talk numbers that actually matter. Floor 12 demands sub-420 second clear times per chamber – that's your hard ceiling. Characters need minimum 2,000 ATK, 70% CRIT Rate, 160% CRIT DMG. Support characters require 140-180% Energy Recharge, no negotiation.
But here's the kicker: Lunar-Bloom teams are clearing 40% faster than traditional approaches. That's not a small optimization – that's a fundamental shift.
The rewards? 100 Primogems, 20,000 Mora, and Domain Reliquaries. Worth the week of focused effort.
Most Effective Elemental Reactions in Current Abyss Rotation
Bloom and Lunar-Bloom reactions absolutely dominate first half through those Stoneborne Seed mechanics I mentioned. Teams using Nefer, Lauma, Nilou, and Nahida excel by triggering multiple seed detonations – it's almost unfair how effective this is.
Second half favors the classics: Overload and Vaporize reactions. Durin's White Flame form provides 20-35% RES shred, while Dark Decay form offers 40-70% single-target damage boosts. These aren't small numbers.
The 7-Day Catch-Up Action Plan: Daily Breakdown
Day 1-2: Account Assessment and Resource Inventory Audit
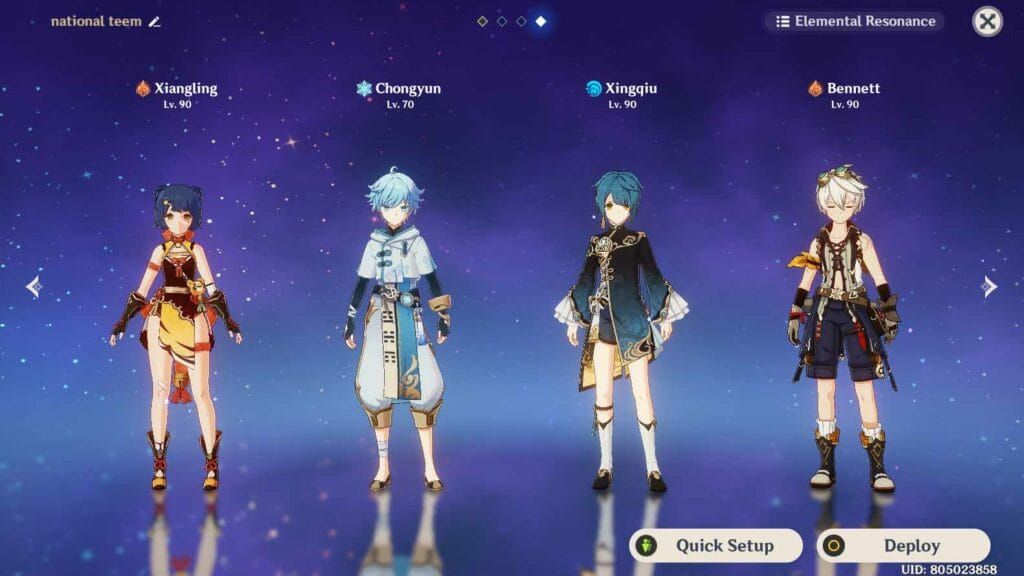
First things first – don't just dive into farming. Take stock of what you've got. Evaluate existing character levels, weapons, and artifact quality. You'd be surprised how many returning players overlook solid 4-star characters like Bennett, Xingqiu, and Fischl that fit perfectly into current meta compositions.
Check your Archon Quest progression: Mondstadt (AR1-16), Liyue (AR20+), Inazuma (AR30), Sumeru (AR30-35), Fontaine (AR30-40), Natlan (AR28-40), Luna III (AR40+). Each unlocks crucial mechanics and materials.
Calculate available primogems from achievements, exploration, and incomplete quests. This isn't busy work – it's strategic planning.
Day 3-4: Priority Character Building and Artifact Farming Focus
Here's where most returning players mess up: they spread resources too thin. Don't.
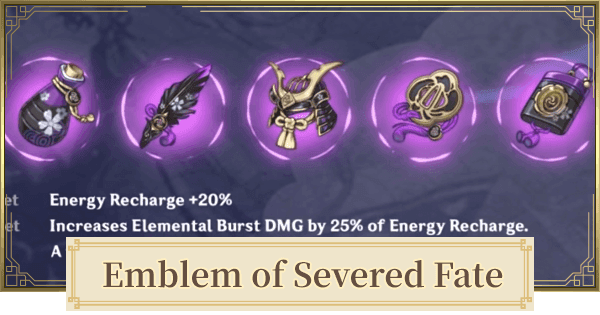
Focus resin on universal artifact sets. Emblem of Severed Fate provides 25% Energy Recharge conversion to Burst DMG (maximum 75%) – that's multiple characters sorted with one domain. Crimson Witch offers 1.4x reaction multipliers and 7.5% Pyro DMG per Skill usage.
Target correct main stats first: ATK%/Elemental Mastery Sands, Elemental DMG Goblets, CRIT Rate/CRIT DMG Circlets. A 4-star artifact with the right main stat beats a 5-star with the wrong one every time.
DPS characters reach 80/90 for that ascension stat bonus, supports stay at 70/80. Talent levels: 6/6/6 minimum for DPS, with Burst priority for sub-DPS.
Day 5-6: Team Composition Testing and Rotation Practice
Now we build actual teams. National Overvape (Xiangling/Durin/Xingqiu/Bennett) provides rock-solid F2P performance. Durin's Dark Decay form offers 40-70% damage amplification with Xingqiu's Hydro application – the synergy's almost broken.
Alternative approach: Overload teams (Lisa/Durin/Fischl/Sayu) using White Flame form for 20-35% RES shred. Practice energy management here – Bennett provides +25% Energy Recharge to Pyro characters, while Durin's Skill refunds 33 Energy every 6 seconds.
Day 7: Final Preparations and Abyss Attempt Strategy
Address the common issues before they derail your runs: insufficient Energy Recharge (add battery characters), interruption problems (include shielders), low damage output (verify those CRIT ratios).
Attempt Floors 9-11 first for 150 primogems and practice. For Floor 12: prioritize Lunar-Bloom strategies in Chambers 1 and 3, use Pyro carries with Overload support in second half chambers.
Resin Priority Matrix for Returning Players
When to Use Condensed vs Original Resin (Efficiency Calculations)
Condensed Resin's your best friend for artifact domains – it guarantees 5-star artifacts at World Level 8. Use it for artifact domains, talent books, weapon materials. Save original resin for world bosses and weekly bosses where condensed doesn't work.
Daily allocation should heavily favor artifact farming (80-100 resin) over character ascension during Days 3-4. Universal artifact sets benefit multiple characters simultaneously – that's efficiency.
Artifact Domain vs Talent Book Domain Priority Ranking
Artifact domains take absolute priority Days 3-4. Focus on those universal sets: Emblem/Shimenawa serves most sub-DPS characters, Crimson Witch benefits all Pyro carries.
Talent book domains become priority after you've got acceptable artifact main stats. The jump from talent level 6→8 provides significant DPS increases, but it's meaningless without proper artifacts.
Weekly rotation: Monday/Thursday (Freedom/Resistance), Tuesday/Friday (Prosperity/Diligence), Wednesday/Saturday (Transience/Elegance).
Weekly Boss Selection Strategy for Limited Resin
Be surgical here. Prioritize bosses providing materials for your invested characters: Childe for Durin, Azhdaha for Bennett/Xingqiu, Signora for universal materials. Limit to 3-4 attempts per week (30 resin each after first three).
Consider skipping entirely during Days 3-4 if artifact needs are urgent. You can always catch up on boss materials later.
Fragile Resin Usage Guidelines: When to Burn Your Reserves
Use 5-10 Fragile Resin on Days 3-4 for universal artifact farming. This isn't wasteful – it's strategic acceleration. Avoid burning them for character ascension or talent books unless absolutely critical for team completion.
Reserve 2-3 for emergency use if your Abyss attempts reveal critical weaknesses.
4 Proven Abyss-Ready Team Compositions for Version 6.2
For optimizing pulls and resource management, Genshin Impact cheap top up 2025 through BitTopup offers secure transactions and competitive rates.
F2P Budget Team #1: National Team Variations (Xiangling, Xingqiu, Bennett Core)
National Overvape: Xiangling (Sub-DPS), Durin (Sub-DPS), Xingqiu (Hydro), Bennett (Battery/Healer). The Pyro Resonance provides 25% ATK bonus, while Durin's Dark Decay amplifies Vaporize damage by 40-70%.
Build Durin with Wolf-Fang R5 (93.83% signature efficiency) or Lion's Roar R5 (80.36%). Target 2,000 ATK, 70% CRIT Rate, 160% CRIT DMG, 140-160% ER.
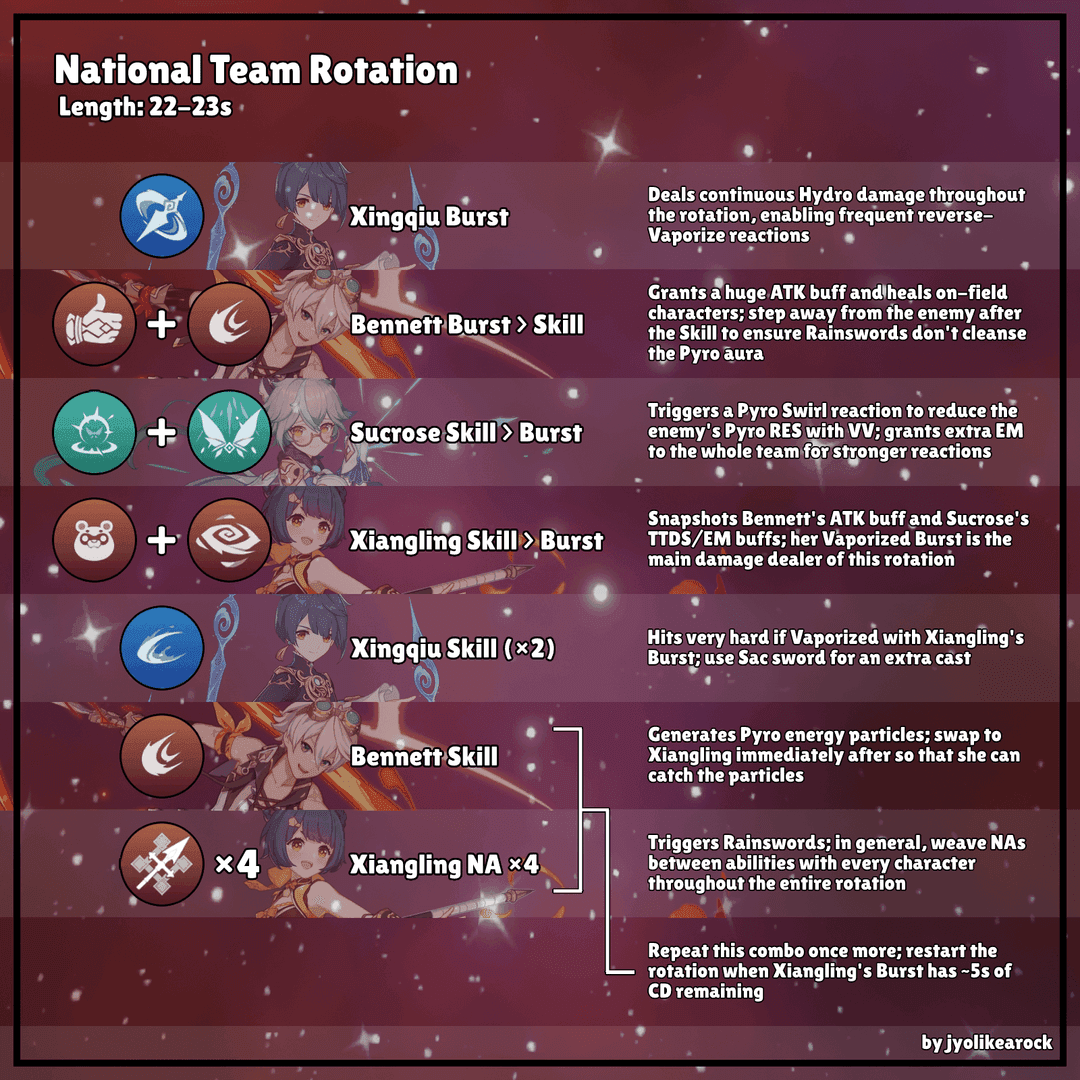
Rotation: Bennett Burst → Xingqiu Skill/Burst → Xiangling Burst → Durin Skill (Dark) + Normal Attacks. Simple, effective, reliable.
F2P Budget Team #2: Hyperbloom Quicken Teams (Dendro Traveler Builds)
Dendro Traveler, Fischl, Xingqiu, Kuki Shinobu/Sucrose. This comp's deceptively powerful once you understand the mechanics.
Dendro Traveler requires 4-piece Gilded Dreams with EM main stats, targeting 800+ EM and 160-180% ER. Fischl uses 4-piece Gilded Dreams with EM focus, maintaining 60% CRIT Rate for Favonius energy generation.
Rotation: Dendro Traveler Skill/Burst → Xingqiu Skill/Burst → Fischl Skill → Normal Attacks for Hyperbloom triggers.
Mid-Investment Team #1: Freeze Composition with 4-Star Alternatives
Kaeya/Rosaria DPS, Xingqiu/Barbara Hydro, Sucrose/Anemo Traveler grouping, Cryo battery. Don't sleep on this – freeze comps are incredibly forgiving for returning players.
Kaeya DPS: 4-piece Blizzard Strayer for 40% CRIT Rate bonus. Target 2,000+ ATK, 40% artifact CRIT Rate (80% effective against frozen), maximum CRIT DMG. Sucrose provides VV 4-piece for 40% Cryo RES shred.
Mid-Investment Team #2: Vaporize and Overload Hybrid Teams
Durin's dual-form mechanics enable both Vaporize (Dark Decay) and Overload (White Flame) reactions – it's surprisingly versatile.
OverBurn: Durin, Kinich, Ororon, Emilie for continuous Burning/Overload. Varesa teams: Durin, Varesa, Chevreuse, Fischl for 40% Pyro/Electro RES shred.
Energy requirements: 140-160% ER for Dark Decay, 160-180% ER for White Flame builds.
Fast-Track Character Building: The 80/20 Efficiency Rule
Acceptable Temporary Artifacts: Main Stats That Matter Most
Here's the truth experienced players know: artifact main stats determine 70-80% of character performance. Everything else is optimization.
DPS: ATK% Sands, Elemental DMG Goblets, CRIT Rate/CRIT DMG Circlets. Supports: Energy Recharge Sands if ER needs exceed 160%, otherwise ATK%/EM.
Accept 4-star artifacts with correct main stats over 5-star with incorrect stats. This isn't settling – it's being smart about your time.
Talent Level Breakpoints: Which Talents to Crown vs Leave at 6
Talent level 6 represents the efficiency breakpoint. Beyond that, you're in diminishing returns territory during catch-up.
DPS: 8/6/8 distribution (Normal/Skill/Burst), sub-DPS: 6/8/8 or 6/6/8. Support characters rarely need above level 6 unless their scaling provides direct team benefits.
Bennett's Burst scales ATK buff, so it's worth upgrading to 8-9. Crown usage (9→10) should be reserved for your main DPS after completing both teams.
Weapon Selection Priority: 4-Star R5 vs 5-Star R1 Comparisons
This might surprise you: 4-star R5 often outperforms 5-star R1. Wolf-Fang R5 achieves 93.83% of Durin's signature weapon DPS. Lion's Roar R5 reaches 80.36% efficiency for Electro-affected enemies.
Weapon level 80/90's sufficient for most characters, 90 reserved for EM scaling characters. The weapon banner provides poor value during catch-up versus character acquisition.
Character Level Investment: When to Stop at 80/90 vs Push to 90
Level 80/90 provides that final ascension stat bonus at 60% of the resource cost of level 90. That's efficiency.
Level 90 benefits EM scaling characters (Sucrose, Kazuha, Nahida) and transformative reaction triggers. DPS characters gain minimal benefit from 80→90 compared to artifact/weapon upgrades.
Support characters perform perfectly adequately at 70/80.
Artifact Farming Strategy for Time-Limited Players
Top 3 Universal Artifact Sets Worth Farming First
Emblem of Severed Fate domain: Emblem 4-piece for sub-DPS (25% ER to Burst DMG, max 75%), Shimenawa 4-piece for Normal Attack DPS. Two sets, one domain – that's what we call efficiency.
Gilded Dreams domain: EM scaling for reactions (80 EM base, 50 EM per different element), Wanderer's 2-piece for hybrids.
Crimson Witch domain: Pyro optimization (15% Pyro DMG, 1.5x Overload/Burning, 7.5% Pyro DMG per Skill).
Domain Rotation Schedule: Which Days to Farm What
Artifact domains are available daily, so you've got flexibility for team needs. Talent books follow the weekly rotation: Monday/Thursday (Freedom/Resistance), Tuesday/Friday (Prosperity/Diligence), Wednesday/Saturday (Transience/Elegance).
Hit weekly bosses early in the week (90-120 resin for 3-4 attempts), then reserve 140-160 resin for daily farming.
Substat Priority Ranking by Character Role (DPS/Support/Healer)
DPS: CRIT Rate/CRIT DMG (1:2 ratio, 60% Rate minimum), ATK%, EM for reaction-based builds.
Sub-DPS: Energy Recharge (140-180%), CRIT substats, ATK%/EM.
Support: Energy Recharge priority, HP%/ATK% depending on scaling.
Healers: HP% for healing scaling, Energy Recharge for Burst availability.
When to Stop Farming and Move to Next Character
Stop when you achieve functional thresholds: correct main stats, 60% CRIT Rate, 120% CRIT DMG, appropriate ER. Move to the next character at 80% performance potential.
Set stopping points at 2-3 useful substats with correct mains. Reserve perfect farming for post-catch-up optimization – you'll thank yourself later.
Critical Stats and Benchmarks for Abyss Floor 12 Success
Energy Recharge Requirements by Character and Team Archetype
Durin: 140-160% ER (Dark Decay with battery), 160-180% ER (White Flame). Bennett reduces Pyro character ER requirements by 20-30% – factor this in.
Hyperbloom teams: 160-180% ER for Dendro/Hydro due to limited particle generation. National variations: Xiangling needs 160-180% without Bennett, 140-160% with proper battery support.
CRIT Ratio Optimization: The 1:2 Rule and Practical Exceptions

Target 60% CRIT Rate, 120% CRIT DMG minimum. But here's where it gets interesting – freeze teams can reduce CRIT Rate investment since Blizzard Strayer provides 40% against frozen enemies. Target 40% from artifacts in those cases.
EM scaling characters may sacrifice CRIT for 800+ EM when reactions exceed direct damage contribution. CRIT Rate above 85% provides diminishing returns – don't chase perfection.
Attack vs Elemental Mastery Tradeoffs for Reaction Teams
EM benefits reaction teams where transformative/amplifying reactions contribute significantly to total damage. Durin benefits from 200-400 EM depending on team composition.
ATK scaling for direct damage dealers with limited reaction contribution. Hybrid builds balance based on damage source distribution – calculate EM value by comparing reaction vs ATK scaling increases.
Effective HP and DEF Thresholds for Survivability
DPS characters: 15,000-18,000 HP with proper dodging mechanics. Support characters: 18,000-22,000 HP for error tolerance.
Shielding characters reduce individual HP requirements across the team. Healing characters ensure sustainability through restoration rather than raw HP pools.
Focus HP over DEF investment due to damage calculation mechanics – it's more efficient.
Resource Acquisition Speed Run: Primogems and Materials
High-Value Quest Chains for Returning Players (Primogem per Hour)
Archon Quests: 30-60 primogems per hour, plus they unlock content and materials. World Quests: 20-40 per quest with shorter completion times.
Story Quests: 60 primogems plus character insight for owned characters – actually useful for team building. Daily Commissions: 60 primogems daily (1,800 monthly) with minimal time investment.
Current Event Priority Ranking and Reward Optimization
Combat events: 420 primogems through progressive challenges, plus they're excellent Abyss practice. Exploration events: 300-360 primogems through discovery mechanics.
Limited domains: artifact/material rewards plus primogems. Evaluate event rewards based on your team needs rather than general strength.
Exploration Efficiency Routes: Chest Hunting vs Time Investment
Common chests: 2 primogems, exquisite: 5 primogems, precious: 10-20 primogems. Focus high-density areas over comprehensive completion – time's your limiting factor.
Prioritize teleport waypoint unlocking for efficient travel. Statue upgrades provide stamina increases and healing access. Use interactive maps for route optimization.
Spiral Abyss Corridor Floors: Easy Primogems Often Overlooked
Floors 1-8: 300 primogems for initial completion with significantly lower difficulty. Floors 9-11: 150 primogems each (450 total), plus they're great practice for Floor 12.
Resets twice monthly (1st and 16th) for 600 primogems per cycle. 6 stars per floor provides 50 primogems, 9 stars yields 150 primogems.
Common Mistakes Returning Players Make (And How to Avoid Them)
Over-Investing in Single Character Before Team Completion
Single character hyper-investment provides diminishing returns versus balanced team development. I see this constantly – players dumping everything into one character while the rest of their team limps along.
Resource allocation should target functional performance across 8 characters. Accept good artifacts with correct main stats and 2-3 useful substats. Prioritize guaranteed upgrades (level, talents, weapons) over artifact RNG.
Ignoring 4-Star Character Potential in Favor of 5-Star Mediocrity
4-star characters often provide better value for specific roles, especially with constellation access. Bennett, Xingqiu, Fischl, Sucrose remain meta-relevant for good reason.
Constellation access significantly impacts 4-star performance in ways that 5-star C0 can't match. Team synergy matters more than individual rarity. Investment efficiency favors 4-star during catch-up periods.
Artifact Perfectionism That Delays Abyss Attempts
Functional artifacts enable completion while perfect artifacts provide minimal benefit during initial clears. Early attempts reveal energy management issues, rotation problems, survivability concerns that perfect substats won't fix.
Functional thresholds: correct main stats, 60% CRIT Rate, 120% CRIT DMG, appropriate ER. Reserve perfect farming for post-36-star optimization.
Misunderstanding Constellation Value vs Base Character Investment
Constellation value varies dramatically by character kit and role. Some gain massive improvements (Bennett C1, Xingqiu C2), others remain perfectly functional at C0.
5-star constellations require significant primogems versus new character acquisition. Plan around your available constellation levels rather than theoretical C0 performance.
Advanced Optimization: Maximizing Your Limited Time
Animation Cancel Techniques for Faster Clear Times
Jump canceling works universally, dash canceling for specific attacks. Durin's Skill cancels through jump/dash after damage registration – saves precious seconds.
Normal Attack canceling improves DPS for characters with slow animations. Burst canceling requires precise timing to maintain effects while reducing animation time.
Team Rotation Flowcharts for Consistent Damage Output
Document successful rotations for consistent execution. National: Bennett Burst → Xingqiu Skill/Burst → Xiangling Burst → Durin Skill/Normal Attacks.
Energy management requires understanding particle generation and absorption mechanics. Buff duration tracking: Bennett's 12-second ATK buff, Xingqiu's 15-second Burst duration.
Elemental Application ICD Mechanics Simplified
Internal Cooldown limits application frequency (2.5 seconds or 3 hits). Durin's Skill follows standard ICD for Pyro application.
Fast Hydro characters like Xingqiu trigger multiple Vaporize reactions with slower Pyro application. Multi-hit abilities trigger reactions on specific hits based on ICD timing.
When to Reset Abyss Chambers vs Push Through Suboptimal Runs
Reset for major early mistakes, complete for minor late issues. Time thresholds: chambers requiring 90+ seconds per half indicate fundamental issues rather than execution problems.
Accept moderate RNG variance, reset for extreme negative RNG. Learning opportunities exist in both successful and failed attempts.
Sustaining Progress Beyond Week 1: Long-Term Planning
Daily Routine Optimization for Busy Returning Players
Daily commissions: 60 primogems for 10-15 minute investment. Resin management: 2-3 sessions daily for optimal efficiency without overflow.
Parametric Transformer: weekly conversion of excess materials. Teapot maintenance: weekly currency for talent books and resources.
Banner Pull Strategy: Building Roster Depth vs Vertical Investment
Prioritize character acquisition over constellations until you've got 12-16 built characters. Evaluate banners for role filling and team synergy rather than raw power.
Maintain 14,400 primogems (90 pulls) for guaranteed acquisition of priority characters. Avoid weapon banner until roster completion and specific upgrade needs.
Future-Proofing Your Account for Upcoming Abyss Rotations
Abyss rotations change every 6 weeks, requiring adaptable team compositions. Invest in versatile characters and universal artifacts that translate across metas.
Maintain elemental diversity for changing requirements. Universal supports (Bennett, Kazuha, Zhongli) provide cross-rotation value.
Where to Get Genesis Crystals and Primogems Efficiently
Daily activities: 60 primogems minimum through commissions. Monthly: Abyss resets (600), Battle Pass (680 with paid), shop purchases.
Events: 420-600 primogems per major event. Welkin Moon: $5 monthly for 3,000 primogems – most efficient paid option by far.
FAQ
How long does it realistically take to catch up in Genshin Impact after a 6+ month break?
7-10 days for Abyss-ready status with focused effort. Archon Quest catch-up takes 30-40 hours. Two functional teams require 1,400-1,600 resin (10-12 days natural regeneration). 10-15 Fragile Resin compresses this to one week.
What are the minimum stat requirements for Spiral Abyss Floor 12 in version 6.2?
DPS: 2,000+ ATK, 70% CRIT Rate, 160% CRIT DMG, 140-180% ER. Support: 160-180% ER with role-appropriate stats. Sub-420 second chamber clears for 36-star completion.
Should I prioritize artifact farming or character building first as a returning player?
Character levels/weapons first (Days 1-2), then artifacts with correct main stats (Days 3-4). Level 80/90, talent 6, weapon 80/90 provide guaranteed improvements. Substat optimization comes after functional performance.
Which F2P teams can reliably clear Floor 12 in version 6.2?
National Overvape (Xiangling/Durin/Xingqiu/Bennett) and Hyperbloom (Dendro Traveler/Fischl/Xingqiu/Kuki). Overload teams (Lisa/Durin/Fischl/Sayu) work great for second half Pyro buffs. All require proper ER management and 80/20 building approach.
How should I allocate my limited Fragile Resin during catch-up?
5-10 Fragile Resin Days 3-4 for universal artifact domains. Reserve 2-3 for emergency team weaknesses discovered during Abyss attempts. Avoid burning them for character ascension/talent books unless absolutely critical for completion.
Is it worth pulling on weapon banner as a returning player trying to catch up?
Absolutely not. Character banner provides better roster value during catch-up. 4-star R5 weapons often match 5-star R1 performance (Wolf-Fang R5: 93.83% signature efficiency). Focus character acquisition until you've got 12-16 built characters.


