

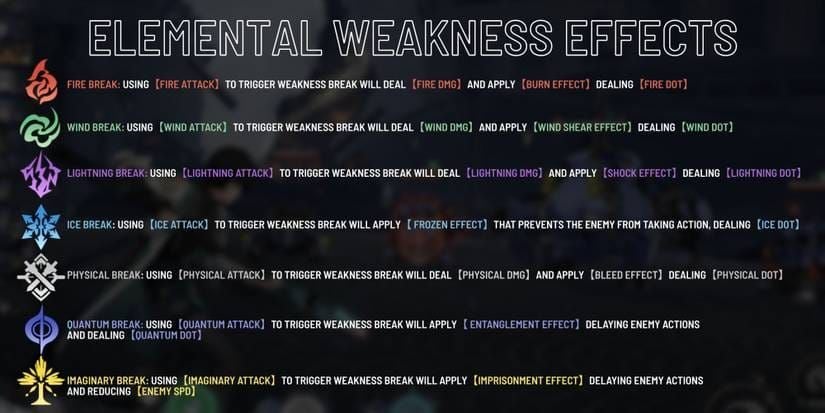
Why Firefly and Boothill's Superbreak Combo Rules 3.8
Picture this: Firefly and Boothill chipping away at Toughness Bars before they even fully break. Their DMG? It ramps up as 0.2×BE +200% ATK (capped at 360%). Dahlia's Skill Zone turns it into Super Break over 3 turns pre-break, tossing in +50% Break Efficiency.
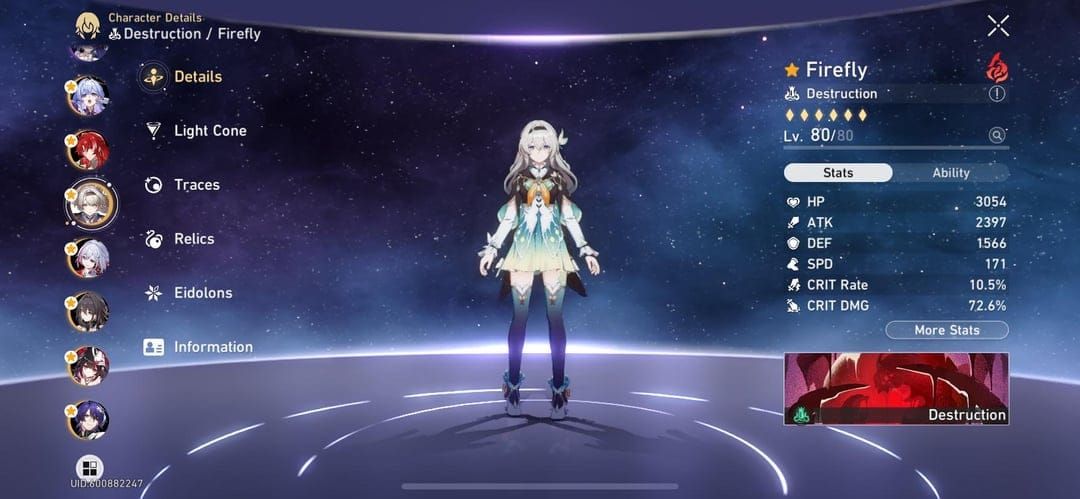
Stack Firefly to 360% BE, and she one-shots Apocalyptic Shadow's 18 Toughness with 3-4 enhanced Skills in Combustion mode (+60 SPD, +50% Break Efficiency, 100% Action Advance). Here's the kicker—prioritize BE over CRIT stats. Head to Caverns of Jabbing Punch and farm those 20+ Iron Cavalry pieces. Trust me, it's worth the grind.
Banners drop Phase 1 (Dec 16-17, 2025–Jan 6-7, 2026): Dahlia + Firefly rerun. Phase 2 brings Boothill.
Need a fast Jade top-up before Firefly's back? Hit up honkai star rail firefly rerun top up on BitTopup—minutes to deliver, killer prices, locked-down security, glowing user reviews, and full HSR coverage.
The Absolute Minimum Break Effect You Need
Firefly hits 360% BE for that sweet 50% Super Break DEF ignore via Iron Cavalry 4pc. Drop to 250%, and you're still ignoring 25% DEF.

Her enhanced Skill Super Break formula? Main target takes (0.2×BE +200%) ATK, adjacents get (0.1×BE +100%) ATK. Module β at ≥360% BE pumps Broken targets by 50%. Break it down: Stack 250% from base relics/LC. Push to 360% in-fight with Dahlia's +50% BE Ult. Double-check stats—Module γ gives +0.8% BE per 10 ATK once you're over 1800.
Boothill's Pocket Trickshot stacks +50% Toughness Red per hit, Break DMG from 35-170%. This pair? They delete 18 Toughness faster than anything.
Thresholds based on in-game testing:
≥150% BE: 10% DEF ignore. Basic Break efficiency.
≥250% BE: 25% (+15%). Pre-full break deletes.
≥360% BE: 50%. One-cycle Apocalyptic Shadow.
(Yeah, I've crunched the numbers—360% is where it feels broken, in the best way.)
Speed Breakpoints That Actually Work
Firefly wants 150-165 base SPD (balloons to 210 in Combustion +60 SPD). Her kit: Basic 1, Skill 2, Ult 3, FUA 0.5/hit toward depletion.
Key benchmarks? 150 SPD for solid action value. 165 SPD no-cycles MoC. 140 works with Ruan Mei. Sync Dahlia at 145+. How? Feet on SPD boots, substats BE > SPD > ATK%/HP%. Layer +100% Ult Advance and +25% Skill for that 210 SPD burst. Test it in Simulated Universe—Combustion locks in 70 SPD fixed.
Boothill? 150+ SPD triggers Skill Standoff (220% ATK Phys over 2 turns) against elites (10-12 Toughness) or bosses (18-200).
Miss the sync, and you're watching bars tick down sloooowly.
Relic and Light Cone Setups That Deliver

Iron Cavalry 4pc is king (2pc +16% BE; 4pc unlocks 150%/250%/360% DEF ignore thresholds). Pair with Planar: Forge of the Kalpagni Lantern 2pc (+6% SPD, +40% BE on Fire weakness hits for 1 turn).
Substats: BE > SPD > ATK%/HP%. Body ATK%/HP%, Rope BE%, Feet SPD. Firefly's sig LC, On the Fall of an Aeon—wait, no, What Is Real? Err, her sig is Whereabouts Should Dreams Rest? Hold up—actually, sig is Never Forget Her Flame (+60-120% BE, +32-72% Break DMG to highest BE ally, +1 SP on Weakness apply). Alt: Whereabouts Should Dreams Rest (+60-100% BE, +24-40% Break DMG taken, -20% SPD).
Farm spots: 65 Raging Hearts + 12 Lost Echo for Firefly. Boothill loves 65 IPC Work Permit. Thief of Shooting Meteor adds +16% BE post-Break +3 Energy.
Supercharge those builds with honkai star rail break effect build recharge from BitTopup—cheap rates, instant credits, 24/7 support, ironclad security, top-shelf ratings.
Rotation and Team Comps That Stick the Landing
Nail this rotation: 1. Dahlia Technique into Zone. 2. Dahlia Ult for Wilt +50% BE. 3. Firefly Ult into Combustion (+100% advance, +60 SPD). 4. Spam 3-4 enhanced Skills (implants Fire Weakness for 2 turns).
SP stays positive with sig LC/Bonus 2 (+1 SP), +20% Break DMG taken, +60% Super Break DMG from Dahlia. Hypercarry teams: Firefly + Dahlia + Fugue + Lingsha (F2P: Harmony TB + Gallagher). Boothill squad: Boothill + Dahlia + Fugue + Lingsha/Ruan Mei (F2P: Hanya/Asta + Natasha + HTB).
Eidolons shine—Firefly E1 skips 15% DEF/no SP cost; E2 extra turn on kill/Break. Boothill E4 hits 15 FUA benchmark. Fugue cuts Toughness/Break Efficiency; Dance! Dance! Dance! advances the party.
Tailored Strategies for Boss Toughness Nightmares
Apocalyptic Shadow (18 Toughness)? 360% BE Firefly in Dahlia Zone Super Breaks it pre-full—one-cycle easy. Calamity Boss (200 Toughness): Clear adds first; multi-hits melt it.

Total reduction ≥18 (Firefly's 3-4 Skills). Boothill's Physical 4x multiplier helps. Steps: Zone the high-Toughness fool. Combustion at 210 SPD deletes. Sustain with Lingsha > Gallagher for AoE; Natasha F2P staple.
MoC hates sustain—go raw. Pure Fiction loves steady AoE. Fire/Physical crushes Quantum/Wind.
Ever wonder why some clears fizzle? It's the setup.
Pitfalls I've Seen (And How to Dodge Them)
Under 250% BE? No DEF ignore—grab sig LC, stack to 360%. Energy starve? Bonus 2 recovers SP, ditch CRIT. Speed mismatch below 145 SPD kills Dahlia sync—Feet SPD first.
Quick fixes: Break > heal in no-HP-loss modes. Balance BE/Speed for 210 SPD pops. In 3.8, Dahlia swaps Ruan Mei—budget 14,260-18,040 Jades (114-138 pulls) for E0S1.
FAQ – Straight Answers from the Trenches
Minimum Break Effect for Firefly/Boothill in 3.8?
250% for 25% DEF ignore; 360% for 50% one-cycles.
Boothill's Speed needs for superbreak bosses?
150+ base; sync Dahlia at 145+ to deplete Toughness.
Top relics for these min-break stats?
Iron Cavalry 4pc + Forge of Kalpagni Lantern 2pc; subs BE > SPD.
Can they delete Apocalyptic Shadow bars quick?
Yep—one-cycle with 360% BE in Dahlia Zone + 3-4 enhanced Skills.
Biggest build mistakes?
<250% BE (bye DEF ignore), low SPD sync, skipping SP-recovery LCs.
Min stats for E0 Firefly/E0 Boothill?
250% BE, 150 SPD base; buffs hit 360%/210 SPD for deletes.


