

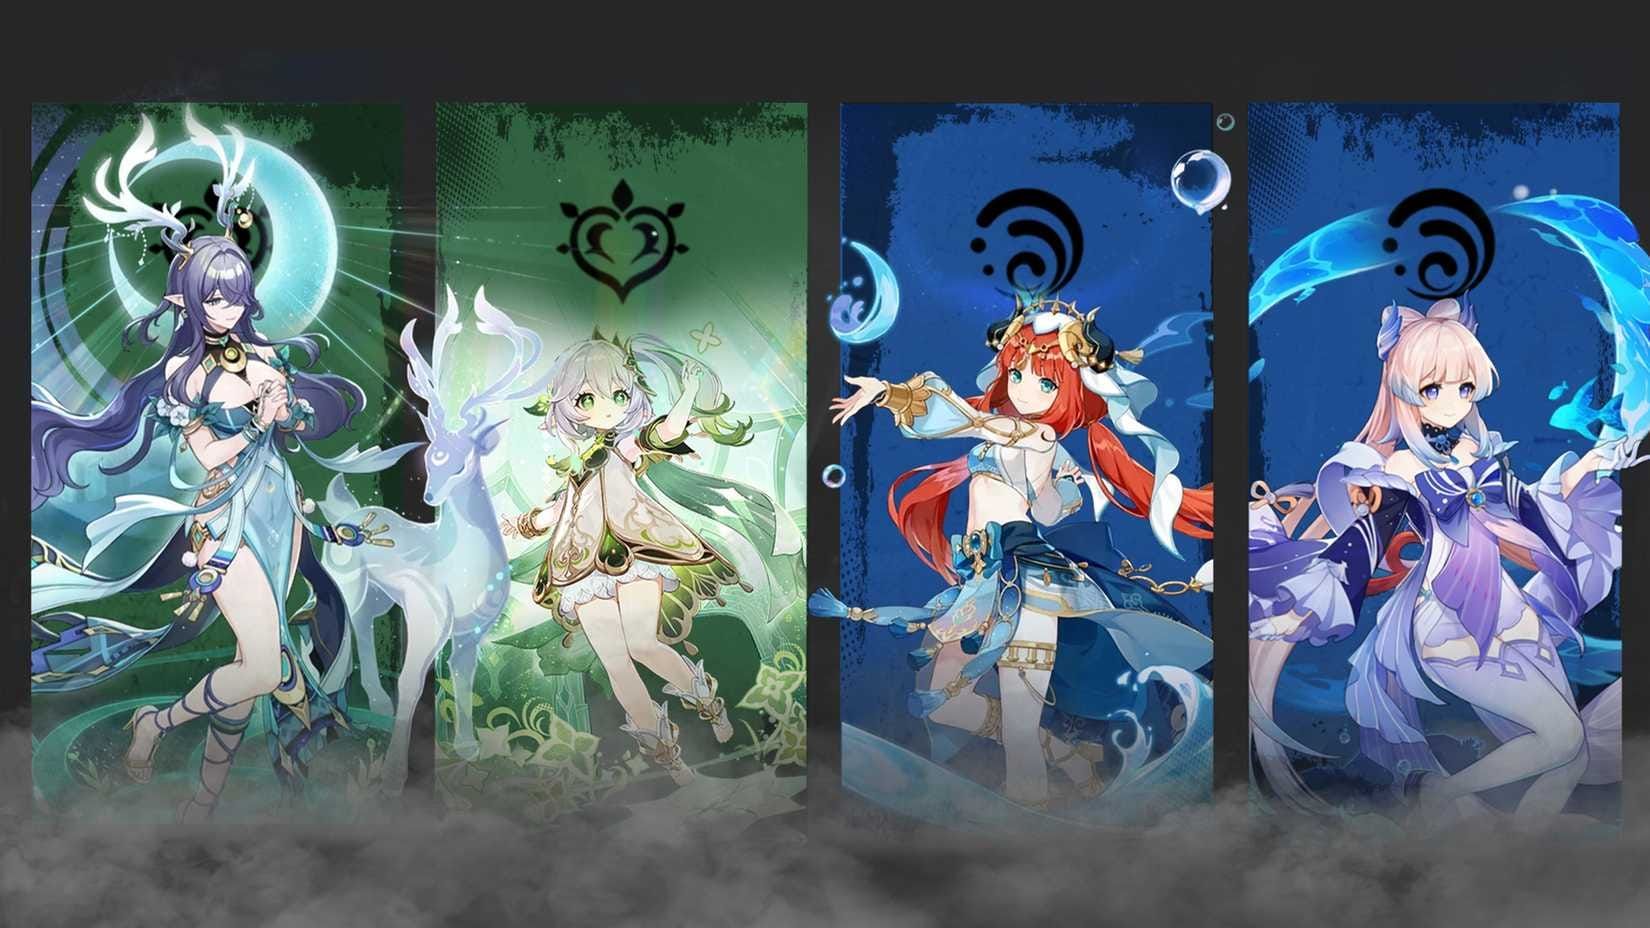
Understanding Nefer Lunar-Bloom Team Mechanics
Let's be honest—Bloom reactions have been pretty underwhelming until now. But Nefer's Lunar-Bloom mechanics? They're a complete game-changer.
Core Bloom Reaction Principles
Here's where things get interesting. Nefer's Lunar-Bloom cores can actually crit and completely ignore enemy DEF when you've got Nod-Krai characters like Lauma or Aino on your team. We're talking about a massive power spike here.

One Nod-Krai ally gives you +15% CRIT Rate and +100% CRIT DMG on these cores. Two characters? You're looking at +25% CRIT Rate and +120% CRIT DMG. The cores also detonate way faster—1.2 seconds instead of the usual sluggish 2 seconds—and cover a much larger area (3.5m vs 2m). Plus, they deal 1.7x base damage with those Moon Eclipse DoT effects.
The damage formula gets pretty wild: [Base Core DMG + (Character's EM × 460.8%)] × (1 + RES Reduction / 2) × 200%. At 1000 EM with 40% resistance shred, you're hitting 68,812 critical damage per explosion. Compare that to standard Bloom's measly 24,576 non-critical output—it's not even close.
Nefer Synergy Fundamentals
Nefer's kit revolves around her Shadow Dance state, which you get from her Elemental Skill's two charges. During Shadow Dance, her Charged Attacks become these Phantasm Performance abilities that trigger Lunar-Bloom reactions with interruption resistance. No more getting knocked out of your combo by random hilichurl arrows.
Her A Wager of Moonlight passive is where the magic happens—it converts regular Dendro cores into Seeds of Deceit, stacking Veil effects that grant +100 EM for 8 seconds each. Daughter of the Dust and Sand increases Verdant Dew gain by +10% per 100 EM over 500 (capped at 50% bonus). And Moonsign Benediction: Dusklit Eaves adds +0.0175% Base DMG per EM point, maxing out at 14%.
Quick note for anyone looking to secure Nefer during her banner—top up Genshin Impact Genesis Crystal pack through BitTopup offers competitive pricing and instant delivery. Her banner runs from October 22 to November 11, 2025, so you've got time to plan.
Team Role Distribution
Your Main DPS (Nefer/Lauma) wants 800-1000 EM with 60-70% CRIT Rate for optimal core scaling. Dendro Support handles consistent application and EM sharing—Nahida's obviously the gold standard here, but Dendro Traveler works fine for F2P players.
Hydro Enablers are where you get some real choice. Nilou focuses on Bountiful Cores, Furina brings universal buffs, Kokomi provides healing, and Aino offers that sweet Nod-Krai synergy. The flex position can be healers, shielders, or even Electro triggers if you want to mix in some Hyperbloom.
Energy requirements are pretty standard: 130-150% ER on Nefer, 180-200% on Burst-dependent supports, and 200-220% on characters like Xingqiu. Favonius weapons can significantly reduce these thresholds while maintaining your damage output.
Nilou Variant Team Compositions
Standard Nilou Bloom Setup
The premium composition here is Nilou (Main DPS), Kokomi (Support), Nahida (Sub-DPS), and Lauma (Support)—we're talking SS-tier performance. Nilou's Court of Dancing Petals requires Hydro/Dendro-only parties, but those Bountiful Cores hit with a 400% damage multiplier when she's got 70,000+ HP.
For Nilou's build, Key of Khaj-Nisut is basically mandatory—it gives +252 personal EM and +140 team EM at maximum HP. Pair that with Tenacity of the Millelith or Vourukasha's Glow artifacts focusing HP% main stats. You're targeting 60,000+ HP for maximum Bountiful Core scaling with 180% Energy Recharge.
Lauma enables the Lunar conversion through her Dendro-infused attacks and RES shred. Nightweaver's Looking Glass weapon with Silken Moon's Serenade artifact set (triple EM main stats) optimizes reaction damage. Her Hold Skill provides +25% Verdant Dew gain and -20% enemy Dendro resistance at C4.
Nilou + Nahida Core
Nahida's Elemental Skill can mark up to 8 enemies for coordinated Dendro application, while her Burst extends duration based on party diversity. Her C2 is particularly nasty—+10% CRIT Rate and +20% CRIT DMG to Lunar-Bloom damage, stacking multiplicatively with Nefer's Moonsign bonuses.
The rotation sequence flows like this: Nahida Burst > Skill marking, Nilou triple Skill for Hydro aura, then let Lauma trigger those Lunar-Bloom reactions while maintaining Bountiful Core generation throughout your 20-second cycles.
Artifact distribution gets a bit specific here. Nahida carries Deepwood Memories for that -30% Dendro resistance, Nilou focuses HP scaling through Tenacity sets, and supports like Kokomi can utilize Instructor pieces for +120 team EM post-reaction.
Alternative Dendro Options
F2P alternatives include Dendro Traveler (reliable Burst application, needs 180-200% ER) and Collei (flexible Skill timing, though her sustained application is weaker). Both need Deepwood Memories for team utility.
Yaoyao serves as a hybrid Dendro/healer with C4 enabling AoE Dendro application, though she's pretty demanding at 200%+ ER. Baizhu provides shields, healing, and a unique talent granting +0.7% Lunar-Bloom damage per 1,000 Max HP up to the 50,000 HP threshold.
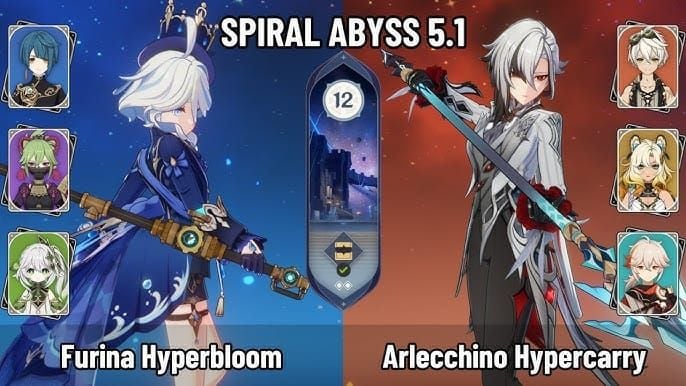
Furina Variant Team Compositions
Furina Bloom Team Structure
The core composition here is Furina (Sub-DPS), Nefer (Driver), Nahida (Dendro Support), and Kuki Shinobu (Hyperbloom/Healer). Furina's Salon Solitaire provides consistent off-field Hydro application while building Fanfare stacks through those HP fluctuation mechanics.
Furina's build focuses on Golden Troupe artifact set for +25% Skill damage off-field, 35,000-40,000 HP, and 180%+ ER for optimal buff uptime. The Fanfare system delivers +0.07% damage per point up to 300 maximum. C2 accelerates stack generation by +250%—pretty significant if you can swing it.
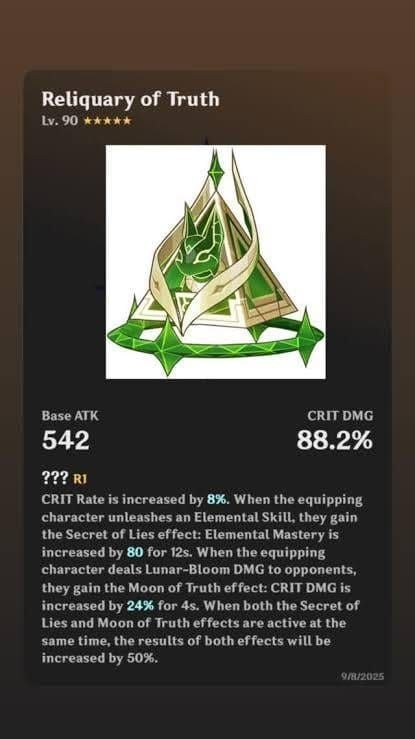
Nefer takes the driver role with 800-1000 EM focus and 60-70% CRIT Rate. Reliquary of Truth weapon provides +8% CRIT Rate, +80 EM on Skill, and +24% CRIT DMG on Lunar-Bloom reactions.
Furina vs Nilou Comparison
This is where strategy comes into play. Nilou variants excel in pure Bloom damage—we're talking 60,000+ damage per explosion with proper HP investment. But you're restricted to Hydro/Dendro only parties.
Furina variants sacrifice about 15-20% core damage for universal team buffs that provide +25% damage amplification through the Fanfare system. Plus, unrestricted party building opens up way more strategic options.
Investment requirements differ significantly too. Nilou really wants Key of Khaj-Nisut and HP-focused artifacts, while Furina performs adequately with 4-star weapons like Favonius Sword when built for support utility.
For optimization purposes, BitTopup offers reliable Genesis Crystal top-ups with competitive rates and instant delivery. Buy Genshin Impact crystals for Nilou teams to secure both characters and their signature weapons during limited banner periods.
Fanfare Stack Management
Optimal Fanfare generation requires active HP manipulation throughout your rotations—it's more involved than it sounds. Furina's Burst creates HP drain while healers provide restoration for stack accumulation. The 36-second duration allows multiple stack cycles within extended rotations.
You're targeting 200+ Fanfare points for meaningful damage amplification, which is achievable through 2-3 HP fluctuation cycles per rotation. C2 Furina provides +0.35% Max HP per excess Fanfare point, enabling faster maximum buff achievement.
EM vs CRIT Build Analysis
Damage Formula Breakdown
The Lunar-Bloom calculation gets pretty technical: AdditiveBaseDMG = LevelMultiplier × ReactionMultiplier × (1 + EMBonus + ReactionDMGBonus). At Level 90, the base multiplier reaches 1663.88 before EM scaling kicks in.
EM scaling follows the formula (5 × EM)/(EM + 1200), yielding 139% bonus at 1000 EM. But here's the kicker—Nefer's passives add linear scaling through +0.0175% Base DMG per EM point, creating dual scaling mechanisms that favor EM investment up to 1000 points. CRIT scaling operates multiplicatively with EM bonuses, making hybrid builds optimal.
Stat Priority Guidelines
Primary distribution should be EM > CRIT Rate > CRIT DMG > ER for Lunar-Bloom DPS characters. Sands and Goblet prioritize EM main stats (186.5 each), while your Circlet depends on CRIT Rate achievement from substats.
Substat optimization targets 23.31 EM per roll maximum. You want 4-5 high-value EM rolls per artifact to enable 800+ total EM. Support priorities differ: Nahida emphasizes EM for sharing (400-600 EM), Kokomi focuses HP (35,000+ HP), and Furina balances HP, ER, and CRIT (35,000 HP, 180% ER, 60% CRIT Rate).
Character-Specific Recommendations
Nefer's optimal build targets 800-1000 EM, 60-70% CRIT Rate, 140-180% CRIT DMG, and 130-150% ER. Reliquary of Truth provides substantial CRIT DMG and EM bonuses with Night of the Sky's Unveiling artifacts.
Lauma prioritizes pure EM scaling with a 1000+ EM target through Nightweaver's Looking Glass and triple EM artifacts. Nilou's HP-focused build targets 60,000+ HP through Key of Khaj-Nisut and HP% main stats for Bountiful Core scaling.
Optimal Rotation Sequences
Nilou Team Rotations
The standard 20-second cycle flows like this: Nahida Burst for Shrine of Maya establishment > Skill marking for coordinated Dendro application. Nilou's triple Skill establishes Hydro aura through Court of Dancing Petals activation, enabling Bountiful Core generation.
Kokomi's Skill provides sustained Hydro application while her Burst enables extended on-field presence. Ocean-Hued Clam synergy converts healing into damage—pretty neat interaction. Lauma's entry triggers Lunar-Bloom conversion: Burst for Pale Hymn stacks > Hold Skill after accumulating 3 Verdant Dew stacks.
Furina Team Rotations
Opening sequence: Furina Skill deployment for Salon Solitaire positioning > Burst for HP drain initiation. Nahida setup mirrors Nilou variants: Burst for duration extension > Skill for enemy marking.
Kuki Shinobu's Skill provides healing for Fanfare generation while triggering Hyperbloom through Electro application. Nefer's driver phase utilizes double Skill charges for Shadow Dance entry > Charged Attack combos with dash canceling for optimal DPS uptime.
Energy Management Timing
Energy distribution requires careful timing for Burst uptime maintenance. Nahida's Burst provides the foundation with extended duration, while other characters stagger energy consumption to avoid buff coverage gaps.
ER thresholds: Nilou variants require 130-150% on DPS characters due to dual Hydro resonance. Furina variants demand 180%+ ER for consistent Fanfare uptime and HP manipulation cycles.
Artifact Sets and Stat Optimization
Main DPS Artifact Builds
Night of the Sky's Unveiling is optimal 4-piece for Nefer: +80 EM from 2-piece, 15-30% CRIT Rate through Gleaming Moon effects on Lunar Reactions. The 4-piece grants +10% Lunar damage per active effect.
Main stat distribution: EM on Sands and Goblet (186.5 each) for maximum passive scaling. Target 40-50% CRIT Rate before set bonuses kick in. Alternative option is Gilded Dreams for diverse elemental teams (+80 EM base, up to +50 EM per different element teammate).
Support Character Sets
Deepwood Memories on Nahida/Dendro Traveler for -30% enemy Dendro resistance. Instructor sets on healers provide +120 team EM for 8 seconds after reactions. Tenacity of the Millelith on Nilou provides +20% ATK team buff and HP% bonuses for Bountiful Core scaling.
Golden Troupe optimizes Furina's off-field damage through +25% Skill damage when not on-field. The 2-piece provides +20% Skill damage universally.
Substats Priority Ranking
EM substats get highest priority for reaction characters (23.31 EM maximum per upgrade). Target 800-1000 total EM through weapon, artifact mains, and substats. CRIT substats follow EM, maintaining that 1:2 Rate to DMG ratio while accounting for set bonuses.
ER substats ensure Burst uptime: 130-150% for dual Hydro teams, 180%+ for Furina variants. Favonius weapons reduce requirements by 20-30% through particle generation.
Weapon Selection and Alternatives
5-Star Weapon Recommendations
Reliquary of Truth (Nefer BiS): 542 Base ATK, 88.2% CRIT DMG, +8% CRIT Rate, +80 EM on Skill, +24% CRIT DMG on Lunar-Bloom, +50% to both effects when fully active. It's expensive, but the performance speaks for itself.
Key of Khaj-Nisut (Nilou): HP-to-EM conversion providing +252 personal EM and +140 team EM at 70,000+ HP. Essential for maximum Bountiful Core damage—no real substitutes here.
A Thousand Floating Dreams (Nahida): optimizes EM sharing capabilities with a passive granting EM based on party elemental diversity, synergizing perfectly with her A4 talent.
4-Star Budget Options
Nightweaver's Looking Glass: 265 EM main stat, +60 EM on Hydro/Dendro Skill use, additional +60 EM on Lunar-Bloom triggers. Excellent F2P value for EM-focused characters.
Dawning Frost balances CRIT DMG (55.1%) with EM utility—+72 EM after Charged Attacks, +48 EM after Skill use. Suits hybrid scaling characters pretty well.
Favonius weapons provide essential energy support through particle generation on CRIT hits, reducing individual ER requirements across the board.
F2P Weapon Choices
Blackmarrow Lantern is the premier F2P Nefer option: 221 EM, +48% Bloom damage, +12% Lunar-Bloom damage when Ascendant Gleam is active. Craftable with Nod-Krai materials—can't beat that accessibility.
Iron Sting offers pure EM scaling (221), +6% damage per stack up to 2 stacks, achieving about 85% of Key of Khaj-Nisut performance in Nilou builds.
R5 Blackmarrow Lantern reaches +96% Bloom damage and +24% Lunar-Bloom damage, achieving near-5-star performance at a fraction of the cost. Pretty impressive for a craftable weapon.
Performance Benchmarks and Testing
Damage Per Screenshot Metrics
Optimized Lunar-Bloom teams achieve 68,000+ damage per core explosion with 1000 EM Lauma and 40% resistance shred. That's a 180% improvement over standard Bloom's 24,576 non-critical damage—the difference is staggering.
Nilou variants with Key of Khaj-Nisut reach 60,000+ Bountiful Core damage at 70,000 HP while maintaining that 400% damage multiplier. Furina variants achieve 50,000-55,000 per explosion while providing +25% damage amplification to all sources.
Abyss Clear Times
Spiral Abyss Floor 12 performance shows optimized Lunar-Bloom teams achieving 2:45 average clear times versus 3:10 for traditional Hyperbloom teams. 36-star completion rates exceed 85% for properly built Nilou variants, 75% for F2P compositions.
Specific strengths become apparent in different chambers. Chamber 12-1 with multiple Ruin enemies favors Lunar-Bloom's AoE damage, while single-target chambers benefit from Furina variants' universal damage buffs.
Investment ROI Analysis
C0 Nefer with 4-star weapons achieves 80% of maximum potential—not bad at all. C1 provides about 15% damage improvement through +60% EM to Lunar-Bloom. Weapon priority: Key of Khaj-Nisut for Nilou variants, while Nefer performs at 85% efficiency with Blackmarrow Lantern.
Artifact investment shows diminishing returns beyond +20 with proper main stats. Focus on correct main stats over perfect substats—EM main stats provide way more value than optimized CRIT substats on incorrect mains.
Advanced Optimization Strategies
Constellation Impact
Nefer C1 Planning Breeds Success: +60% EM to Lunar-Bloom from Phantasm Performance when boosted by Veil of Falsehood (about 15% damage improvement). C2 extends Veil duration by +5 seconds, increases maximum stacks to 5 (+140% Phantasm damage), and provides +2 stacks on Skill use with +200 EM at maximum stacks.
Nilou C2 offers -35% Hydro resistance after Golden Chalice's Bounty damage, -35% Dendro resistance after Bloom reactions. Furina C2 accelerates Fanfare generation by +250%, enabling faster maximum buff achievement.
Team Flexibility Options
Substitution strategies vary by role. Nahida replacements include Dendro Traveler (F2P accessibility) or Baizhu (defensive utility), though both sacrifice EM sharing. Hydro alternatives: Kokomi (healing/consistent application), Yelan (damage/mobility), Xingqiu (damage reduction/reliable aura).
Flex accommodations include Anemo supports like Sucrose (EM sharing/grouping), Electro characters like Kuki Shinobu (Hyperbloom variants), and defensive options like Zhongli (comfort in challenging content).
Future-Proofing Considerations
Upcoming Nod-Krai characters will expand Lunar-Bloom team options significantly. Investment in core mechanics and artifact sets positions your teams for easy integration without fundamental rebuilding.
Current EM and CRIT-focused builds provide a solid foundation for transition to optimized sets when they become available. Lunar-Bloom's unique mechanics create design space for continued optimization and strategic depth.
FAQ
Q: Should I prioritize EM or CRIT for Nefer in Lunar-Bloom teams? Prioritize EM to 800-1000 first for passive scaling, then CRIT Rate to 60-70% and CRIT DMG to 140-180%. The hybrid approach maximizes both reaction damage and critical potential with Night of the Sky's Unveiling bonuses.
Q: Which is better: Nilou or Furina variants? Nilou excels in pure Bloom damage (60,000+ core damage) but restricts your party to Hydro/Dendro only. Furina sacrifices 15-20% core damage for universal team buffs and party flexibility—depends on your playstyle preference.
Q: What's the optimal Nilou Lunar-Bloom rotation? Nahida Burst > Skill, Nilou triple Skill for Hydro aura, Kokomi Skill for application, Lauma Burst > Hold Skill for Lunar conversion. Maintain 20-second cycles with 130-150% ER.
Q: How much Energy Recharge do I need? Target 130-150% ER for DPS characters in dual Hydro teams, 180%+ for Furina variants. Favonius weapons reduce requirements by 20-30% through particle generation—pretty significant savings.
Q: Are F2P weapons viable in Lunar-Bloom teams? Absolutely. Blackmarrow Lantern achieves 85% of 5-star performance for Nefer, Iron Sting provides excellent Nilou value. R5 4-star weapons often outperform R1 5-star options.
Q: What artifacts should I prioritize? Night of the Sky's Unveiling on Nefer for CRIT Rate bonuses, Deepwood Memories on Dendro supports for resistance shred, Instructor on healers for team EM sharing. Focus EM main stats on Sands/Goblet—that's where the real damage comes from.


