

Why This Duo Absolutely Dominates
Let's be honest here—after testing dozens of team combinations over the past few months, nothing quite hits like a well-executed Neuvillette-Furina taser comp. The synergy is almost unfair.
The Magic Behind the Numbers
Neuvillette's Charged Attack delivers a devastating 14.5% Max HP as continuous Hydro damage over 3 seconds. That's not just big numbers—it's consistent AoE coverage that keeps enemies locked in Electro-Charged hell. Meanwhile, Furina's doing her thing off-field, building up to 75% DMG Bonus through her Fanfare mechanic (maxing at 300 stacks).
Here's where it gets interesting: Neuvillette heals himself through Sourcewater Droplets (16% Max HP per absorption), which perfectly counters Furina's HP drain (1.6-3.6% HP per attack). It's like they were designed for each other—which, let's face it, they probably were.
In practice? We're talking 35,000-45,000 DPS in multi-target scenarios. The Electro-Charged arcs provide a whopping 73% damage reduction through stagger effects alone.
2025's Meta Shift Changes Everything
The introduction of Lunar-Charged reactions has catapulted this team into SS-tier territory. Unlike traditional reactions that scale with individual Elemental Mastery, Lunar-Charged variants pull from team stats—meaning your investment spreads across the entire squad.
Current Spiral Abyss data doesn't lie: Neuvillette maintains a 41.8% usage rate in successful Floor 12 clears, with Furina appearing in 97.54% of those Neuvillette teams. That's not coincidence.
Version 6.0's Abyss blessings are practically gift-wrapped for this comp: +200% Electro-Charged damage and an additional +75% Lunar-Charged amplification. For players looking to optimize their pulls, Genshin recharge discount options through BitTopup offer competitive pricing with instant delivery—crucial for those constellation upgrades that really make this team sing.
The Technical Stuff (That Actually Matters)
Hydro Resonance gives you +25% HP, which directly feeds Neuvillette's damage scaling (+0.6% Hydro DMG per 1% HP above 30%, capping at 30% bonus). Furina benefits too—her A4 passive grants +28% Skill DMG at 40,000 HP.
Electro-Charged follows this formula: ((6 * EM) / (EM + 2000)) * 100%. You'll hit 96% bonus at 500 EM and cap at 162% with 1000 EM. But here's the kicker—with Lunar-Charged mechanics, you're not just building EM on one character anymore.
Team Compositions That Actually Work
Stygian Onslaught's Perfect Storm

My go-to lineup: Neuvillette, Furina, Ineffa, Xilonen.
Ineffa's the game-changer here, maintaining thunderclouds for Lunar-Charged reactions while adding critical hit potential. Xilonen handles the dirty work—Hydro RES shred, team healing, and most importantly, interruption resistance during Neuvillette's Charged Attack windows. She doesn't mess with your Hydro-Electro reactions either.
This team absolutely demolishes Battle-Hardened Fireblade Shock Trooper shields. Those things have 3 layers at 6% boss HP each (285,959 HP per shield), but Electro-Charged deals 600% damage to shields while Lunar-Charged provides 200% effectiveness. You're breaking through in seconds, not minutes.
Spiral Abyss Variants That Clear Sub-420
For chambers with those juicy Electro-Charged +200% damage bonuses, I swap to Neuvillette-Furina-Ororon-Kazuha. Kazuha's EM sharing combined with VV shred is just chef's kiss. Against multi-wave encounters like Chamber 12-2, prioritize grouping while maintaining Ororon's off-field Electro application. You're looking at 35-40K DPS and sub-420 second clears.
Single-target bosses? Neuvillette-Furina-Raiden-Xilonen. Raiden's Burst windows provide massive Electro damage while solving energy issues—particularly nasty against high-HP targets like Jadeplume Terrorshroome (4,765,990 HP at max scaling). Trust me, you'll need the energy.
Fourth Slot Flexibility
Fischl: The reliable workhorse. Oz delivers 0.6 particles per second with consistent off-field Electro. 4-piece Golden Troupe setup maximizes her contribution without breaking the bank.
Yae Miko: Premium option with serious burst potential through her Skill totems. That 90 Energy requirement demands careful ER management, but the single-target damage payoff is worth it.
Kuki Shinobu: Self-sufficient option combining Electro application with team-wide healing. Perfect when you want to drop external healers.
Building Neuvillette Right
Artifacts That Make Sense
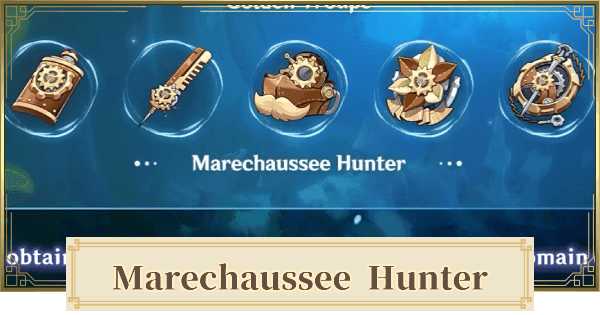
4-piece Marechaussee Hunter is your best friend here. +15% Normal/Charged Attack damage plus up to +36% CRIT Rate through HP fluctuation stacks. With Furina constantly draining HP, you'll maintain 3-stack uptime without even trying.
Main stats are straightforward: HP% Sands, Hydro DMG%/HP% Goblet, CRIT Rate/DMG Circlet. Target 40,000 HP for maximum damage scaling while keeping 70-80% CRIT Rate and 180-200% Energy Recharge.
Substats priority: HP% > CRIT Rate/DMG > Energy Recharge > Elemental Mastery. Don't overthink it.
Weapon Choices (And What Actually Matters)
Tome of the Eternal Flow: His signature weapon with 542 Base ATK, 88.2% CRIT DMG, +16% HP, +14% Charged Attack DMG per stack (max 3), plus energy restoration. It's expensive but transformative.
Sacrificial Jade: Solid mid-range option with +40 EM off-field bonus and HP scaling that complements taser mechanics perfectly.
Prototype Amber: Budget king with 41.3% HP substat, post-Burst energy regen, and team healing. Don't sleep on this one.
Constellation Investment Strategy
C1 is the sweet spot—interruption resistance during Charged Attacks plus guaranteed Glory stack generation. Essential if you're not running shield support.
C2 provides substantial damage through +14% CRIT DMG per Glory stack (42% max bonus). Combined with C1's stack generation, it's often more valuable than pulling for signature weapons. (Editor's note: I've seen too many players chase weapons before securing C1—don't make that mistake.)
Furina's Supporting Role
Artifact Optimization
4-piece Golden Troupe delivers +20% Skill DMG (2-piece) and +25% off-field Skill DMG with an additional +25% on-field bonus after swapping. Perfect for taser teams where Furina stays off-field.
HP%/HP%/CRIT Rate main stats targeting 40,000 HP for A4 passive activation. Alternative mixed sets work too: 2-piece Golden Troupe + 2-piece Heart of Depth or Tenacity of the Millelith for balanced stats.
Energy Requirements (The Real Talk)
Dual-Hydro teams need 150-160% ER for consistent Burst uptime. Solo Hydro? You're looking at 200-220% ER for that 15-second cooldown maintenance.
Substats: Energy Recharge (until threshold) > CRIT Rate/DMG (1:2 ratio) > HP% > Elemental Mastery.
For those looking to optimize their pulls, Genshin top up promo opportunities through BitTopup frequently offer promotional rates on Genesis Crystal packages—making Furina's constellations and weapons more accessible.
Hybrid builds represent the sweet spot: 40,000 HP for A4 activation while maintaining 60-70% CRIT Rate and proper CRIT DMG ratios. Maximum team support with respectable personal damage.
Electro Sub-DPS Deep Dive
Fischl: The Consistent Choice
Still the gold standard for F2P Electro application. Oz's 10-second duration with 0.6 particle generation per second is just reliable. 4-piece Golden Troupe maximizes off-field damage, Stringless provides optimal EM and Skill bonuses.
Her A4 passive triggers additional Electro damage on reactions, creating synergy loops with Neuvillette's Hydro application. Simple, effective, affordable.
Yae Miko: When You Want More
Superior single-target damage through Skill totems and high-scaling Burst (442% scaling per totem at Talent Level 10). 4-piece Gilded Dreams for EM scaling or mixed 2-piece combinations work well.
Strategic totem placement covers Neuvillette's effective range while ensuring consistent Electro application. The investment pays off against tanky single targets.
Raiden: The Game Changer
Transforms team dynamics through 7-second Burst windows dealing massive Electro damage while restoring 12.5-25 Energy to teammates. Engulfing Lightning maximizes damage through ER scaling, while The Catch provides excellent F2P alternatives.
4-piece Emblem of Severed Fate optimizes both ER and Burst damage scaling. She's expensive to build but changes how the entire team functions.
Rotations That Flow
Standard 20-Second Cycle
Optimal sequence: Furina Skill > Burst → Xilonen Skill > 2 Normal Attacks > Burst → Ineffa Skill > Burst → Neuvillette Skill > Burst > Charged Attacks.
This ensures maximum buff uptime and reaction consistency while building Fanfare stacks before your main damage phase. Timing matters here—don't rush it.
Advanced technique: N2 Walk Cancel during Neuvillette's Charged Attack sequences achieves 12 reaction procs versus 10 standard applications. That's a +20% damage increase for players willing to practice the timing.
Emergency Management
When things go sideways, prioritize Neuvillette Skill > immediate Charged Attack for rapid Sourcewater Droplet absorption (16% Max HP per Droplet). Combine with Xilonen's area healing for quick recovery.
Coordinate Xilonen's Burst with Furina's snapshots for maximum Fanfare generation without compromising survivability. It's all about timing those overlaps.
Stygian Onslaught Mastery
Understanding Enemy Patterns
Battle-Hardened Fireblade Shock Troopers feature three-layer shields requiring Electro-Charged damage for efficient breaking. Each shield represents 6% boss HP (285,959 HP per layer), but Electro-Charged deals 600% effectiveness against shields.

Frostnight Herra encounters benefit from Lunar-Charged piercing through elemental immunities—something traditional reactions can't handle.
Maintain medium range with Neuvillette for optimal Charged Attack effectiveness while avoiding close-range interruptions. Use Furina's water-walking for enhanced mobility during transitions.
Time Management Strategy
Three Battlefields within 180 seconds total. Prioritize rapid shield breaks during the first 30 seconds using Electro-Charged's 600% shield damage.
Stage progression breakdown:
- Stage 1: Lunar Reaction piercing for Frostnight Herra
- Stage 2: Electro-Charged against Battle-Hardened Lightkeeper
- Stage 3: Bond of Life cleanse coordination for Veteran Frost Operative
Spiral Abyss Performance Analysis
Floor 12 Optimization
Current configurations heavily favor taser teams through Electro-Charged +200% bonuses and multi-enemy designs. Target 35-40K DPS for sub-300 second clear times within 420-second limits.
Chamber 12-2 particularly benefits from Electro-Charged arcs providing crowd control across multiple waves. Second-half chambers with Lunar-Charged bonuses (+75%) favor Ineffa/Ororon integration for enhanced reaction damage stacking.
Blessing Synergy
Dendro reaction blessings enable hybrid Bloom-Taser strategies through Furina's Hydro application, triggering shockwave True DMG every 3 seconds. Version 6.0's blessing rotation emphasizes Electro-Charged amplification—making this the optimal period for team investment.
Chamber-Specific Adaptations
Chamber 12-3-1: Electro-Charged provides 600% damage effectiveness against Multi-Shield enemies during vulnerability windows.
Battle-Scarred Rock Crab encounters: Require 6 Hermit Seed conversions through Hydro-Dendro coordination.
Grief-Stricken mechanics: Demand Ascendant Gleam triggers through consistent reaction application.
Common Mistakes (And How to Avoid Them)
Rotation Errors
Don't swap characters prematurely—you'll disrupt energy generation and buff timing. Maintain proper field time for particle generation, especially crucial for Neuvillette's 180% ER requirements.
Use Favonius weapons on supports (60% CRIT Rate for consistent procs) and leverage Electro Resonance (+100% particle generation on Electro-Charged) to reduce individual ER requirements.
Survivability Issues
Furina's HP drain requires proactive healing management. Avoid shield-only supports without healing capabilities—you need both. Build Fanfare stacks before DPS phases while healers remain active.
Calculate HP drain rates (1.6-3.6% per attack) against healing output for sustainable team HP levels. It's math, but important math.
Advanced Optimization & Future Planning
Damage Calculations Worth Knowing
Neuvillette's passive grants +0.6% Hydro DMG per 1% HP above 30% (maximum 30% bonus), requiring 80% HP maintenance.
Electro-Charged scales: ((6 * EM) / (EM + 2000)) * 100%, reaching 96% at 500 EM, capping at 162% with 1000 EM.
Lunar-Charged uses team stat scaling: A1 + (A2/2) + (A3/12) + (A4/12), making team-wide investment more valuable than individual character focus.
Upcoming Synergies
Version 5.8's Ineffa (August 2025) introduces Lunar-Charged critical hit potential and enhanced team stat scaling. Ororon provides 4-star Electro bow support with AoE capabilities and Scroll of the Hero compatibility.
Version 6.1's Nefer (October 2025) enables hybrid Lunar-Bloom-Taser strategies. The meta's evolving fast.
Investment Roadmap
Prioritize Neuvillette C1 over signature weapon for interruption resistance and guaranteed Glory stacks. Focus support character development (talent levels 6-8, appropriate artifacts) before pursuing C2+ DPS upgrades.
Maintain 80/20 resin distribution between artifact farming and character development. Target 40 daily domain runs while ensuring all team members reach level 80/90. It's a marathon, not a sprint.
FAQ
Q: What's the best 4-star alternative to Ineffa for Lunar-Charged reactions? Ororon serves as the premier 4-star Electro support, providing off-field application and team ATK buffs through Scroll of the Hero set. C2 adds two additional chains for 50% more multi-target damage.
Q: How much Energy Recharge does Neuvillette need in taser teams? Target 180-200% ER solo Hydro or 150-160% dual-Hydro with Furina. Use Favonius weapons and Electro Resonance (+100% particles on Electro-Charged) to reduce requirements.
Q: Can F2P players clear endgame content with this team? Absolutely. F2P variants using Fischl and Sucrose achieve 70-80% of premium damage (40K DPS) with R5 4-star weapons. More than enough for 36-star Abyss with proper execution.
Q: What's the optimal rotation timing for maximum DPS? Execute 20-25 second cycles: Furina Skill > Burst → Xilonen Skill > 2 Normal > Burst → Ineffa Skill > Burst → Neuvillette Skill > Burst > Charged Attacks. Use N2 Walk Cancel for +20% damage.
Q: How do I handle Furina's HP drain without compromising damage? Pair with healers like Xilonen/Baizhu rather than shield-only supports. Build Fanfare before DPS phases while healers are active, use Neuvillette's Sourcewater Droplets (16% Max HP) for emergency healing.
Q: Which constellation provides the biggest upgrade? Neuvillette C1 offers the most significant improvement with interruption resistance and guaranteed Glory stack generation. More valuable than signature weapons for consistent damage windows.


