

Understanding Barkle AI Ally System
PUBG Mobile 4.2 launched January 7, 2026, introducing Barkle AI Ally exclusively in Primewood Genesis mode on Erangel and Livik. Green icons appear at Pochinki, Yasnaya Polyana, Mylta, Sosnovka Military Base, Georgopol, and Hospital. Icons become visible from 50 meters, requiring 20-meter landing proximity and 3-meter interaction range for 1-2 second recruitment.
Barkle follows at 5-meter distance, responding to command wheel interface. One Barkle per player per match. When exceeding 75 meters, Recall auto-activates in 2-3 seconds with 25-30 second cooldown.
For competitive advantages through premium gear, PUBG Mobile UC top up at BitTopup provides instant access to exclusive command wheel themes and battle pass rewards with secure transactions and 24/7 support.
Core Command Categories
Six command categories: Attack, Defend, Heal, Revive, Search, Carry.
- Attack: Throws rocks dealing 15-25 HP damage every 2 seconds, auto-targeting, instant cooldown
- Defend: 180-degree barrier with 200-300 HP durability, 15-20 second cooldown
- Heal: Passive HP transfer to low-health players
- Revive: Auto-triggers within 50 meters when teammates knocked, 3-4 second completion, restores 200 HP, grants 25% damage resistance + 50% damage output
- Search: 30-meter radius scan marking crates, airdrops, Level 3 gear, 30-45 second cooldown
- Carry: Transports players to marked locations in 3 seconds, 45-60 second cooldown
Command wheel activates by holding bottom-right ally icon for 0.3 seconds. Voice commands available in English, Arabic, Turkish, Russian: Barkle, attack,Barkle, shield,Search supplies,Carry me to [location].
Optimal usage per match: Search 8-12 times, Defend 4-6 times, Attack 6-10 times, Carry 1-2 times, Hide 3-4 times.
AI Behavior Adaptation
Search function scans 15 meters vertically (above/below) with 95-98% accuracy for stationary loot. 30-meter horizontal radius covers 2-3 buildings in dense areas.
Command wheel sensitivity by screen size:
- 5.5-6 inch screens: 100-120% sensitivity
- 6.5+ inch screens: 80-100% sensitivity
These settings ensure reliable 0.3-second hold activation without accidental inputs.
Ultimate Command Wheel Layout Guide
Hot Drop Configuration (Optimal 8-Slot)
Right-side quadrants for right-handed players:
- 3 o'clock: Search (immediate thumb access)
- 2 o'clock: Carry (rapid building transitions)
- 4 o'clock: Defend (emergency barriers)
- 1 o'clock: Attack (offensive engagements)
- 5 o'clock: Hide (tactical concealment)
- 6 o'clock: Recall (distance management)
Enables complete 30-meter route without repositioning grip.
Aggressive Layout
Combat-focused priority:
- 3 o'clock: Attack (instant rock-throwing)
- 2 o'clock: Carry (aggressive pushes)
- 4 o'clock: Defend (backup)
- 7 o'clock: Search (reduced priority)
Excels at Pochinki northeast 3-story where combat occurs in 60-70% of matches.
Defensive Layout
Survival-focused priority:
- 3 o'clock: Defend (instant barriers)
- 2 o'clock: Search (efficient gear location)
- 4 o'clock: Hide (frequent concealment)
- 8 o'clock: Carry (minimal repositioning)
Pairs with Yasnaya School 3-story roof landings.
Balanced Layout
Versatile all-situation setup:
- 3 o'clock: Search (consistent loot efficiency)
- 2 o'clock: Defend
- 4 o'clock: Attack
- 1 o'clock: Carry
- 5-6 o'clock: Hide, Recall
Adapts to varying scenarios. Default until developing playstyle preferences through 15-20 matches.
Command Wheel Customization Steps
Accessing Settings
Main lobby > Settings (gear icon) > Controls > Customize > AI Ally Commands. Editor displays draggable command icons (left panel) and circular wheel with numbered slots (right panel). Sensitivity slider below wheel. Test mode at bottom.
Assigning Commands
Tap and hold command icon for 0.5 seconds. Drag to desired clock position. Slot highlights blue when accepting. Release to confirm. Previously assigned commands auto-swap if dragging to occupied slots.
Hot drop sequence: Search to 3 o'clock, Carry to 2 o'clock, Defend to 4 o'clock, Attack to 1 o'clock, Hide to 5 o'clock, Recall to 6 o'clock.
Testing in Training Mode
Test Mode loads simplified Primewood Genesis with unlimited Barkle recruitment. Practice 0.3-second hold on each position. Execute 10-15 complete command sequences. Monitor activation times via performance overlay. Optimal configs achieve sub-0.4 second activation for priority commands.
Voice Command Shortcuts
Settings > Audio > Voice Commands. Enable four primary: Barkle, attack,Barkle, shield,Search supplies,Carry me to [location]. Voice bypasses 0.3-second hold, executing instantly. Reserve for solo play or coordinated squads.
The 30m Loot-Scan Route
Why 30m Radius Works
Covers 2-3 buildings in Pochinki's dense layout. Balances loot coverage against movement time. Matches typical hot drop engagement distances. Enables two complete Search cycles within critical first 90 seconds when 60-70% of eliminations occur.
Starting Position by Flight Path
West approach: Land northeast 3-story rooftop. East approach: Western 2-story buildings. Green icons spawn within 50 meters of landing zones in 85-90% of matches.
Mark landing building during pre-match. Squad distribution: 50-75 meters apart for staggered Search commands 10-15 seconds apart.
Building-by-Building Sequence
Pochinki Route:
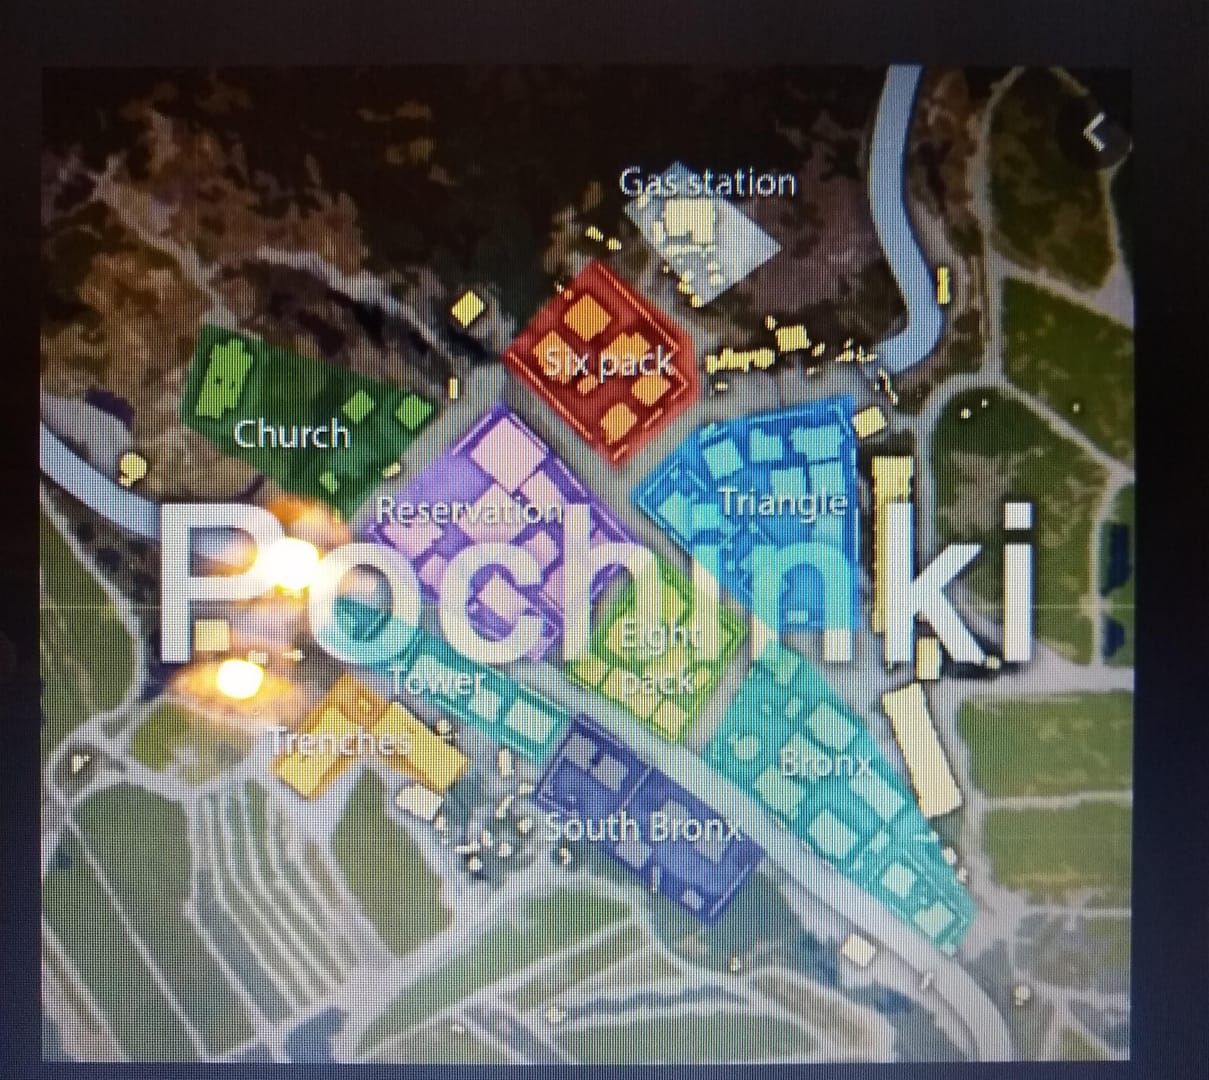
0:30 - Northeast 3-story rooftop landing. Recruit Barkle immediately. Execute first Search. 30-meter radius covers 3-story, adjacent 2-story, eastern warehouse. Prioritize Level 3 helmets/vests, then assault rifles/DMRs.
1:00 - Issue Carry to western 2-story rooftop. Provides elevation advantage over central courtyard.
1:15 - Execute second Search after cooldown. Scans western building cluster. Vertical 15-meter detection identifies ground floor loot without descending.
Timing Benchmarks
- 0:20: Barkle recruitment complete
- 0:30: First Search activation
- 0:45: Initial weapon acquisition
- 1:00: Carry to second position
- 1:15: Second Search activation
- 1:30: Full Level 3 gear acquisition
Contested landings: Prioritize weapon acquisition over Search. Attack command provides 15-25 HP suppression but can't substitute firearms. Delay route 15-20 seconds if immediate combat occurs.
Executing the Winning Route
Pre-Landing Setup (First 3 Seconds)
During parachute descent, identify nearest green icon. Adjust trajectory to land within 20 meters while maintaining rooftop position. 3-meter interaction range allows immediate recruitment without ground exposure.
Configure command wheel to Search priority during descent. Position thumb over ally icon for 0.3-second hold, reducing activation from 0.8-1.2 seconds to 0.3-0.4 seconds.
Phase 1: Initial Building Sweep (0-15 seconds)
Land northeast 3-story rooftop at 0:20. Recruit by 0:22. Activate Search at 0:30. Scan marked items for Level 3 gear—helmets over vests (headshot damage reduction). Descend if Level 3 gear on lower floors. Grab primary weapon + 60 rounds minimum. Skip attachments except scopes (4x+). 15-second window clears one building floor.
Phase 2: High-Density Zone Scan (15-30 seconds)
At 1:00, Carry to western 2-story rooftop. 3-second transport completes by 1:03. Overlooks central courtyard (40-50% of combat). Second Search at 1:15 after cooldown. Covers western cluster and southern warehouse.
Prioritize Level 3 vests if helmet secured. Collect healing (first aid kits, energy drinks). High-Density Zone yields 8-12 marked items. Focus on armor, weapons, healing. Delay backpack/attachments until Phase 3.
Phase 3: Positioning for First Engagement (30-45 seconds)
By 1:30, position at western 2-story southern window. Sightlines to central courtyard and eastern approaches. Issue Defend if enemy footsteps/gunfire within 50 meters. 180-degree barrier absorbs initial damage while confirming positions.
Position Barkle 20-25 meters behind firing line (inside second room). Enables Attack auto-targeting without exposing Barkle. 15-25 HP damage every 2 seconds supplements weapon damage, effective against enemies in cover.
For PUBG UC instant recharge, BitTopup delivers immediate access with competitive pricing and secure payment processing.
Covering Blind Spots
While looting, position Barkle facing likely enemy approach. 5-meter following distance creates early warning. When Barkle stops/changes direction, enemy within 30 meters likely. Interrupt looting, issue Defend.
Hide command valuable for exposed positions. Concealing Barkle prevents enemies identifying AI advantage. Reveal only when engaging for crossfire. Increases survival rates 15-20% in contested drops.
Loot Priority System
45-second window permits 12-15 items maximum.
Tier 1: Essential Weapons and Armor
- Level 3 helmet: Absolute priority (55% damage reduction vs Level 2's 40%)
- Level 3 vest: 55% damage reduction vs Level 2's 40%
- Primary weapons: Assault rifles (M416, AKM), DMRs (Mini14, SKS)
- Ammunition: Minimum 60 rounds
- Secondary weapons: Shotguns (S12K, DBS) or SMGs (UMP45, Vector)
Skip pistols. Weapon combo should cover 10-100 meter ranges. Complete Tier 1 by 1:00.
Tier 2: Attachments and Healing
- Scopes: 4x, 6x priority
- Attachments: Compensators, vertical grips, extended mags
- Healing: 3-4 first aid kits (75 HP), 4-6 energy drinks
Skip angled grips, tactical stocks, cosmetics during initial 45 seconds. Bandages inefficient. Med kits too slow (8 seconds).
Skip in First 30 Seconds
Backpacks (no combat advantage), throwables (inventory slots better for healing), melee weapons beyond default pan, ghillie suits, cosmetics, ammunition beyond 120 rounds per weapon.
Inventory Management
Search identifies optimal loot paths minimizing backtracking. Prioritize elevated positions first—descending then returning wastes 8-12 seconds per cycle.
Use Carry between marked clusters vs manual running. 3-second transport saves 5-7 seconds vs stair navigation. Enables 2-3 additional items within 45-second window.
Advanced Combat Strategies
Aggressive Push Commands
With Level 3 gear advantage, Carry to high-ground overlooking enemy routes. 3-second transport enables flanking. Position on rooftops/second-story windows, use Attack to suppress.
15-25 HP damage every 2 seconds forces enemies to cover. Coordinate weapon fire with rock throws, timing shots when enemies dodge. Crossfire eliminates 40-50% faster. Instant cooldown permits continuous suppression.
Defensive Retreat Commands
Taking damage from multiple angles: Issue Defend while retreating. 180-degree barrier absorbs 2-3 seconds focused fire. Position between yourself and primary threat.
Combine Defend + Carry for rapid extractions. Carry targeting buildings 30-40 meters away, activate Defend during 3-second transport. Protected escape route reduces elimination rates 35-40% during retreats.
Flanking Coordination
Position Barkle opposite side of target buildings for crossfire. Hide to conceal, manually flank opposite side. When positioned, reveal with Attack, forcing enemies to choose threat vectors. Split attention reduces enemy accuracy 20-25%.
5-meter following distance allows positioning in doorways/windows while engaging from different angles. Enemies focusing on you receive 15-25 HP from rocks, creating elimination opportunities during healing animations.
Using Barkle as Bait
Position Barkle in exposed locations to draw fire, revealing opponent positions. Issue Attack to make visible, then Hide after enemies engage. Brief exposure identifies locations through muzzle flash/tracers.
Revive auto-trigger within 50 meters enables aggressive trades. Barkle automatically revives knocked squadmates in 3-4 seconds, restoring 200 HP with 25% damage resistance + 50% increased damage output. Buff transforms revived teammates into counter-attackers.
Common Mistakes to Avoid
Overloading Command Wheel
Don't assign voice and wheel commands for same function. Eight-slot wheel should contain eight distinct commands. Voice serves as alternative, not supplement. Assign voice to four most-used (Search, Attack, Defend, Carry).
Don't place Defend and Hide adjacent—different purposes. Defend = active combat protection. Hide = passive rotation concealment. Separate to opposite quadrants.
Ignoring Line of Sight
Attack requires direct line of sight. Positioning behind walls while fighting outside prevents rock-throwing. Position in doorways, windows, outdoor positions with clear sightlines.
180-degree Defend barrier faces Barkle's direction when activated. Issuing Defend while facing away creates useless barriers. Manually position facing threats before combat.
Poor Route Adaptation
Standard route assumes uncontested landings. Enemies within 30 meters: Prioritize weapon acquisition over Search. Land on visible weapon spawns, skip Barkle until securing firearms.
Contested scenarios need defensive configs. Swap Search from 3 o'clock to 7 o'clock, move Defend to 3 o'clock for instant barriers.
Command Spam
Multiple commands within 2-3 seconds create queue conflicts. Barkle executes sequentially—rapid inputs override before completion. Allow 3-4 seconds between commands.
Search requires 2-3 seconds stationary scanning. Movement commands (Carry, Recall) during Search interrupt scan, wasting 30-45 second cooldown. Wait for completion indicator (blue pulse).
Setup Optimization
Graphics Settings
- Quality: Smooth
- Frame Rate: Extreme
- Shadows: Disabled
- Anti-aliasing: Disabled
- Style: Colorful mode (30-40% better loot visibility)
- Brightness: 60-70%
- Auto-Adjust Graphics: Enabled
Audio Settings
- High-Quality Audio: Enabled (use headphones)
- Master Volume: 70-80%
- Effects Volume: 90-100%
- Music Volume: 20-30%
Footsteps audible at 15-20 meters. When heard during Search, interrupt looting, issue Defend.
Sensitivity by Screen Size
- 5.5-6 inch: 100-120% sensitivity
- 6.5+ inch: 80-100% sensitivity
Test with 10 consecutive Search commands—each should activate first attempt.
Practice Drills
Training Mode: Practice Pochinki route 15-20 times. Focus on timing benchmarks. Practice contested scenarios with training bots. Execute Defend-Attack-Carry under simulated fire. Aim for sub-0.5 second activation during combat.
Version 4.2 Meta
Weapon Balance Changes
- M416: 5% recoil reduction—optimal for 80%+ recoil control skill
- AKM: 49 HP damage per shot—highest-damage assault rifle. Two-shot eliminations vs Level 1 helmets, three-shot vs Level 2. Requires 70%+ spray accuracy.
Map Modifications
Primewood Genesis ends March 10, 2026. Mode features:
- 15% higher Level 3 gear spawn rates in hot drops
- Pochinki northeast 3-story: Increased DMR spawns
- Yasnaya School roof: 20% higher assault rifle spawns
AI Improvements
Version 4.2 fixes:
- Revive auto-trigger behind solid cover (95-98% reliability vs 70-75%)
- Search accuracy for moving loot (90-95% vs 60-70%)
Competitive Adoption
Pro teams use dedicated Barkle commanders focusing on Search/Carry while teammates handle combat. Increases squad loot efficiency 35-40%.
Staggered Defend commands create overlapping barriers protecting squads during rotations. 200-300 HP barriers absorb sniper fire, reducing casualties 25-30%.
BitTopup for Competitive Play
Why UC Matters
UC unlocks command wheel customization themes improving visual clarity. Premium themes highlight priority commands with distinct colors/icons, reducing activation time 0.1-0.2 seconds. Battle pass provides exclusive weapon skins with improved iron sights.
Royale Pass Elite/Elite Plus offer additional UC rewards and exclusive emotes.
BitTopup Benefits
- 24/7 customer support
- Secure encrypted payment processing
- Competitive pricing vs in-game purchases
- Bulk discounts for large UC purchases
- Fast delivery (2-5 minutes)
- Two-factor authentication
- Wide game coverage
Three-step process: Select UC amount, choose payment, confirm transaction. UC delivered within 2-5 minutes for immediate use.
FAQ
How do I customize the Barkle command wheel?
Settings > Controls > Customize > AI Ally Commands. Drag icons to clock positions. Adjust sensitivity: 100-120% for 5.5-6 inch screens, 80-100% for 6.5+ inch. Test in Training Mode.
What's the fastest loot route?
30-meter Pochinki route: Land northeast 3-story rooftop, recruit by 0:20, Search at 0:30, weapons by 0:45, Carry to western 2-story at 1:00, second Search at 1:15. Completes in 40-45 seconds, secures Level 3 gear in 75-80% of uncontested drops.
Can Barkle pick up loot automatically?
No. Search marks loot within 30-meter radius, but you manually collect. Carry transports you to marked locations, saving 5-7 seconds per transport.
What commands should I prioritize?
Search at 3 o'clock (loot efficiency), Carry at 2 o'clock (repositioning), Defend at 4 o'clock (emergency protection), Attack at 1 o'clock (combat support).
How does 30m loot-scan work?
Search scans 30-meter horizontal radius + 15-meter vertical range, marking crates, airdrops, Level 3 gear with 95-98% accuracy. Covers 2-3 buildings in Pochinki. Execute 8-12 times per match.
Best Primewood Genesis landing spots?
Pochinki northeast 3-story and Yasnaya School 3-story roof. Average 3-4 Barkle icons within 50 meters, offer elevation advantages. Military Base similar but attracts more contesters.


