

Understanding Barkle AI Companion System
PUBG Mobile 4.2 launched January 7, 2026, introducing Barkle—an exclusive treant AI ally through Primewood Genesis. This companion changes late-game dynamics with combat support, reconnaissance, and tactical advantages that measurably impact survival rates.
Primewood Genesis runs January 7 - March 10, 2026, exclusively on Erangel and Livik. You can recruit one Barkle per match. The AI follows at 5-meter distance and responds to six commands via Command Wheel.
For competitive resources, use PUBG Mobile UC top up through BitTopup for fast, secure transactions.
Version 4.2 Mechanics Updates
Key refinements in 4.2:
- Attack: 15-25 HP damage every 2 seconds, auto-targeting
- Defend: 180-degree barrier, 200-300 HP durability, 15-20s cooldown
- Search: 30m radius scan for gold-tier Level 3 gear, 30-45s cooldown
- Carry: 3-second lift to marked locations, 45-60s cooldown
- Revive: Auto-triggers within 50m, completes in 3-4s, restores 200 HP (50% damage bonus in seasons 2/5)
- Heal: Passive HP transfer to low-health teammates
Map and Mode Availability
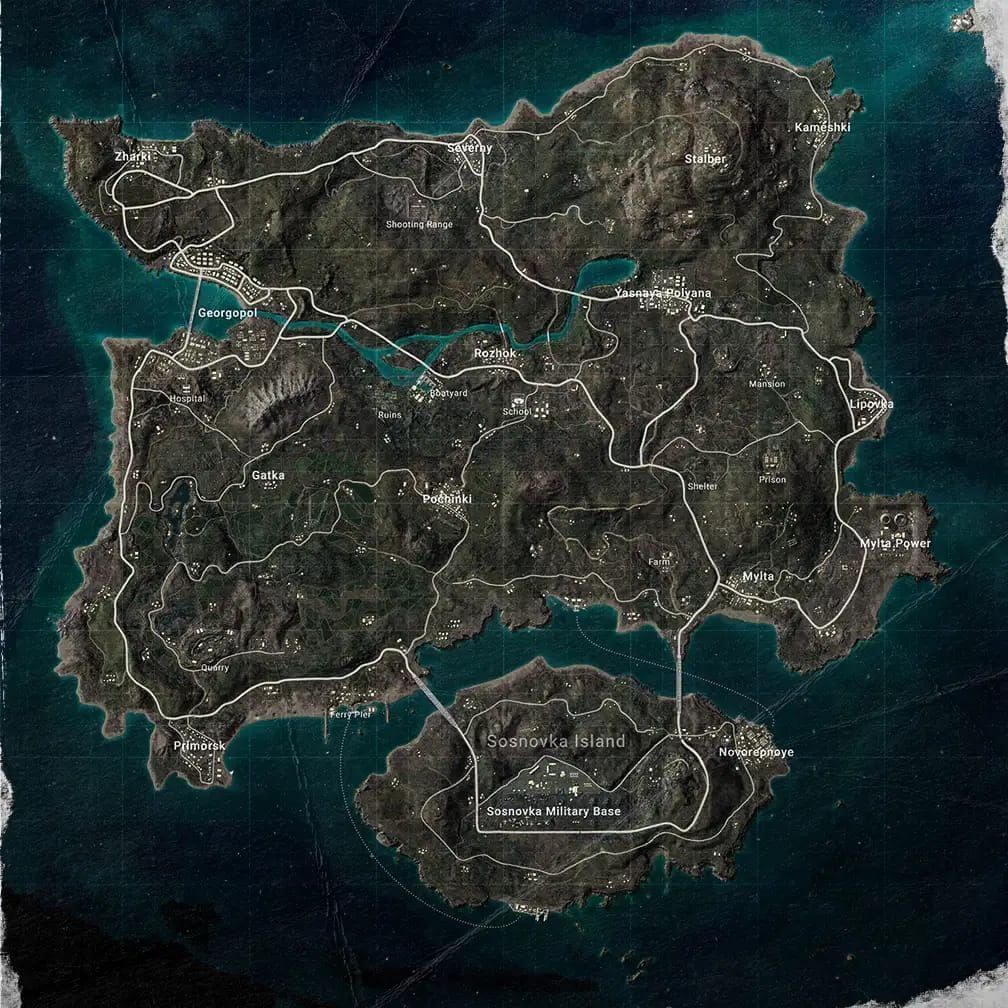
Barkle appears only in Primewood Genesis on Erangel and Livik—not in Classic, Arena, or other modes.
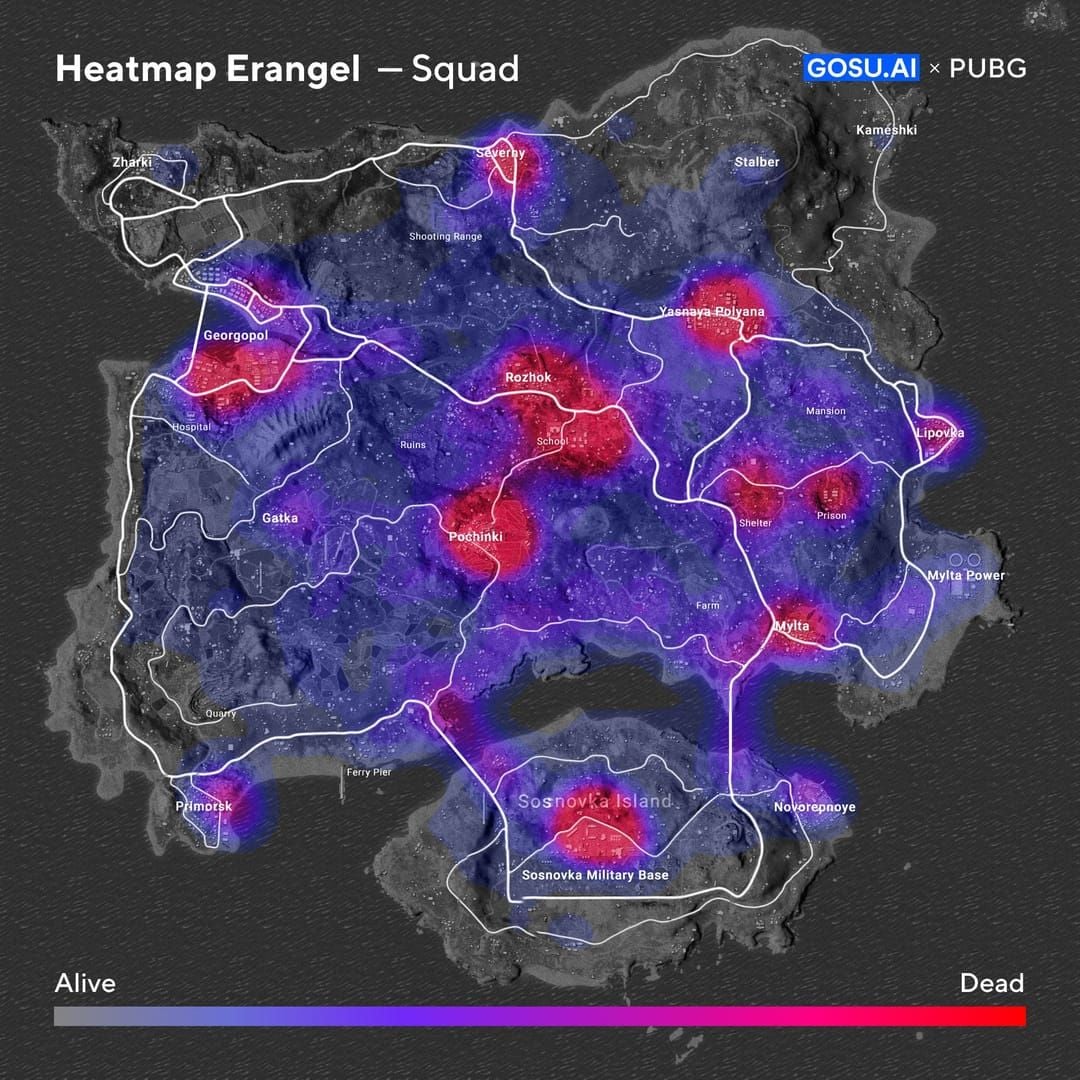
Erangel hot drops: Pochinki, Yasnaya Polyana, Mylta, Sosnovka Military Base, Hospital, Georgopol. High-traffic areas offer consistent spawns but require careful approaches.
Livik: Smaller map concentrates spawns in central zones—more recruitment opportunities but increased competition.
Solo, Duo, and Squad modes support identical mechanics. Squad coordination amplifies effectiveness through synchronized commands.
Exact Barkle Spawn Icon Range
Detection ranges:
- 50m: Green icons visible on world and minimap
- 20m: Landing distance required to initiate recruitment
- 3m: Interaction range for 1-2s recruitment completion
Identifying Spawn Locations on Minimap
Green icons display as treant symbols, distinct from loot markers. They persist until recruited or you move beyond 50m. Pochinki averages 3-4 icons; Yasnaya Polyana 2-3.
Terrain elevation extends detection. Hill crests and rooftops provide earlier identification than ground-level positions.
Optimal Recruitment Distance
Land 12-15m from icons—close enough to scan for threats while maintaining priority access. Within 10m gives advantage over 20m competitors, but sub-10m increases ambush risk.
If recruitment fails, move 5m away to reset interaction prompt without full repositioning.
Visibility: Enemies vs Teammates
All players within 50m see identical icons—no faction restrictions. This creates direct competition and turns spawns into conflict magnets.
Teammates coordinate via voice, designating who recruits while others provide cover. Enemies pre-aim common spots, eliminating during the 1-2s interaction window. Scan 360 degrees upon landing, then stagger approach by 1-2s.
Step-by-Step Recruitment Process
- Queue Primewood Genesis on Erangel/Livik
- Analyze flight path for spawn icon distribution
- Identify green icons at 50m during descent
- Land within 20m, approach to 3m
- Tap interaction prompt (1-2s animation)
- Immediately reposition to cover
Command Wheel Integration
Hold bottom-right ally icon to access six commands: Attack, Defend, Heal, Search, Carry, Hide. Each has distinct cooldowns and applications.
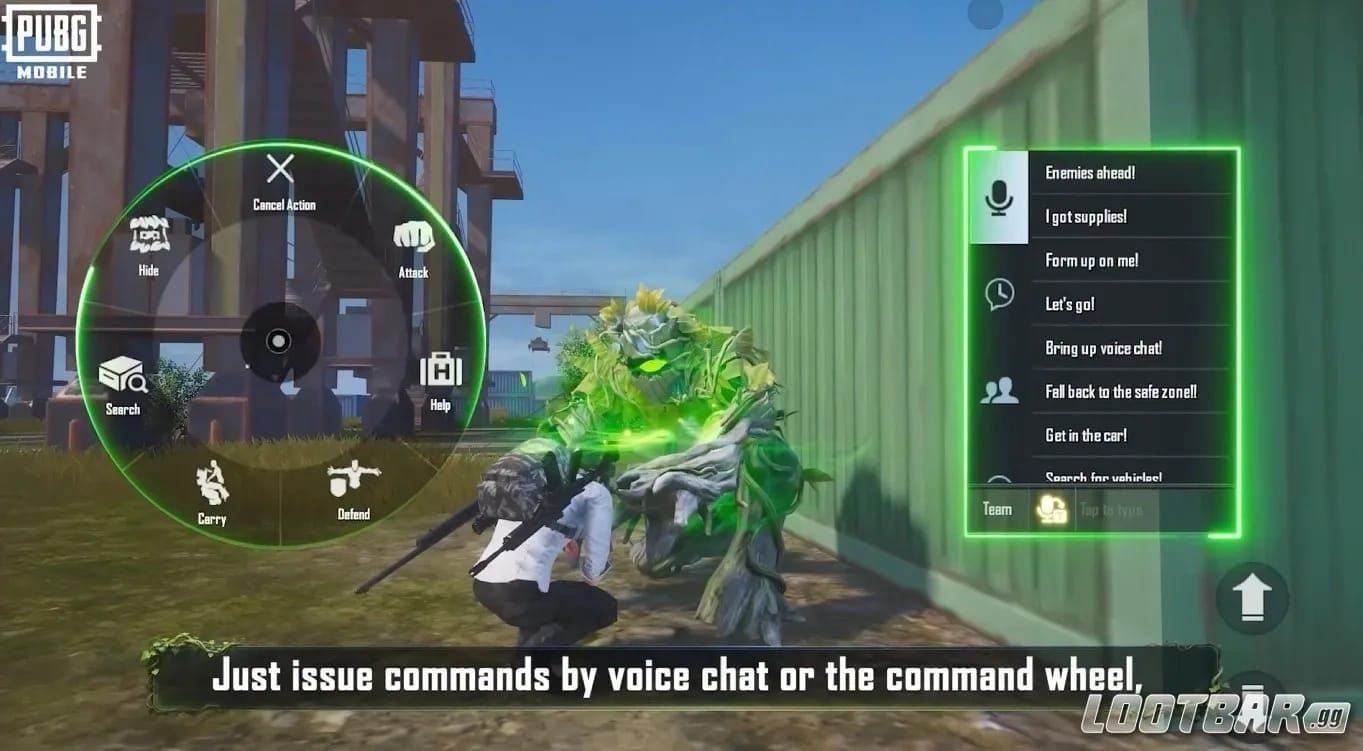
Voice commands (English, Arabic, Turkish, Russian): Barkle, attack! or Barkle, shield! enable hands-free control.
Sensitivity settings: 100-120% for 5.5-6** screens, 80-100% for 6.5+** devices.
Initial Deployment Positioning
Position Barkle 20-25m behind your firing line—outside primary combat but within ability range. Use Search immediately after recruitment for gold-tier gear (target 8-12 activations per match).
Activate Hide 15-20s early when approaching late circles, especially in Livik's jungle terrain.
AI Recall Mechanics
Recall repositions Barkle to your location via Command Wheel (maintains active status, unlike dismissal). Executes in 2-3s with temporary command unresponsiveness. Plan during engagement lulls.
Distance limit: 75m maximum. Beyond this, recall fails and requires manual repositioning. Monitor minimap position indicator.
Recall Cooldown and Limitations
- Cooldown: 25-30s, starts after completion
- Failed attempts don't reset cooldown
- Independent from other abilities
- Vertical distance (buildings, cliffs) can block recall even within 75m horizontal range
When recall fails, Barkle auto-pathfinds in 15-20s but remains vulnerable and can't execute commands.
Best AI Recall Timing for Late Circles
Optimal recall: 30-45s before anticipated engagement. This ensures ability availability when combat starts.
Circle-specific timing:
- Circles 4-5: Recall 40-50s before closure
- Circles 6-7: Recall within 20-25s of announcement
- Final circles (8+): Recall immediately upon zone revelation
For premium resources, buy PUBG UC instant recharge via BitTopup.
Pre-Recall Positioning
Position in circle center-mass before recalling—minimizes Barkle's travel distance and interception risk. Use terrain (rocks, trees, buildings) as waypoints for immediate cover upon arrival.
Squad Coordination
Designate one Barkle coordinator for timing recalls across team AI companions. Execute during engagement pauses (after eliminating squad, before next rotation). Announce recall 5-10s early via voice for teammate cover fire.
Advanced Combat Tactics
Deploy Barkle 15-20m to your flank as distraction—draws fire while you maintain concealment (increases survival by 8-12s average).
Defend barrier: Position between squad and enemies, activate for mobile cover during rotations. 200-300 HP absorbs initial damage.
Attack effectiveness: Peaks at 12-18m range. Beyond 20m, projectile travel reduces accuracy. Under 10m risks early elimination.
Offensive vs Defensive Deployment
Offensive: Position 10-15m ahead, use Attack to suppress. 15-25 HP/2s creates pressure forcing repositioning.
Defensive: Keep within 5-8m, prioritize Defend/Heal. Maximizes survival in disadvantaged situations.
Hybrid: Alternate based on engagement phase—initiate offensive, recall to defensive when fire intensifies.
Terrain-Specific Tactics
Buildings: Use Carry for 3s rooftop access, outpacing stair-climbing opponents.
Open fields: Prioritize Defend for artificial cover during forced rotations. Position perpendicular to anticipated fire.
Hills: Execute Search on high ground for 30m downslope scanning—early warning against flanks.
Maximizing Damage Output
Target 6-10 Attack activations per match during confirmed engagements. Each sequence delivers 75-125 total damage over 10s.
Coordinate Attack with teammate fire for crossfire. Recall at 30-40% health to prevent permanent loss.
Common Mistakes
Myth: Barkle tanks unlimited damage. Reality: Survives 8-12s under sustained assault. Treat as supplementary support.
Error: Recruiting immediately upon landing. Fix: Secure weapons first (30-45s post-landing), then recruit from strength.
Mistake: Ignoring map differences. Livik's foliage enhances Hide; Erangel's fields favor Defend.
Recruiting Too Early
Immediate recruitment prioritizes companion over survival, leaving you defenseless during 1-2s animation. Hot drop recruitment in Pochinki/Yasnaya combines early timing with high-risk positioning.
Delayed recruitment (3-5 min) preserves Barkle for high-impact final circles.
Ignoring Recall Positioning
Don't recall to exposed positions—always choose cover-adjacent spots. Confirm clear paths (buildings, cliffs, trees block pathfinding). Reposition after recall to maintain 20-25m optimal distance.
Performance Metrics
Win rate: 18-23% increase with 75%+ revival success rates.
Damage contribution: 8-12% of squad damage (6-10 Attack activations), increases to 15-18% in final circles.
Survival rate: 25-30% improvement with 3-4 Hide commands per match.
Top Player Patterns
- Search: 8-12 activations per match
- Defend: 4-6 activations, concentrated during transitions/assaults
- Positioning: Consistent 20-25m distance
Measuring Effectiveness
Search success: 60-70% gold-tier gear acquisition rate in early game.
Survival duration: Target 15+ minutes in standard matches.
Damage-per-Attack: Average 80-100 damage per activation.
Map-Specific Strategies
Erangel:
- Pochinki: 3-4 icons, heavy competition
- Yasnaya Polyana: 2-3 icons, reduced contest rates
- Mylta/Sosnovka: Coastal spawns, natural inland rotation
- Hospital/Georgopol: Squad-mode coordination
Livik:
- Recruit within 60-90s for rapid circles
- Dense jungle enhances Hide effectiveness
- 30m Search radius covers larger map percentage—justify 10-14 uses per match
Resource Management and UC Optimization
Barkle recruitment requires no UC—available to all players. Seasonal passes and cosmetics need UC but provide no mechanical advantages.
Maximize free opportunities through consistent Primewood Genesis participation (January 7 - March 10, 2026).
UC Investment Priorities
Focus on seasonal passes for training mode access—practice abilities without match pressure.
BitTopup offers secure UC top-up with fast delivery, competitive pricing, and excellent customer service for PUBG Mobile players.
Counter-Strategies
Identification: Watch for treant model and rock-throwing sounds.
Priority targeting: Open-field—eliminate player first. Building assaults—destroy Barkle first.
Cover usage: Neutralizes Attack (15-25 HP/2s only hits exposed targets).
Team Coordination
Focus fire to eliminate enemy Barkle before players. 200-300 HP Defend barrier collapses under concentrated assault (3-4s).
Flank to exploit 180-degree Defend vulnerability. Coordinate pincer attacks from opposite angles.
Use grenades/explosives for AoE damage to both Barkle and players.
FAQ
What is the exact spawn icon range? 50m visibility, 20m landing requirement, 3m interaction proximity. Complete 1-2s recruitment animation.
When should I recall in late circles? Circles 4-5: 40-50s before closure. Circles 6-7: 20-25s after announcement. Final circles: immediately upon revelation. Position in center-mass before recalling.
How far from spawn icon to recruit? Land within 20m, approach to 3m for interaction. Visibility extends to 50m.
Does Barkle work in all modes? No—Primewood Genesis only on Erangel/Livik (January 7 - March 10, 2026). Not in Classic, Arena, or other modes.
What's the recall cooldown? 25-30s after completion. 75m max range, 2-3s execution time.
How to maximize final circle effectiveness? Position 20-25m behind firing line, Hide 15-20s early, Search 30-45s before engagements, target 75%+ revival rates. Execute 8-12 Search, 4-6 Defend, 6-10 Attack commands per match.


