

Understanding Safe Landing Fundamentals
Defining Safe vs Hot Landing Zones
Here’s the thing about safe landings – they’re not just about avoiding crowds. You need three key ingredients: low player density (we’re talking 1-3 opponents max), decent loot that won’t leave you scrambling with a pistol, and positioning that doesn’t trap you in the blue zone later.
Hot drops? Those are chaos incarnate. 8-12 players landing within seconds of each other, fighting over scraps while you’re still trying to figure out which building has an actual weapon.
The math tells an interesting story here. Nusa crams 32 players into just 1 square kilometer – that’s intense. Livik spreads 52 players across 4 square kilometers, giving everyone more breathing room. This density difference isn’t just numbers on paper; it completely changes how you should approach each map.
Solo Queue Landing Psychology
Nusa’s Auto Recall feature flips traditional PUBG psychology on its head. Get eliminated in the first four minutes? No problem – you’re back in the game automatically (solo mode only). This mechanic makes players way more aggressive than usual, which actually works in your favor if you’re playing it smart.
Think about it: while everyone’s rushing toward Pochinki-style mayhem, those traditionally safe spots become even safer. The impatient crowd gravitates toward instant action, leaving quality loot areas surprisingly empty.
I’ve been tracking landing patterns, and successful solo players consistently choose spots that score 7+ on loot quality while keeping opponent count under 2. It’s not rocket science, but discipline matters.
Nusa Map: Top Safe Landing Spots
Tier 1 Safe Zones
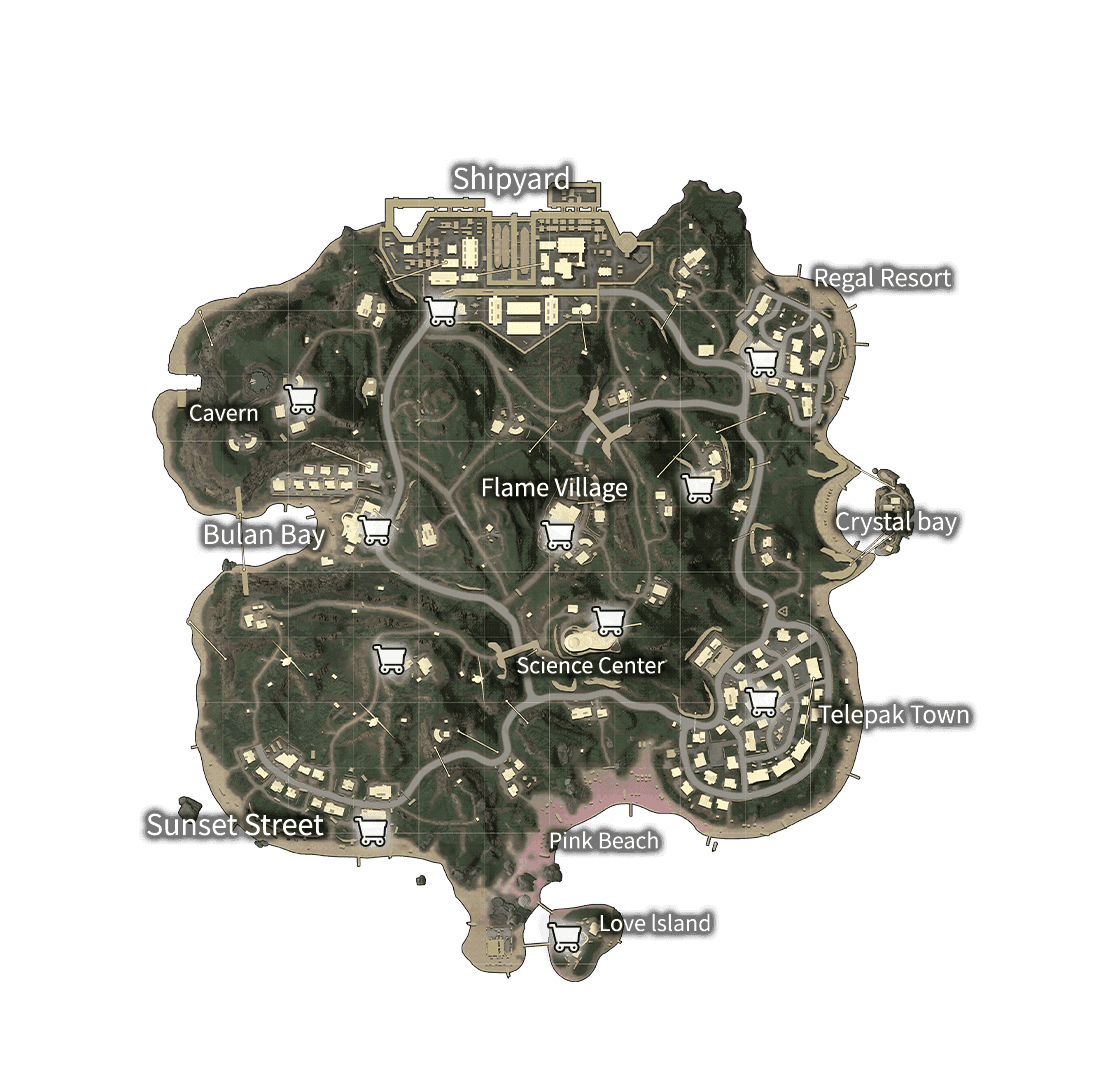
Telepak Town might seem counterintuitive – it’s literally the biggest city on the map. But here’s what most players miss: size works in your favor here. The sprawling layout spreads loot across dozens of buildings, so you’re not fighting three people for one assault rifle.
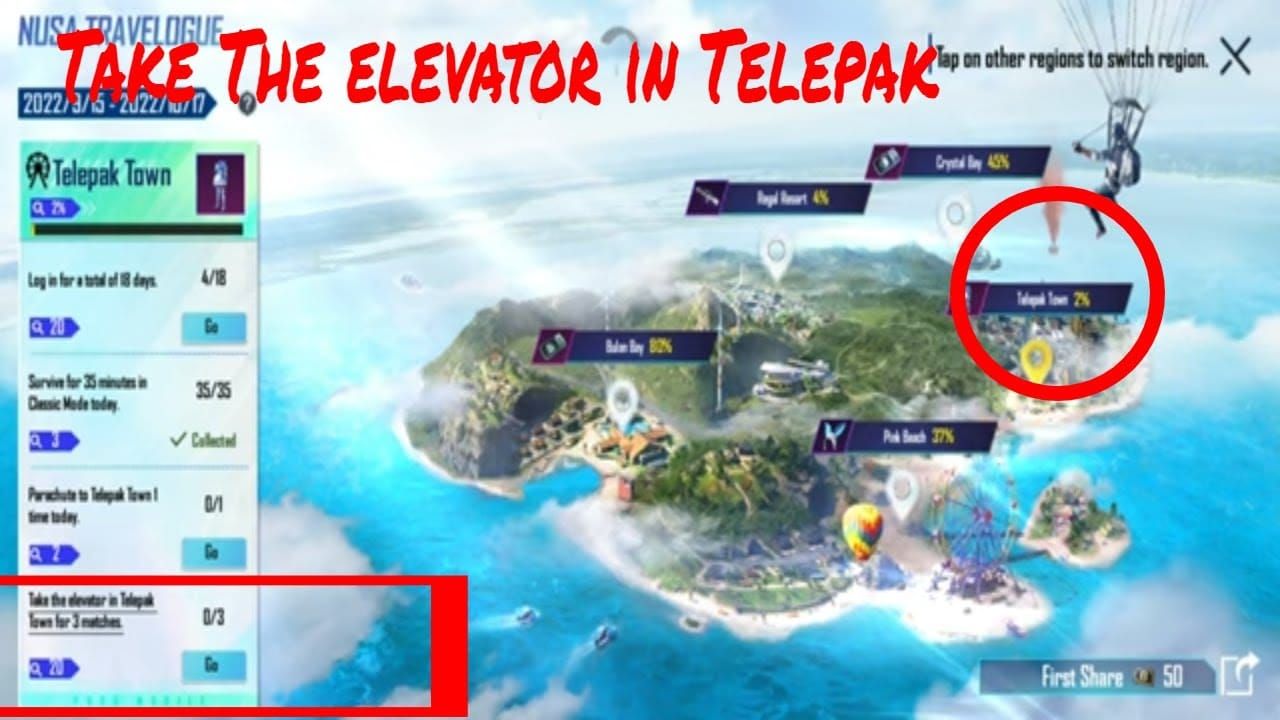
Those functional elevators? Game-changers. While other players are stuck on ground floors, you can zip up to higher levels for better positioning. Plus, Mecha Soldiers on 7th floors practically guarantee Level 3 gear. The peripheral location keeps traffic light – usually just 1-2 other players max.
Shipyard feels like Georgopol’s little brother, and I mean that in the best way possible. Container-based loot distribution means predictable spawns, excellent cover, and multiple escape routes. Vehicle spawns are reliable (hello, Quad rotations), and you’ll consistently find ARs and Level 2 gear without the Georgopol death trap experience.
Tier 2 Moderate Risk Locations
Science Center is high-risk, high-reward territory. Those hidden spots consistently spawn Level 3 helmets and vests – we’re talking premium gear. But the compact layout means if someone else had the same idea, you’re probably going to meet them very quickly.
My rule for Science Center: only land here if the flight path passes directly overhead. Otherwise, skip it entirely.
Livik Map: Optimal Solo Queue Landing Strategies
Best Safe Spots
Iceborg absolutely dominates Livik’s safe landing tier, and it’s not even close. That northeast corner location features a massive church surrounded by solid buildings, all packed with loot – assault rifles, armor, medical supplies, the works.
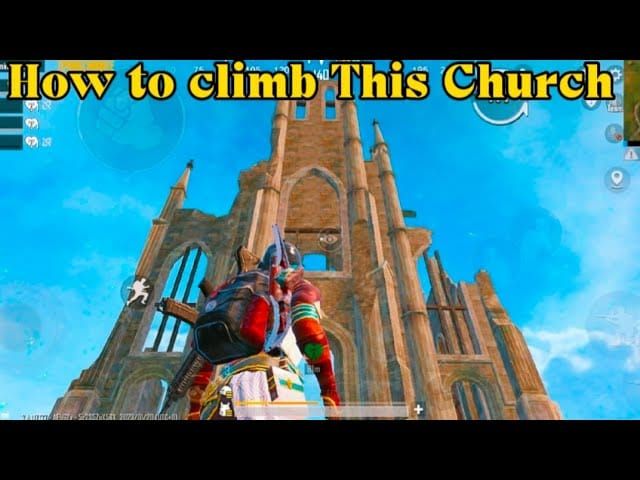
Most flight paths don’t favor Iceborg, which keeps the tourist traffic minimal. Start with the church for sniper rifle spawns, then systematically work through surrounding houses. It’s methodical, safe, and effective.
East Port combines the best of both worlds – small town buildings for quick looting plus large warehouses for diverse gear. Being on the eastern edge means minimal early traffic, and those boat spawns? They’re not just for show. Water-based escape routes can save your life when things get dicey.
Hot Springs offers something unique: health regeneration without burning through your medical supplies. Players can literally soak in the springs to restore health. In solo queue, conserving meds for later circles is huge, and the northeast positioning keeps you relatively safe while providing this utility.
Fast-Paced Options
Blomster strikes an excellent balance in the northwest. You get small houses and larger buildings with solid loot distribution, but without the complete chaos of true hot drops. The slightly elevated position gives you good sightlines for early enemy detection, plus vehicle spawns are reliable.
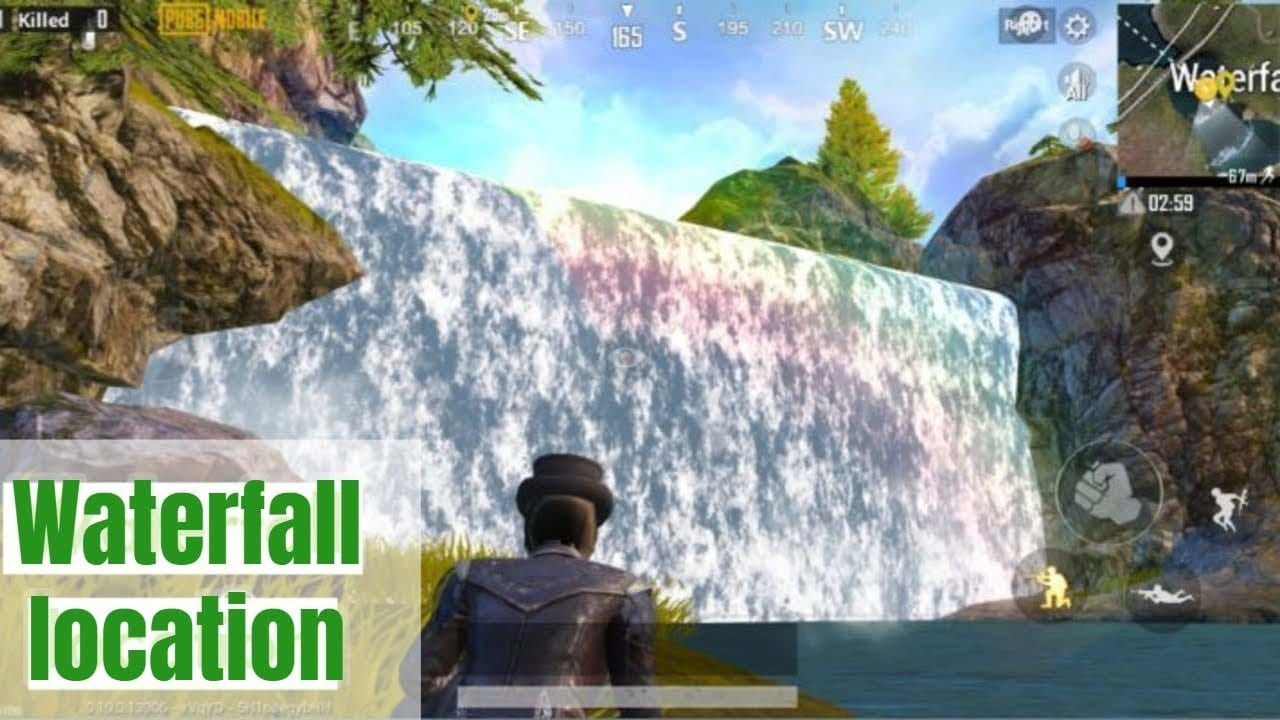
Waterfall – now this is Livik’s best-kept secret. There’s a hidden cave behind the waterfall containing Super Crates with rare weapons like the Mk12 DMR and Level 3 equipment. The jetski spawn at the top provides immediate escape options. It’s basically a hit-and-run paradise.
Nusa vs Livik: Map Comparison
Loot Density Comparison
Nusa’s loot density is frankly ridiculous – 6k heatmap rating across just 1 square kilometer. This means virtually every building cluster provides viable starting equipment. Livik concentrates its loot more heavily in named locations, creating distinct quality tiers.
The exclusive weapons make a real difference too. Nusa’s NS2000 shotgun has dual firing modes – hip-fire for spread damage, ADS for single-slug precision dealing 99 damage at 10+ meters. That’s not your typical shotgun. Livik’s Mk12 DMR (48 base damage, 0.13 rate of fire) gives you superior mid-range capabilities that can control entire areas.
Rotation Speed Differences
Here’s where Nusa gets brutal: the blue zone moves 70% faster than traditional maps. First shrink begins under 2 minutes versus 5+ minutes elsewhere. By the 7-minute mark, you’re looking at an eighth circle with 200-250m diameter, and the blue zone will absolutely melt you – 30% health loss within seconds.
Livik’s 10-15 minute matches feel luxurious by comparison, giving you time to plan strategic rotations across that 2x2 km area.
Early Fight Decision Making
When to Engage vs Avoid
Engage immediately if you’ve secured an AR or SMG while enemies are stuck with inferior weapons. AKM delivers 48 base damage with 0.1s rate of fire – that dominates pistols or melee weapons. M416 provides 41 damage at 0.085s intervals, which is still overwhelming against basic equipment.
But if you land late or only grab basic gear? Avoid fights. Period.
Position assessment becomes crucial when multiple enemies are nearby. Secure high ground immediately – those rooftops in Telepak Town or elevated positions in Iceborg provide massive advantages for tracking enemies and easier disengagement when things go south.
Positioning for Early Fights
Prioritize cover and escape routes over aggressive angles. In building-dense areas, control doorways and windows rather than gambling in open courtyards. Close-quarters early fights favor defensive positioning with quick peek opportunities.
For PUBG UC Top Up players using premium weapon skins, early fights showcase those investments while building psychological advantages. But remember – premium equipment can’t overcome poor positioning.
Third-Party Prevention
Choose spots with limited approach angles and excellent visibility. Iceborg’s church provides outstanding sightlines, while East Port’s warehouse positioning limits enemy approach vectors.
When fights become unavoidable, prioritize speed. Quick eliminations prevent audio attraction, while prolonged engagements broadcast your position across significant map areas. Not ideal.
Loot Prioritization After Safe Landing
Essential Gear Checklist
Solo queue prioritization follows a strict hierarchy: weapon acquisition first, armor protection second, medical supplies third, then utility items. ARs like M416 or AKM provide effectiveness across all ranges. SMGs like Vector (33 damage, 0.067s rate of fire) excel close-quarters but limit your mid-range options.
Immediate Priority: Any AR/SMG, Level 2+ vest and helmet, first aid kits or energy drinks, 90+ rounds for your primary weapon, grenades for area denial.
Secondary Priority: Scope attachments (2x minimum for ARs), weapon attachments for recoil control, Level 3 gear upgrades, vehicle fuel and repair kits.
Weapon Priority Rankings
Tier 1: M416 (41 damage, excellent attachment ecosystem), AKM (48 damage, high single-shot potential), UMP45 (40 damage, stable platform)
Tier 2: Vector (insane close-range DPS), Mk12 on Livik (48 damage DMR), NS2000 on Nusa (versatile shotgun mechanics)
That NS2000’s dual-mode functionality really shines in Nusa’s close-quarters combat scenarios, while Mk12’s burst-fire capability gives Livik players superior mid-range control.
Early Game Rotation Strategies
Safe Rotation Timing
Nusa demands rotation planning the moment you land – that first circle shrinks in under 2 minutes. Monitor the blue zone timer obsessively and prioritize movement over additional loot. Livik allows slightly more flexibility, but early rotation still prevents those brutal chokepoint battles.
Optimal Windows: Nusa – begin movement with 90 seconds remaining on first circle. Livik – start rotation with 2-3 minutes remaining. Both maps – prioritize vehicle acquisition for long-distance rotations.
Vehicle Acquisition
Nusa’s 35 vehicle spawn locations include reliable Quad spawns near Shipyard and Telepak Town outskirts. Quads provide excellent stability and flip resistance for solo players – crucial when you don’t have teammates to revive you after a vehicle mishap.
Livik’s distribution favors named locations: East Port (boats), Power Plant (cars), and Blomster (various types).
Pro tip: use vehicles for initial rotation speed, then abandon them before entering the next safe zone. Vehicle noise attracts enemies and limits positioning flexibility in smaller circles.
Common Landing Mistakes
Overcrowded Zone Errors
The most frequent mistake? Landing in artificially overcrowded safe zones. When flight paths directly cross popular spots like Iceborg or Telepak Town, these become temporary hot drops with 4-6 players instead of the usual 1-2.
Always maintain 2-3 backup landing options for each preferred spot. Visual confirmation during descent helps identify overcrowded situations – count parachutes heading toward your intended zone. More than 2 other players? Time for immediate route adjustment.
Poor Timing Mistakes
The fastest landing technique requires initiating dives at 375 meters from target locations. Dive straight down for maximum speed until parachute auto-deployment. Practice this timing in training mode until it becomes muscle memory – competitive advantages often come down to 5-10 second equipment acquisition differences.
Loot Greed Pitfalls
Establish clear loot thresholds for movement decisions. Minimum Viable Loadout: Primary weapon with 60+ rounds, Level 1+ armor, 2+ healing items, basic attachments. Once you meet minimum thresholds, prioritize movement over optimization.
That perfect scope can wait. Staying alive can’t.
2025 Meta Changes
New Update Impacts
The 2025 release of Rondo will disrupt both the competitive meta and player base. Professional players anticipate that the skyscraper-centric design will introduce elevator squats and stair control strategies—potentially shifting player preferences away from smaller maps like Nusa and Livik.
This redistribution could actually make our favorite compact maps safer for casual players. Sometimes the best strategy is letting the pros chase the new shiny object while you master the fundamentals.
Recent updates strengthened NS2000’s slug damage and improved Mk12’s burst accuracy, making these map-exclusive weapons more viable for competitive play. These changes increase the value of landing in locations with higher spawn rates for specialized weapons.
Pro Player Adaptations
Professional players increasingly utilize Nusa’s Auto Recall for aggressive skill development, treating early eliminations as low-cost learning opportunities. Smart approach, honestly – fail fast, learn faster.
Livik strategies focus heavily on secret location exploitation. Waterfall cave and Underground Bunker routes provide consistent high-tier loot with minimal risk. The pros know these spots inside and out.
Advanced Solo Queue Techniques
Parachute Control Mastery
Advanced control involves wave-flying techniques – alternating between steep dives and shallow glides to maintain speed while covering horizontal distance. Steps: Begin steep dive for speed accumulation, transition to shallow glide to maintain momentum, repeat wave pattern, execute final steep dive for precise targeting.
Master players can adjust landing zones by 200-300 meters using wave-flying while maintaining competitive arrival times. It’s like having a second chance at zone selection mid-flight.
Sound-Based Decision Making
Audio during descent provides critical intelligence that most players completely ignore. Gunfire indicates early fighting, suggesting overcrowded zones. Vehicle sounds reveal rotation patterns you’ll want to avoid. Absence of audio? That confirms truly safe zones.
Analysis Priorities: Gunfire intensity indicates player density, vehicle sounds suggest routes to avoid, building destruction reveals explosive weapon presence.
Rank-Specific Strategies
Bronze-Gold: Focus on consistent safe landings with reliable loot. Player skill variations are high at these ranks, making survival prioritization more valuable than aggressive plays.
Platinum-Crown: Utilize meta knowledge advantages. Most players know basic safe spots but lack advanced route knowledge – that’s your edge.
Ace-Conqueror: Expect optimal play from opponents. Success requires perfect execution of advanced techniques and innovative approaches that catch experienced players off-guard.
For players investing in premium content, rank-appropriate strategies maximize cosmetic purchase value by ensuring consistent survival. BitTopup provides secure UC purchases with competitive pricing, fast delivery, and comprehensive customer support for reliable ranking progression.
FAQ
What makes a landing spot safe in solo queue? Safe spots combine low player density (1-2 opponents maximum), adequate loot quality, and strategic positioning for rotations. Telepak Town and Iceborg offer these advantages while avoiding those 8-12 player hot drop concentrations that turn into immediate elimination festivals.
How do Nusa and Livik compare for beginners? Livik proves more beginner-friendly with its 2x2 km area allowing strategic breathing room and 10-15 minute matches providing learning time. Nusa’s 1x1 km size with 5-8 minute matches creates intense pressure, but offers Auto Recall for early elimination recovery – which can actually be great for skill development.
When should solo players take early fights? Engage only when you’ve secured superior weapons (AR/SMG) while enemies have basic equipment, and you’re controlling advantageous positioning. AKM’s 48 base damage or M416’s 41 damage absolutely dominate pistol-equipped opponents. Avoid fights when landing late or facing multiple opponents – that’s just asking for trouble.
What loot should players prioritize after landing? Follow this strict order: AR/SMG first, Level 2+ armor second, medical supplies third, 90+ rounds ammunition. Skip attachment optimization initially – survival trumps perfect loadouts. Prioritize NS2000 on Nusa for dual-mode versatility, Mk12 on Livik for mid-range capabilities.
How has 2025 meta changed landing strategies? The meta emphasizes faster gameplay, making small map expertise more valuable than ever. The upcoming Rondo release may redistribute competitive players, potentially making Nusa/Livik safer for everyone else. Weapon balance changes have strengthened map-exclusive weapons, increasing the value of locations with higher spawn rates.
What are the biggest landing mistakes? Critical errors include landing in overcrowded safe zones when flight paths favor them, poor timing that leaves you fighting for leftover loot, and loot greed that delays rotations beyond safe blue zone timing. Combat these with backup options, precise dive timing at 375 meters, and minimum loadout thresholds before prioritizing movement over optimization.


