

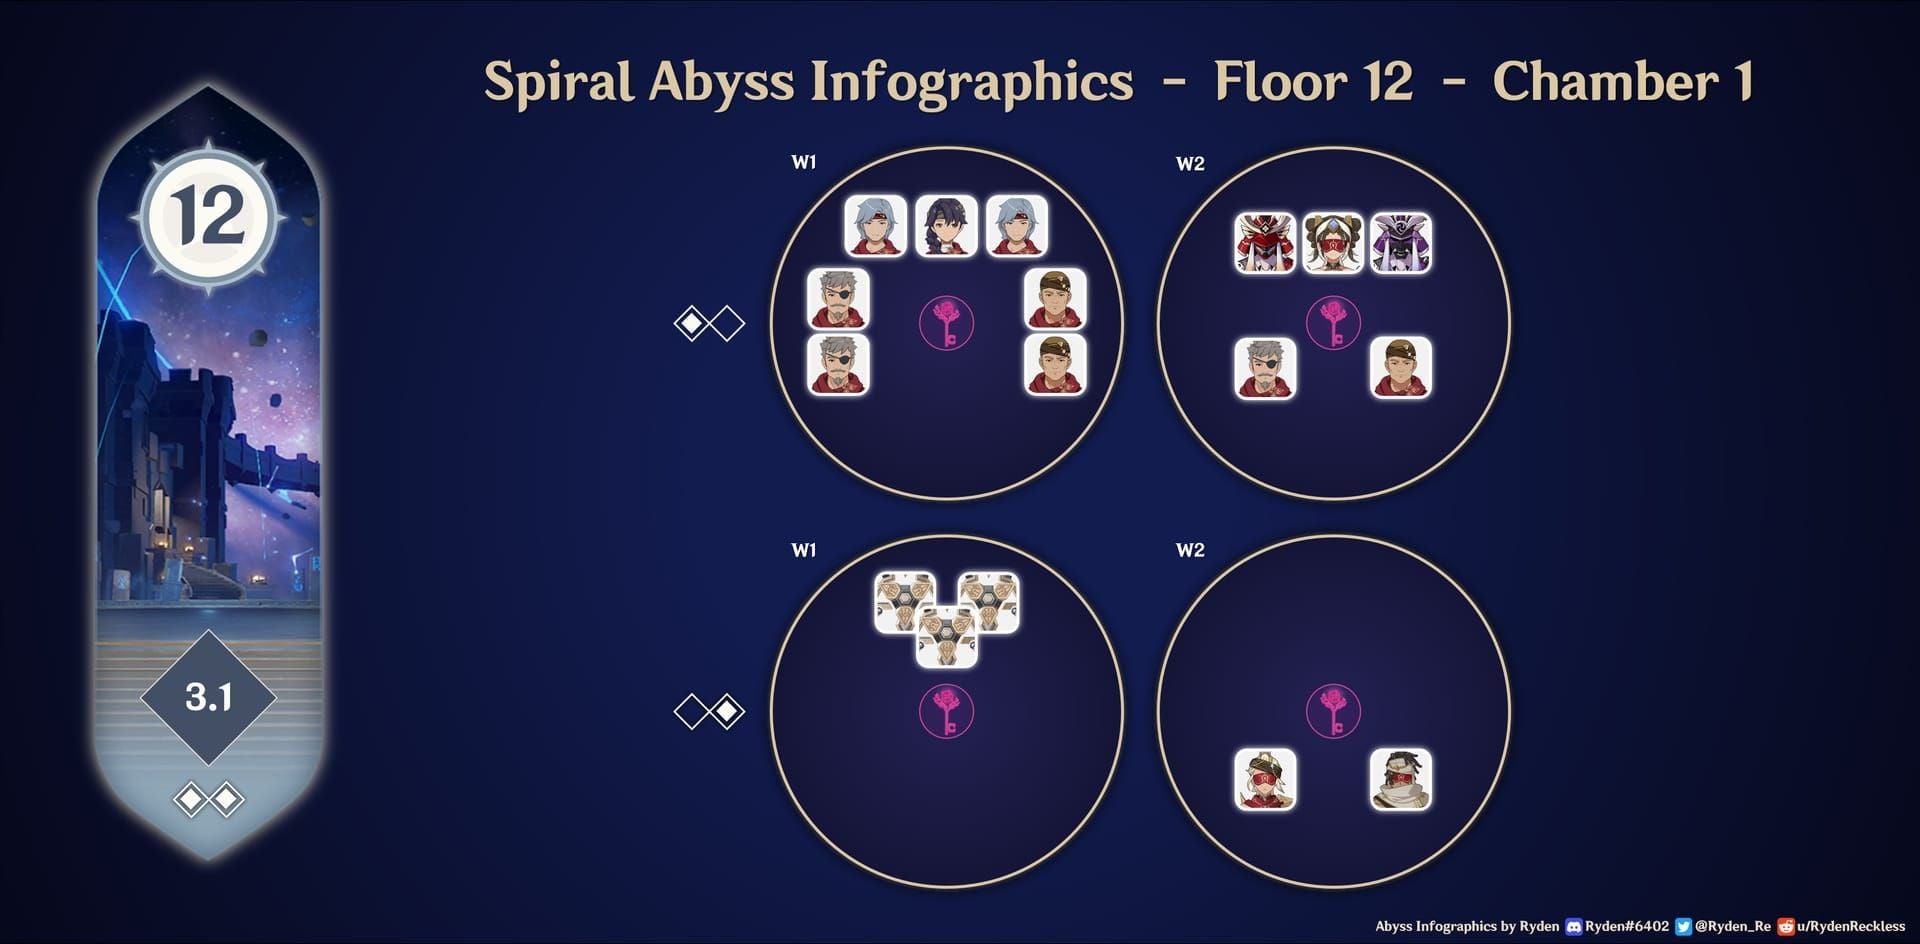
Understanding Wayob Manifestations: Enemy Mechanics
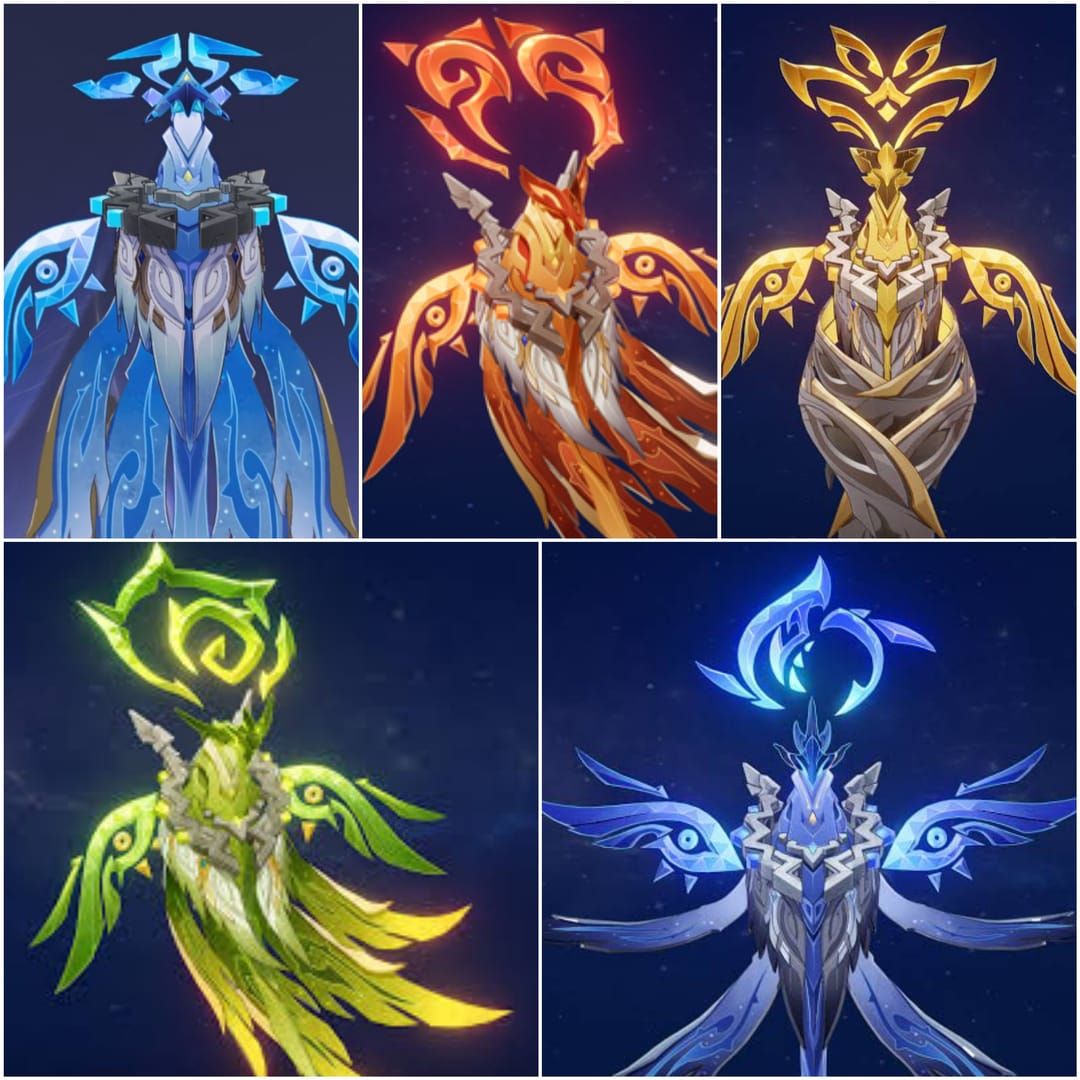
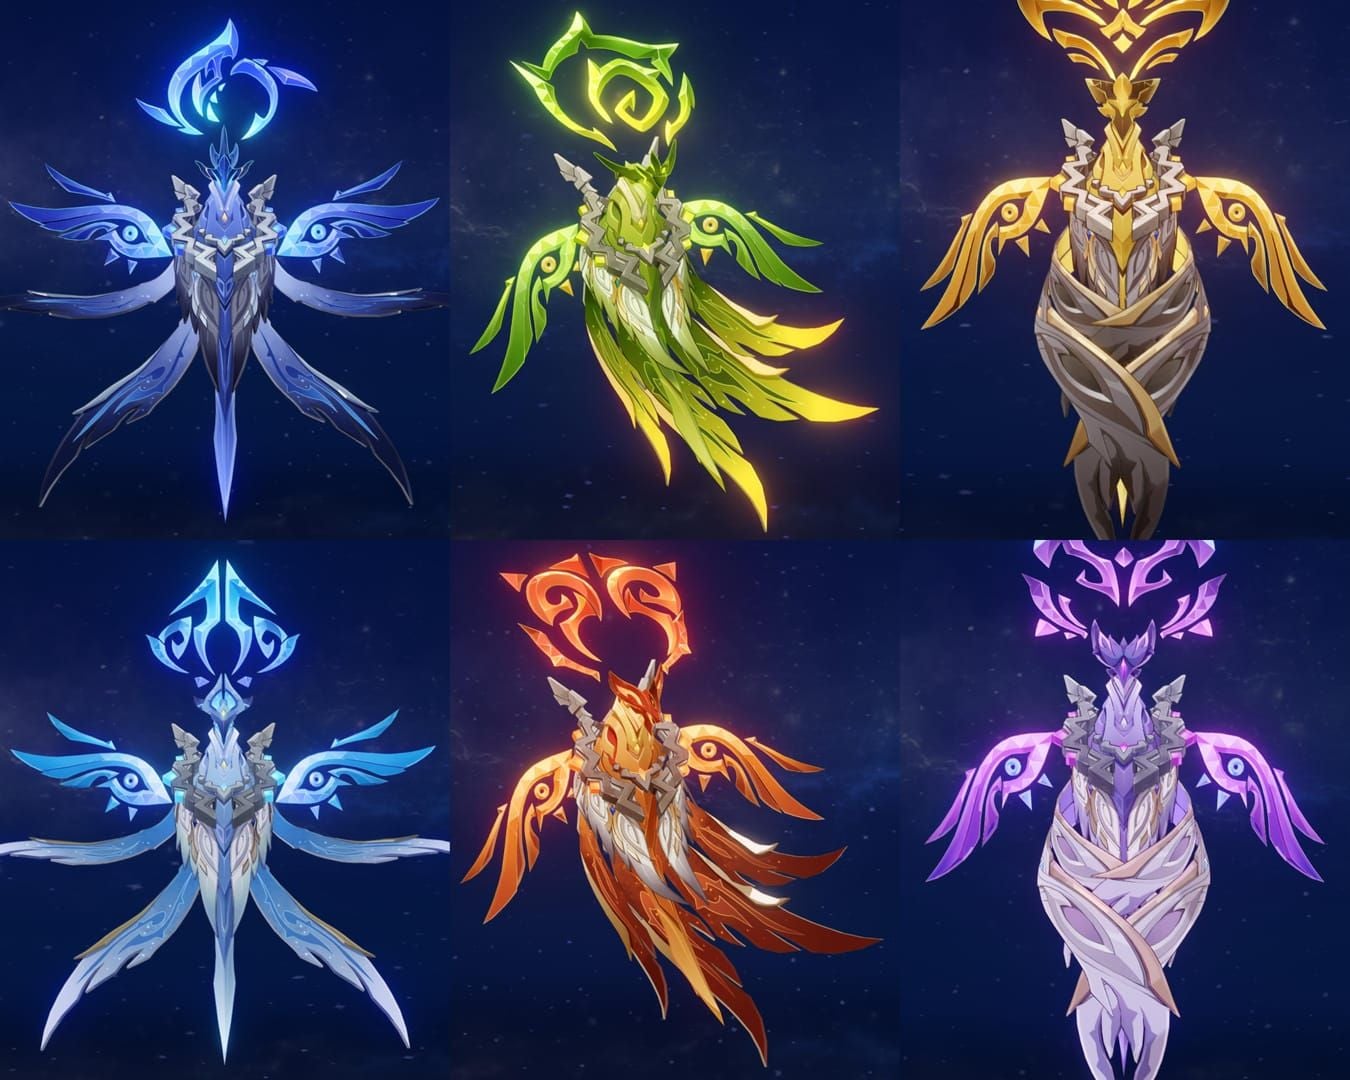
Wayob Manifestations are elite Natlan enemies introduced August 28, 2025 in Version 5.0. These elemental constructs appear across multiple Abyss rotations—Thundering variant in Floor 12-2 (Version 6.1), Burning-Aflame in Second Chamber Lower Half (Version 5.8).
Level 90 Biting-Cold Wayob has 259,702 HP normally, 5,639,244 HP as Local Legend. In Abyss, they deploy arena shields at 111.4% max HP, creating energy-draining zones that hurt burst-dependent teams.
For optimal team building, Purchase Genesis Crystals at BitTopup for competitive pricing and instant delivery.
Weight Class and CC Susceptibility
Wayobs fall under 150 weight units, allowing full immobilization by Anemo CC. Venti's Wind's Grand Ode achieves 100% immobilization with 15-meter radius vortex lasting 8 seconds. This makes Anemo grouping highly effective.
Wayobs teleport when isolated from combat 3+ seconds or when you move beyond aggro range. Maintain damage pressure to keep them stationary.
Arena Mechanics
Wayob shields drain energy but breaking them restores 90 base Energy and paralyzes enemies for 5 seconds. Flow-Inverted Wayob's Trial Arena lasts only 13 seconds—precision matters.
Break shields with fast-hitting attacks or reactions. Multi-hit Skills, Bursts, and normal chains work best. Flow-Inverted Hydro shield reaches 48% effectiveness; Biting-Cold Cryo shield breaks fastest with Pyro/Electro.
Anemo Crowd Control Method
Anemo CC leverages pull effects to consolidate Wayobs for AoE damage, using vacuum effects that draw enemies regardless of spawn positions.
Best Anemo Characters Ranked
Kazuha leads in practical grouping. Chihayaburu creates 6-meter pull (tap) or 10-meter pull (hold). Hold version superior for Wayob grouping with wider coverage. Provides 0.04% elemental DMG buff per EM point, capping at 40% with 600 EM.
Venti offers strongest pull with 60-energy Wind's Grand Ode: 15-meter radius, 8-second duration, 15-second cooldown. Skyward Sonnet hold deals 380% AoE Anemo damage with 20-second upcurrent. Burst may lift Wayobs beyond melee range, requiring ranged DPS.
Sucrose serves as accessible option. Moderate pull strength, shorter cooldowns allow multiple attempts. EM sharing benefits reaction teams but weaker pull radius/strength than Kazuha/Venti.
Anemo CC Execution Steps
- Position centrally between spawn points at chamber start
- Wait 1-2 seconds for spawn animations to complete
- Deploy Anemo CC (Kazuha hold Skill, Venti Burst, Sucrose Skill) at geometric center
- Switch to main DPS during pull animation (0.5-1 second grouping time)
- Execute burst rotation while clustered, prioritize AoE over single-target
- Reapply grouping after 8-10 seconds if enemies spread
Viridescent Venerer Optimization
4-piece VV shreds 40% elemental RES for 10 seconds after Swirl, multiplicatively increasing damage. Equip on Anemo grouper to maximize team output.
Combine with Anemo Resonance (two Anemo) for +10% Swirl DMG and +5% movement speed.
Manual Aggro Technique
Manual grouping exploits enemy AI detection and movement without Anemo abilities. Suits teams lacking CC or where Anemo reduces DPS potential.
Enemy Aggro Radius
Wayobs activate aggro at 15-20 meters from spawn. Once aggroed, they path toward you via direct movement or short teleports. Position equidistant from multiple Wayobs to trigger simultaneous aggro and convergence.
Key difference: manual aggro requires continuous positioning adjustments. Wayobs actively track movement—maintain grouping through controlled positioning.
Manual Grouping Steps
- Identify spawn locations at chamber start
- Calculate geometric center between spawn points
- Sprint to center before spawn animations complete
- Stand stationary 1 second to trigger simultaneous aggro
- Micro-adjust position as Wayobs approach, move toward lagging enemies
- Begin attacks once all enter melee range, verify grouping tightness
- Maintain central positioning, dodge perpendicular to formations
Movement and Camera Control
Use sprint cancels for micro-adjustments—tap sprint 0.3-0.5 seconds, reposition 2-3 meters max. Excessive movement breaks formation.
Rotate camera at 45-degree angles for peripheral vision of all enemies while maintaining forward combat visibility.
Anemo CC vs Manual Aggro Comparison
Effectiveness Analysis
Anemo CC: 95%+ success rate with proper timing. Kazuha's 10-meter hold skill covers most spawn patterns, Venti's 15-meter burst encompasses wide formations. Mechanical pull overrides AI.
Manual aggro: 70-85% success rate depending on positioning skill and spawn RNG. Tighter spawns group reliably; spread patterns need precise positioning. Higher execution difficulty.
Time Efficiency
Anemo CC teams: 30-50 second clears with proper investment. Instant grouping plus VV RES shred. 5-second paralysis synergizes with burst rotations.
Manual aggro teams: 45-70 seconds for equivalent clears. Time lost to positioning adjustments. Hypercarry compositions can compensate with overwhelming single-target DPS.
Team Building Flexibility
Anemo grouping: Mandates one slot for CC, reduces DPS potential but enables lower-investment clears. Buy Primogems Online through BitTopup for optimal character acquisition.
Manual aggro: Full slots for DPS/supports/sustain. Benefits limited Anemo options or specialized compositions where Anemo disrupts reactions.
When to Use Each Method
Use Anemo CC when:
- Team relies on AoE damage (Ganyu, Ayaka, Neuvillette)
- Lack high single-target DPS
- VV RES shred boosts main DPS element
- Wide spawn formations
Use Manual Aggro when:
- Hypercarry single-target specialists (Hu Tao, Yoimiya, Alhaitham)
- Anemo reduces team synergy (mono Geo/Pyro)
- Strong positioning mechanics
- Chamber buffs favor non-Anemo elements
Recommended Team Compositions
Top Anemo CC Teams
Premium Kazuha Team:
- Kazuha (VV, 800+ EM) - Grouping/RES shred
- Raiden/Neuvillette - Main DPS with AoE
- Bennett - ATK buff/healing
- Xiangling/Fischl - Off-field damage/reactions
F2P Sucrose Team:
- Sucrose (VV, Thrilling Tales) - Grouping/EM sharing
- Beidou - AoE Electro burst
- Xingqiu - Hydro application/damage reduction
- Fischl - Electro application
Best Manual Aggro Teams
Hypercarry Composition:
- Hu Tao/Alhaitham - Single-target DPS
- Xingqiu/Yelan - Hydro application/sub-DPS
- Zhongli - Shield for positioning
- Albedo/Fischl - Off-field damage
Quickswap Team:
- Raiden Shogun - Burst DPS/energy battery
- Chevreul - Electro-Charged reactions
- Kazuha - Occasional grouping
- Bennett - ATK buff/healing
Common Mistakes
Why Anemo Skills Fail
Timing errors: Activating before spawn animations complete misses invulnerability frames. Wait 1-2 seconds after spawn visuals.
Insufficient pull strength: Using tap instead of hold. Kazuha tap covers 6 meters vs 10 meters held. Always hold for maximum coverage.
Poor positioning: Stand within 5 meters of grouping center before activating skills.
Positioning Errors
Strafe left/right when dodging, not forward/backward. Perpendicular movement maintains grouping; forward/backward causes spread.
Don't chase single lagging enemies. Position slightly toward stragglers while maintaining proximity to main group.
Timing Mistakes
Wayobs teleport when isolated 3+ seconds. Maintain continuous damage—normal attacks, skills, or persistent effects. Queue normals after burst activation to prevent damage gaps.
Advanced Optimization
Optimal Damage Rotation
Execute bursts in descending energy cost during 5-second paralysis:
- 80-energy bursts (Raiden, Xiangling, Beidou) immediately after grouping
- 60-energy bursts (Xingqiu, Yelan) for reactions
- 40-energy bursts (Bennett, Sucrose) for buffs
- Normal attacks fill remaining grouped time
Energy Management
90 energy restore from shield breaks enables burst-every-rotation. Break at least one shield per cycle. Build 160-180% ER on Anemo groupers for 15-20 second skill availability.
Elemental Reaction Chains
- Pre-apply Hydro with Xingqiu/Yelan burst
- Group enemies with Anemo CC
- Apply Pyro with Bennett for instant Vaporize
- Swirl reactions spread elements for chains
Character-Specific Guides
Kazuha Tech
Hold Chihayaburu 1.5 seconds for max 10-meter pull. Release at full charge indicator. Position 3-5 meters from grouping center. Plunge attack after skill provides second grouping pulse.
Venti Positioning
Aim Wind's Grand Ode at ground level between enemies, not directly at them. Ground-targeted creates wider pull radius. 8-second duration allows two full attack rotations.
Sucrose Swirl Stacking
Two charges, 15-second cooldown each. First charge for initial grouping, second for regrouping after 6-8 seconds. Equip Thrilling Tales for 48% ATK buff transfer to DPS.
Troubleshooting
Enemies group then spread within 2-3 seconds: Insufficient damage pressure. Increase attack frequency or deploy persistent AoE (Fischl Oz, Albedo skill).
One Wayob stays outside formation: Spawn position outside skill radius. Reposition toward outlier before second attempt or use secondary skill charge.
Wayobs teleport after grouping: Burst animation creates damage gap. Queue normal attacks during animations.
Backup Plan
If Anemo grouping fails twice:
- Focus single-target on nearest Wayob
- Break shield for 90 energy + 5-second paralysis
- Eliminate paralyzed enemy
- Repeat for remaining Wayobs
Performance Benchmarks
Expected Clear Times
High Investment Anemo CC (5-star DPS, R1 weapons, optimized artifacts): 30-40 seconds, single grouping cycle, consistent sub-35 second clears
Medium Investment Manual Aggro (4-star DPS/weapons, decent artifacts): 45-60 seconds, two positioning cycles, 50-55 second average
Low Investment: 60-90 seconds, often missing three-star, multiple regrouping attempts
Damage Thresholds
Floor 12-1 requires 150,000-200,000 total damage in 3 minutes for three stars (50,000-70,000 sustained DPS). Effective grouping reduces requirement 20-30% through AoE efficiency.
Consistent 40-50 second clears indicate readiness for 12-2 and 12-3. Times exceeding 60 seconds suggest investment gaps.
FAQ
Can Wayobs be grouped with Anemo skills? Yes, they fall under 150 weight units. Venti achieves 100% immobilization, Kazuha's 10-meter hold and Sucrose effectively group them.
Best Anemo character for Floor 12-1? Kazuha provides optimal balance: grouping effectiveness, 40% elemental DMG buff at 600 EM, team flexibility. Venti has stronger pull but may lift enemies beyond melee. Sucrose is accessible F2P option.
How do Wayob teleport mechanics work? Teleport when isolated 3+ seconds or beyond aggro range. Maintain continuous damage to prevent teleportation.
Why won't Venti burst pull Wayobs? Timing issue—activating before spawn animations complete (1-2 seconds) misses invulnerability frames. Wait for AI activation.
Is manual aggro better than Anemo CC? Anemo CC achieves higher success (95%+ vs 70-85%) and faster clears (30-50s vs 45-70s). Manual suits hypercarry compositions or teams where Anemo disrupts synergies.
Best team compositions for Floor 12-1? Anemo CC: Kazuha/Venti with AoE DPS (Raiden, Neuvillette, Ayaka) plus supports (Bennett, Xingqiu). Manual aggro: Hypercarry (Hu Tao/Alhaitham) with Zhongli for shielded positioning. Both benefit from 90 energy restore when breaking shields.
Master Floor 12-1 with the right team? Top up Genesis Crystals at BitTopup for best rates and instant delivery. Get the characters and weapons you need to dominate Spiral Abyss—secure, fast, reliable!


