

Level 90 Yae Miko: The Math That’ll Change Your Mind
The Numbers Don’t Lie (And They’re Pretty Compelling)
Here’s something most guides won’t tell you straight up - Level 90 isn’t just a nice to have for Yae. The Level Multiplier system jumps from 1077.44 at Level 80 to 1446.85 at Level 90. That’s roughly 34% more base reaction damage, and honestly? It shows.
For Aggravate specifically, you’re looking at base damage calculated as Level Multiplier × 1.15. So we’re talking 1663.88 base damage at Level 90 versus 1239.06 at Level 80.
Now, here’s where it gets interesting - Yae’s Sesshou Sakura totems are constantly triggering Aggravate throughout their 14-second duration. In my testing (and I’ve run this through Spiral Abyss more times than I care to count), this level increase represents about 10%+ of your total team damage. The investment? 420,000 Mora and a mountain of materials. But the returns are permanent and guaranteed.
Quick tip: If you’re running low on resources for this upgrade, Genshin top up with PayPal through BitTopup offers solid rates and fast delivery for Genesis Crystals. Their payment processing is secure, and honestly, their customer support actually responds when you need them.
How Aggravate Actually Works (Because It’s Weird)
Aggravate operates as an additive reaction - it literally adds flat damage directly to your triggering Electro attacks. The complete formula looks like this: AdditiveReactionDamage = LevelMultiplier × ReactionMultiplier × (1 + EM_Bonus + ReactionDMG_Bonus). This additive damage then benefits from CRIT, DMG%, and enemy resistance calculations.
Here’s where Yae gets spicy: her A4 passive creates this unique double-scaling with Elemental Mastery. Every EM point increases Aggravate damage AND provides 0.15% DMG bonus to Sesshou Sakura. It’s like getting two upgrades for the price of one.
That said, don’t go crazy stacking EM. ATK% and CRIT remain essential since not every totem hit triggers Aggravate - Internal Cooldown mechanics see to that.
Artifact Sets: What Actually Works in Practice
Golden Troupe - The Clear Winner
4-piece Golden Troupe is Yae’s best-in-slot for Aggravate teams, and it’s not particularly close. You get 20% Elemental Skill DMG from the 2-piece, plus 25% on-field and an additional 25% off-field bonus. That’s 70% Skill DMG bonus when you’re playing her off-field (which you should be).
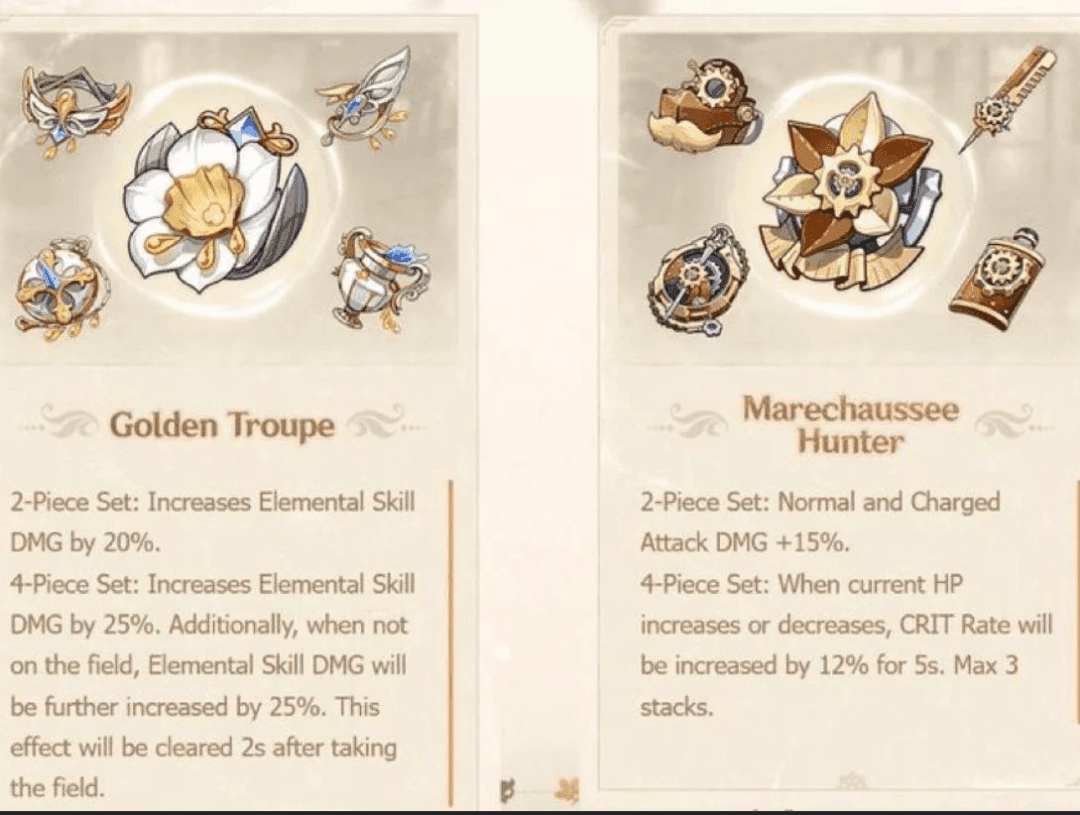
Since Sesshou Sakura is both her primary damage source AND her main Aggravate trigger, this bonus directly amplifies what matters most.
Target these substats: CRIT Rate/DMG, ATK%, Elemental Mastery. Energy Recharge needs vary wildly - 200% if you’re running solo Electro (don’t), 110-130% with Fischl, or around 100% at C1 with proper battery support.
Pro tip: The Golden Troupe domain pairs with Marechaussee Hunter, so your resin efficiency is actually decent here.
Gilded Dreams and the Alternatives
4-piece Gilded Dreams gives you 80 base EM plus these flexible buffs: 14% ATK per same-element team member and 50 EM per different-element member (8-second duration). In your typical Aggravate team - Yae/Fischl/Nahida/Anemo - you’re looking at 150 EM and 14% ATK.
The nice thing about Gilded Dreams? It benefits both Skill and Burst equally, unlike Golden Troupe’s Skill focus.
Some effective mixed combinations I’ve tested:
2pc Golden Troupe + 2pc Wanderer’s (20% Skill DMG + 80 EM)
2pc Golden Troupe + 2pc ATK% (20% Skill DMG + 18% ATK)
2pc Gilded + 2pc Wanderer’s (160 total EM)
Stats That Actually Matter
Main stats are straightforward: ATK% or EM Sands, Electro DMG Goblet, CRIT Circlet. Target these benchmarks: ATK 1500+, CRIT Rate around 80%, CRIT DMG around 200%, EM 100-300, ER 110-200% depending on your team.
Substat priority: ER (until you meet requirements) > CRIT Rate/DMG > ATK% ≥ EM.
For artifact farming efficiency, Genshin top up with credit card via BitTopup ensures you’ve got enough Original Resin refreshes. Their transaction security is solid, and the pricing stays competitive.
Team Compositions That Don’t Suck
The Dual-Electro Foundation
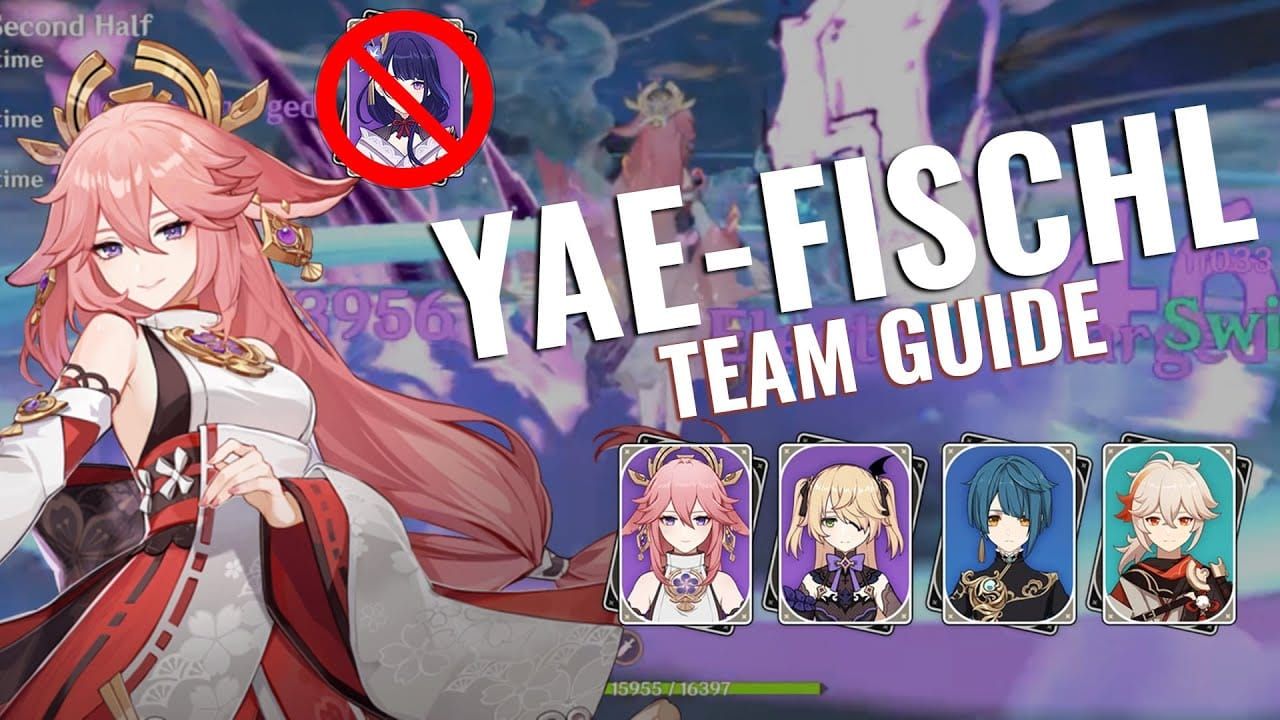
Yae + Fischl creates this beautiful synergy that most people underestimate. Fischl’s A4 passive triggers additional Electro damage on Electro-related reactions with no internal cooldown. Plus, she reduces Yae’s ER requirements from a painful 200% (solo) down to a manageable 110-130% with proper particle funneling.
Nahida provides the best Dendro application through her Skill, plus up to 250 EM to your on-field character via Burst. If you don’t have Nahida, Baizhu, Kirara, and Yaoyao offer defensive utility. The Quicken aura persists for extended periods and isn’t consumed by Aggravate triggers - which is honestly pretty forgiving.
That Fourth Slot (And Why Anemo Usually Wins)
Your fourth slot typically wants Anemo support with Viridescent Venerer. Kazuha provides 40% Electro RES reduction plus Elemental DMG bonuses via his A4 passive, with superior grouping for totem AoE. Sucrose offers similar RES shred with team-wide EM sharing - excellent 4-star alternative.
Defensive supports like Zhongli work too, providing universal RES shred and interruption resistance for Yae’s lengthy Skill animations.
Premium team: Yae/Fischl/Nahida/Kazuha F2P option: Yae/Fischl/Sucrose/Kirara
Weapons: From Whale to F2P
5-Star Tier List
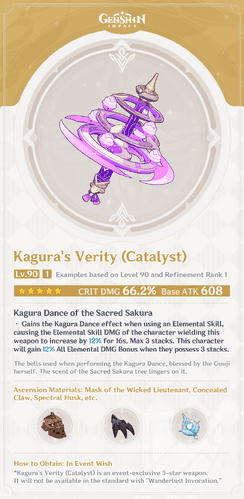
Kagura’s Verity remains best-in-slot: 608 base ATK, 66.2% CRIT DMG, plus 12% Skill DMG per stack (max 3) and 12% All Elemental DMG at max stacks. It synergizes perfectly with her EEE combo and that 16-second duration.
A Thousand Floating Dreams offers 265 EM and team-wide buffs - excellent for reaction-focused builds. Skyward Atlas provides 674 base ATK, 33.1% ATK%, and 12% Elemental DMG. It’s a strong stat stick with consistent performance.
4-Star Options That Don’t Disappoint
The Widsith (R5) is your premier 4-star option - all three random buffs (ATK%, Elemental DMG%, EM) provide significant value. The 10-second uptime with 30-second cooldown creates some inconsistency, but the damage potential is substantial.
Solar Pearl provides CRIT Rate and DMG bonuses for Skills/Bursts through Normal Attack triggers. Hakushin Ring offers ER and team-wide Elemental DMG bonuses when triggering Electro reactions. Oathsworn Eye provides ATK% and ER buffs after using Skills.
Talents and Constellations: Where to Spend
Leveling Priority (Don’t Mess This Up)
Elemental Skill takes absolute priority - those Sesshou Sakura totems are your bread and butter. At Talent Level 10, you’re looking at 109.2% (Level 1), 136.5% (Level 2), 170.6% (Level 3) damage multipliers.
Elemental Burst priority depends on how often you’re actually using it - 2271% total multiplier with three totems consumed isn’t nothing.
My recommended sequence: Skill to 8 → Burst to 8 → Skill to 10 → Burst to 10. Normal Attacks? Lowest priority. They contribute minimal damage.
Constellation Value (And When to Stop)
C1 provides 8 energy per Tenko Thunderbolt (24 total), reducing ER requirements by 27-40%. That’s a lot of offensive stat allocation you get back.
C2 increases Sesshou Sakura starting level to 2 with 60% range increase - roughly 25% more base damage plus improved AoE coverage.
Investment priority: C2 > Kagura’s Verity > C1. Honestly? C2 is an excellent stopping point for most players.
Rotations and Advanced Mechanics
Totem Placement (It Actually Matters)
Proper totem placement uses a triangle pattern where each totem connects to others. Avoid linear placement - you’re wasting potential. Standard rotation uses EEE combo with N1E to reduce animation time. That 14-second duration with 4-second cooldowns per charge allows for precise timing coordination.

Her A1 passive resets one Skill charge per totem consumed by Burst, enabling immediate redeployment.
Standard team rotation: Yae EEE → Kazuha Burst → Fischl Skill → Nahida Skill + Burst → Kazuha Skill + Plunge → Yae Burst + EEE → Fischl Burst.
Energy Management That Works
ER requirements breakdown: 200% solo Electro (again, don’t), 110-130% with Fischl, 100-110% at C1. Particle funneling from Fischl’s Skill maximizes energy transfer.
Alternative strategy: Burst every other rotation minimizes ER investment for maximum offensive stats. Sometimes the math just works out better this way.
Spiral Abyss Performance
Where Yae Shines (And Where She Doesn’t)
Yae excels in single-target and multi-wave scenarios with that consistent off-field damage. Her totems keep dealing damage during enemy invulnerability phases - which is more valuable than you’d think. C2’s range increase becomes really valuable against spread enemies.
Shield-based teams are recommended for interruption protection during that 3-second setup phase.
Enemy Matchups
High Electro RES enemies require Anemo VV support for 40% RES shred. Cryo shields get efficiently broken by Electro reactions. Flying enemies? Manageable with proper totem positioning at ground level beneath targets.
Common Mistakes (That I See Constantly)
Artifact Farming Pitfalls
Over-investment in ER with Fischl battery leads to diminished offensive stats. 110-130% ER is sufficient with dual Electro - don’t go overboard.
EM vs ATK% balance gets frequently misunderstood. Balanced investment outperforms extreme specialization. And honestly? High-quality mixed sets can outperform mediocre 4-piece sets.
Team Building Misconceptions
Over-reliance on EM buffs while neglecting CRIT ratios and Elemental DMG bonuses. Your Anemo support selection should prioritize team utility over personal damage. Excessive ER investment when Burst usage isn’t optimized just wastes offensive potential.
Future-Proofing Your Investment
Long-term Value in 2025
Yae maintains A-Tier Sub-DPS status despite power creep. Her core strengths in Dendro teams continue providing competitive endgame performance. Resource allocation toward Level 90, key talents, and appropriate artifacts offers guaranteed returns that scale with future upgrades.
Team composition flexibility through that fourth slot allows adaptation to future content without fundamental restructuring. That’s long-term viability right there.
Quick Answers to Common Questions
Why is Level 90 important for Yae Miko in Aggravate teams? Level 90 provides ~34% more base Aggravate damage versus Level 80 due to Level Multiplier scaling. Often represents 10%+ of total team damage in endgame content.
Golden Troupe or Gilded Dreams for Yae Miko? Golden Troupe’s superior for off-field Sub-DPS (70% Skill DMG bonus). Gilded Dreams works better for on-field/burst-focused builds. Damage difference is often small - substat quality might determine your choice.
How much Energy Recharge with Fischl? 110-130% ER at C0, 100-110% at C1. Solo Electro requires around 200% ER. Proper particle funneling and dual Electro resonance significantly reduce requirements.
What’s the optimal team composition? Core: Yae + Fischl + Dendro + Flex. Nahida’s the premier Dendro choice. Flex typically goes Anemo (Kazuha/Sucrose) for VV or defensive supports (Zhongli/Kirara) for interruption resistance.
Is Yae worth pulling in 2025? She remains A-Tier, highly effective in Dendro compositions. Valuable for players focused on Aggravate teams with unique off-field consistency and AoE coverage.
Best weapon priority? Kagura’s Verity is best-in-slot. A Thousand Floating Dreams excels for reaction builds. 4-star options: Widsith (R5) has highest damage potential, Solar Pearl offers reliable performance.


