

Understanding Yanagi"s Kit (It"s More Complex Than You Think)
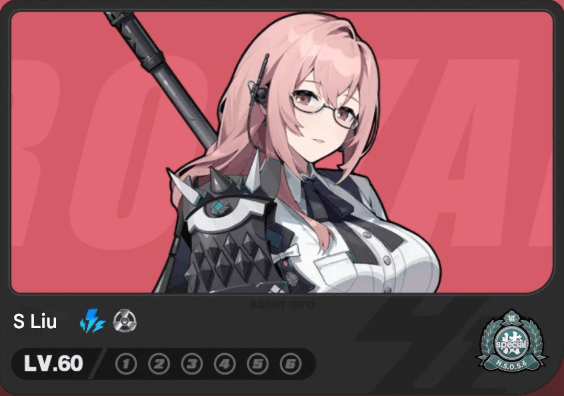
Let"s be honest - Yanagi isn"t your typical “press buttons, win fights” character. She"s an S-Rank Electric Anomaly DPS with 7,788 HP, 797 ATK, 612 DEF, and 114 Anomaly Proficiency at Level 60, but those numbers barely scratch the surface.
Her signature Polarity Disorder mechanic is where things get interesting. When her EX Special or Ultimate hits enemies already affected by Anomalies, you"re looking at 15% of the original Disorder damage plus a whopping 3,200% Anomaly Proficiency scaling - and here"s the kicker, it doesn"t remove the base Anomaly. Think of it as free bonus damage that keeps on giving.

The stance-switching between Jougen and Kagen modes might seem gimmicky at first, but it"s actually brilliant design. Jougen gives +10% Electric DMG with Anti-Interrupt, while Kagen provides +10% PEN Ratio and Interrupt Level. Switch between them and you"ll maintain both buffs for 8 seconds - that"s a 20% damage boost just for pressing a button at the right time.
Her Core Passive “Lunar Eclipse” is where Yanagi becomes a team player. After using EX Special, your entire squad gets 250% Disorder damage amplification for 15 seconds, while Yanagi herself enjoys an additional 20% Electric DMG boost.
What makes her shine: Incredible Disorder scaling, 40-energy EX Special for frequent ultimates, fantastic multi-element synergy, and those built-in blocking mechanics that let aggressive players stay in the fight.
Where she struggles: You absolutely need Disorder setups for optimal damage. She"s also quite demanding with premium teammates and rotation management. Solo Electric? Not her strongest suit.
W-Engine Choices (From Whale to F2P)
Timeweaver remains her best-in-slot for obvious reasons. That 30% Electric Anomaly Buildup Rate, 75 Anomaly Proficiency buff lasting 15 seconds, and 25% Disorder DMG at 375+ Anomaly Proficiency? It"s basically custom-made for her kit.
But let"s talk alternatives. Fusion Compiler serves as an excellent S-Rank substitute - those ATK% bonuses and stackable Anomaly Proficiency work beautifully, plus you can share it with other Anomaly agents. Smart investment if you"re building multiple characters.
For Battle Pass holders, Electro-Lip Gloss offers solid value with ATK% scaling and flat DMG% against Anomaly-affected enemies. Weeping Gemini (the F2P option) actually performs better than you"d expect in extended boss fights where those Anomaly Proficiency stacks really pile up.
Need to secure premium W-Engines? Zenless Zone Zero Top Up through BitTopup provides reliable transactions with competitive rates and instant delivery.
Drive Disc Strategy (Mix and Match Wisely)
Here"s where personal preference meets team composition. Thunder Metal 4-piece delivers the highest raw damage potential - that 10% Electric DMG from 2-piece plus 28% ATK when enemies are Shocked from 4-piece is substantial. Perfect for Mono-Electric teams where Shock uptime isn"t an issue.
Chaos Jazz 4-piece offers more versatility. The 30 Anomaly Proficiency from 2-piece is nice, but the 4-piece effect really shines: 15% Electric DMG plus 20% EX Special/Assist DMG for 5 seconds after switching stances. This synergizes beautifully with Disorder compositions.
Want to get fancy? Try Thunder Metal 4pc + Chaos Jazz 2pc for maximum Electric damage when you can maintain Shock uptime. Alternatively, Chaos Jazz 4pc foundation pairs efficiently with Proto Punk sets if you"re farming multiple characters.
Main Stats breakdown: Position 4 needs Anomaly Proficiency (non-negotiable), Position 5 wants Electric DMG% or PEN Ratio if you"re running Rina/Fusion Compiler, Position 6 should be Anomaly Mastery for balanced builds or ATK% for Hyper Carry setups.
Substats priority: Anomaly Proficiency > ATK% = PEN Ratio > Energy Recharge. Skip Crit entirely - Anomaly damage doesn"t care about your Crit Rate.

Skill Investment (Where Your Resources Matter Most)
Core Skill gets priority - that 250% squad Disorder boost affects your entire team"s damage output. Next up: Special Attack & Ultimate for Polarity Disorder scaling improvements. Basic Attack comes third for sustained damage, followed by Assist for rotation flexibility. Dodge sits at the bottom unless you"re really struggling with survivability.
Resource-wise, Level 1-60 costs 800,000 Denny plus 4 Basic, 32 Advanced, and 30 Controller Certification Seals. Individual skills from 1-12 need 500,000 Denny, 1 Hamster Cage Pass, and varying Shock Chips (always double-check in-game for current requirements - they love changing these).
Team Building (The Right Partners Make All the Difference)
Premium Disorder composition: Yanagi (On-field) + Burnice (Off-field Fire) + Caesar (Support/Buffer). This is the gold standard. Burnice enables maximum Yanagi field time while providing continuous Disorder triggers - it"s the highest damage ceiling you"ll find.
Mono-Electric Premium: Yanagi + Seth (Defense/Anomaly buffs) + Rina (PEN Ratio support). Clean, effective, expensive.
F2P Alternative: Yanagi + Anby (Electric resonance) + Ben (Burn for Disorder). Surprisingly functional once you get the rotation down.
One quick note - avoid pairing her with Grace Howard. They compete for field time, and that"s a headache you don"t need.
Her “Gessou” Additional Ability activates with Anomaly/Electric teammates, providing 45% Electric Anomaly Buildup for 8 seconds after stance switching. Bangboo recommendations: Plugboo/Electroboo for Mono-Electric, Red Moccus for Fire Disorder, Agent Gulliver for Section 6 synergy, or Magnetiboo for enemy grouping.
Building multiple S-Rank Anomaly agents? Buy ZZZ Polychrome via BitTopup"s reliable service for optimal Disorder team construction.
Combat Execution (Getting the Rotation Right)
The basic sequence skips her first two hits - go straight to BA3 > BA4 > BA5 > Special Attack, then continue in the new stance with BA3 > BA4 > BA5. Her Swift Ruten mechanic means Special Attack after the 3rd, 4th, or 5th Basic switches stance and continues the combo from the 3rd hit of the new stance.
Shinrabanshou State activates after EX Special, giving you 15 seconds (30 with M6) where you can continuously loop 3rd-5th Basics without resets. It"s incredibly satisfying when you nail the timing.
Stance management is crucial - maintain both buffs by switching every 8 seconds. Miss that window and you"re losing either 10% Electric DMG or 10% PEN Ratio.
Advanced players should note that Dodge Counter, Chain Attack, and Assist skills all start combos from the 3rd hit. Her Special Attack includes blocking/parrying mechanics, allowing for aggressive offense-defense gameplay without traditional dodging patterns.
Stat Optimization (The Numbers That Actually Matter)
Primary focus: Anomaly Proficiency drives that 3,200% Polarity Disorder scaling. Electric DMG% provides consistent scaling across all abilities. ATK% works for Hyper Carry builds but isn"t the main priority.
Minimum thresholds: 375+ Anomaly Proficiency (needed for Timeweaver activation), 2,000+ ATK, 100+ Electric DMG%.
Optimal ranges: 450-500 Anomaly Proficiency, 2,200-2,500 ATK, 120-140% Electric DMG%, 20-30% PEN Ratio.
Remember - Crit stats are essentially wasted on Anomaly damage mechanics.
Endgame Performance (Where She Really Shines)
Shiyu Defense showcases her strength perfectly. Polarity Disorder triggers additional damage without consuming base Anomalies, creating consistent high damage output. Focus on Disorder teams, use stance switching for defense during enemy burst phases, and time your Ultimate during vulnerability windows.
Blessing priorities: Anomaly buildup/damage multipliers > Electric damage bonuses > ATK% scaling.
Hollow Zero suits her kit beautifully - low energy costs and sustained damage excel in extended encounters. Those blocking mechanics provide defensive utility during exploration, and Anomaly damage scales independently of Pressure level damage reduction.
Boss tactics: Maintain stance buffs for single-target optimization and use those 15-second Lunar Eclipse windows during vulnerability phases for maximum impact.
For serious endgame progression, secure your resources through Zenless Zone Zero Recharge from BitTopup with instant delivery and secure transactions.
Common Mistakes (Learn from Others" Pain)
Equipment errors I see constantly: investing in Crit-focused W-Engines (Anomaly scaling doesn"t care), mixing incompatible Drive Disc sets without purpose, prioritizing Crit Rate/DMG over Anomaly Proficiency.
Team composition issues: Field time competition with other main DPS characters, Anomaly element conflicts requiring extended rotations, neglecting defensive utility for pure damage buffs.
Resource allocation problems: Prioritizing Basic Attack/Dodge over Core Skill (you"re hurting team effectiveness), rushing character levels without proportional equipment investment, building Yanagi without adequate support agent investment.
Quick FAQ
What"s her best W-Engine? Timeweaver (signature) provides 30% Electric Anomaly Buildup, 75 Anomaly Proficiency, 25% Disorder DMG at 375+ Anomaly Proficiency. Alternatives: Fusion Compiler (S-Rank), Electro-Lip Gloss (Battle Pass), Weeping Gemini (F2P).
Which Drive Disc sets work best? Thunder Metal 4pc for highest damage in Mono-Electric (28% ATK when Shocked). Chaos Jazz 4pc for versatile Disorder teams (15% Electric DMG + switching bonuses). Hybrid builds combine Thunder Metal 4pc + Chaos Jazz 2pc.
Who should I team her with? Premium: Yanagi + Burnice + Caesar (Disorder focus). Mono-Electric: Yanagi + Seth + Rina. F2P: Yanagi + Anby + Ben. Prioritize Anomaly synergy over pure damage buffers.
What stats should I focus on? Anomaly Proficiency (375+ minimum, 450-500 optimal) > Electric DMG% > ATK%. Substats: Anomaly Proficiency > ATK% = PEN Ratio > Energy Recharge. Skip Crit stats entirely.

Optimize your Tsukishiro Yanagi build with BitTopup"s secure Zenless Zone Zero Top Up services featuring competitive pricing, instant delivery, and 24/7 customer support for all your Electric DPS team building needs!


