

Understanding Matrix Operation Weekly Buffs
Matrix Operation is ZZZ's premier endgame challenge, accessed through Scott Outpost Interior's large tent. Requires Chapter 1 Intermission completion, Inter-Knot Level 25-30, agents at Level 40+.
Weekly buffs rotate Monday 04:00 to next Monday 03:59, creating four distinct meta windows monthly. Buffs apply percentage-based multipliers to specific damage types or stats, scaling 15-25% at lower tiers to 30-50% at max difficulty.
Buffs activate automatically upon stage entry—no manual selection needed. They directly influence Investigation Point accumulation rates. Higher damage from buff-aligned teams accelerates clears, enabling more runs within weekly resets. This efficiency unlocks the 7,000 Investigation Points threshold: 900 Z-Merits and 3-5 Hamster Cage Passes.
For premium pulls during buff windows, Zenless Zone Zero Monochrome top up through BitTopup provides instant access with competitive pricing.
February 6 Rotation Schedule
Week 1 (Feb 6-9): Universal ATK
- 15-25% ATK buff (all damage types)
- Most flexible window for roster experimentation
- Difficulty VI reaches full 25% multiplier
Week 2 (Feb 10-16): Physical Focus
- 20-35% Physical DMG bonus
- Favors Physical damage dealers
Week 3 (Feb 17-23): Dual Elemental
- 20-35% Ether DMG + 20-35% Fire DMG
- Enables hybrid team compositions
Week 4 (Feb 24-Mar 2): Critical Precision
- 12-20% CRIT Rate + 30-50% CRIT DMG
- Rewards crit-optimized Drive Discs
Why Buffs Matter
Matrix Operation distributes 4,640 Polychrome weekly: Lost Void (3,200) + Withered Domain (1,440). That's 5-6 premium pulls weekly.
Additional weekly rewards:
- 2,900,000 Dennies (2M Lost Void, 900K Withered Domain)
- 116 Boopons
- 4,000-4,500 Shadow Crystal Data (Difficulty V-VI)
- 24-27 Bangboo System Widgets (Difficulty VI)
These materials gate late-game progression. Sunna's full ascension costs 2,905,000 Dennies including skills.
February 6 Buff Breakdown
Week 1 implements universal 15-25% ATK buff scaling with difficulty. At Difficulty V: ~20% ATK. Difficulty VI: full 25%.
The buff applies to all damage instances—normal attacks, skills, ultimates, Chain Attacks. No elemental or damage-type restrictions.
Activation & Mechanics
Buffs activate automatically at stage entry. No trigger requirements. Persists throughout entire stage duration, including all combat phases and bosses.
Buff values remain constant regardless of team composition or performance. 10,000 base damage receives exactly 2,500 additional damage from 25% ATK buff.
System displays active buffs in three locations: Scott Outpost console, stage selection briefing, pause menu during runs.

Optimal Characters for Week 1
ATK buff favors high-frequency damage dealers with rapid attack strings and short skill cooldowns.
Sunna (Physical DPS)

- Ascension: 4 Basic Seals, 32 Advanced Seals, 30 Ruler Support Seals
- Skills: 25 Basic + 75 Advanced + 250 Specialized Physical Chips, 5 Hamster Cage Passes
- Total cost: 2,905,000 Dennies
Aria (Ether Anomaly)
- Ascension: 4 Basic Seals, 32 Advanced Seals, 30 Controller Anomaly Seals, 9 Clouded Crystalline Substance, 60 Spiked Corruption Core
- Skills: 25 Basic + 75 Advanced + 250 Specialized Ether Chips
Nangong Yu (Stunner)
- Ascension: 4 Basic Seals, 32 Advanced Seals, 30 Specialized Stunner Seals, 9 Exuvia of Refinement, 60 Miasmic Elytron
- Skills: 250 Specialized Physical Chips
The Assist-Point System
Operates on 6-point maximum pool shared across three agents. Requires Inter-Knot Level 30 for full functionality. Assign up to 3 Assist Agents at Scott Outpost console before entering stages.
Point Generation
Two primary sources:
- Chain Attacks: Recover 1 point per execution
- Ultimates: Recover 3 points per execution
6-point cap means excess points are lost. Creates strategic tension between spending for immediate advantage versus banking for critical phases.
Point generation occurs instantly upon action completion. Ultimate animations complete before point recovery triggers.
Three Assist Types
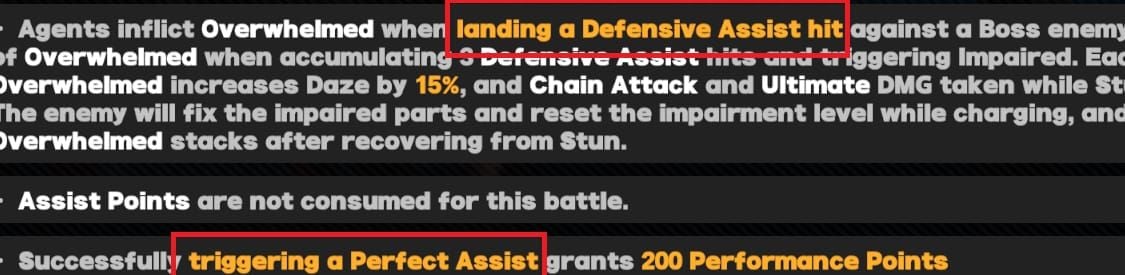
Defensive Assists (1 point)
- Trigger when swapping during enemy attack animations
- Provide i-frames and interrupt enemy actions
- Excel against bosses with long combo strings
Evasive Assists (1 point)
- Activate when dodging immediately before swapping
- Extend i-frame duration vs standard dodges
- Valuable against tracking attacks
Support/Assault Assists
- Share same point costs
- System auto-selects based on swap timing and combat context
Resource Interaction
Chain Attacks require Decibel thresholds separate from Assist-Points. Building Decibels through combat enables Chain Attack activation, which generates 1 Assist Point.
Daze Gauge creates extended damage windows ideal for spending accumulated Assist Points. Coordinating Daze timing with full 6-point pools maximizes burst damage.
Decibels and Assist-Points operate as independent but complementary pools. Decibels fund Chain Attacks and Ultimates. Those actions regenerate Assist-Points, creating cyclical resource economy.
Critical Setup Mistakes
Mistake #1: Ignoring Assist Priority in Team Composition
Players select teams based solely on individual agent strength without considering assist synergy. Optimal teams include at least one agent with rapid Ultimate charging and strong assist effects.
These assist batteries maintain high point availability while providing utility during swaps. Sunna, Aria, and Nangong Yu each fulfill this role effectively.
Mistake #2: Poor Timing on Assist Triggers
Players trigger assists during neutral combat instead of coordinating with damage buff windows and enemy vulnerability phases. An assist during enemy Daze with active buffs provides far more value than random usage.
Advanced players pre-load Assist Points before critical damage phases by executing Chain Attacks and Ultimates during enemy attack animations or invulnerable states. This ensures full 6-point pools when enemies become vulnerable.
Mistake #3: Misunderstanding Point Carryover
Many assume Assist Points reset between combat phases. In reality, points persist throughout entire stage runs, including transitions between normal encounters and boss fights.
This causes players to dump points before phase transitions, entering boss encounters with depleted pools. Optimal play conserves 4-6 points before anticipated boss phases.
Real Example: Suboptimal vs Optimized
Suboptimal: Three pure DPS with slow Ultimates enter stage with 2 points. Player triggers Defensive Assist during minor attack (1 point left). During boss Daze, lacks points for offensive cycling, missing 30% of damage window. Boss phase extends 45 seconds, losing ~800 Investigation Points.
Optimized: Balanced team (Sunna/Aria/Nangong Yu) enters with 5 points. Conserves points through first encounter. Boss Daze triggers with full pool. Executes Sunna Ultimate (+3), offensive assist to Aria (-1), skill rotation, Chain Attack (+1), defensive assist to Sunna (-1). Maintains 5+ points throughout Daze. Clears 40 seconds faster, gaining 1,200 Investigation Points.
Need resources for optimal teams? ZZZ Monochrome instant recharge through BitTopup delivers fast, secure top-ups.
Optimizing Assist-Point Setup
Team Composition Framework
Optimal structure: 1 primary DPS, 1 support/sub-DPS, 1 utility agent with rapid Ultimate charging.
Sunna (primary DPS) + Aria (support/Anomaly) + Nangong Yu (Stunner/utility) generates 8-10 Assist Points per 30-second combat sequence.
Calculate your team's point generation by tracking Ultimate costs and Chain Attack frequency. Teams generating fewer than 6 points per 30 seconds struggle in extended boss encounters.
Rotation Order Strategy
Position highest point-generating agent in slot 1 for immediate combat access. Slot 2 holds primary DPS for mid-combat swaps. Slot 3 contains defensive specialist.
Rotation cycle:
- Slot 1 opens, builds resources
- Swap to Slot 2 during vulnerability (-1 point)
- Slot 2 damage rotation + Ultimate (+3 points)
- Swap to Slot 3 for defense (-1 point)
- Slot 3 Chain Attack (+1 point)
- Return to Slot 1
Maintains 4-6 points consistently while maximizing damage.
W-Engine & Drive Disc Choices
W-Engines: Prioritize Ultimate cost reduction (10-15%) or Decibel generation passives. Secondary: Chain Attack damage bonuses.
Drive Discs: Four-piece sets boosting damage after swapping (15-25% for 8-10 seconds). Main stats: ATK% (slot 4), Damage Bonus% matching element (slot 5), CRIT Rate/DMG (slot 6).
Substats: Balance ATK%, CRIT Rate, CRIT DMG equally.
Bangboo Selection
Choose Bangboo with low activation thresholds (8-10 Decibels) for frequent Chain Attacks. Prioritize passive Decibel generation or Ultimate cost reduction.
Defensive Bangboo with shields reduce reliance on Defensive Assists, preserving points for offensive usage.
Buff-Specific Team Compositions
S-Tier Teams for Week 1
Physical Dominance Core
- Sunna (primary DPS) + Nangong Yu (Stunner) + Physical Support
- Leverages rapid attacks and Daze acceleration
- Investment: 2,400,000 Dennies for Sunna + Nangong Yu, 250 Specialized Physical Chips each
Ether Anomaly Hybrid
- Aria (Anomaly DPS) + Ether Support + Defensive Utility
- Anomaly application benefits from ATK scaling
- Materials farmable from Withered Domain lower difficulties
Balanced Flex
- Highest-invested DPS + Complementary Support + Rapid Ultimate Agent
- Universal ATK buff means strongest agent automatically becomes optimal
Budget F2P Alternatives
Focus on maximizing starter agents over premium pulls. ATK buff provides equal percentage benefits to all agents—well-built starter with optimized Drive Discs outperforms under-invested premium agent.
Prioritize Drive Disc farming over character pulls. Starter agent with optimized four-piece sets gains 40-60% effective damage vs random discs.
Focus Dennies on ascending one primary DPS to max level with maxed skills before diversifying. Sunna's 2,905,000 Dennies represents 10-12 weeks of Matrix Operation earnings but provides consistent value across all rotations.
Flex Slot Recommendations
Without Sunna: Substitute highest-invested Physical DPS with similar attack speed. Personal investment levels matter more than tier lists during Week 1.
Without Aria: Field strongest Anomaly/Ether agent, prioritizing rapid skill cycling and low Ultimate costs.
Defensive slots: Prioritize shield/interrupt capabilities over pure healers. Matrix Operation scoring penalizes extended clear times—damage prevention beats healing.
Agent Synergy for Buff Stacking
Agents providing ATK buffs to teammates stack additively with weekly ATK buff, creating 40-50% total ATK increases.
Stunner agents reducing enemy defense create pseudo-multiplicative damage. 20% defense reduction + 25% ATK increase = ~50% effective damage increase.
Chain Attack damage bonuses provide another multiplicative layer. Teams built around Chain Attack synergies execute 3-4 per minute, each recovering 1 point while dealing amplified damage.
Advanced Timing Strategies
Understanding Buff Duration Windows
February 6 ATK buff persists throughout entire stages with no cooldowns. Practical utilization windows depend on enemy vulnerability states and team rotation cooldowns. Effective windows last 8-12 seconds during Daze states.
Coordinate assist timing with vulnerability windows, not neutral combat. Offensive assist swapping primary DPS during Daze with full skills provides 3-4x more value than same assist during neutral combat.
Track enemy attack pattern cycles (20-30 seconds with 2-3 vulnerability windows). Pre-load Assist Points during enemy offensive phase.
Pre-Loading Points Before Critical Phases
Execute Ultimates and Chain Attacks during enemy invulnerable states to build pools without sacrificing damage uptime. Ensures 5-6 points when enemies become vulnerable.
Qualification Assessment's two stages provide ideal practice for pre-loading techniques. Predictable patterns with clear invulnerable phases.
Boss encounters like Inferno Reap vs Nineveh demand pre-loaded pools. Entering with 5-6 points enables immediate Defensive Assist during opening sequence.
Chain Attack Timing
Chain Attacks deal burst damage and recover 1 point. Optimal timing executes during vulnerability windows when all team members have skills available.
Delay Chain Attack 1-2 seconds after Daze triggers to allow skill cooldowns to complete. Chain Attack with all skills available deals 40-60% more damage than one with skills on cooldown.
ATK buff amplifies Chain Attack damage equally across all agents. Three-agent Chain Attack with 25% ATK buff deals ~25% more total damage.
Enemy Behavior Patterns
Old Capital Metro (5 stages): 15-20 second attack cycles, 2-3 second vulnerability windows after specific attacks.

Construction Ruins (4 stages): Counter-attack mechanics punish poorly-timed assists. Conservative timing more effective.
Abandoned Skyscraper (3 stages): Highly mobile enemies with irregular patterns. Reactive assist usage over predictive timing. Maintain 4-5 point pools for flexibility.
Scoring System & Reward Tiers
Scoring Calculations
Investigation Points based on three factors:
- Base clear rewards (scale with difficulty)
- Time bonus multipliers
- Performance penalties
Time bonus breakpoints:
- 3:00 remaining: baseline
- 2:30 remaining: ~10% bonus
- 2:00 remaining: ~20% bonus
- 1:30 remaining: 40-50% bonus
Performance penalties: 50-100 points per damage instance. Three+ damage instances typically eliminate time bonuses.
Reward Thresholds
Lost Void (5 stage groups):
- Qualification Assessment: 600 Polychrome, 200,000 Dennies
- Old Capital Metro: 1,200 Polychrome, 800,000 Dennies
- Construction Ruins: 800 Polychrome, 600,000 Dennies
- Abandoned Skyscraper: 600 Polychrome, 400,000 Dennies
- Withering Garden: 1,440 Polychrome, 900,000 Dennies
- Total: 3,200 Polychrome, 2,000,000 Dennies weekly
Withered Domain: 1,440 Polychrome, 900,000 Dennies, 36 Boopons
Combined weekly: 4,640 Polychrome, 2,900,000 Dennies, 116 Boopons
7,000 Investigation Points bonus: 900 Z-Merits, 3-5 Hamster Cage Passes
Clear Time vs Survival Impact
Clear time contributes 40-50% of final points through time bonuses. 30-second improvement yields 800-1,200 additional points.
Survival impacts through penalties, not bonuses. Zero damage provides no bonus, but each damage instance subtracts 50-100 points.
Optimal play balances aggressive clear time with defensive damage prevention. Pursue max DPS during vulnerability windows, use Defensive Assists during enemy offensive phases.
Weekly vs Seasonal Structure
Weekly rewards reset Monday 04:00. Missing a reset permanently loses rewards—no catch-up mechanism. Consistent participation yields 18,560 Polychrome monthly (20-24 premium pulls).
Complete runs early in weekly cycle to identify bottlenecks and adjust compositions before reset.
Troubleshooting Assist-Point Issues
Low Point Generation
Stems from high Ultimate costs and infrequent Chain Attacks. Calculate team's average Ultimate cost—teams averaging 12+ Decibels struggle to maintain adequate generation.
Insufficient Decibel generation creates bottlenecks. Solution: improve damage through better Drive Discs or substitute agents with superior Decibel generation.
Poor Chain Attack timing wastes opportunities. Optimal play delays Chain Attacks 2-3 seconds to ensure maximum damage alongside point recovery.
Extended Fight Duration
Fights exceeding 4-5 minutes indicate fundamental composition or execution problems. February 6 ATK buff should enable 2-3 minute clears with properly-built teams.
Audit damage rotation efficiency:
- Executing skills during vulnerability windows?
- Maintaining buff uptimes through proper cycling?
- Drive Discs optimized with correct main stats?
Energy drain (Decibel depletion) indicates excessive defensive assist usage. Reduce defensive frequency by improving dodge timing and positioning.
Misaligned Buffs
Week 1's universal ATK buff accommodates all rosters. Future elemental restrictions may disadvantage players lacking specific damage types.
Stage-based reward structure allows selective optimization. Prioritize perfect clears on aligned stages, accept lower scores on misaligned content. Maintains 70-80% of max weekly rewards.
Long-term: Diversify rosters across damage types. Invest in one premium agent per major type (Physical, Ether, Fire, Ice) over 3-4 months.
Mobile Performance Optimization
Enable performance mode prioritizing frame rate over visuals. Consistent 60 FPS more valuable than max graphics. Reduce particle effects and shadows.
Customize touch layouts to minimize finger travel between dodge, swap, skill buttons. Position frequently-used controls within thumb reach.
Practice custom layouts in lower-difficulty content before high-score runs.
Resource Investment Guide
Character Priority
Sunna (Physical): 2,905,000 Dennies total. Versatility across rotations, strong assist utility. Materials farm from Lost Void lower difficulties.
Aria (Ether): 9 Clouded Crystalline Substance, 60 Spiked Corruption Core. Materials from Withered Domain. Investment synergizes with weekly participation.
Nangong Yu (Stunner): 9 Exuvia of Refinement, 60 Miasmic Elytron, 250 Specialized Physical Chips. Universal utility justifies early investment.
W-Engine Priority
- Ultimate cost reduction (10-15%) for primary DPS
- Decibel generation passives
- Chain Attack damage bonuses
Avoid purely conditional damage bonuses without resource generation. Versatile engines outperform specialized options across weekly cycles.
Drive Disc Farming
Farm four-piece sets boosting damage after swapping/assists (15-25% for 8-10 seconds).
Main stats:
- Slot 4: ATK%
- Slot 5: Damage Bonus% (matching element)
- Slot 6: CRIT Rate or CRIT DMG
Substats: Balance ATK%, CRIT Rate, CRIT DMG equally.
Polychrome Management
Week 1's universal buff creates poor conditions for evaluating new agents. Wait until Week 2-3's elemental buffs before committing Polychrome.
Restrictive buffs reveal true agent performance. Prioritize pulling agents filling roster gaps in under-represented damage types.
Avoid pulling redundant agents within already-strong types.
FAQ
What are the weekly buffs for February 6?
Week 1: 15-25% ATK (Feb 6-9). Week 2: 20-35% Physical DMG (Feb 10-16). Week 3: 20-35% Ether + Fire DMG (Feb 17-23). Week 4: 12-20% CRIT Rate + 30-50% CRIT DMG (Feb 24-Mar 2).
How does the assist-point system work?
6-point max pool shared across three agents. Defensive/Evasive Assists cost 1 point. Chain Attacks recover 1 point. Ultimates recover 3 points. Optimal play maintains 4-6 points through coordinated Ultimate usage.
What's the most common assist-point mistake?
Wasting points through reactive defensive usage during neutral combat instead of conserving for offensive cycling during buff windows and Daze states. Reduces damage output 30-40% during critical phases.
How do I maximize Matrix Operation scores?
Prioritize clear time through buff-aligned teams and aggressive damage cycling during vulnerability windows. Maintain 4-6 Assist Points. Execute Ultimates during enemy invulnerable phases to pre-load points. Avoid damage to prevent performance penalties.
Which characters benefit most from February 6 buffs?
Universal ATK buff benefits all equally, but high-frequency attackers like Sunna gain more through rapid damage accumulation. Agents with low Ultimate costs and strong assist utility (Aria, Nangong Yu) provide optimal damage + point generation.
How often do buffs rotate?
Weekly on Monday 04:00. Four distinct meta windows per month. Each rotation lasts exactly seven days (Monday 04:00 to next Monday 03:59).


