

Understanding Arlecchino & Her Bond of Life Mechanics
What Makes Her Tick
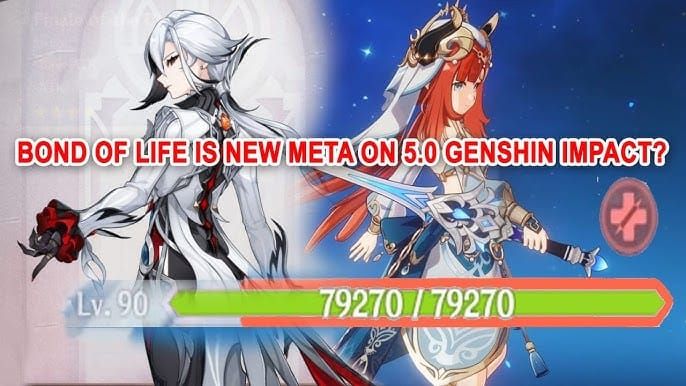
Here’s the thing about Arlecchino – she’s not your typical DPS character. This 5-star Pyro Polearm wielder sits at 342 base ATK when maxed, but that’s just scratching the surface. What really sets her apart? She literally can’t be healed by external sources during combat. Sounds terrifying, right?
But here’s where it gets interesting. In exchange for that vulnerability, she gets a whopping 40% Pyro DMG Bonus and access to one of the highest damage ceilings in the entire game. It’s a high-risk, high-reward playstyle that honestly feels refreshing after years of shield-and-heal meta.
For players serious about maximizing their Arlecchino investment, you’ll want those Primogems flowing consistently. The Blessing of the Welkin Moon purchase remains the gold standard for daily Primogem income – especially when you’re chasing constellations or that signature weapon.
Bond of Life: The Heart of Her Kit
Bond of Life (BoL) is Arlecchino’s signature mechanic, and honestly? It took me a while to fully appreciate how elegant this system is. While BoL is active, you can’t heal – but your damage potential skyrockets.
The magic number is 30% of your Max HP. Hit that threshold and boom – you’re in Masque of the Red Death state. Your attacks convert to Pyro damage with bonuses that scale off both your ATK and current BoL percentage. The system caps at 200% Max HP, and you’ll consume 7.5% BoL per Normal Attack while reducing skill cooldowns by 0.8 seconds per hit.
Blood-Debt Directives give you 65% Max HP worth of BoL, while Dues bump that up to 130% (maxing at 145% per skill use). It’s a numbers game, but once you get the rhythm down, it becomes second nature.
Kit Breakdown
Her Elemental Skill drops Blood-Debt Directives on enemies – think of them as time bombs that mature into Dues after 5 seconds. The Elemental Burst? That’s your panic button and reset tool rolled into one. It clears all Directives, deals solid AoE Pyro damage, resets your skill cooldown, and provides ATK-scaling healing based on your current BoL.
The passive talent is where things get spicy – 40% Pyro DMG Bonus in exchange for blocking all external healing. It forces you to master her mechanics, but the payoff is substantial.
Weapon Tier List for Arlecchino
Premium 5-Star Options
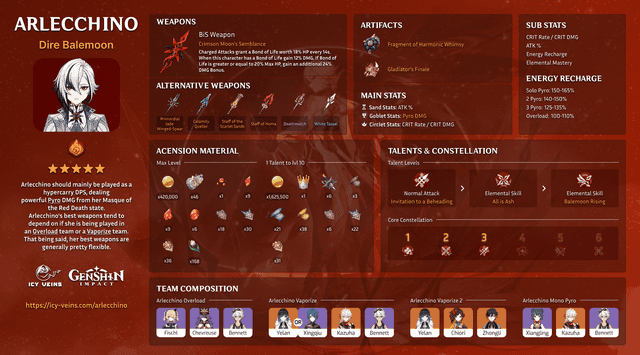
Crimson Moon’s Semblance stands as her signature for good reason.
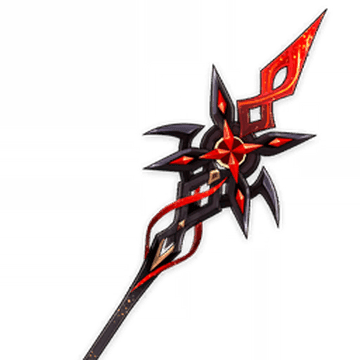
674 Base ATK and 22.1% CRIT Rate are solid, but the real magic happens with its passive. You get additional BoL (25% Max HP on Charged Attacks) plus up to 36% DMG Bonus scaling with your current BoL value. It’s tailor-made for her kit.
Primordial Jade Winged-Spear offers the same base stats but with a different approach. The stacking ATK% passive reaches maximum effectiveness quickly during her extended field time, making it surprisingly competitive.
Staff of Homa brings 66.2% CRIT DMG and that beloved HP-scaling ATK bonus. Sure, it lacks BoL synergy, but sometimes raw stats just work.
Staff of the Scarlet Sands shines brightest in Vaporize teams when you’re running EM Sands. The CRIT Rate substat plus EM-to-ATK conversion creates beautiful reaction synergy.
4-Star Champions
Deathmatch remains the 4-star king with 36.8% CRIT Rate and a consistent ATK% passive. It’s reliable, accessible, and performs admirably.
White Tassel at R5 is the F2P hero nobody talks about enough. 23.4% CRIT Rate and 48% Normal Attack DMG bonus? With the right ATK buffers, this thing can surprise you.
Ballad of the Fjords deserves mention for reaction teams featuring three elements. CRIT Rate substat plus substantial EM buffs make it competitive with Deathmatch in the right scenarios.
Artifact Optimization
The Main Event
Fragment of Harmonic Whimsy (4pc) is her best-in-slot, no contest.
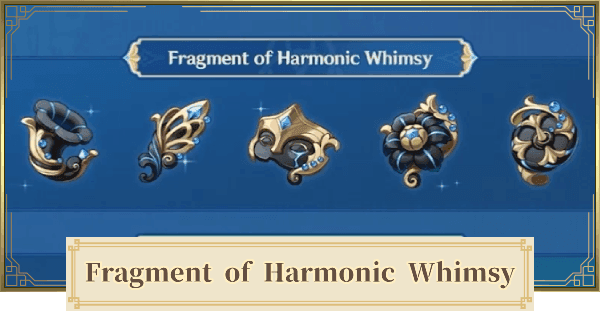
18% ATK baseline plus 18% increased DMG for 6 seconds whenever BoL changes. This stacks three times for 54% total DMG increase with near-perfect uptime. It’s disgustingly good.
Gladiator’s Finale (4pc) serves as the resin-efficient alternative. 18% ATK and 35% Normal Attack DMG won’t break records, but it’ll get the job done while you farm other priorities.
Echoes of an Offering (4pc) offers 70% chance for additional Normal Attack DMG. Just remember – this set demands low ping (under 100ms) for consistent procs. Your internet connection literally affects your DPS.
Stat Priorities That Actually Matter
Main stats are straightforward: ATK% Sands (EM in Vaporize teams), Pyro DMG Goblet, CRIT Rate/DMG Circlet. For substats, chase CRIT Rate/DMG > ATK% > ER > EM. Target that classic 1:2 CRIT ratio – around 75% Rate to 150% DMG works beautifully.
ER requirements vary wildly: 100-165% depending on your Burst usage and team composition. More on that later.
For efficient artifact farming, Welkin Moon top up deals provide cost-effective resin refreshes when you’re pushing for those perfect pieces.
Talent Investment Strategy
Normal Attack takes absolute priority – get this to Level 10 before touching anything else. I can’t stress this enough. Her Elemental Skill and Burst share secondary priority, but you can safely stop at Level 8 for resource efficiency.
Critical breakpoints: Level 6 for early-game viability, Level 8 for solid performance, Level 10 for maximum optimization. The damage scaling on her Normal Attack is just that good.
Triple-crown materials? You’re looking at 9 Teachings, 63 Guides, 114 Philosophies (Order books), 18 Fading Candles from weekly bosses, various Fatui Insignias, and 4,957,500 Mora. Plan accordingly.
Team Compositions That Work
Vaporize: The Damage King
Premium Setup: Arlecchino + Yelan + Bennett + Zhongli.
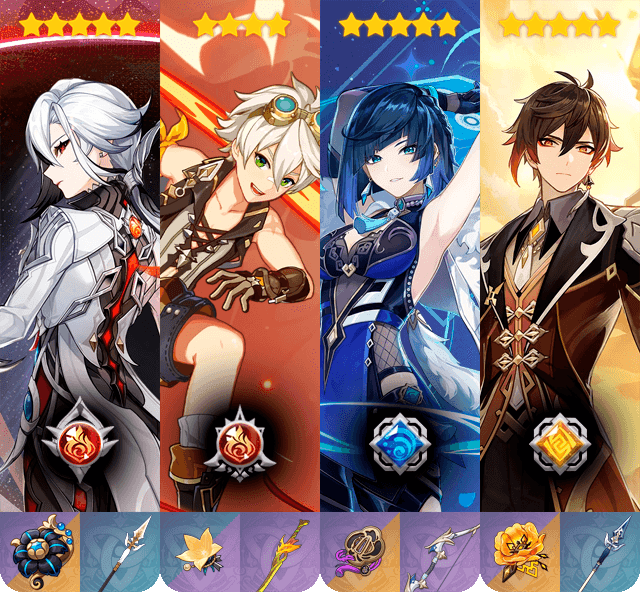
The rotation flows like this: Arlecchino E → Zhongli Hold E → Yelan E Q → Bennett Q → Arlecchino Charged Attack → Normal Attack spam. Maximum damage with bulletproof survivability.
Budget Version: Swap Zhongli for Kazuha and Yelan for Xingqiu. More accessible, still strong damage with VV shred, but you’ll need better positioning skills.
Overload: The Sleeper Hit
Optimal: Arlecchino + Fischl + Chevreuse + Bennett. High single-target damage with Chevreuse’s RES shred and energy synergy. The catch? You’re locked to Pyro/Electro characters only, but honestly, that’s not much of a limitation.
Mono Pyro: The Consistent Choice
Standard: Arlecchino + Xiangling + Kazuha + Bennett. Reliable damage without reaction dependencies and strong AoE potential. Lower single-target ceiling than Vaporize, but sometimes consistency beats peak performance.
Constellation Value Analysis
C1 represents the most valuable upgrade you can get. 100% Masque damage bonus enhancement plus interruption resistance? Many players prioritize this over her signature weapon, and honestly, I get it. The quality-of-life improvement alone is worth considering.
C2 eliminates that annoying 5-second Directive waiting period, adds 900% ATK AoE damage every 10 seconds, and grants 20% RES bonus. Excellent stopping point for moderate spenders.
C6 transforms her Burst into a proper nuke with 700% BoL scaling, providing 20 seconds of 10% CRIT Rate and 70% CRIT DMG buffs. We’re talking roughly 40% overall damage increase – whale territory, but undeniably powerful.
Mastering Her Rotations
Standard rotation: Cast E → Support buffs for 5+ seconds → Return to Arlecchino → Charged Attack to absorb Dues → N5D combo spam → Burst when healing is needed.
That N5D combo (5 Normal Attacks + Dash cancel) is your bread and butter. You’re skipping the lengthy 6th attack animation for optimal DPS. Takes practice, but muscle memory kicks in eventually.
Advanced techniques include BoL consumption manipulation, emergency Burst timing for healing (remember, it scales with current BoL), and maintaining BoL between enemy waves in multi-wave content.
Performance in Current Meta
Arlecchino absolutely dominates in Spiral Abyss with her high single-target damage and respectable AoE. Current Floor 12 heavily favors sustained damage against high-HP targets – right in her wheelhouse.
Overworld efficiency benefits from minimal setup requirements and straightforward rotations. Weekly bosses? Her sustained damage profile often outperforms burst-oriented DPS characters in longer encounters.
Common Pitfalls & How to Avoid Them
Don’t fall into these traps: over-prioritizing HP% substats (BoL scales from percentages, not flat values), neglecting CRIT balance despite her 38.4% CRIT DMG ascension, and excessive ER investment when you’re barely using Burst.
Low DPS troubleshooting checklist: Ensure maximum BoL absorption from Dues (wait those 5+ seconds), practice N5D combo timing, and verify your team buffs align with damage windows.
Frequently Asked Questions
What exactly is Bond of Life? BoL prevents healing but serves as Arlecchino’s damage resource. Hit 30% Max HP and you enter Masque state – your attacks convert to Pyro with damage bonuses. Gain BoL by absorbing Directives (65% Max HP) or Dues (130% Max HP).
Is her signature weapon worth the investment? Crimson Moon’s Semblance provides 15-20% damage increase over Deathmatch, but C1 offers similar gains plus interruption resistance. Most players find C1 better value unless they already own it.
What are her best teams? Vaporize (Yelan/Xingqiu + Bennett + Zhongli) for highest damage, Overload (Chevreuse + Fischl + Bennett) for competitive damage with unique mechanics, Mono Pyro (Kazuha + Bennett + Xiangling) for consistent performance.
How much Energy Recharge does she need? Depends entirely on Burst usage: 0% if you’re avoiding Burst entirely, 150-165% solo Pyro, 140-150% double Pyro, 125-135% triple Pyro, 100-110% in Overload teams. Decreases significantly with Favonius weapons and C4.
Can she survive without external healing? Absolutely – her kit blocks external healing anyway. Use shields (Zhongli), damage reduction (Xingqiu), or interruption resistance (C1) for survivability. Skilled players can operate without defensive supports using positioning and dash-canceling.
What’s the talent priority? Normal Attack to Level 10 first, no exceptions. Then Skill and Burst to Level 8. Her Normal Attack provides the largest damage gains per level invested – it’s not even close.


