

What’s Actually Changed in 6.0 Floor 12
The Numbers Don’t Lie (And They’re Scary)
Here’s the thing about this reset cycle—it’s brutal. Floor 12 enemies got a 150% HP buff, which sounds manageable until you’re staring down a Knuckle Duckle with 5,615,327 HP. That’s not a typo.
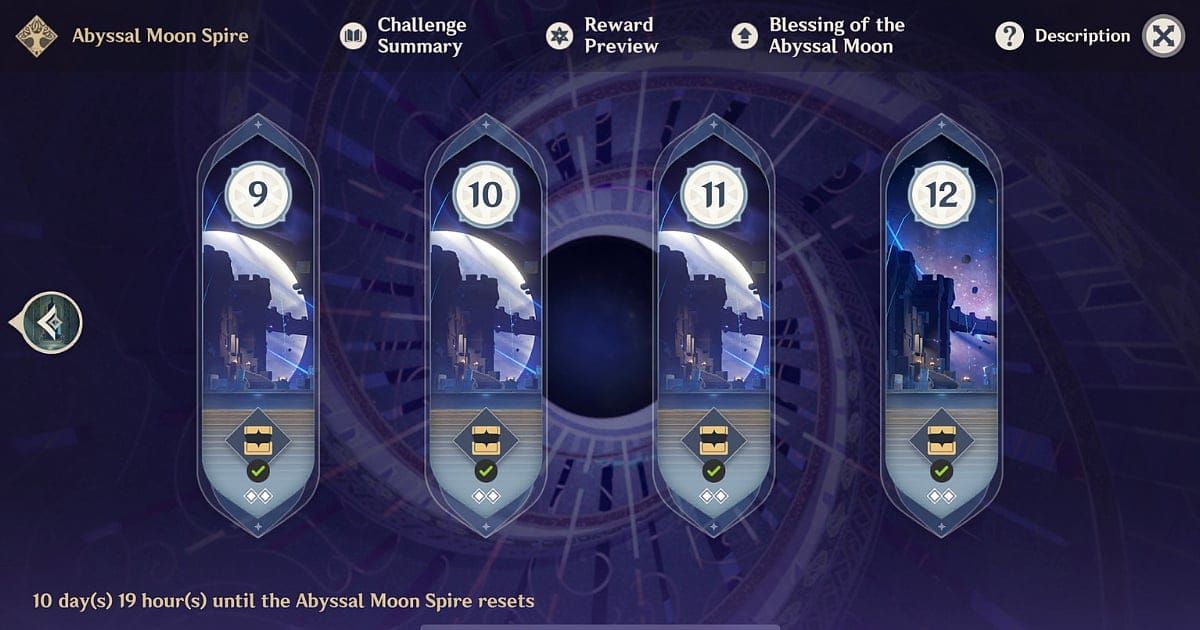
The Abyss resets monthly on the 16th, but version 6.0 throws us a curveball with two rotations: September 16 and October 16, 2025. Why? Honestly, your guess is as good as mine—maybe HoYoverse wanted to give us extra chances to suffer.
The Maguu Kenki trio makes its grand return too, each packing 2,205,907 HP. Remember when these guys felt challenging at half that health? Yeah, those were simpler times.
Enemy Lineup Breakdown (Brace Yourself)
First Rotation (September 16, 2025):
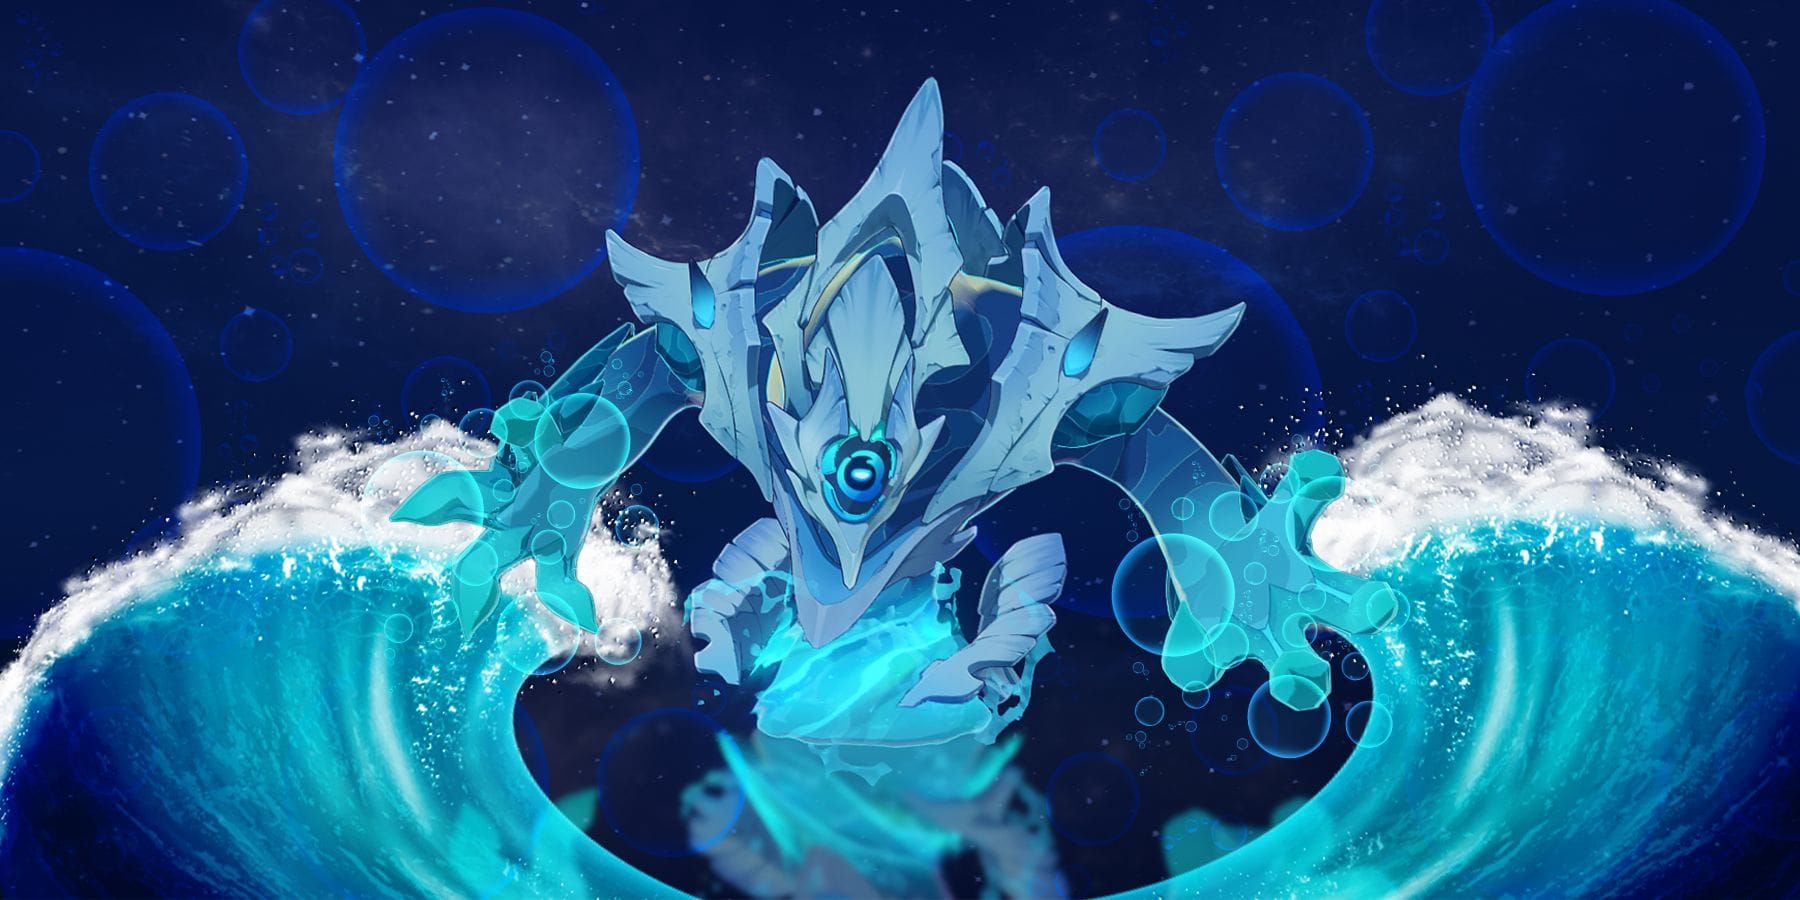
Chamber 1 starts deceptively manageable with a Mirror Maiden (1,022,145 HP), but then slams you with The Last Survivor of Tenochtzitoc at 3,407,150 HP. The second half? Two Tainted Water-Spouting Phantasms (681,430 HP each) followed by a Hydro Tulpa sitting pretty at 3,747,865 HP.
Chamber 2 keeps the Hydro theme going—because apparently we didn’t suffer enough—with dual Hydro Hilichurl Rogues (965,636 HP each) and a Radiant Moonfly (3,090,036 HP). The second half throws a multi-wave gauntlet at you: Thundercraven Rifthounds, Assault Specialist Meks, and an Eremite duo that’ll test every ounce of your stamina management.
Chamber 3 is where things get really spicy. An Oprichniki Thunderblitz Druzhina (831,900 HP) serves as your warm-up before the main event: that aforementioned Knuckle Duckle with its absolutely ridiculous 5.6 million HP. The flip side features a Shadowy Husks trio leading into three Maguu Kenki variants, each sporting 2,205,907 HP.
Second Rotation (October 16, 2025):
The October lineup swaps in The Night Watcher (1,609,878 HP), Cineas (2,085,774 HP), a Hermit Crab (4,409,072 HP), and an Oprichniki Fireblade Shock Trooper (4,263,489 HP). Slightly more manageable? Maybe. Still requiring serious commitment? Absolutely.
Why This Cycle Hits Different
Look, I’ve been covering Spiral Abyss rotations for a while now, and this one ranks among the most punishing. The Hydro-element prevalence severely limits team flexibility—you can’t just throw your usual Freeze comp at everything anymore. Those multi-million HP pools demand sustained DPS that many players simply haven’t needed before.
The 600-second time limit per chamber remains unchanged, but with these HP pools, you’re looking at battles that can easily stretch 4-5 minutes for a single boss. That’s… intense.
Full 36-star completion still nets you 200 Primogems and 60,000 Mora from Floor 12. When farming becomes insufficient for these increased difficulty demands, Genshin Impact Top Up services can help bridge the resource gap.
Breaking Down Each Chamber’s Nightmares
Chamber 1: When Hydro Becomes Your Enemy
The Mirror Maiden seems almost quaint now at just over a million HP. She still requires Cryo or Electro for shield breaking—standard stuff. But then comes The Last Survivor of Tenochtzitoc with its hat mechanic that can make or break your run.
Here’s what you need to know about those hats: the correct one contains 40% of the boss’s total HP and takes 300% increased damage from Electro-Charged reactions. The tell? Look for the ghostly face marking or that distinctive golden movement trail. Miss this, and you’re in for a very long fight.
The second half’s dual Phantasms demand AoE grouping—nothing revolutionary there. But the Hydro Tulpa at nearly 3.8 million HP? That’s where teams start breaking. Complete Hydro immunity means your Childe or Ayato suddenly become dead weight. Dendro reactions work beautifully for shield breaking, which is something I wish more players realized.
Chamber 2: The Endurance Test
Those Hydro Hilichurl Rogues teleport like caffeinated ninjas, each packing nearly a million HP. The Radiant Moonfly at 3 million HP loves staying airborne, making melee DPS a questionable choice.
But Chamber 2-2’s multi-wave encounter? That’s the real test of your team’s stamina:
Wave 1: Two Thundercraven Rifthounds (1,451,891 HP each) with their lovely corrosion effect Wave 2: Dual Assault Specialist Meks (927,011 HP each) Wave 3: Eremite Floral Ring-Dancer and Stone Enchanter (965,636 HP each)
Pro tip from personal experience: maintain central positioning and keep that healing active throughout. There’s no shame in playing defensively here.
Chamber 3: The Final Boss Rush
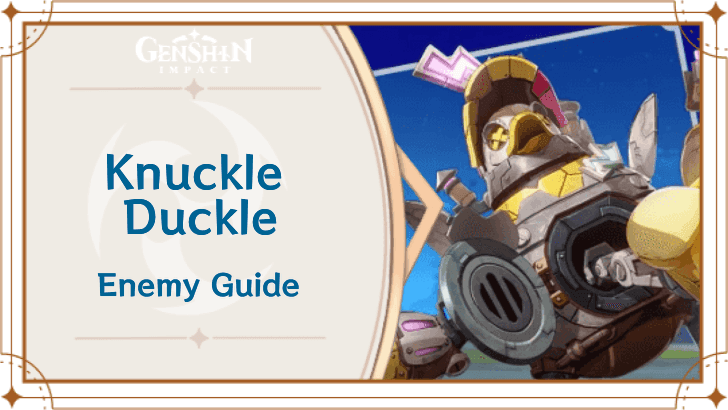
The Oprichniki Thunderblitz Druzhina at 831,900 HP serves as your appetizer before the main course: that monstrous Knuckle Duckle. Five and a half million HP means your team needs to sustain DPS for 4-5 minutes of continuous combat. That’s not a sprint—it’s a marathon.
The flip side features Shadowy Husks with their damage reflection, team buffs, and shield penetration nonsense. Then the Maguu Kenki trio coordinates Anemo, Electro, and Cryo attacks like some sort of elemental symphony of pain.
Strategy-wise: eliminate Husks in reverse HP order, focus single-target elimination for the Maguu Kenki. Don’t try to be clever—just pick one and delete it.
Teams That Actually Work
The Meta Champions
Electro-Charged Core (My personal favorite for this rotation):
Kokomi (Driver/Healer): 4pc Ocean-Hued Clam, HP/HP/Healing Bonus
Fischl (Off-field DPS): 4pc Golden Troupe, ATK/Electro/Crit
Beidou (AoE Electro): 4pc Emblem of Severed Fate, ATK/Electro/Crit
Kazuha (Support): 4pc Viridescent Venerer, EM/EM/EM
This comp thrives in Hydro-heavy environments. Kokomi enables consistent reactions while keeping everyone alive, Fischl provides ridiculous off-field damage (C6 nearly mandatory), and Beidou handles AoE situations.
Dendro Reaction Focus:
Nahida (Dendro DPS): 4pc Deepwood Memories, EM/Dendro/Crit
Xingqiu (Hydro Support): 4pc Emblem of Severed Fate
Kuki Shinobu (Electro Healer): 4pc Tenacity of the Millelith
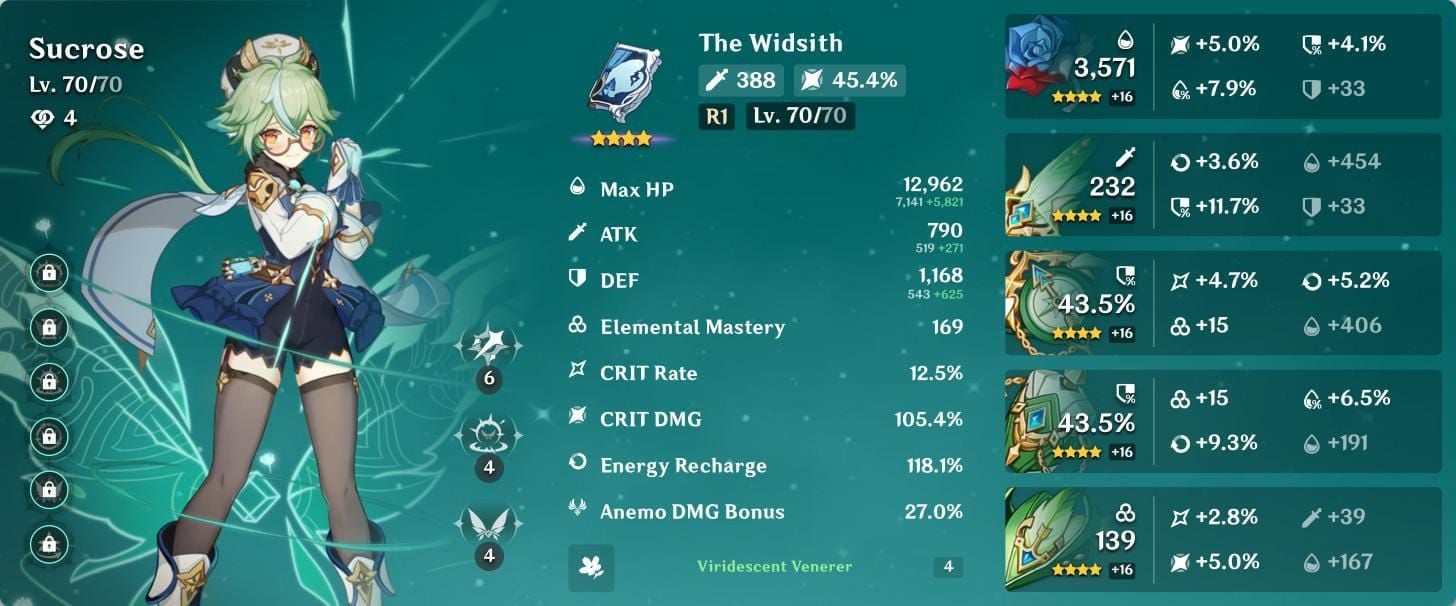
Sucrose (EM Support): 4pc Viridescent Venerer
Perfect counter to that Hydro Tulpa. Bloom reactions absolutely shred through shields, and the team’s self-sufficiency handles extended fights beautifully.
Hypercarry Configuration (For when you need raw damage):
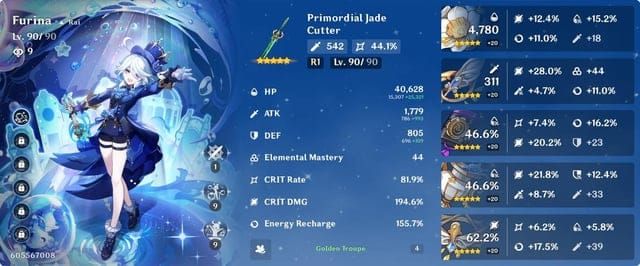
Neuvillette (Main DPS): 4pc Marechaussee Hunter, HP/Hydro/Crit
Furina (Sub-DPS): 4pc Golden Troupe, HP/Hydro/Crit
Xianyun (Support): 4pc Viridescent Venerer, ATK/Anemo/Healing
Kazuha (Grouping): 4pc Viridescent Venerer, EM/EM/EM
When you absolutely, positively need to delete a 5.6 million HP boss overnight.
Constellation Reality Check
Minimum viability: Kokomi C0 with Prototype Amber works fine. Neuvillette C0 is functional but noticeably slower.
Where constellations matter: Fischl C6 isn’t just recommended—it’s practically mandatory for optimal Electro-Charged performance. The difference is night and day. Neuvillette C1 can reduce clear times by 15-20%, but it’s luxury, not necessity.
Budget Solutions (Yes, F2P Can Do This)
The 4-Star Squad
Budget Electro-Charged:
Sucrose (Driver): 4pc VV with Thrilling Tales
Kuki Shinobu (Healer/Electro): 4pc Tenacity
Xingqiu (Hydro Support): 4pc Emblem
Fischl (Off-field DPS): 4pc Golden Troupe
This team costs zero wishes for established players and can absolutely achieve 36 stars with proper investment.
F2P Vaporize Alternative:
Xiangling: 4pc Emblem of Severed Fate
Bennett: 4pc Noblesse Oblige
Xingqiu: 4pc Emblem of Severed Fate
Sucrose: 4pc Viridescent Venerer
The classic National team variant. Not flashy, but reliable.
Investment Minimums
Artifacts: Main DPS needs +16 artifacts with correct main stats. Supports can manage at +12 if you focus Energy Recharge.
Talents: Main DPS Normal Attack and Burst to Level 8. Support bursts Level 6-8.
Weapons: Level 80 minimum for DPS, Level 70 for supports. No exceptions.
F2P weapon highlights: Thrilling Tales R5 for Sucrose (that 48% ATK buff is no joke), The Catch for Xiangling, Iron Sting for Kuki. When additional resources become necessary for character development, Buy Genesis Crystals through reliable platforms.
Specific Counter Strategies
Shield Breaking 101
Hydro shields: Dendro reactions work best, Electro-Charged as backup. Apply Dendro immediately when you see shield formation—don’t wait for visual confirmation.
Multi-element insurance: Always maintain two different elemental counters per team. Trust me on this.
Boss Mechanics That Matter
Pipilpan Idol: The correct hat shows either a ghostly face or golden trail. Position centrally, pause DPS during selection phases. Don’t guess—wait for the tell.
Climbing mechanics: Xianyun provides direct flight access. Kazuha offers sufficient height for most situations. Geo Traveler constructs work in a pinch.
When Things Go Wrong
Energy crisis: Prioritize low-cost skills over bursts. Sometimes a well-timed skill beats waiting for burst energy.
HP emergency: Use food buffs during preparation phase. No shame in preparation.
Time pressure: Focus highest DPS-per-second abilities over complex rotations. Simple and effective beats fancy and slow.
Build Requirements (The Real Numbers)
DPS Benchmarks
You need 60% Crit Rate minimum, 120% Crit Damage, 1,800+ ATK, and 120-140% Energy Recharge. These aren’t suggestions—they’re requirements for comfortable clears.
Support priorities: 180-220% Energy Recharge, 20,000+ HP, 600+ Elemental Mastery for reaction supports.
Testing method: Can you eliminate the Masanori dummy within 30-40 seconds? If yes, you’re Floor 12 ready. If no, back to farming.
Artifact Set Priorities
Universal sets: 4pc Emblem for burst characters, 4pc Viridescent for Anemo supports, 4pc Ocean-Hued Clam for healers.
Farming efficiency tip: Focus the Emblem domain first. It’s universally applicable and saves sanity.
Your 36-Star Roadmap
Pre-Flight Checklist
DPS characters Level 80+
Support characters Level 70+
All weapons Level 80+
Critical talents Level 8+
Two complete teams with elemental coverage
Healing capability verified
Energy generation tested
Execution Timeline
Chamber 1: 0-60s first wave elimination, 60-180s boss completion. Target: 480+ seconds remaining.
Chamber 2: 0-90s first wave clear, 90-150s single boss completion, 150-180s multi-wave finish. Target: 450+ seconds.
Chamber 3: 0-120s preliminary elimination, 120-240s high-HP boss defeat. Target: 420+ seconds.
These timings aren’t arbitrary—they’re based on successful clear patterns.
When You’re Stuck
Insufficient DPS: Check artifact stats first, test overworld synergy, consider targeted upgrades.
Energy problems: Increase ER substats, add battery characters, adjust rotation timing.
Survivability issues: Add healer/shielder, improve dodging patterns, increase HP/DEF substats.
Advanced Techniques
Animation Canceling
Dash cancel after final normal attack hits for faster combos. Fischl skill canceling through character swapping saves 0.5-1 seconds per cycle—sounds small, adds up over time.
Time burst animations with enemy attacks for iframe efficiency. It’s a skill worth developing.
Energy Management Mastery
Swap to energy-needy characters after skill activation but before particle collection. Coordinate Favonius weapons with high crit rate characters. Position battery characters strategically for optimal energy distribution.
Small optimizations compound into significant time saves.
Mistakes That Kill Runs
Team Composition Errors
Elemental conflicts: Don’t bring Electro to Freeze teams. Use Anemo supports instead.
Counter coverage: Ensure appropriate shield counters per team half. This seems obvious until you’re stuck.
Timing Disasters
Burst misalignment: Bennett ATK buff before main DPS burst. Kazuha absorption setup required—don’t rush it.
Energy deficits: Include particle generation windows in rotation planning.
Resource Misallocation
Over-investment syndrome: Focus two main DPS before expanding your roster.
Farming inefficiency: Complete builds in universal domains before switching focus.
Weapon neglect: Enhance weapons to max before character 80→90 upgrades. Better returns on investment.
FAQ: The Questions Everyone’s Asking
What are the exact enemy lineups for Genshin Impact 6.0 Floor 12?
First rotation (Sept 16): Chamber 1 features Mirror Maiden (1,022,145 HP) and Pipilpan Idol (3,407,150 HP) first half, dual Phantasms (681,430 HP each) and Hydro Tulpa (3,747,865 HP) second half. Chamber 2 includes Hydro Rogues leading to Radiant Moonfly (3,090,036 HP), plus a brutal three-wave encounter. Chamber 3 culminates with Knuckle Duckle (5,615,327 HP) and the Maguu Kenki trio (2,205,907 HP each).
Can F2P players actually achieve 36 stars with budget teams?
Absolutely. The Sucrose/Kuki/Xingqiu/Fischl composition costs zero wishes for established players. Requires Level 80 characters, +16 artifacts with correct main stats, Level 8 critical talents, and Level 80 weapons. I’ve seen community examples showing success with 3-4 months of focused farming.
What DPS requirements are needed for completion?
Chamber 1 demands 35,000-40,000 DPS per team half. Chamber 3 requires 50,000+ sustained DPS for Knuckle Duckle’s 5.6 million HP pool. Test with the Masanori dummy—if you can eliminate it within 30-40 seconds, you meet Floor 12 standards.
How often does Floor 12 reset and change?
Resets monthly on the 16th, providing 200 Primogems and 60,000 Mora. Enemy lineups typically change with new versions (every 6 weeks). Version 6.0 unusually features two rotations: September 16 and October 16, 2025.
Which characters work best against these new bosses?
The Hydro-heavy composition favors Electro-Charged teams heavily. Kokomi enables consistent reactions plus healing. Fischl C6 is nearly mandatory for optimal Electro application. Nahida counters Hydro Tulpa through Bloom reactions beautifully. Neuvillette or other hypercarry compositions handle high-HP encounters most efficiently.
What constellation levels are actually required?
Most characters achieve completion at C0 with proper investment. Fischl C6 dramatically improves performance in Hydro rotations—it’s the exception worth pursuing. Kokomi C1 simplifies energy management but remains optional. Neuvillette C1 reduces clear times 15-20% but isn’t necessary. Focus investment over constellations—well-built C0 teams consistently outperform higher constellation characters with poor investment.


