

Season 4 Airport Mission Overview
Season 4 launched January 8, 2026 at 6PM EST. Airport map operates on 72 tick rate servers with 35-minute raid durations.
Three critical missions dominate progression:
- Signal: Eliminate 3 operators each with AMB-17, T191, U191 weapons on TV Station
- Close Encounters: Search 4 unsearched small safes on Airport
- Building a Stronghold: Kill 10 enemies north of river, search 3 encrypted safes on Airport
For faster progression, Arena Breakout Mobile Bonds top up through BitTopup provides instant access to premium loadouts with competitive pricing trusted by 500K+ players.
New AI Behavior Patterns
Airport AI detection range: 30-40m standing, 15-20m crouch-walking (60% audio reduction). AI reinforcements activate when sustained gunfire occurs within 100m of patrol routes. Eliminating one target triggers 45-second alert window where nearby units converge. Complete kills within this window or disengage entirely.
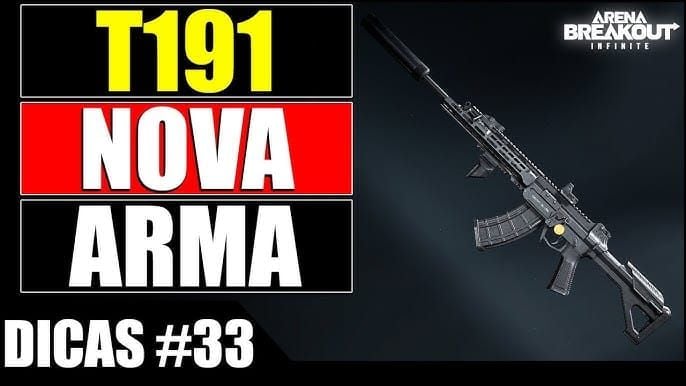
Mission Objectives: AMB-17/T191/U191 Requirements
AMB-17: 9x39mm, 730 RPM, 37m effective range. Meta builds cost 280k Koens (ergonomics 61-69, stability 51-61). Ideal for Terminal close-quarters.
T191: 5.8x42mm, 750 RPM, 53m range. Meta builds cost 490k Koens (ergonomics 73-81, stability 70-80). Superior for Hangar medium-distance fights.
U191: Heavy armor, enhanced detection, aggressive pursuit. Spawns conditionally based on player activity.
Risk vs Reward Analysis
Airport runs yield 200-400k Koens per 12-15 minute run using optimized routes. Grain Trade Center-Stables-Motel path concentrates high-value safes within 350m circuit.
Key loot zones:
- Motel: 3 safes (2011 key required)
- Stables: 1 upstairs safe (2011 key)
- Northridge Hotel: 8 safes (densest concentration)
2011 key costs 30-50k Koens, unlocks 4-6 safes per raid—immediate positive ROI.
AMB-17 AI Units: Spawn Locations and Kill Methods
AMB-17 units concentrate in Terminal: Baggage Claim, Security Checkpoint, Gate areas. Patrol predictable 40-60m loops with 8-12 second stationary observation periods.
Exact Spawn Coordinates
- Terminal Baggage Claim: 2-3 units near conveyor belts (southwestern quadrant)
- Security Checkpoint: 1-2 units behind metal detectors with corridor sightlines
- Gate waiting areas: 1 roaming unit alternating between seating rows every 45 seconds
Grain Trade Center: 2 ammo boxes provide 60-120 rounds in 45-60 seconds.
Optimal Engagement
AMB-17 units have minimal armor. Headshots lethal within 2-3 rounds from 5.8x42mm or 9x39mm. Engage at 15-25m where accuracy remains high and AI reaction time creates 0.8-1.2 second advantage window.
Position behind solid cover with pre-aimed angles on patrol endpoints. Deliver controlled 2-round bursts to head when target reaches stationary point. Safe interaction takes 12-18 seconds (standard) or 15-22 seconds (electronic).
Recommended Weapons
T191 assault rifles optimal: 53m range, 750 RPM. Load 90-120 rounds across primary magazine and tactical rig.
Budget alternative: Basic AK with 7.62x39mm PS ammunition, under 50k Koens. Maintain weapon durability above 80% to prevent malfunctions.
Solo Kill Strategy
- Enter Terminal through western entrance at 2-3 minute mark
- Crouch-walk to Baggage Claim perimeter, maintain 20m distance
- Observe two complete patrol cycles (90-120 seconds)
- Position behind luggage cart cover with pre-aimed angle
- Execute 2-round headshot burst at stationary endpoint
- Relocate 15m laterally to secondary cover
- Wait 30 seconds to confirm no reinforcements
- Loot and continue to next spawn
Common Mistakes
Running generates audio detectable at 40-50m, alerting all AI. Crouch-walk between zones. Looting immediately after kills without confirming surroundings triggers reinforcements. Maintain 360-degree awareness for 30 seconds post-engagement.
T191 Elimination Tactics
T191 AI units wear enhanced armor requiring precise shot placement. Patrol Hangar zones, Runway perimeters, Control Tower approaches with 60-80m routes.
Patrol Routes and Timing
Hangar zones: 3-4 T191 units in paired patrols, 25-35m separation creating overlapping detection zones. Engage when pairs reach maximum separation (15-20 second window).
Control Tower perimeter: 2 T191 units on elevated platforms (8-12m height), observing approaches. Use structural cover and vertical angle awareness.
Headshot vs Body Shot Efficiency
T191 armor absorbs 4-6 center mass hits from 5.8x42mm before penetration. Headshots lethal within 2-3 rounds regardless of armor.
Recommended armor:
- SEK Composite Body Armor Tier 4: 70 durability, -5% movement
- Sentry 308 Armored Rig: 60 durability, 20 storage slots, -6% movement
Cover Utilization
Hangar structural pillars provide full concealment. Position 1-2m behind pillar edges, use quick-peek for intelligence gathering. Stacked cargo containers create multi-level cover—vertical movement disrupts AI tracking.
Squad Coordination
Duo teams: Assign primary/secondary targets, execute simultaneous headshots to prevent reinforcement triggers. Communicate target position, armor status, reload timing.
Full squads: Execute pincer movements—2 players suppressive fire, 2 flank from perpendicular angles. Works best in Hangar zones.
U191 Kill Methods
U191 represents highest-threat AI: heavy armor, enhanced detection, aggressive pursuit.
Spawn Triggers
U191 activates when players remain in high-value zones (Northridge Hotel, Control Tower, AOK Archives) for 3+ consecutive minutes. Additional spawns after eliminating 5+ AI within 200m radius.
Early raids (0-5 minutes) rarely encounter U191. Late raids (20+ minutes) face guaranteed U191 presence.
Pre-Engagement Checklist
- Ammunition reserves exceed 60 rounds
- Armor durability above 50%
- Medical supplies in tactical rig quick-access slots
- Two escape routes identified with hard cover every 15-20m
- Surrounding area cleared of additional AI
Kiting and Aggro Management
U191 pursues at 90% player sprint speed. Lead through pre-planned routes with corner angles breaking line of sight every 25-30m. Crouch-walk after breaking line of sight for 8-10 seconds resets aggro.
Emergency Escape Routes
Northern Outpost: Requires 1 kill, max 2 players, operates 10-20 minute windows. Position 200m northwest of Motel.
Drainage Pipe: First 10 minutes only, no backpacks. Viable for pure mission completion.
Southern Blockade: 2000 Koen payment, guaranteed access regardless of timing.
Safe Search Locations: Loot Routes
Grain Trade Center-Stables-Motel route: 350m circuit, 12-15 minutes, 200-400k Koens per run.
For maximized loadout investments, buy Arena Breakout Bonds instant recharge at BitTopup for fast delivery and excellent customer service.
Baggage Claim Safe Zone Route
Step 1: Spawn southern insertion, crouch-walk 150m northwest to Grain Trade Center. Loot 2 ammo boxes (45-60 seconds, 60-120 rounds).
Step 2: Continue 150m northwest to Stables, access upstairs safe with 2011 key. Yields 50-80k Koens (jewelry, electronics, currency). Safe interaction 12-18 seconds.
Step 3: Advance 100m northeast to Motel, unlock 3 safes with 2011 key. Collectively 150-250k Koens in 3-4 minutes.
Step 4: Extract Northern Outpost 200m northwest after 10-15 minutes. Requires 1 kill (AI acceptable), 2-2.5 minute extraction.
Control Tower Perimeter
Control Tower Fountain safe: Executive Lounge Key 2F required. Medium-value loot, minimal PVP.
AOK Control safe: VIP Reception Key 2F. AOK Archives safe: AOK Archives Key, yields 250-500k Koens. High-risk high-reward.
Maintenance Area Hidden Stashes
Valley Beach Villa: 2 safes, 10 weapon crates in 40m radius. Outside primary traffic routes.
Valley Port: 1 safe, 7 weapon boxes near waterfront. Proximity to Access Bridge extract (activates 25 minutes) suits late-raid scavenging.
Audio Cues for Player Detection
Player footsteps exhibit irregular movement cadences with frequent direction changes. AI maintains consistent patrol rhythms. Distinguish threats 30-40m before visual contact.
Door opening sounds indicate recent activity within 50m. Fresh interactions (within 30 seconds) produce louder audio.
The 2-Extract Strategy
Traditional multi-extract wastes 5-8 minutes per attempt while exposing to cumulative PVP risk. 2-extract strategy designates one primary, one contingency.
Primary Extract Selection
Northern Outpost optimal for Grain Trade Center-Stables-Motel routes: 200m from Motel, 10-20 minute operational window, 1 kill requirement.
Southern Blockade: Universal backup, 2000 Koen payment for guaranteed access. Maintain 3000+ Koens in secure container.
Secondary Extract Contingency
Access Bridge: Activates 25 minutes, late-raid emergency option. Position near bridge 22-24 minutes for first-access advantage.
Parking Lot Helicopter: Requires 2 dogtags after 1 minute activation. Suits squad play, impractical for solo mission runs.
Inventory Management
Prioritize high-value-per-slot: jewelry, electronics, currency, rare keys. Discard low-value ammunition and basic medical supplies once secure container fills.
Sentry 308 Armored Rig's 20 slots accommodate mission-critical loot with Tier 4 protection. Balance weight to preserve 85%+ movement speed.
Optimal Loadouts
Budget Loadout (Under 50K Koen)
- Primary: Basic AK with 7.62x39mm PS (15k)
- Armor: Class 3 body armor, 50 durability (8k)
- Helmet: Class 2, no face shield (5k)
- Tactical Rig: 12-slot basic (4k)
- Medical: 2x bandages, 1x tourniquet, 1x painkiller (3k)
- Misc: 2011 key, flashlight, spare mag (15k)
Total: 50k Koens
Handles AMB-17 effectively, struggles with T191 armor penetration (4-6 body shots per kill).
Mid-Tier Loadout (50K-150K Koen)
- Primary: T191 with basic attachments (65k)
- Armor: SEK Composite Body Armor Tier 4 (25k)
- Helmet: Class 3 with visor (15k)
- Tactical Rig: Sentry 308 Armored Rig (20k)
- Medical: 3x bandages, 2x tourniquets, 2x painkillers, 1x medkit (8k)
- Misc: 2011 key, laser sight, 3x spare mags (17k)
Total: 150k Koens
Reliable T191 elimination (2-3 headshot lethality), adequate armor for 2-3 firefight survivability. Positive ROI after 1-2 successful extractions.
Insurance Strategy
Insure primary weapons and armor exceeding 50k Koen value. Insurance costs 10-15% of item value, returns 70-80% when deaths occur in non-looted locations. Budget loadouts rarely justify insurance.
Avoid insuring tactical rigs and helmets below Class 3. Focus insurance on high-tier weapons with meta attachments.
Medical Supply Requirements
Position 1 tourniquet and 1 bandage in tactical rig quick-access slots. Store additional supplies in backpack. Painkillers maintain movement speed when injured.
Medkits restore 30-40% health over 8 seconds, require safe positioning. Reserve for post-engagement recovery, not mid-combat.
Timing and Entry Strategy
Early vs Late Raid
Early (0-5 minutes): Maximum player density in premium zones. Minimal AI spawns, peak PVP risk. Avoid unless targeting PVP objectives.
Mid-raid (8-15 minutes): Optimal balance. Initial waves extracted/died, secondary zones accessible, moderate AI presence. Grain Trade Center-Stables-Motel route most efficient.
Late (20+ minutes): Players concentrated near extracts, predictable camping. Maximum AI density, guaranteed U191 presence. Suits experienced players.
AI Spawn Timing
Reinforcement waves at 5, 12, 20-minute marks introduce fresh patrols into cleared zones. U191 spawns exclusively after 15 minutes in premium zones. Complete missions before this threshold to eliminate high-threat encounters.
Player Traffic Analysis
Northridge Hotel: Peak traffic 2-8 minutes. Traffic decreases 60-70% after 10 minutes.
Extraction points: Contested 15-20 minutes when mid-raid players complete objectives. Northern Outpost and Southern Blockade experience highest camping activity.
Advanced Tactics: Solo vs Squad
Solo Stealth Route
Execute Grain Trade Center-Stables-Motel with strict crouch-walking. Avoid non-essential AI engagements. Maintain 30m+ distance from gunfire audio. Solo survival depends on remaining undetected.
Duo Coordination
Assign roles: one eliminates AI, second loots safes and provides overwatch. Reduces mission time 25-30% vs solo. Communication: target callouts with cardinal directions, ammunition status every 30 seconds, extraction timing.
Full Squad Tactics
Four-player squads execute aggressive Northridge Hotel rushes during early windows, overwhelming AI through concentrated firepower. Assign one overwatch, three execute room clearing.
Distribute high-value loot across multiple players to prevent total loss from single deaths.
When to Abort
Abort criteria: armor durability below 30%, ammunition under 40 rounds, medical supplies exhausted, sustained PVP contact. Early extraction preserves partial progress, prevents total gear loss.
Hunter's Path extract: Requires backpack discard, offers immediate access regardless of timing. Use when carrying valuable secure container loot but facing overwhelming opposition.
Common Failure Points
Overextending After First Kill
Maintain defensive positioning 30 seconds post-engagement. Use audio to confirm clear surroundings before advancing. Treat each kill as isolated event requiring fresh threat assessment.
Ignoring Audio Cues
Audio provides 2-4 seconds advance warning before visual contact. Reduce in-game music to zero, increase effects volume to maximum. Quality headphones provide directional accuracy for threat triangulation.
Poor Inventory Management
Pre-organize inventory during safe moments. Designate specific tactical rig slots for medical, ammunition, keys. Maintain consistent organization for muscle-memory access during high-stress situations.
Underestimating AI Reinforcements
Sustained gunfire (3+ seconds continuous) within 100m triggers reinforcements regardless of initial density. Execute quick, decisive engagements. Suppressed weapons reduce trigger range 40-50%.
Maximize Season 4 Progress
Koen Farming While Completing Missions
Grain Trade Center-Stables-Motel generates 200-400k Koens per 12-15 minute run. 800k-1.6M Koen hourly potential with consistent execution.
Alternative locations:
- Sewage Plant: 3 safes
- Campus Services: 2 safes, compact layout
Cost-Benefit Analysis
Budget loadouts (50k): Require 1 success per 4 attempts for break-even. Mid-tier (150k): 1 success per 2-3 attempts for positive ROI.
Insurance reduces effective loss rates 70-80% for remote deaths, improving break-even ratios.
Resource Allocation
Prioritize 2011 key purchases (30-50k) as foundational investment—highest ROI of any purchasable resource.
Allocate 20-30% farming profits toward progressive loadout improvements, maintain 70% reserves for insurance and replacement gear. Sustains long-term progression without bankruptcy risk.
FAQ
Where do AMB-17 units spawn in Airport Season 4? Terminal building: Baggage Claim (2-3 units), Security Checkpoint (1-2 units), Gate waiting areas (1 roaming unit). Patrol 40-60m loops with 8-12 second stationary observation periods.
What's the fastest way to kill T191 AI? 2-3 headshots from 5.8x42mm or 9x39mm. Engage 15-25m from solid cover, controlled bursts when targets reach stationary points. Crouch-walking reduces detection from 30-40m to 15-20m.
Which extraction points are safest for Airport missions? Northern Outpost optimal for Grain Trade Center-Stables-Motel routes (1 AI kill, 10-20 minute window, 2-player capacity). Southern Blockade guaranteed for 2000 Koens. Avoid Parking Lot Helicopter and Access Bridge during peak 15-20 minute traffic.
What loadout is best for Airport AI elimination missions? Mid-tier: T191 (65k), SEK Composite Body Armor Tier 4 (25k), Sentry 308 Armored Rig (20k). 150k total delivers reliable 2-3 headshot lethality against T191 with adequate protection for 2-3 firefights.
Can you complete Airport missions solo in Season 4? Yes. Use Grain Trade Center-Stables-Motel stealth route with strict crouch-walking. Enter 8-15 minute mid-raid windows. Avoid non-essential AI, maintain 30m+ distance from gunfire.
How do you avoid PVP while completing Airport missions? Mid-raid entries (8-15 minutes), crouch-walk exclusively (60% audio reduction), avoid premium zones (Northridge Hotel, Control Tower), extract Northern Outpost 10-15 minutes before peak camping (15-20 minutes).


