Understanding Marulos Extract Trap Spots in Arena Breakout
Here's the thing about Arena Breakout's Marulos map – it's absolutely brutal for extraction camping. And honestly? That's by design.
Extract trap spots aren't just random hiding places. They're carefully chosen positions where experienced players intercept opponents trying to extract with fat loot bags. These spots work because they exploit something fundamental: predictable movement patterns and those agonizing vulnerability windows during extraction timers.
What makes a trap spot deadly? Superior sightlines, solid cover options, and – this is crucial – multiple escape routes. During extraction attempts, players become sitting ducks. They're locked into confined areas, counting down those endless seconds while praying nobody's watching.
For competitive players serious about dominating these zones, Arena Breakout Bonds top up for Dust to Gold raids through BitTopup ensures you've got the resources for premium loadouts and multiple raid attempts. Because let's face it – you're going to die learning these spots.
The Dust to Gold Event Meta: Why Extract PvP Intensifies
Dust to Gold events completely flip the script on risk-reward calculations. Suddenly everyone's carrying gear worth 500k+ Koens, and extraction zones become absolute war zones.
I've watched players completely change their behavior during these events. Conservative looters become aggressive. Rats turn into chads. The event mechanics often modify extraction requirements too – payment costs, extended timers, conditional elements that create even more opportunities for smart positioning.
The economics are simple: successful extract ambushes during events yield 300,000-800,000 Koens from single engagements. That's not pocket change. The most successful operators I know don't camp every extraction – they focus on high-probability engagements against overloaded players.
Complete Marulos Extraction Point Overview
Marulos runs three extraction categories, and understanding this system is fundamental to successful camping (or avoiding it). You've got fixed green extracts that spawn opposite to your starting position, chance-based white extracts marked by red smoke when active, and conditional orange extracts requiring specific items or payments.
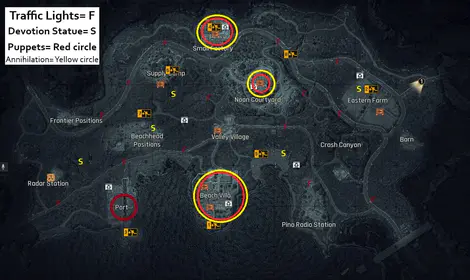
All Marulos Extract Locations Mapped
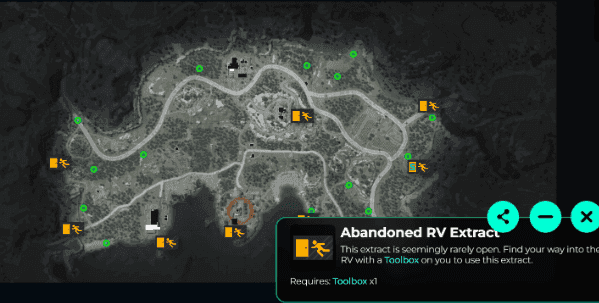
Farm Area Extracts:
- Outpost (Fixed): Your bread-and-butter opposite-spawn extraction. Minimal exposure time, but everyone knows about it.
- Boulder Wall (Fixed): Elevated position that's a nightmare to approach safely. Sniper heaven.
- Highway (Fixed): Open terrain extraction that's basically a death sentence if someone's watching.
- Artificial Lake (Chance): Red smoke confirmation required. Moderate cover, but you're gambling on availability.
- Path to Northridge (Chance): Treeline approach with decent concealment options.
- Southern Blockade (Conditional): 2,000 Koen payment requirement (doubles during Lockdown). Extended vulnerability window.
- Hunter's Path (Conditional): Backpack discard requirement. Watching players agonize over gear sacrifice decisions never gets old.
Valley Area Extracts:
- Northeast Road (Fixed): Peripheral location with excellent escape routes. Underutilized by most players.
- Northwest Road (Fixed): Coastal approach with natural elevation cover.
- Port (Chance): High-value loot area with integrated extraction. Expect company.
- Beachhead Positions (Chance): Multiple sub-locations requiring tactical assessment.
- Beach Villa Helipad (Conditional): 2 Dogtag requirement plus militant clearing. High barrier to entry.
In practice, high-traffic extractions like Port, Southern Blockade, and conditional extracts see 60-80% more player activity due to proximity to valuable loot spawns. Buy Arena Breakout Bonds online for Marulos gear optimization through BitTopup's secure platform for multiple loadout configurations.
Extract Timer Mechanics and Vulnerability Windows
Most extractions lock you into 10-30 second exposure windows where you can't move beyond the designated radius. It's agony when you know someone might be watching.
Conditional extracts are even worse. Dam Sluice Gate requires a 3-minute activation window – that's an eternity in PvP terms. Access Bridge only becomes available after 25 minutes, creating predictable late-raid traffic.
Timing your positioning matters enormously. Early raid positioning (10-15 minutes) targets aggressive looters who hit high-value areas fast. Late positioning (25+ minutes) catches conservative players who've spent the entire raid accumulating loot.
12 Deadly Marulos Extract Trap Spots (Detailed Breakdown)
North Extract Ambush Angles (Spots 1-3)
Spot 1: TV Station Overwatch
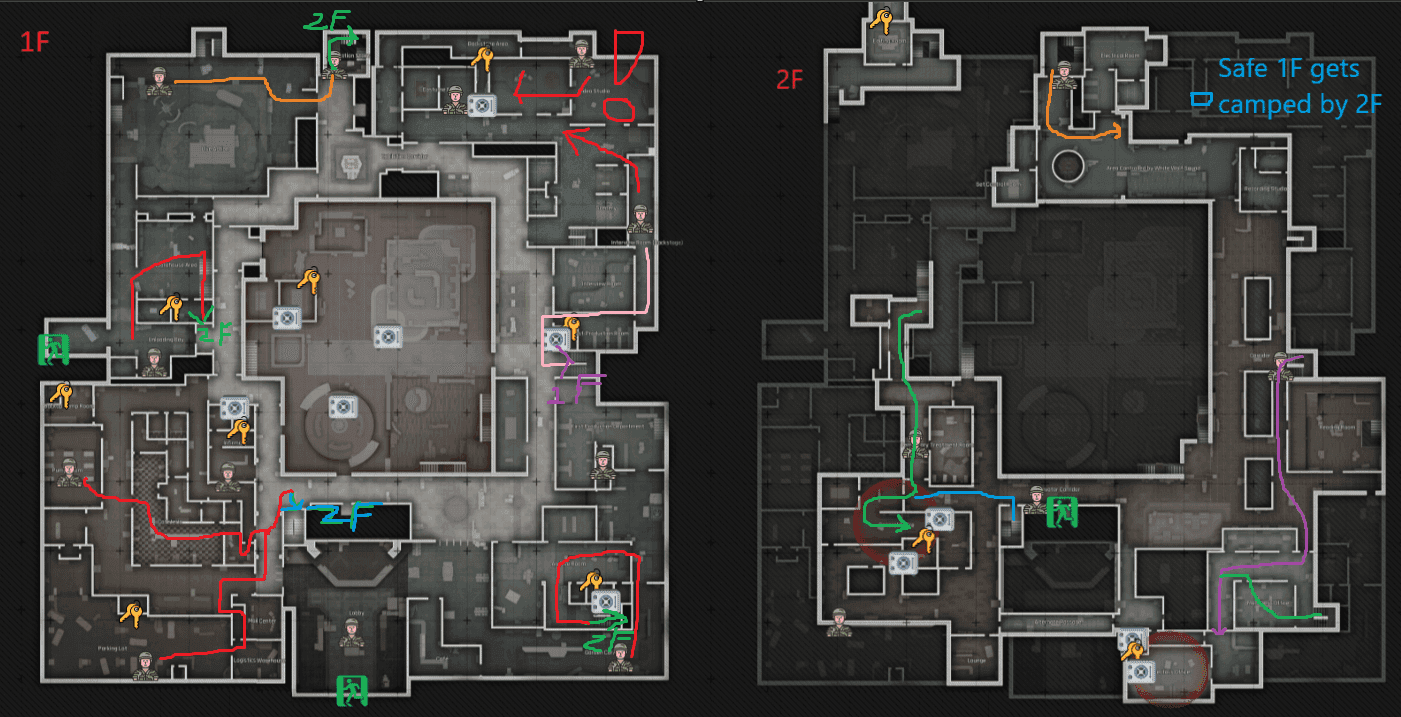
Position yourself on the elevated platform 150 meters northeast of TV Station extraction. This spot's beautiful – clear sightlines, multiple escape routes through the industrial complex, and optimal engagement distance of 80-120 meters for scoped weapons.
What works best is pre-aiming the extraction switch area. Players get tunnel vision during the activation sequence.
Spot 2: Loading Dock Flanking Position The shipping container arrangement 200 meters east of Loading Dock extraction is criminally underused. Staggered container layout provides excellent cover while maintaining visual contact with the extraction switch.
Pre-aim that 20-second exposure window when players activate the mechanism. They're completely committed once they start the timer.
Spot 3: Elevator Shaft Perimeter Building ruins 100 meters south of Elevator extraction offer elevated second-floor positioning with superior angles. The 10-minute activation delay gives you ample setup time – use it.
East Extraction Zone Trap Positions (Spots 4-6)
Spot 4: Port Authority Sniper Nest
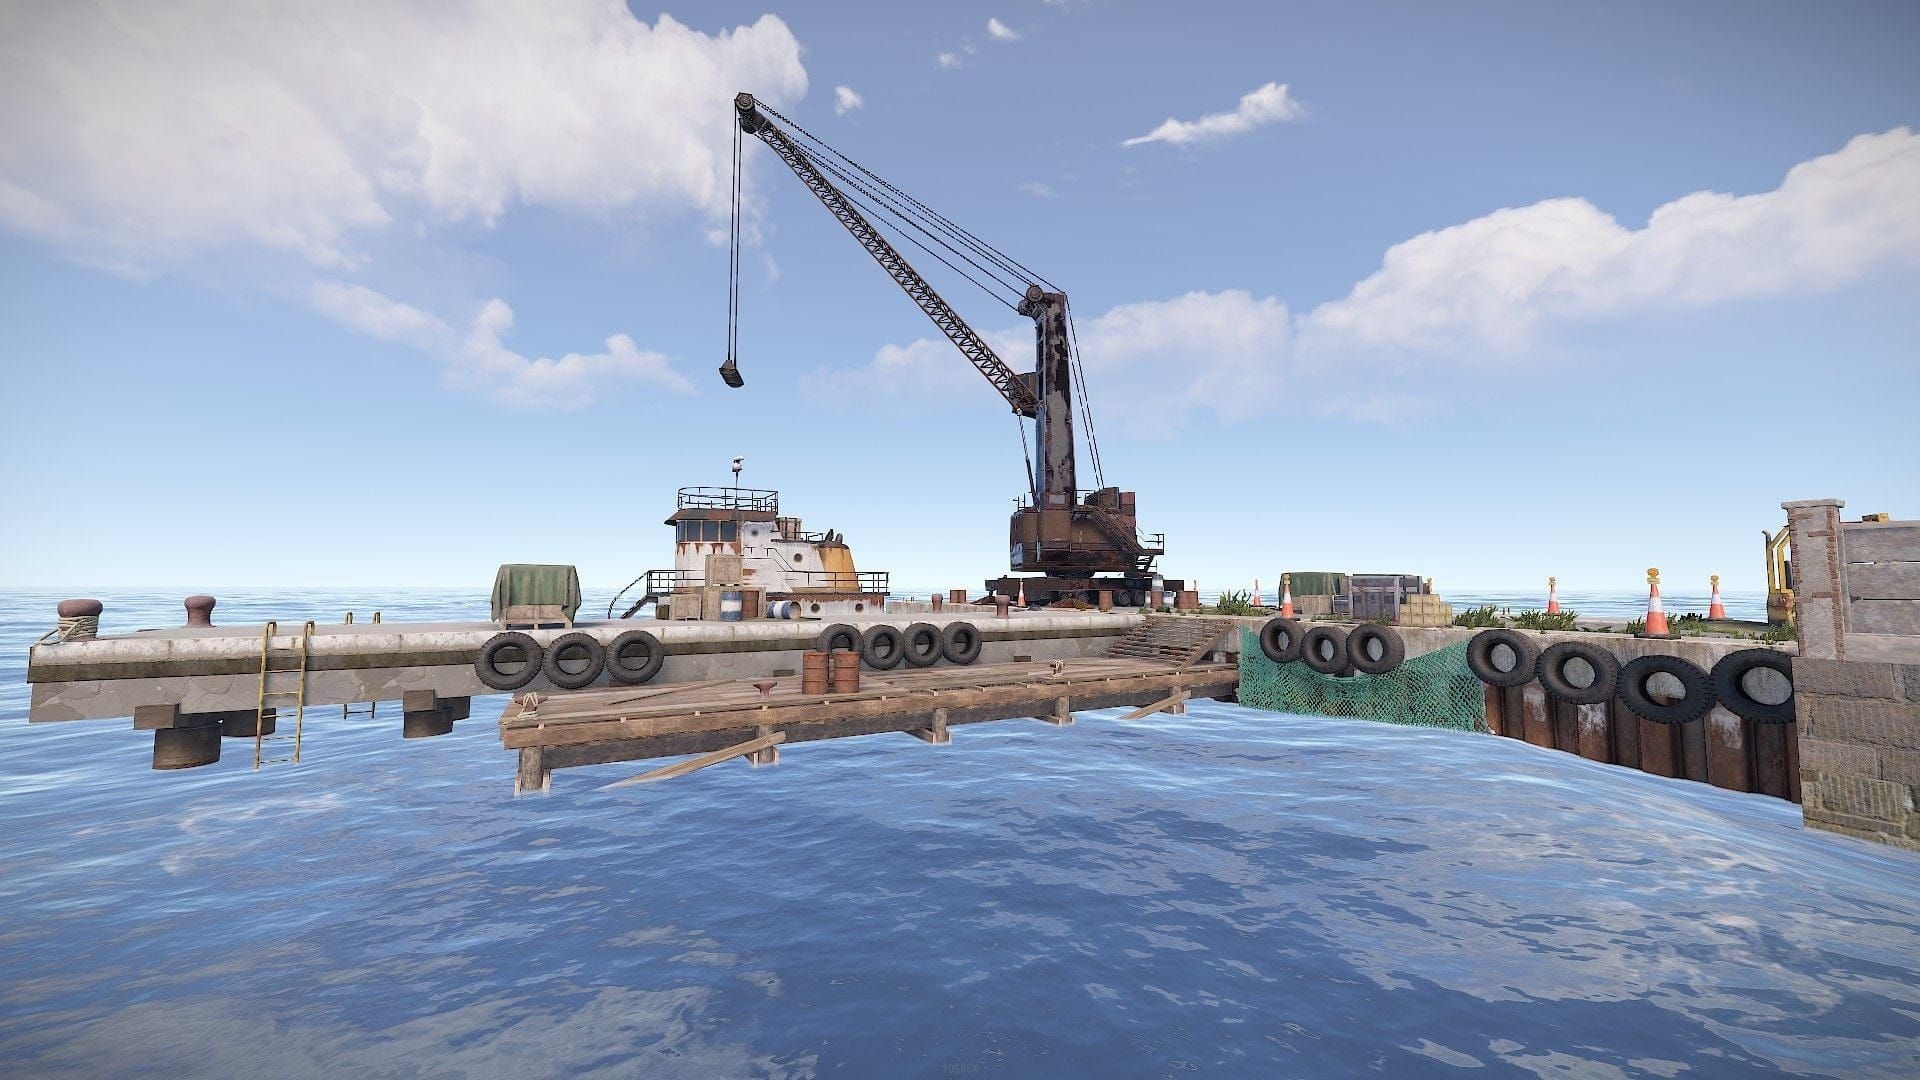
The crane structure overlooking Port extraction is absolutely devastating. 200+ meter engagement capability with clear escape routes via industrial walkways. You're not just dominating the extraction zone – you control the high-value loot spawns too.
Spot 5: Beachhead Treeline Concealment Dense vegetation 80 meters inland from Beachhead extractions offers natural camouflage with multiple firing lanes. The varied terrain lets you reposition quickly between different Beachhead sub-locations based on red smoke activation.
Spot 6: Northeast Road Intersection Control Road junction 300 meters southwest of Northeast Road extraction creates a natural chokepoint. Players approaching from central map areas must cross this intersection. It's predictable, and predictable gets you kills.
South Evac Point Camping Locations (Spots 7-9)
Spot 7: Southern Blockade Payment Trap Position within abandoned checkpoint structures 50 meters from Southern Blockade extraction. That 2,000 Koen payment requirement forces players into extended vulnerability while accessing payment terminals. It's like they're asking to get shot.
Spot 8: Hunter's Path Discard Zone The backpack discard requirement creates incredibly predictable behavior patterns. Position 75 meters from the discard zone with clear sightlines to both discard area and extraction point.
Players often hesitate during gear sacrifice decisions. That hesitation kills them.
Spot 9: Artificial Lake Confirmation Point Establish overwatch 120 meters from Artificial Lake extraction, focusing on the red smoke confirmation approach. Players must move into the open to verify extraction availability. Consistent engagement opportunities.
West Extract Defensive Positions (Spots 10-12)
Spot 10: Boulder Wall Elevation Advantage Rocky outcropping 180 meters southeast of Boulder Wall extraction provides superior elevation with natural cover. You dominate primary approach routes while staying concealed from counter-sniper attempts.
Spot 11: Highway Overpass Ambush Bridge structure crossing highway near the extraction zone – elevated position with 360-degree visibility and multiple escape routes via bridge supports. Highway extractions are already risky; this makes them suicidal.
Spot 12: Outpost Perimeter Control Abandoned military structures 100 meters from Outpost extraction offer fortified positions with prepared firing lanes and excellent cover. Clear sightlines, solid protection.
Tactical Positioning Guide for Each Trap Spot
Optimal Engagement Distances by Extract Location
Port and Beachhead positions favor 150-250 meter engagements using scoped weapons. You want that distance for reaction time and accuracy. Confined extractions like Southern Blockade and Hunter's Path optimize for 50-100 meter ranges – close enough to guarantee hits, far enough to avoid grenades.
Medium-range engagements (80-150 meters) provide the optimal balance between accuracy and reaction time for most Marulos extractions. This is the sweet spot where most extract kills happen.
Pre-planned movement routes should include primary positions, secondary fallback positions, and emergency escape routes. Each position change should maintain visual contact with target extraction zones while improving your tactical advantage.
Common pre-aim points? Extraction zone centers, payment terminal approaches, and natural chokepoints leading to extraction areas. Maintain sight picture on these positions during high-probability extraction windows to maximize first-shot accuracy.
Loadout Optimization for Extract Zone PvP
Best Weapons for Medium-Range Extract Engagements
FAL M80 Configuration (441 penetration, 850 damage)
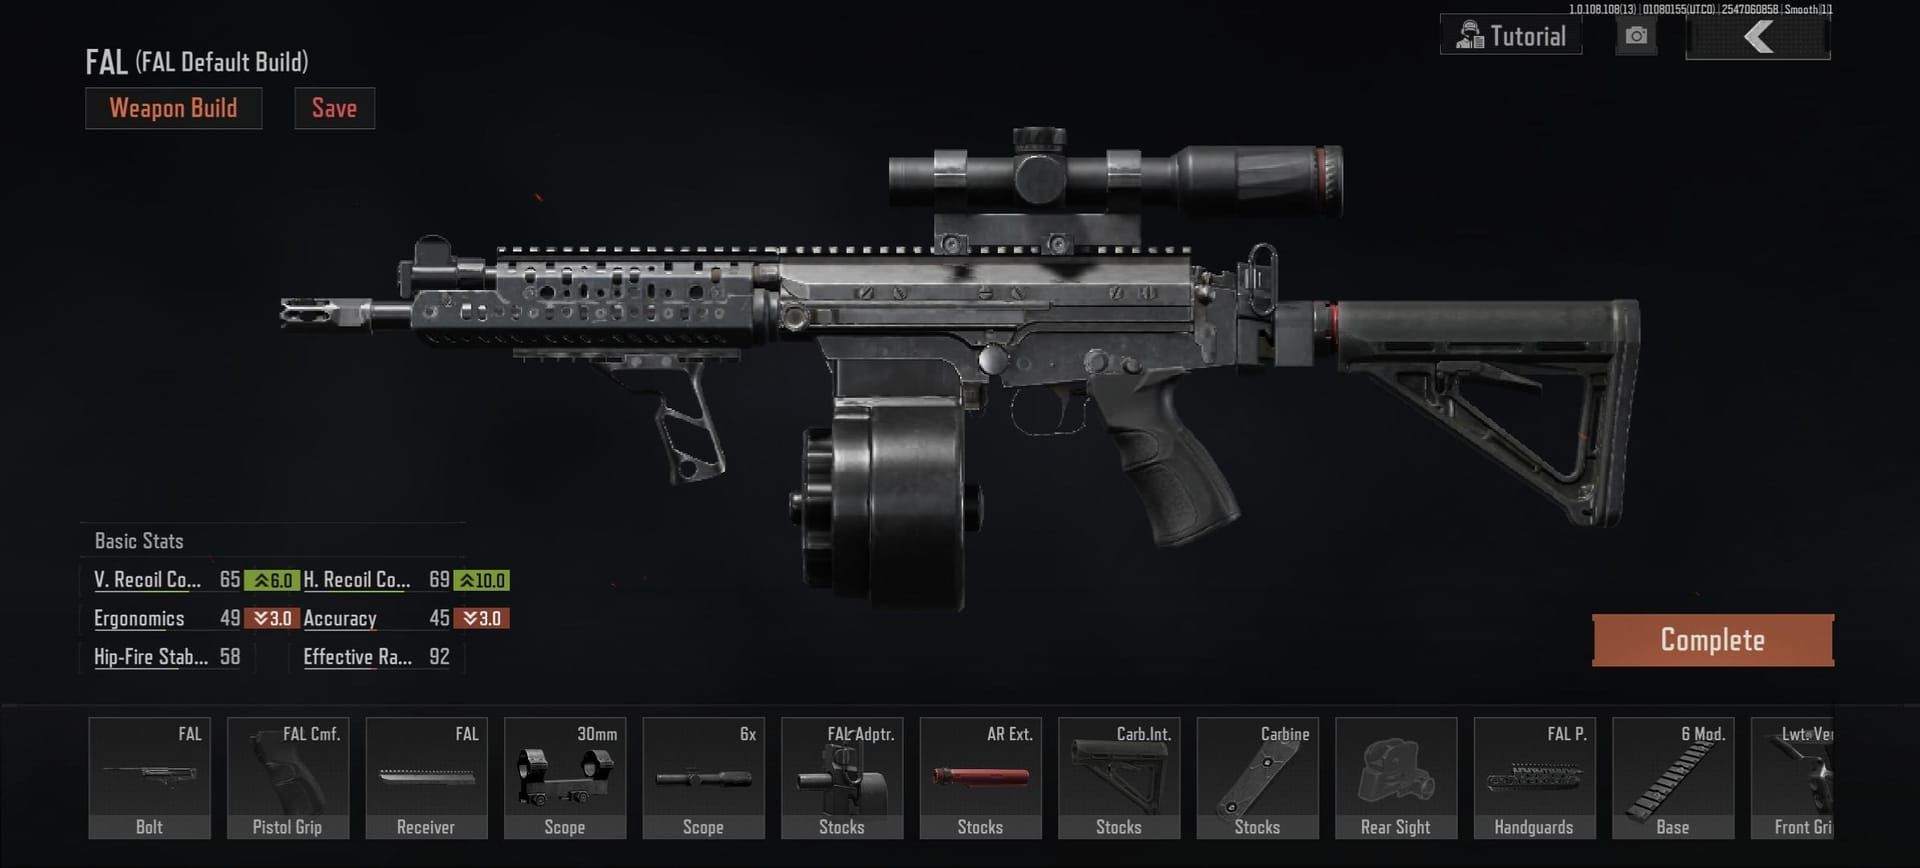
This is my go-to for 100-200 meter engagements. 30-round magazines with 4x optics, 630 RPM fire rate provides excellent follow-up shot capability. Estimated cost: 135,000 Koens with essential attachments. Worth every Koen.
MPX 7N31 Setup (566 penetration, 665 damage) Superior for close-range extract ambushes. 850 RPM provides rapid target elimination – critical when you're dealing with squads. Extended magazines and suppressor configuration optimize for stealth engagements. Budget configuration available for 88,000 Koens.
AK-74N L5 BP Alternative (145,000-200,000 Koens) Versatile platform suitable for varied engagement distances with excellent penetration characteristics. Accommodates multiple attachment configurations while maintaining cost-effectiveness. Reliable workhorse.
Essential Equipment: Grenades, Armor, and Medkits
Extract zone PvP requires specific equipment prioritization focusing on engagement sustainability and escape capability. Essential medical supplies include bandages for bleed management, surgical kits for limb damage, and painkillers for mobility maintenance.
Here's something most players get wrong: armor selection should prioritize mobility over protection. Heavy armor creates movement penalties that limit repositioning capability. You need to be able to move between spots quickly.
Budget configurations under 200,000 Koens focus on single-engagement optimization. Premium loadouts exceeding 300,000 Koens provide equipment redundancy and enhanced optics for extended operations.
Reading Player Behavior at Extraction Zones
Audio Cues That Reveal Approaching Players
Footstep audio signatures provide critical intelligence for extract trap positioning. Experienced players know that crouch-walking reduces audio signatures by approximately 60%, while prone movement eliminates most audio cues beyond 20 meters.
But here's what they can't eliminate: equipment audio cues. Reload sounds, medical item usage, payment terminal interactions – these provide precise timing for engagement initiation. Listen for these tells.
Visual Tells and Movement Patterns
Overloaded players exhibit characteristic movement patterns that scream I'm carrying valuable loot. Reduced sprint duration, frequent pauses for stamina recovery, predictable route selection favoring shortest distances.
Solo players typically exhibit more cautious movement with extended observation periods. Squad players demonstrate coordinated movement with overwatch elements. Learn to read these patterns – they tell you everything about engagement timing.
Counter-Strategies: How to Avoid Extract Campers
Pre-Extract Reconnaissance Techniques
Effective counter-camping requires systematic area reconnaissance before extraction attempts. Utilize binoculars or scoped weapons to observe extraction zones from multiple angles, identifying potential ambush positions.
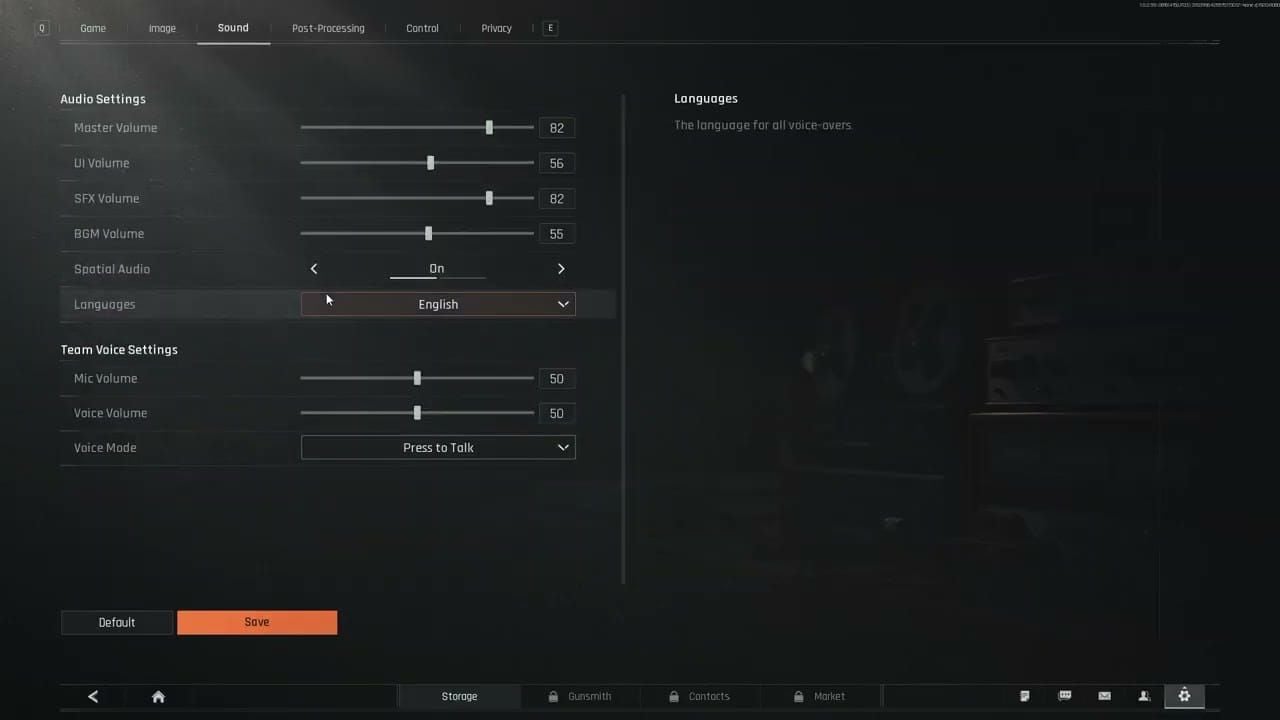
Audio reconnaissance involves listening for equipment sounds, movement audio, and breathing patterns that reveal concealed players. Take your time. That extra two minutes of reconnaissance can save a 500k+ Koen loadout.
Alternative Route Planning on Marulos
Develop multiple extraction route options based on loot value and threat assessment. Peripheral extraction points like Northeast Road and Boulder Wall provide safer alternatives with reduced ambush probability.
These routes require longer travel times but significantly improve extraction success rates for valuable loot loads. Sometimes the long way around is the smart way out.
Engagement decisions should consider ammunition reserves, medical supplies, and gear value relative to potential losses. Relocation becomes optimal when camper presence is confirmed but direct engagement presents unfavorable odds.
Dust to Gold Event-Specific Extract Tactics
High-Value Target Identification During Events
Dust to Gold events create predictable player behavior patterns focused on high-value loot accumulation. Target identification focuses on players with extended looting times, multiple high-value area visits, and characteristic overloaded movement patterns.
Event-specific loot spawns concentrate player activity in predictable areas. Smart campers position themselves accordingly.
Event periods feature increased player aggression and willingness to engage in extract zone PvP. Positioning strategies should emphasize escape route preparation and engagement range optimization. Event currency optimization requires selective target engagement focusing on high-probability success scenarios.
Advanced Extract Zone Tips from Veteran Players
Common Extract Camping Mistakes to Avoid
Over-positioning represents the most common extract camping error. Players maintain positions too long and become predictable. Effective camping requires position rotation and timing variation.
Ammunition management errors include insufficient reserve ammunition and inappropriate ammunition selection for engagement distances. Don't bring a pistol to a sniper fight.
Psychological Warfare: Manipulating Player Decisions
Effective extract zone control utilizes psychological pressure to influence player decision-making. Visible positioning can deter extraction attempts, forcing players toward alternative zones where you might have better angles.
Audio manipulation through deliberate movement sounds can create false threat impressions, influencing player route selection. Sometimes the threat of being there is more powerful than actually being there.
But remember – extract camping becomes counterproductive when it replaces active looting and map control strategies. Balanced gameplay approaches provide better long-term success rates and comprehensive skill development.
Optimizing Your Arena Breakout Experience
Managing In-Game Resources for Consistent Extract Success
Successful extract zone operations require careful resource management balancing equipment costs against potential returns. Maintain equipment reserves sufficient for multiple raid attempts while optimizing loadout costs.
Economic sustainability requires tracking success rates and adjusting strategies based on performance metrics. If you're not making money, you're doing it wrong.
How BitTopup Helps You Stay Competitive
BitTopup provides secure, fast Arena Breakout Bonds transactions ensuring consistent access to premium equipment and multiple raid attempts necessary for extract zone mastery. The platform's competitive pricing and reliable delivery support sustained tactical experimentation and loadout optimization.
Professional players rely on consistent resource availability to maintain competitive advantage through superior equipment and tactical flexibility. You can't master these techniques without the resources to practice them repeatedly.
Frequently Asked Questions
What are the most effective weapons for Marulos extract trap spots? FAL M80 (441 penetration, 135k Koens) and MPX 7N31 (566 penetration, 88k Koens) provide optimal performance for medium-range extract engagements. Sufficient penetration for L5 armor threats while maintaining cost-effectiveness. These are proven performers.
How long should I wait at an extract trap spot before relocating? Early raid positioning (10-15 minutes) targets aggressive looters, while late positioning (25+ minutes) catches conservative players. Avoid positions exceeding 10 minutes without activity to prevent predictability. Stay mobile.
Which Marulos extraction points have the highest ambush success rates? Conditional extracts like Southern Blockade (2,000 Koen payment) and Hunter's Path (backpack discard) provide highest success rates due to extended vulnerability windows. Port and Beachhead offer good target volume but require superior positioning.
How do I counter extract campers when extracting with valuable loot? Utilize peripheral fixed extracts like Northeast Road or Boulder Wall with lower camper probability. Conduct systematic reconnaissance using binoculars, approach from unexpected angles, and maintain alternative extraction options. Patience saves loadouts.
What audio cues indicate extract campers are nearby? Listen for equipment sounds, reload audio, medical item usage, and breathing patterns within 50 meters. Crouch-walking reduces audio signatures by 60%, so focus on subtle movement sounds and gear manipulation. Your ears are your best early warning system.
Is extract camping profitable during Dust to Gold events? Extract camping becomes highly profitable during events due to increased loot values and player traffic. Target players with overloaded movement patterns and focus on conditional extracts where payment requirements extend vulnerability windows. Events are when the real money gets made.


