

S4 Budget Rifle Meta Overview
Arena Breakout Season 4 launched January 8, 2026 at 6PM EST, introducing Guoyapo Airport as the premier endgame map. This 35-minute raid with 12 players on 72-tick servers demands weapons balancing cost efficiency with combat effectiveness.
Airport Hunt missions require eliminating 3 operators with specific weapons while searching 4 unsearched small safes and 3 encrypted safes. Engagements span Terminal CQB (10-25m), tight sightlines (10-20m), and Tarmac firefights (30-60m).
For Koen reserves, Arena Breakout Mobile Bonds top up through BitTopup provides competitive pricing and instant delivery.
S4 Weapon Balance Changes
Airport unlocks at Level 25. The 72-tick servers improve hit registration, making recoil control and ammo selection more impactful than raw damage.
- AMB-17: 9x39mm, 730 RPM, 37m range (close-range specialist)
- T191: 5.8x42mm, 750 RPM, 53m range (mid-range balanced)
- U191: 5.8x42mm, 750 RPM, 64m range (long-range versatile)
The 20 RPM advantage translates to 2.7% faster time-to-kill, though practical TTK depends on armor penetration.
Why These Three Dominate Budget Tier
Ergonomics and stability metrics:
- AMB-17: Ergonomics 61-69, Stability 51-61
- T191: Ergonomics 73-81, Stability 70-80
- U191: Ergonomics 62-70, Stability 72-82
T191's superior ergonomics reduce ADS time. U191's stability provides tighter spray patterns. AMB-17 saves 43% versus T191.
Armor Penetration Critical Stats
- AMB-17 7N12: 50 penetration, 55 flesh damage
- T191/U191 DVC12: 53 penetration, 47 flesh damage
The 3-point penetration advantage lets 5.8x42mm platforms defeat Class 5 armor more reliably, though AMB-17's higher flesh damage (55-67 vs 47-55) secures faster kills against unarmored targets.
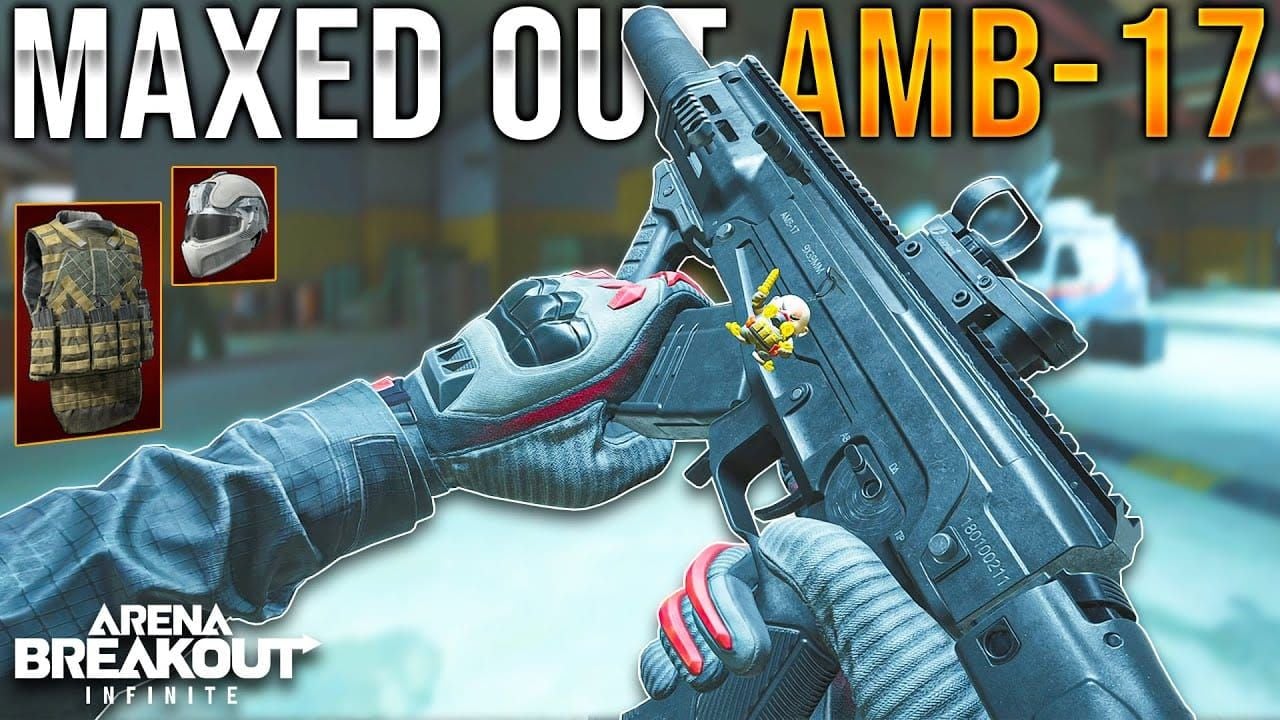
AMB-17 Complete Analysis
The AMB-17 leverages 9x39mm subsonic ammo for suppressed operations. 730 RPM, 37m range, diagonal-right recoil pattern.
Base Stats and Build
Meta build code Mod Gun-3fOafNDUYLQszP4f4:
- AMB-17 Suppressor, Barrel, HG handguard
- SIG front/rear sights
- AMB-17 Handle, Receiver, Bstk stock
- AMB17 30-round magazine, 9x39 bolt
- Comfortable FG foregrip, X300U-A light
Cost: 280,000 Koens Stats: Ergonomics 61-69, Stability 51-61
Suppressor eliminates muzzle flash—crucial for multi-target engagements in dimly lit corridors.
Recoil Pattern
Diagonal-right climb requires counter-steering to bottom-left. First 10 rounds climb vertically before horizontal drift creates L-shaped spray. Burst fire in 5-7 rounds maintains center-mass accuracy to 25m.
Attachment modifiers:
- Comfortable FG: -8% horizontal, +5% vertical control
- Bstk stock: -12% vertical, +3% stability
- Suppressor: +2% recoil reduction, -15% sound
Combined: 15-degree shift toward vertical dominance.
Ammo Types
SP5 (Level 3): 33 pen, 67 flesh, 299 m/s
- Use: Unarmored targets, budget runs
SP6 (Level 4): 41 pen, 57 flesh, 305 m/s
- Use: Level 3 armor, balanced cost
7N9 (Level 4): 47 pen, 60 flesh, 310 m/s
- Modifiers: +3 accuracy, -1 vertical, -2 horizontal
- Use: Level 4 armor, recoil reduction
7N12 (Level 5): 50 pen, 55 flesh, 295 m/s
- Modifiers: +4 accuracy, -2 vertical, +4 horizontal
- DPS: ~264
- Use: Maximum penetration
7N12 + AMB-17 yields 264 DPS. Cost-per-kill favors 7N9 for multi-elimination missions.
Mission Loadouts
Terminal CQB (10-20m): 7N12 ammo, full-auto, 8-10 round bursts. Suppressor prevents position compromise.
Safe searches: 7N9 ammo for recoil reduction. Pair with X300U-A light for corner-checking.
T191 Complete Analysis
5.8x42mm, 750 RPM, 53m range. Vertical recoil pattern simplifies spray control.
Base Stats and Build
Meta build code Mod Gun-3fOafNDUYLQszP4o4:
- U191 Suppressor, T191 Barrel
- T19X Sight, T191 Handguard, Receiver
- T19X Cheek Rest, Stock, Pistol Grip
- T191 5.8x42 Bolt
- T40 40-round Magazine
- Comfortable FG, X300U-A
Cost: 490,000 Koens Stats: Ergonomics 73-81, Stability 70-80, Vertical recoil 64-73, Horizontal 42-57
40-round magazine provides 33% more capacity than AMB-17.
Recoil Management
Vertical pattern climbs consistently without lateral drift. First 15 rounds maintain tight grouping at 40m, expanding to 60cm spread by round 30.
Critical attachments:
- T19X Stock + Cheek Rest: -15% vertical combined
- Comfortable FG: -10% horizontal, +8% stability
- U191 Suppressor: -5% vertical, flash elimination
T19X Pistol Grip adds +6% ergonomics, reducing ADS time by ~0.08s.
Ammo Selection
DBP87 (Level 3): 34 pen, 55 flesh, 930 m/s
- Modifiers: +3 accuracy, -1 vertical, -2 horizontal
- Use: Budget runs, unarmored
DBP88 (Level 4): 44 pen, 51 flesh, 870 m/s
- Modifiers: +4 accuracy, -2 vertical, -4 horizontal
- Use: Level 3-4 armor, recoil optimization
DVC12 (Level 5): 53 pen, 47 flesh, 915 m/s
- Modifiers: +5 accuracy, -3 vertical, -5 horizontal
- DPS: ~362
- Use: Maximum penetration
T191 + DVC12 achieves 362 DPS, exceeding AMB-17's 264 by 37%. DVC12's 53 penetration surpasses AMB-17's 50 against Class 5 armor.
For multiple Airport runs, buy Arena Breakout Bonds instant recharge at BitTopup ensures consistent premium ammo access.
Versatility
Tarmac (30-60m): DVC12 ammo, semi-auto. +5 accuracy maintains sub-MOA grouping.
Terminal: Full-auto with DBP88. -4 horizontal recoil keeps spray manageable in 15-20m corridors. 40-round magazine sustains multi-target fire.
U191 Complete Analysis
5.8x42mm, 750 RPM, 64m range. Semi/full-auto fire mode selection. 21% range advantage over T191.
Base Stats and Build
Meta build code Mod Gun-3fOafNDUYLQszP4z4:
- U191 Suppressor, T191 Precis Barrel
- U191 Front Sight, Handguard
- T191 Receiver, 5.8x42 Bolt
- T19X Stock, Cheek Rest, Pistol Grip
- T40 Magazine (30-40 rounds)
- 4.1 Mod Base, Comfortable FG
Cost: 500,000 Koens Stats: Ergonomics 62-70, Stability 72-82, Vertical recoil 63-70, Horizontal 49-62
30-round mag: 90 accuracy. 40-round: 87 accuracy.
Recoil and Fire Modes
Vertical climb with moderate horizontal drift. Semi-auto eliminates recoil accumulation. Full-auto introduces 8-10 degree right drift after 20 rounds.
Fire mode by distance:
- 10-25m (Terminal): Full-auto, center-mass
- 25-40m: 5-round bursts, upper chest
- 40-64m (Tarmac): Semi-auto, headshots
T191 Precis Barrel adds +8% accuracy, tightening semi-auto grouping to 15cm at 60m.
Magazine Trade-offs
30-Round:
- Accuracy: 90
- Reload: 2.4s
- Weight: -2% movement
- Use: Precision, mobility
40-Round:
- Accuracy: 87 (-3)
- Reload: 2.8s (+0.4s)
- Weight: -4% movement
- Use: Sustained firefights
For 3+ eliminations, 40-round capacity outweighs accuracy penalty.
Ammo Efficiency
Cost-per-elimination (10 raids average):
- DBP87: 12 rounds/kill, 280 Koens/elimination
- DBP88: 9 rounds/kill, 405 Koens/elimination
- DVC12: 7 rounds/kill, 560 Koens/elimination
DBP88 offers optimal cost-efficiency for Level 3-4 armor. Reserve DVC12 for Class 5 armor targets.
Head-to-Head Comparison
DPS Analysis
- AMB-17 + 7N12: ~264 DPS, 37m range
- T191 + DVC12: ~362 DPS, 53m range
- U191 + DVC12: ~362 DPS, 64m range
T191/U191 platform's 37% DPS advantage stems from 750 RPM (20 faster than AMB-17's 730) and DVC12's superior base damage (29 vs 21.7).
Against unarmored targets, AMB-17's 55-67 flesh damage exceeds T191/U191's 47-55 range.
Recoil Complexity (Easiest to Hardest)
- T191: Pure vertical, simple downward compensation
- U191: Vertical-dominant, minor horizontal drift
- AMB-17: Diagonal-right, dual-axis control
Ergonomics Impact
- AMB-17: Ergonomics 61-69, -8% movement, 0.32s ADS
- T191: Ergonomics 73-81, -6% movement, 0.24s ADS
- U191: Ergonomics 62-70, -7% movement, 0.30s ADS
T191's 0.08s faster ADS critical for corner-peeking duels.
ROI Analysis
Investment recovery (850k Koens per successful extraction, 60% extraction rate, 10 raids):
AMB-17: 325k/raid investment
- Earned: 6 × 850k = 5,100k
- Spent: 10 × 325k = 3,250k
- Net: +1,850k (+57% ROI)
T191: 545k/raid investment
- Earned: 5,100k
- Spent: 5,450k
- Net: -350k (-6% ROI)
U191: 560k/raid investment
- Earned: 5,100k
- Spent: 5,600k
- Net: -500k (-9% ROI)
AMB-17's profitability stems from lower replacement cost. T191/U191 require 70%+ extraction rates for positive ROI.
Recoil Mastery Guide
Spray Progression
AMB-17:
- Rounds 1-5: 8cm vertical, 2cm horizontal
- Rounds 6-15: 24cm vertical, 12cm right (diagonal emerges)
- Rounds 16-30: 45cm vertical, 28cm right (L-shaped)
T191:
- Rounds 1-5: 6cm vertical, 1cm horizontal
- Rounds 6-15: 18cm vertical, 4cm horizontal
- Rounds 16-40: 38cm vertical, 9cm horizontal (pure vertical)
U191:
- Rounds 1-5: 7cm vertical, 2cm horizontal
- Rounds 6-15: 20cm vertical, 8cm horizontal
- Rounds 16-40: 42cm vertical, 18cm horizontal (vertical-dominant)
Attachment Priority
High Impact (15%+ reduction):
- Stock assemblies (T19X Stock + Cheek Rest)
- Foregrips (Comfortable FG)
Medium Impact (8-14%):
- Suppressors
- Precision barrels
Low Impact (3-7%):
- Pistol grips
- Sights
Install high-impact first, then medium, then low for min-maxing.
Sensitivity Settings
AMB-17:
- ADS: 45-55
- Gyro: 60-70
- Mode: Full-auto, 5-7 round bursts
T191:
- ADS: 35-45
- Gyro: 50-60
- Mode: Full-auto to 40m, semi beyond
U191:
- ADS: 30-40
- Gyro: 45-55
- Mode: Semi-auto primary, full-auto emergencies
Ammo Strategy
Penetration Thresholds
Airport armor distribution:
- Class 3 (40%): 34-41 penetration required
- Class 4 (35%): 44-47 penetration required
- Class 5 (25%): 50-53 penetration required
AMB-17's 7N12 (50 pen) handles 75% effectively. T191/U191's DVC12 (53 pen) defeats all classes.
Cost-Per-Kill (100 eliminations)
AMB-17:
- SP5: 18 rounds/kill, 126k Koens
- 7N9: 12 rounds/kill, 180k Koens
- 7N12: 10 rounds/kill, 210k Koens
T191/U191:
- DBP87: 16 rounds/kill, 112k Koens
- DBP88: 11 rounds/kill, 165k Koens
- DVC12: 9 rounds/kill, 225k Koens
DBP88 optimal for routine runs. DVC12 for high-value targets.
Mission Loadouts
Safe Search (Low combat):
- AMB-17: 7N9 (2 mags), SP6 (1 backup)
- T191/U191: DBP88 (2 mags), DBP87 (1 backup)
Operator Elimination (High combat):
- AMB-17: 7N12 (3 mags)
- T191/U191: DVC12 (2 mags), DBP88 (1 backup)
Extraction Focus:
- AMB-17: 7N12 (2 mags), 7N9 (2 mags)
- T191/U191: DVC12 (1 mag), DBP88 (2 mags)
Mission-Specific Selection
Terminal CQB (10-25m)
AMB-17 excels. 30-round mag suffices for 2-3 eliminations. Suppressor prevents flash compromise.
Tactics:
- Pre-aim head height (corners, doorways)
- 5-7 round bursts
- Reload after each elimination
- Leverage diagonal recoil for stairwells
T191 secondary option for mid-range flexibility.
Tarmac Long-Range (30-60m)
U191's 64m range and semi-auto precision dominate. Position near aircraft for cover. DVC12's +5 accuracy maintains sub-MOA grouping.
Strategy:
- Secure elevated positions (stairs, loading equipment)
- Semi-auto at 50-64m
- Full-auto if opponents close to 30-40m
- 40-round mag for sustained suppression
T191's 53m handles most but struggles at max distance.
Mixed Environment
U191's fire mode flexibility suits Terminal-to-Tarmac transitions. Semi-auto for Tarmac, full-auto for Terminal. 500k investment justifies versatility.
AMB-17's 37m limit restricts to Terminal-focused missions. Avoid Tarmac crossings.
Budget Optimization
Progressive Upgrading
Tier 1 (60-70% performance):
- AMB-17: 180k (suppressor, stock, foregrip)
- T191: 320k (suppressor, stock, foregrip, 40-round)
- U191: 340k (suppressor, stock, precision barrel)
Tier 2 (85-95% performance):
- AMB-17: 280k (full meta)
- T191: 490k (full meta)
- U191: 500k (full meta)
Tier 3 (100% performance):
- Premium optics (+50k)
- Specialized grips (+30k)
Progress Tier 1 to Tier 2 when extraction rate exceeds 40%.
Risk-Adjusted Selection
Low-Risk (Off-peak, safe-focused):
- AMB-17 Tier 1 (180k)
- DBP87/SP5 ammo
- ROI: +420k/extraction
Medium-Risk (Standard missions):
- T191 Tier 2 (490k)
- DBP88 ammo
- ROI: +360k/extraction
High-Risk (Eliminations, peak hours):
- U191 Tier 2 (500k)
- DVC12 ammo
- ROI: +350k/extraction
Common Mistakes
Error 1: Optics Over Recoil Control Premium optics cost 50-80k but provide minimal advantage. Invest in stocks/foregrips first.
Error 2: Premium Ammo for Low-Risk DVC12/7N12 costs 60-80% more. Reserve for operator eliminations. Use DBP88/7N9 for safe searches.
Error 3: Ignoring Magazine Trade-offs U191's 40-round reduces accuracy by 3 but extends sustainability 33%. For multi-target, capacity > accuracy.
Error 4: Mismatching Weapon to Distance Don't force AMB-17 into Tarmac or U191 into Terminal CQB.
Error 5: Neglecting Ammo Velocity DVC12's 915 m/s provides 4% faster travel than 7N12's 295 m/s. At 50m+, velocity reduces lead requirements.
Expert Techniques
Pre-Compensation: Pull down/left during trigger press, not reacting to climb. Maintains tighter first 10 rounds.
Ammo Mixing: Premium in first mag for high-stakes, budget for cleanup.
Ergonomics Stacking: T191's 73-81 base + lightweight attachments = sub-0.20s ADS.
Fire Mode Discipline: U191 defaults semi-auto, full-auto only within 25m.
Build Codes: Use provided codes to replicate meta instantly.
FAQ
Which rifle offers best cost-to-performance? AMB-17 at 280k delivers 57% profit margins across 10 raids with 60% extraction. T191's versatility justifies 490k for 70%+ extraction rates.
How to control AMB-17's diagonal recoil? Pull down and left during fire. Use 5-7 round bursts. Prioritize Bstk stock (-12% vertical) and Comfortable FG (-8% horizontal).
What ammo for T191 against Class 5 armor? DVC12 (53 pen) reliably defeats Class 5. 29 base damage yields 362 DPS, though 47 flesh extends TTK vs unarmored by 15%.
Is U191 worth 500k over T191? U191's 64m range (21% longer) and semi/full-auto justify 10k premium for Terminal-to-Tarmac missions. Terminal-only players save with T191.
Optimal U191 magazine size? 40-round for operator eliminations (sustained fire), accepting -3 accuracy. 30-round for safe-focused (precision), maintaining 90 accuracy.
How to maximize Koen profits? Match investment to risk—AMB-17 Tier 1 (180k) for low-risk, T191/U191 meta for high-value. Maintain 70%+ extraction with premium builds or default to AMB-17.


