

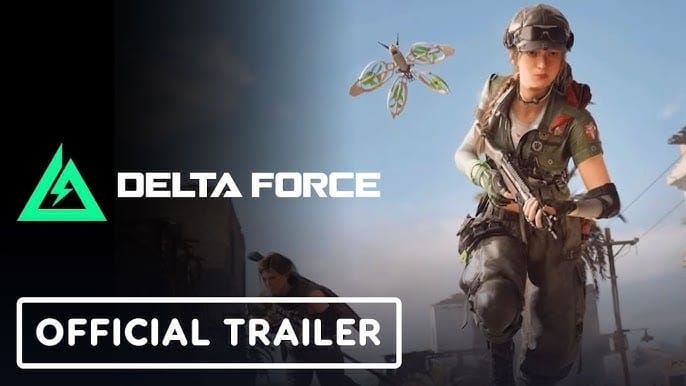
Vlinder Support Operator Overview: Season Morphosis Meta
Vlinder (Lina van der Meer) launches February 3-4, 2026, affiliated with G.T.C. Europe Division. Born March 4, 2008 (167cm, 57kg), she brings unprecedented sustain through four abilities designed for team preservation and tactical flexibility.
Season Morphosis support meta shifts dramatically with Vlinder's introduction, particularly on destruction maps like Aftershock where 95% of buildings are destructible. Unlike static healing stations, Vlinder's mobile medical drone and revive-focused ultimate enable aggressive pushes while maintaining survivability. Players need to Delta Force Bonds top up to access Season 8 Battle Pass efficiently.
Core Abilities
Nano Medical Dust: Deploys medical drone tracking allies through line-of-sight. Short-press heals teammates, long-press switches to self-healing. Dual-functionality separates skilled players from average ones—knowing when to prioritize team sustain versus personal survivability determines outcomes.
Remote-Controlled Smoke Grenade: Gesture-based guidance lets you steer grenade flight path mid-air. Creates dynamic smoke screens for revives, objective captures, or repositioning. On destruction maps, steering smoke through collapsed building gaps provides cover where traditional blockers no longer exist.
Butterfly Rescue Drone System: Operates within 55m radius, administering plasma injections to recover HP and reviving downed allies. Ultimate intercepts one explosive damage instance, crucial for countering C4 traps and RPG spam. Reviving allies reduces cooldown, rewarding aggressive support play.
Vital Signs Monitoring (Passive): Extends downed/critical timers for allies while highlighting silhouettes and health through walls. Information advantage lets teams coordinate pushes knowing exact teammate conditions.
Why Vlinder Dominates Destruction Maps
Aftershock's 550 destructible object types create constantly shifting battlefields where traditional cover disappears mid-fight. Vlinder's mobile healing and steerable smoke adapt better than static support abilities. When enemies collapse wooden structures with single C4 charges or penetrate concrete walls with 2-3 charges, Vlinder's drone follows teammates through debris fields.
Dust clouds from building collapses obscure vision for 15-20 seconds—exactly when Vital Signs Monitoring provides maximum value. While enemies navigate visual chaos, Vlinder tracks ally positions and health, coordinating revives through environmental hazards. Butterfly Rescue Drone's explosive interception counters C4 meta prevalent on destruction maps.
Key Performance Metrics
Effective Vlinder players monitor:
- Healing output: 3,000+ HP restored per 15-min match
- Assist-to-kill ratio: 1.5:1 or higher
- Survival rate: 65%+ in ranked modes
- Drone uptime: 70%+ active healing coverage
- Revive count: 4+ per match for aggressive support play
- Death-to-revive ratio: Below 1:3 (higher indicates positioning errors)
Best Vlinder Loadouts for Season Morphosis
Aggressive Push Loadout
Primary: SMG with vertical recoil control + extended mags. High fire rate compensates for support focus, enabling quick eliminations when pushing through collapsed structures.
Gadgets: Nano Medical Dust (primary) for constant healing during advances, Remote-Controlled Smoke (secondary) for crossing open areas created by destruction.
Playstyle: Position 3-5m behind assault operators during breaches. Short-press healing sustains point players while maintaining combat readiness. Deploy Butterfly Rescue Drone before major pushes to enable immediate revives, with explosive interception preventing enemy C4 counter-plays.
Excels with 2+ assault operators in squad compositions, providing sustain for extended objective contests.
Defensive Anchor Loadout
Primary: Assault rifle configured for 25-50m engagements with recoil stabilization. Prioritize accuracy over fire rate to hold angles while monitoring ally health.
Gadgets: Butterfly Rescue Drone (primary) for area lockdown, Nano Medical Dust (reactive healing). Ultimate's 55m radius covers entire objective zones, creating safe revive zones.
Playstyle: Establish positions with multiple escape routes—critical on destruction maps where enemies create new sightlines by collapsing walls. Pre-place Remote-Controlled Smoke trajectories for common push routes.
Track enemy C4 usage patterns; after observing 2-3 charges used on structure destruction, activate Butterfly Rescue Drone knowing enemies have limited explosive reserves for next 30-45 seconds.
Balanced All-Purpose Loadout
Primary: Assault rifle with balanced attachments—moderate recoil control, acceptable ADS speed, versatile optics for 15-75m engagements.
Gadgets: Equal emphasis on Nano Medical Dust and Remote-Controlled Smoke, alternating based on engagement phase. Healing during firefights, smoke during repositioning.
Playstyle: Adapt positioning based on squad needs. If assault players push aggressively, shift to close support with constant healing. If team adopts defensive posture, extend range to 10-15m behind frontline.
Suits solo queue ranked play where team composition remains uncertain until match start.
Destruction Map Specialist Loadout
Primary: SMG or compact assault rifle for navigating tight spaces from partial building collapses. Prioritize mobility attachments and hipfire accuracy for close-quarters combat in debris fields.
Gadgets: Remote-Controlled Smoke (primary) for vision control in dust clouds, Nano Medical Dust (secondary) for healing during 15-20 second visual obscuration periods.
Playstyle: Exploit destruction mechanics by positioning near support columns and load-bearing walls. When enemies collapse structures, immediately deploy steerable smoke into dust cloud, creating layered vision denial. Use Vital Signs Monitoring to guide teammates through debris while enemies remain disoriented.
Coordinate with teammates using C4—when they arm charges (3-second sequence), pre-position for post-collapse healing.
Optimal Weapon Choices and Attachments
Primary Weapon Tier List
S-Tier: Balanced assault rifles with 30+ round mags, moderate recoil, 650-750 RPM. Handle unexpected close-quarters encounters while maintaining medium-range effectiveness.
A-Tier: High-mobility SMGs with 40+ round extended mags and vertical recoil. Excellent for destruction map specialists navigating collapsed structures, though limited beyond 30m.
B-Tier: Low-recoil assault rifles with slower fire rates (550-650 RPM). Suitable for pure defensive anchors but lack close-quarters stopping power.
C-Tier: High-recoil, high-damage weapons requiring significant recoil management. Vlinder's focus on ability usage leaves insufficient attention for complex recoil compensation.
Best Assault Rifle Attachments
- Muzzle: Compensators reducing vertical recoil by 15-20%
- Barrel: Mid-length balancing ADS speed (sub-300ms) with recoil stabilization
- Optics: 2-3x magnification for 25-50m optimal range
- Underbarrel: Vertical grips reducing recoil by 10-12%
- Magazine: Extended 40-50 round mags for sustained fire
SMG Configuration for Tight Spaces
For destruction map specialists, SMGs with 900+ RPM and hipfire accuracy attachments excel in partially collapsed buildings. Configure with:
- Laser sights improving hipfire spread by 25-30%
- Stock attachments enhancing movement speed by 5-8%
- Extended mags for sustained engagements
Secondary Weapon
Equip high-damage pistols with 12+ round mags as emergency backup. Avoid shotguns or machine pistols—these occupy mental bandwidth better spent monitoring ally health and positioning.
Gadget Selection Priority
Healing Gadget Management
Activate short-press healing when teammates drop below 60% HP—earlier wastes healing potential, later risks deaths before healing completes. Long-press self-healing only when personal HP drops below 40% AND no teammates are critically wounded.
Healing drone's compact design allows deployment in tight spaces created by partial building collapses. On Aftershock, position near interior walls that can be destroyed for emergency escapes while maintaining line-of-sight through doorways and windows.
Gadget Cooldown Management
Butterfly Rescue Drone's cooldown reduction through revives creates skill-testing loop: aggressive revive attempts reduce future cooldown, but failed revives eliminate ultimate entirely. Target revives on teammates with 8+ seconds remaining on downed timers.
Explosive interception should be spent deliberately on predicted C4 detonations rather than saved indefinitely. When enemies arm C4 (identifiable by 3-second arming animation), activate ultimate knowing detonation is imminent.
Remote-Controlled Smoke cooldown (25-30 seconds) requires predictive deployment. Steer grenades toward objectives 5-10 seconds before teammates arrive, creating smoke cover that peaks exactly when needed.
Environmental Gadget Synergies
Coordinate Nano Medical Dust with teammate C4 usage. When allies equip C4, position for post-detonation healing as they'll take splash damage from close-range breaches.
Use Remote-Controlled Smoke to obscure enemy sightlines into areas where your team is collapsing structures. Smoke steered through windows of adjacent buildings creates multi-layered vision denial.
Butterfly Rescue Drone placement should anticipate structural collapses. Position 55m radius to cover both current engagement zones AND likely fallback positions after buildings collapse.
Team Role Mastery
Positioning Fundamentals
Maintain 5-10m distance from closest teammate during active engagements. Closer positioning risks area-of-effect damage killing both you and supported player; greater distance breaks line-of-sight for Nano Medical Dust tracking.
Identify cover with multiple exit routes before engagements start. On destruction maps, permanent cover doesn't exist—walls become sightlines with 2-3 C4 charges. Position near doorways, windows, or thin walls you can quickly breach.
Avoid clustering with multiple teammates in destructible buildings. Single C4 charges collapse wooden structures entirely, and 2-3 charges penetrate concrete walls.
Communication Protocols
Establish health status callouts using percentages: Assault player 40%, needs healing provides clearer information than Assault player hurt.
Call out revive intentions before attempting: Reviving sniper, cover northwest lets teammates suppress enemies during vulnerable revive animation.
Announce Butterfly Rescue Drone activation and radius: Ultimate active, 55m from objective A informs teammates they can take riskier plays knowing revives are available.
Synergy with Other Operators
Pair with assault operators who push aggressively—your sustain enables extended engagements where their fragging potential maximizes. Defensive or passive assault players waste Vlinder's healing capabilities.
Recon operators providing enemy positions let you pre-position for engagements. When recon calls Three enemies pushing east, move to eastern cover before fighting starts.
Avoid redundant support compositions. Two support operators create healing overlap while lacking fragging power. Optimal squad: one support (Vlinder), 2-3 assault operators, one recon.
Adapting Mid-Match
Monitor teammate performance through first 3-5 minutes. If assault players consistently win 1v1 engagements, adopt aggressive support positioning. If teammates struggle in direct combat, shift to defensive anchoring.
When teammates ignore callouts or coordination, transition to self-sufficient play. Prioritize long-press self-healing, use Remote-Controlled Smoke for personal repositioning, and save Butterfly Rescue Drone for self-preservation.
Destruction Map Exploitation

How Destruction Physics Work
- Wooden structures: Collapse from single C4 charges at wall-floor junctions or support column bases. 3-second arming sequence provides warning, but collapse is instantaneous.
- Concrete walls: Require 2-3 C4 charges for penetration, creating person-sized breaches rather than total collapses. These become permanent sightlines.
- RPG impacts: 2-3 impacts collapse wooden structures, more for concrete. Immediate impact with no warning.
- Dust clouds: Obscure vision for 15-20 seconds, creating temporary smoke screens larger than any gadget-generated smoke.
Creating Advantageous Sightlines
Coordinate with teammates to collapse walls creating crossfire angles. When allies arm C4 on eastern walls, position west of target building. Post-collapse, hold angles into breach while teammates push through.
Use Nano Medical Dust's line-of-sight requirement strategically. Position where healing drone tracking requires you to hold angles toward teammates, naturally covering their flanks while providing sustain.
Identify load-bearing columns in multi-story buildings. Collapsing these creates vertical sightlines—upper floors become exposed to ground-level fire.
Area Denial Through Destruction
Destroy buildings between your position and enemy spawn points, creating open ground enemies must cross. Works best on Aftershock's urban sectors where 3-4 building collapses transform close-quarters zones into medium-range engagement areas.
Collapse structures on top of objectives after securing them. Debris creates physical obstacles slowing enemy retakes while dust clouds obscure their approach.
Use Remote-Controlled Smoke in combination with structural collapses. Steer smoke into dust clouds from collapsed buildings, extending vision denial from 15-20 seconds to 30-35 seconds.
Emergency Escape Routes
Pre-identify thin walls (wooden or damaged concrete) near your position. When enemies push aggressively, equip C4, place at wall base, and detonate immediately for emergency escapes.
Coordinate with teammates for extraction collapses. When you're pinned down, have allies collapse structures between you and enemies, creating debris obstacles that block pursuit.
Butterfly Rescue Drone's explosive interception can absorb C4 detonations targeting your position. If enemies arm C4 on your cover, activate ultimate—interception prevents collapse while revive/healing functions remain available.
Common Vlinder Mistakes
Over-Aggressive Positioning
New Vlinder players position too close to frontline combat, treating operator like assault classes. This results in focus-fire deaths that eliminate all team sustain. Maintain minimum 5m distance from closest engaged teammate.
Chasing kills with Vlinder's weapons wastes support potential. Each second spent chasing eliminations is time not spent monitoring ally health or positioning for revives.
Revive attempts on teammates downed in open areas without smoke cover consistently fail. Use Remote-Controlled Smoke before revive attempts in exposed positions.
Gadget Timing Errors
Activating Nano Medical Dust when all teammates are above 80% HP wastes healing potential and cooldown time. Wait for teammates to drop below 60%.
Saving Butterfly Rescue Drone for perfect moments that never arrive leaves ultimate unused. Cooldown reduction from revives means frequent usage actually increases total availability.
Remote-Controlled Smoke deployed without steering wastes the ability's unique advantage. Always hold skill button and actively guide grenade.
Neglecting Environmental Awareness
Failing to track enemy C4 usage leads to unexpected structural collapses. Count enemy C4 detonations—most players carry 2-3 charges, so after observing multiple uses, you know they have limited remaining explosives for next 45-60 seconds.
Positioning in buildings without monitoring structural integrity causes deaths from collapses. Visually inspect support columns and load-bearing walls—damaged structures collapse more easily.
Ignoring dust cloud timing wastes the 15-20 second vision denial period. When structures collapse, immediately reposition or push objectives while enemies are blind.
Poor Communication
Not announcing when Nano Medical Dust is on cooldown causes teammates to take damage expecting healing that isn't available. Call out cooldown status: Healing on cooldown, 15 seconds.
Attempting revives without informing teammates results in death during vulnerable revive animations. Always announce revive attempts and request covering fire.
Failing to communicate Vital Signs Monitoring information wastes intelligence advantage. Constantly update teammates on squad health status and positions.
Countering Vlinder
Exploiting Weaknesses
Vlinder's line-of-sight requirement for Nano Medical Dust creates exploitable positioning constraints. When you identify enemy Vlinder, collapse structures or use explosives to break line-of-sight between Vlinder and teammates, disabling healing.
The 55m Butterfly Rescue Drone radius is large but finite. When you down an enemy and suspect Vlinder has ultimate active, immediately push beyond 55m from downed player's last known position.
Focus-fire Vlinder first in team fights. Without sustain, enemy teams lose extended engagement potential. Vlinder's moderate combat effectiveness means eliminating support operator is easier than killing assault-focused enemies.
Operators That Counter Support
Assault operators with high burst damage can eliminate Vlinder before healing activates. Nano Medical Dust requires time to restore HP—burst damage exceeding 80-100 HP in under 2 seconds kills targets before healing provides value.
Recon operators revealing Vlinder's position enable coordinated focus-fire. Vlinder relies on positioning slightly behind frontlines; when revealed, enemies can pre-aim angles and eliminate support operator before engagements develop.
Explosive-focused operators counter Vlinder on destruction maps by collapsing structures that break line-of-sight for healing.
Disrupting Healing Setups
Throw grenades or use explosives at downed enemies to prevent revives. Butterfly Rescue Drone's revive function requires downed player to survive until drone reaches them—explosive damage during revive process kills downed player and wastes Vlinder's ultimate.
Push aggressively when you down enemy players. Vlinder's revive capabilities are strongest when given time and space—immediate pressure forces rushed revive attempts that often result in Vlinder's death.
Use smoke or flashbangs to disrupt Vlinder's line-of-sight for healing. Nano Medical Dust requires visual tracking—breaking line-of-sight even briefly interrupts healing.
Advanced Tips from Top Players
Pre-Firing Common Angles
Memorize standard breach points on Aftershock—walls adjacent to objectives, support columns near high-traffic areas, common defensive positions. Pre-aim these angles after hearing C4 arming sounds.
Track match timing and predict structural collapses. After 3-5 minutes, most destructible buildings near objectives show damage. Pre-position for sightlines that will exist after these structures collapse.
Use Vital Signs Monitoring to identify which teammates are engaging enemies, then pre-aim angles supporting those teammates.
Ability Combo Sequences
Optimal combo: Remote-Controlled Smoke → Butterfly Rescue Drone → Nano Medical Dust. Steer smoke to cover team's position, activate ultimate for revive/healing coverage and explosive interception, then use medical drone for immediate HP restoration.
Defensive holds: Activate Butterfly Rescue Drone before enemies push, position Nano Medical Dust for reactive healing, keep Remote-Controlled Smoke ready for emergency vision denial.
Emergency escape: Remote-Controlled Smoke toward retreat path → long-press Nano Medical Dust for self-healing → reposition to cover.
Reading Enemy Patterns
After 2-3 enemy pushes, identify preferred routes and timing. Position proactively along these routes 10-15 seconds before expected pushes.
Track enemy C4 and explosive usage patterns. Some players immediately use explosives on engagement, others save them for specific situations. Adjust Butterfly Rescue Drone timing based on observed patterns.
Monitor enemy focus-fire tendencies. Teams that consistently target support operators first require more conservative positioning (12-15m from frontline). Teams that ignore support players allow aggressive positioning (3-5m).
Ranked Mode Strategies
Communicate loadout selection during operator choice phase. If teammates select aggressive assault operators, confirm you're running aggressive support loadout to match their playstyle.
Prioritize objective-focused positioning over kill chasing. Ranked rewards objective captures and defenses more than eliminations.
Track ultimate economy—yours and enemies'. If enemy support operators used ultimates recently, push aggressively knowing they lack sustain for 60-90 seconds.
Adapt to rank tier playstyles. Lower ranks feature less coordinated teams, allowing more aggressive Vlinder play. Higher ranks require conservative positioning as coordinated enemies focus-fire support operators efficiently.
Unlocking and Upgrading Vlinder
Fastest Path to Unlock
Vlinder unlocks at Battle Pass tier 15 in Season 8 Morphosis, launching February 3, 2026. Season 8 Battle Pass contains 150 total tiers, making tier 15 an early unlock achievable within first week of dedicated play.
Daily challenges provide 3-5 tier progress per day, meaning 3-5 days of completing all daily objectives unlocks Vlinder. Weekly challenges offer 10-15 tier progress.
Premium Battle Pass (purchasable with Delta Force Bonds) provides 25% bonus tier progression, reducing unlock time to 2-3 days of active play.
Essential Perks and Modification Order
Healing efficiency modifications: Perks increasing Nano Medical Dust healing rate by 15-20%. Unlock through operator-specific challenges requiring 5,000-10,000 HP healed.
Butterfly Rescue Drone cooldown reduction: Perks reducing base cooldown by 10-15 seconds enable more frequent ultimate usage.
Remote-Controlled Smoke duration extensions: Modifications increasing smoke duration from 8-10 seconds to 12-15 seconds.
Weapon modifications: Unlock recoil control attachments before ADS speed improvements.
How to Get Battle Pass Items
Battle Pass tier progression occurs through match completion, challenge completion, and bonus objectives. Each standard match provides 0.5-1.0 tier progress depending on performance and match duration.
Challenges offer most efficient progression:
- Daily challenges: 3-5 tiers
- Weekly challenges: 10-15 tiers
- Seasonal challenges: 20-30 tiers total
Premium currency (Delta Force Bonds) allows direct tier purchases at approximately 150 Bonds per tier. For immediate Vlinder access on launch day: (15 tiers - current tier) × 150 Bonds = total cost.
Buy Delta Force Bonds through BitTopup for competitive pricing with instant delivery, secure transactions, and 24/7 customer support. The platform's high user ratings and wide game coverage make it the reliable choice for players looking to accelerate Battle Pass progression and unlock Vlinder immediately when Season Morphosis launches.
Frequently Asked Questions
What are the best gadgets for Vlinder in Season Morphosis? Nano Medical Dust (primary) and Remote-Controlled Smoke (secondary) provide optimal versatility. Healing drone enables sustained engagements while steerable smoke creates tactical flexibility. Use Butterfly Rescue Drone proactively during team fights rather than saving for emergencies, as revive-based cooldown reduction rewards frequent usage.
How does Vlinder's healing ability work? Nano Medical Dust deploys medical drone requiring line-of-sight to track targets. Short-press heals allies, long-press switches to self-healing. Drone follows targets automatically once line-of-sight is established, but breaks if vision is blocked. Position 5-10m from teammates to maintain tracking while avoiding focus fire.
What is the best Vlinder loadout for destruction maps? SMG or compact assault rifle with mobility attachments, Remote-Controlled Smoke as primary gadget, Nano Medical Dust secondary. This configuration excels in tight spaces created by collapsed structures while steerable smoke provides vision control during 15-20 second dust cloud periods following building destruction.
How do you maximize healing output as Vlinder? Activate Nano Medical Dust when teammates drop below 60% HP to maximize efficiency without wasting cooldown. Maintain line-of-sight positioning 5-10m from frontline combat. Target 3,000+ HP healed per 15-minute match by staying alive and positioning proactively before engagements start.
What team composition works best with Vlinder? One Vlinder support, 2-3 assault operators, one recon operator creates optimal squad balance. Aggressive assault players maximize value from Vlinder's sustain capabilities, while recon intelligence enables predictive positioning. Avoid multiple support operators as healing overlap wastes fragging potential.
How does Vlinder compare to other support operators? Vlinder's mobile healing and revive-focused ultimate excel on destruction maps where static support abilities lose effectiveness as cover disappears. Butterfly Rescue Drone's explosive interception counters C4-heavy metas on Aftershock, while Vital Signs Monitoring provides intelligence advantages other support operators lack.


