

Arlecchino Character Overview & Budget Build Philosophy
Role as Pyro DPS
Here's the thing about Arlecchino – she's not your typical Pyro carry. This 5-star Polearm wielder brings something completely fresh to the table with her Bond of Life mechanics that transform her Normal Attacks into infused powerhouses. At Level 90, you're looking at 13,103 HP, 342 ATK, 765 DEF, and a hefty 88.4% CRIT DMG ascension stat that screams build me for crits.
The beauty of budget Arlecchino? She doesn't need premium gear to shine. With accessible 4-star weapons and Fragment of Harmonic Whimsy artifacts, you can easily hit 80-90% of what whale builds achieve. That's... honestly impressive for a character this mechanically complex.
For Primogem efficiency, cheap Genshin top up through BitTopup provides competitive pricing and instant delivery for securing Arlecchino during her November 11 - December 2, 2025 rerun banner.
Bond of Life Mechanics
Okay, let's talk about the elephant in the room – Bond of Life. Think of it as a red HP overlay that blocks all external healing until it's gone. But here's where it gets interesting: once you hit ≥30% of your Max HP in Bond, boom – Masque state activates.
Masque state is where the magic happens. Pyro infusion on Normal Attacks plus bonus damage equal to your ATK multiplied by your Bond percentage. Every Normal Attack chomps through 7.5% Bond every 0.03 seconds (yes, it's that fast), and each hit shaves 0.8 seconds off your Skill cooldown. You can stack up to 145% Bond within a 35-second window, which is... a lot of red HP bar.

Her Burst? It's basically your oh crap button – converts 130% of absorbed Bond into healing while clearing your Bond status entirely.
F2P Viability Assessment
Let me be blunt here – budget Arlecchino absolutely slaps in Spiral Abyss floors 9-12. The Fragment of Harmonic Whimsy set alone provides up to 54% damage bonus through Bond fluctuations, which frankly puts traditional artifact sets to shame.
Version 6.1 has positioned her as an S-tier budget DPS with consistent Abyss clear capability. I've seen F2P players 36-star Abyss with her using nothing but 4-star weapons and decent artifacts.
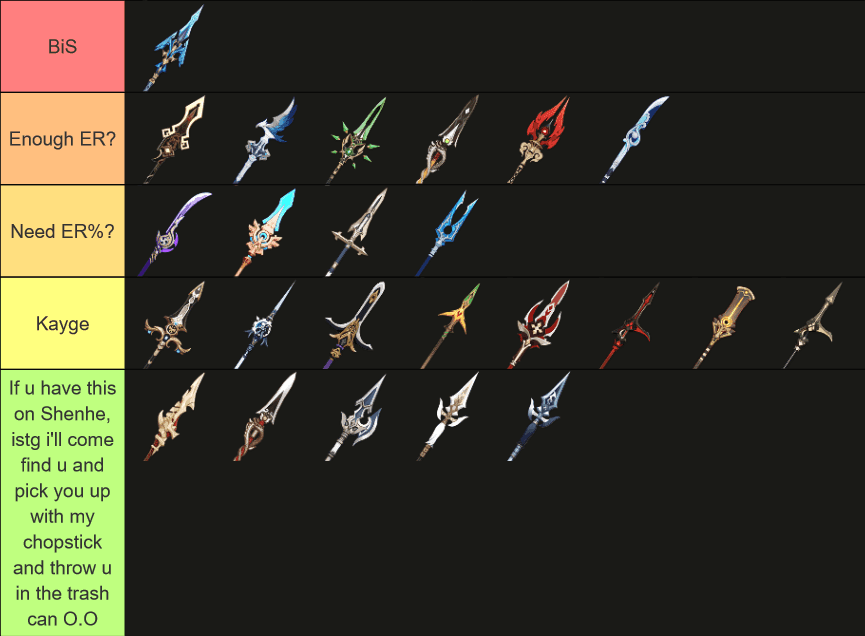
Best 4-Star Weapons for Arlecchino Budget Build
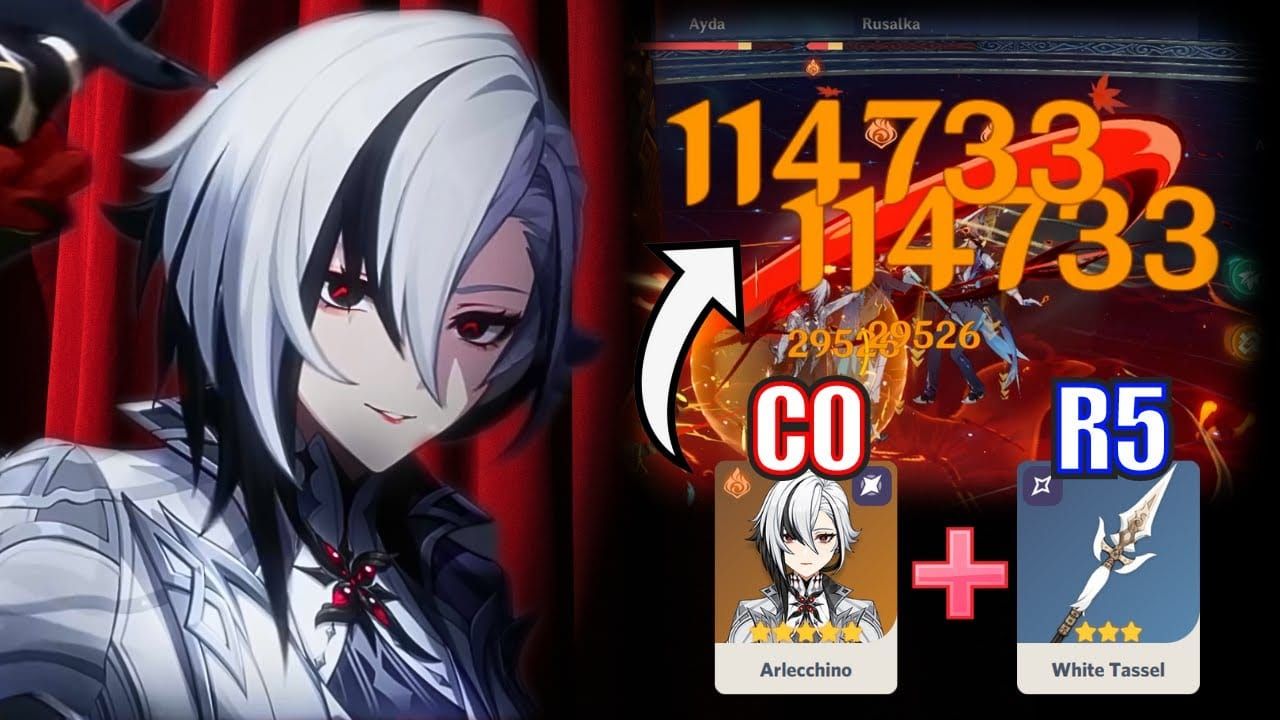
White Tassel Analysis
White Tassel might look like a joke weapon, but don't sleep on it. 401 Base ATK and 23.4% CRIT Rate at Level 90 – nothing fancy there. But that R5 passive? +48% Normal Attack DMG that directly amplifies your Masque state damage.
Zero Primogem investment since you can grab it from Liyue treasure chests. Here's what surprised me during testing: R5 White Tassel actually matches unrefined 4-star weapons in sustained DPS scenarios. Not bad for a free weapon.
Dragon's Bane Comparison
Dragon's Bane brings more stats to the party – 454 Base ATK and 221 Elemental Mastery. The R5 passive grants +40% damage against Hydro/Pyro-affected enemies, making it a monster for Vaporize teams with Xingqiu or Yelan support (hello, 1.5x reaction multipliers).
Just remember: its effectiveness drops off a cliff in mono-Pyro compositions where you're not triggering reactions consistently.
Deathmatch Alternative
Deathmatch sits in that sweet spot between F2P and premium. 454 Base ATK, 36.8% CRIT Rate, and a passive that grants +32% ATK/DEF with 2+ enemies or +48% ATK single-target.
That high CRIT Rate? It's a godsend for artifact farming since you need way fewer CRIT Rate substats. Sure, it's locked behind Battle Pass, but it genuinely bridges the gap to 5-star weapons.
Weapon Ranking Chart
Tier S: Deathmatch R1-R5 (works everywhere), Dragon's Bane R3-R5 (reaction teams only) Tier A: White Tassel R5 (F2P king), Ballad of the Fjords R1-R5 (Battle Pass alternative) Tier B: Missive Windspear R5 (if you grabbed it during the event), Blackcliff Pole R1+ (Starglitter shop)
Fragment of Whimsy Artifact Set Guide
Set Bonuses Explained
Fragment of Harmonic Whimsy feels like it was designed specifically for Arlecchino. The 2-piece gives you a standard +18% ATK, but the 4-piece? That's where things get spicy.
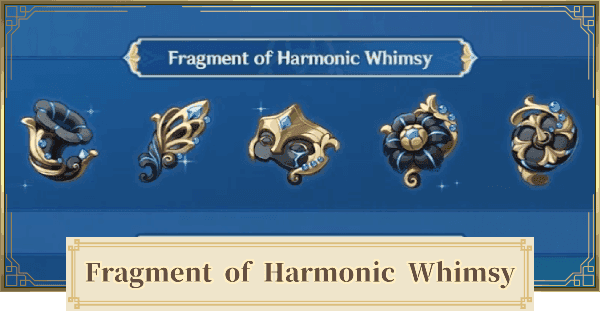
+18% DMG per Bond change, stacking 3 times for a whopping 54% total damage bonus with 6-second duration. It activates through Normal Attacks consuming Bond AND Skill/Burst fluctuations, creating near-permanent uptime. You'll be farming the Faded Theater domain in Fontaine's Petrichor Island (AR45+ requirement).
Vs Crimson Witch Comparison
Let's be real – Whimsy absolutely demolishes Crimson Witch for Arlecchino. We're talking 54% vs 22.5% damage bonus. Whimsy provides universal damage application with perfect Bond synergy, no reaction dependency required.
Crimson Witch has easier farming and reaction bonuses going for it, but the damage ceiling for Normal Attack-focused gameplay? Not even close.
Farming Efficiency Tips
Use daily Condensed Resin (20 per run) with food buffs for that +10% drop rate boost. Target Sands/Goblet/Circlet first – these are your biggest stat sticks. Enhance at +4/+8/+12/+16/+20 intervals to avoid wasting resources on bad pieces.
Balance domain farming with talent materials on Wednesday/Saturday/Sunday schedules. Realistically? You're looking at a 2-3 month timeline for complete optimization.
Energy Recharge Requirements & Calculation
ER Thresholds by Team Comp
This is where team composition really matters:
Vaporize Teams (Xingqiu): 160-180% ER Mono-Pyro (Bennett + Xiangling): 180% ER Overload (Fischl + Chevreuse): 190% ER Solo Pyro: 200% ER minimum (and honestly, why would you do this to yourself?)
Formula: Total ER = Base (100%) + Weapon + Artifact Sands + Substats + Pyro Resonance (+25%).
For team optimization, fast Genshin recharge services from BitTopup ensure immediate character access with reliable processing and 24/7 support.
Battery Support Options
Bennett remains the gold standard – 2-3 particles per 2-second Skill cooldown while providing 1000+ ATK buffs. C1+ removes those annoying HP restrictions. Xiangling offers secondary support in mono-Pyro but competes for energy (which can get awkward).
Pro tip: Favonius weapons on supports supplement particle generation through CRIT hits. It's not glamorous, but it works.
Rotation Optimization
Standard rotation looks like this: Skill (Directive) → Support Buffs → Charged Attack (Bond absorption) → Infused Normal Attacks → Burst (heal/reset).
Time that 5-second Directive upgrade with the 6-second Whimsy duration. Use N3 dash cancels for DPS optimization, but watch your stamina – you don't want to be caught without dodges.
Artifact Stats Priority & Optimization
Main Stats Selection
Sands: ATK% is your bread and butter; ER% only if you're below that 180% threshold Goblet: Pyro DMG Bonus (though ATK% substitute is acceptable if substats are godly) Circlet: CRIT Rate until you hit 70%, then switch to CRIT DMG
EM Sands can work for Vaporize teams, but ATK% provides more consistent scaling with 4-star weapons.
Substat Priorities
- CRIT Rate/DMG: Target that golden 1:2 ratio (70% Rate, 140%+ DMG)
- Energy Recharge: 20-30% from substats should cover most scenarios
- ATK%: Always percentage over flat values
- Elemental Mastery: 100-200 for reaction teams
CRIT value calculation (Rate × 2 + DMG) should exceed 200. Budget builds might settle for 180+ while prioritizing ER requirements – and that's perfectly fine.
Stat Thresholds
Minimum Viable: 2000+ ATK, 60% CRIT Rate, 140% CRIT DMG, 180% ER Optimal Budget: 2200+ ATK with Bennett, 70/160 CRIT ratio, 180-200% ER, 100-200 EM
Talent Leveling Priority & Investment Timeline
Skill Priority Order
- Normal Attack: Level 10 (Crown priority) – that 120.4% damage boost is massive
- Elemental Skill: Level 8-9 – Directive damage and Bond generation scale here
- Elemental Burst: Level 6-8 – mainly for healing and Bond clearing
Resource Allocation
Total Requirements: 6 Philosophies of Order, 18 Fading Candle, 93 Lieutenant's Insignia, 3 Crown of Insight, 4,957,500 Mora
Timeline: Week 1-2 get Normal to 6, Week 3-4 push Skill to 6, Month 2 brings Normal to 8-10, Month 3 is optimization time.
Stopping Points
Early Game: Normal 6, Skill 6, Burst 4 (gets you functional) Mid Game: Normal 8, Skill 8, Burst 6 (solid performance) Endgame: Normal 10, Skill 8-9, Burst 6-8 (min-maxed)
Crown that Normal Attack first – maximum impact across all scenarios.
Budget Team Compositions & Synergies
Core Support Units
Bennett: The eternal MVP with 1000+ ATK buffs. C1+ removes HP restrictions, Noblesse 4-piece for team buffs. Xingqiu: Your Vaporize enabler with Sacrificial Sword and Emblem 4-piece. C6 adds +30% Normal Attack damage. Fischl: Overload support extraordinaire. C6 coordinated attacks pair beautifully with Chevreuse for RES shred.
F2P Team Examples
Vaporize: Arlecchino + Xingqiu + Bennett + Fischl (1.5x multiplier, 160-180% ER)

Overload: Arlecchino + Fischl + Chevreuse + Bennett (RES shred, C6 Chevreuse gives 40% damage bonus) Mono-Pyro: Arlecchino + Xiangling + Bennett + Thoma (+25% ATK resonance, shield protection)
Rotation Guides
Vaporize (20s): Skill → Xingqiu Burst/Skill → Bennett Burst/Skill → Charged Attack → N5/N3 dash → Burst Overload (18s): Fischl Skill/Burst → Chevreuse Skill → Bennett Burst → Arlecchino combo
Build Progression: Early to Endgame
AR45-55 Milestones
AR45: Begin Whimsy farming, settle for 2-piece combinations, maintain 150% ER minimum AR50: Complete 4-piece Whimsy, achieve 60/120 CRIT ratio, Normal Attack Level 8, 180% ER AR55: Substat optimization phase, push for 70/140+ CRIT ratio, talent completion
Performance Benchmarks
Early Game: 15,000-20,000 Normal Attack damage, Floor 10 clears Mid Game: 25,000-35,000 damage, Floor 11 clears Endgame: 40,000+ damage, Floor 12 clear capability
Common Mistakes & Optimization Tips
Build Pitfalls to Avoid
Overhealing During Bond: Don't use external healers while Bond is active – it prevents Masque activation. Shields are your friend here. ER Starvation: Insufficient Energy Recharge completely disrupts rotations. Prioritize ER substats and Sacrificial weapons on supports. Incorrect CRIT Ratio: That 1:2 Rate:DMG ratio isn't just a suggestion – it's crucial for consistent damage. Use CRIT Rate weapons or Rosaria support if needed.
Advanced Techniques
Animation Canceling: N3 dash for optimal DPS, jump-cancel Charged Attacks for faster Bond absorption Bond Management: Monitor that percentage for perfect Masque timing, absorb Directives immediately via Charged Attacks Positioning: Maintain melee range while avoiding interruption – adapt for Overload knockback patterns
Performance Analysis & Endgame Viability
Damage Calculations
Let me run some numbers for you. Sample calculation with Deathmatch + Whimsy: 2200 Base ATK × 220% Talent × 145% Bond × 2.12 CRIT × 1.54 Whimsy = roughly 45,000 per Normal Attack.
Throw Vaporize into the mix? You're looking at 67,500. That's genuinely competitive with premium builds.
Spiral Abyss Performance
Floor 12 demands 40,000+ DPS per character. Budget Arlecchino hits this through proper team composition and rotation execution. You'll start with 33-35 star clears and progress to full 36 stars with continued investment.
Consistent performance requires support investment and artifact optimization – but it's absolutely achievable.
FAQ
What's the best 4-star weapon for budget Arlecchino? White Tassel R5 for pure F2P (+48% Normal Attack damage), Deathmatch for Battle Pass users, Dragon's Bane for Vaporize teams.
How much Energy Recharge does Arlecchino need? 180-200% covers most scenarios. Vaporize teams can get away with 160-180%, solo Pyro needs 200%+.
Is Fragment of Whimsy better than Crimson Witch? Absolutely. Up to 54% damage bonus vs 22.5% Pyro damage, plus perfect Bond synergy.
What team compositions work best? Vaporize for highest damage, Overload for AoE clearing, Mono-Pyro for beginner-friendly gameplay.
Which talents should I level first? Normal Attack to 10 (crown it), Elemental Skill to 8, Elemental Burst to 6.
Can Arlecchino work without Bennett? Technically possible, but Bennett's ATK buff is crucial for 4-star weapon scaling. Alternative buffers require significantly higher investment.


